No reveal but 10 year caulking looks good
I’m doing prep for re-painting 1/2 by 8 inch beveled cedar. I’m using SW Duration in Charlotte, NC. I know, who paints WRC siding but it was done 15 years before I bought the house. Very few cups, popped nails or check/splits. Me thinks the cedar was primed on the back before original install.
The caulking is about 98.5 %, few if any cracks, with paint still adhering. I’ll be to old and broke when it needs another coat in future.
Q1.0: Add new layer of 30 year caulk over all the existing caulk without stripping the existing paint?
Q1.1: Will the new caulk adhere to existng paint?
Q2.0: Scrap paint off existing caulk and re-caulk, then paint? More work I would prefer to avoid.
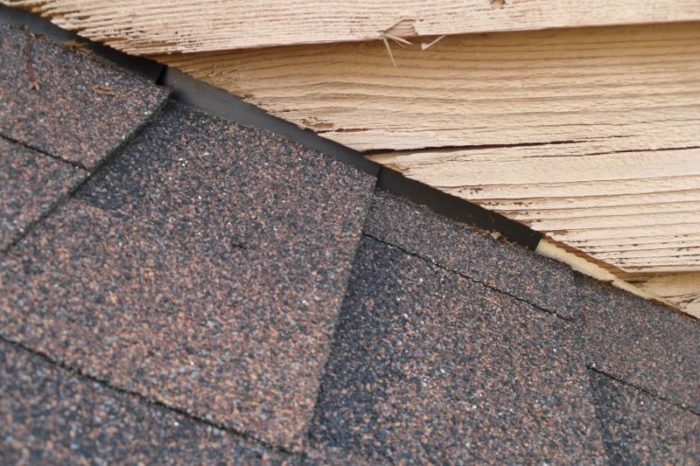
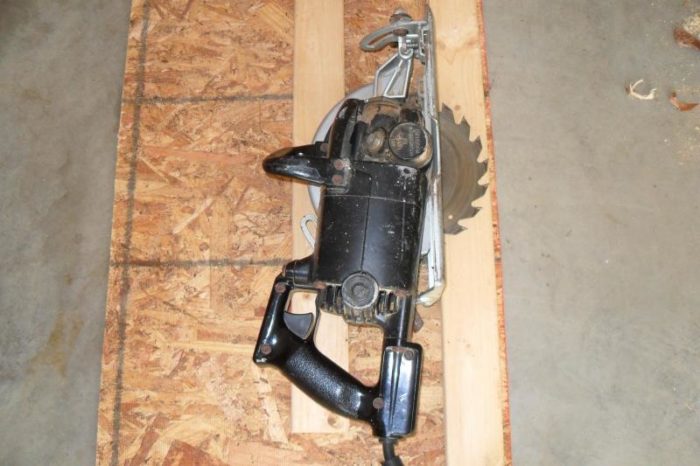
The siding only has a 1/4 inch reveal above the step flashing. WTF? The 6 on 1 tails where the siding hits the roof are showing the effects of water damage (surprise). I’m making a guide jig from OSB, 1×4 and 2×4 to lay on the 35 year architectural shingles. The jig will even out the shingle variations, control/guide the worm drive shoe and trim a nice edge. Blade depth to be shy of the flashing and finish with a noko giri pull saw, utility knife or snap on a stout drywall blade. I’m setting up for a 6/4 reveal.
Your thoughts and critique would be appreciated.


Replies
If the existing caulk is not sound, dig it out, prime the ends of the wood, and recaulk. Caulking over the existing is a bad idea.
If good quality caulk was used, and there is no obvious caulk failure, then there is no need to recaulk -- just prime any areas where the paint may have cracked off the caulk, then repaint.
Note that good quality caulk manufactured in the past 20-30 years should have an essentially unlimited lifetime if properly installed and kept painted. Caulk failure is usually due to either improper preparation (not priming cut ends) or a joint that is too "tight" -- you need at least 1/8" and preferably 3/16" gap for the caulk to perform well.
When finishing the cut to enlarge the clearance above the roof, I'd suggest using a multimaster or other multitool, rather than trying to hand cut it with a japanese nokogiri. Just my preference. My multitool easily paid for itself making cuts like that on my recent siding redo.
Multi Master
I would hate to nick the flashing using the multi as a hand held. Do you have a suggestion for a fence to control the depth of cut?
I doubt a fence exists, although one might be fashioned, I guess. The siding is lapped, so there should be a slight gap behind most of it and anything behind, and it isn't likely to be perfectly dimensioned at any rate, so any fence wouldn't work perfectly. Speaking of which, I don't know about your circ saw, but I tried using mine to cut siding on the wall in some places, but the lap means you're changing depths all the way along the cut (in your first picture, cutting from right to left the saw will start shallow then go deeper until you have to lift the saw up so its foot plate can clear the next overlap).
Back to the multitool: It seems to me you'll have just about as much problem with a handheld saw, unless you're talking about housewrap (Tyvek, etc.) underneath rather than metal flashing. I was able to hand-hold my multitool pretty accurately for such cuts, and in places where I nicked the underlying tyvek, I just covered the cut with tyvek tape. If it's metal flashing, you should easily be able to back off before cutting through it.
For the circ saw, I'd attach a piece of aluminum angle to the board that lays on the shingles, to give something for the saw plate to ride against. Then the cut depth would be consistent.
Once the circ saw cut is made about 3/4 of each piece will just break away, so the amount that needs to be teased off is relatively small.
Worm Drive Jig Update
Dan et al,
Thanks for the feed back.
Predictably, the bottom tails of the side boards are NOT perfectly aligned. Imagine that. The jig is working fine with saw dust providing a bit of dry lubricant to ease the saw uphill. But to avoid nicking the existing step flashing, I still use the Japanese pull saw to "tease" the last millimeter or 3.
But my second worst fear has be realized: the existing (20 year old) flashing is only super thin step flashing extending up the wall less than 2 inches. YOW! So now I am faced with more extensive options:
1. Pry the siding out carefully and place new 4 inch step flash leaving about a 2 inches up behind the siding, a 6/4 reveal below the siding but eliminating the cedar contact with the roofing a runoff.
2. Cut off about 4 to 6 inches of side, add drip edge under siding and trim out with a PVC 1 by 2 board below the drip edge/cedar bottom.
3. I'm open to new ideas.
Code in the Carolinas not to mention inspection and compliance 20 years ago has left me with a fun project. All I was doing was repainting. HA! And as I surveyed the other 40 houses in the lakeside wooded development, the all have the same zero reveal at the siding/roof interface. I guess I show be thankful that my shed roof contemporary design has limited siding/roof contact that all face the morning sun to dry things out.
Can you pry out the boards enough to slide a roughly 4" wide strip of flashing behind the siding? (You'll need to pull any nails near the ends of the boards.) Work with strips 2-3 feet long, starting from the bottom. Tack in place as high as you can with 2-3 nails per strip.
The nails are 8d, 2 1/4 inch, hot dip galvanized. I'm sure I can ease them out as needed.
Regarding the flashing strips 2-3 feet long, you are suggesting placing that over the step flashing, correct?
thanks
You are making a counterflashing.
It should cover the steps and overlap the lower end if you work with the 3-4 ft lengths.
Those step flashings are pretty short up the wall. I might, heck I do it anyway- because I don't roof hardly at all, and then an addition or perhaps a dormer repair. At any rate, I use a strip of vicor or other peel and stick flexible flashing to stick to the sheeting and down over the step flashing. This keeps the top of the shallow steps sealed, adding protection from penetrations of nails from the siding (if you can get it up under there) . Lay your counterflash over that and down closer to the shingle to cover the vicor
I like to do a wide strip b/4 siding. Stick it to the sheeting and lay the housewrap/felt/other over that to complete the anti water detailing.