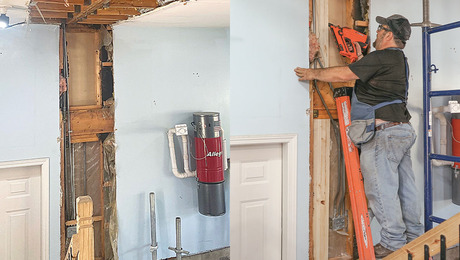
Client wants to remove a Roman bathtub and install a conventional tub. The existing bath unit is an all-tile construction, 4″ ceramic tiles on all sides and the floor. House is slab on grade, the tub area is depressed about 20″ deep, and 34″x 66″ . They want a tub that essentially sits on the floor level, so you step over the side and into the tub; some elevation difference would be tolerated. Lots of variables right now, so we’re open to all ideas. The new shower walls will be 4″ tile again, the front of the tub could be tile or something else. Big question: how do you fill the depressed area to raise the floor?


Replies
More info.
What's on the other side of EACH wall? especially at the floor/ slab(?) level?
Have you removed the existing tub yet? You need to do a probe to find out what it's foundation is. That will most likely direct your decision. You may be able to do this probe from the other side of the tub wall depending on your answer to my first question. This way you won't have to decomission the tub prematurely.
Can it acomodate a joist system? I'm thinking this is your best bet. Why spend all that effort to fill something so empty? Be sure to insulate between the joists.
How will you treat the seam between where the tub was and where the existing floor is? Will the new tub cover it?
Two sides are exterior walls, one side is the dressing area of the master bath. Have not done any work yet, still in the discussion and pricing stage. It's a concrete slab on grade in a limestone soil area...dirt is shallow, maybe 12" at most, usually less, then limestone. I had thought of a joist infill, possibly using 2x10 (the span would only be 36")...would you pour some type of slab at the top, or just treat it like second floor construction: ply over joist? There really is no existing tub...the room floor is ceramic tile, the tub/shower walls and the 'basin' are also tile, but a different color. There is a +/- 2" curb separating the room floor from the tub, and it is coverd in tile.
Aha! So you're thinking of not even taking out the existing tub. Just span it with a few joists, then plywood, Blah, blah, blah. Brilliant!
The plywood would then be "covered" by the new tub's apron. So what do you need us for. You're doing quite well on your own.
One suggestion though. Do a probe from the dressing area side to confirm the structure of the existing tub walls. They may be concrete but then again they may be rotting wood studs. You won't want your new joists to be fastened to them.
I would then just frame as I would an upstairs tub. BTW I also use doubled up 2x's as the joists and cleats for the new joists to rest on or be fasened to.
Wait, wait! Now that I have given this too much thought, have you concidered this? Put bown a layer of 1/8" roofing sh-t in the tub floor and walls and then start stacking cmu's. At the top course provide tripled 2x's (4 sets) packed in between the blocks and mortared in. Then apply the plywood sheathing. This way they can always go back to the Roman Tub design statement. The tub will not have been damaged. It may be alot easier than the other framing option.
Okay, Frank, I can take your sh!t. No problem, I've dished it out a few times. But hang on a minute...what gave you the impression I was going to leave the existing tub? Wrong-o big buddy. I intend to leave the depressed concrete slab, because it was probably poured monolithically with the rest of the first floor. The tile goes...at least whatever is necessary to to 'fill' the hole. And that was part of the question...how to fill the hole. Fill it full of concrete? Maybe a 4" slab on top of sand fill? CMU's might work as you suggested. Or fasten headers/ledgers along two sides and put in 2x with ply deck. No, I'm not doing well on my own, that's why I posted the question. It is possible that the entire floor may have to be re-tiled. Right now there are two slightly different tiles in the room...one for the shower/tub, and one for the floor...so if I can make it work out well, it may not be necessary to replace all the tile. I can't probe from the dressing area, because that floor is the same level as the rest of the house...all I would see would be the back side of the shower walls.
Elcid -
Lighten up! Life's too short. I was not kidding around. I know it's hard to tell. Totally out of character?
Now let's get down to business. You have a hole that's dressed up - tiled. Why undress it just to fill it up? Seems like extra work. Speaking of filling it up, don't you have enough work? Don't see the point. Attatching a cleat to the side walls would work but then that too is a lot of work. Nails have to be about 4" long. Pounding them in and having the tile break, loosen then the 2x is not tight to the wall, Blah, blah, blah......
All you really need is about a dozen CMUs, some mortar and six 2x8's. (1 + 2 + 2 + 1) running lengthwise. PT of course. The 2x8 joists rest on the CMUs Then slap on the plywood. The structure is complete and you have plenty of room to resolve the plumbing.
Your biggest difficulty will be installing the drain. Will you attatch it to the existing? FYI - don't have a very long verticle drop in the line before it hits the trap. When someone takes a shower they will hear the water "falling" down the drain. It's amazing how loud it gets. I learned the hard way.
Keep it coming!
Sorry I snapped at you, it's that time of the month and I can't do a thing with my hair. Can't nail ledgers to the side walls, they're concrete, so I was planning on removing a row of tiles and expansion bolting 2x4's to the concrete. Guess I could bolt through the tile, but I'd rather have the ledger tight against the concrete. Yes, I plan to pipe over to the existing drain, which is in the middle of the existing shower. Would it be wrong to install another p-trap, or should I just use the existing one that's embedded in the slab? I had planned to use treated 2x's to support two layers of treated 3/4 ply.
I was thinking masonry/ cut nails.
Wait a minute. let's back up a moment. Are you re-doing a tub or a shower? I thought it was a tub. So the tub has a center drain? Could happen.
I don't think there is anything wrong with a secong p-trap. It might prove a bit difficult if the drain gets clogged. You should talk to a plumber about this. You will still have to break into the tub floor to get at the connection. While you are there might as well tack out the existing trap.
Okay, you can expansion bolt the ledger to the tub side, after you chip away the tiles and some of the thinset. But I think it's more work than the CMU route. Sounds like you're more of a framer than a mason. If you're more comfortable this way go for it. Personally, the time and effort to install the ledger board and have it level will be a lot more than stacking a dozen CMUs with some mortar in between. Think about it. Each ledger board will require at least 6 expansion bolts. That's a dozen with cooresponding holes in the ledger. Much quicker to stack block. But that's just me.
Edited 1/21/2003 10:56:43 PM ET by Frankie
Masonry is definately my weak suit. I call this thing a roman tub, maybe ther's a more correct name...think of a tiled shower about 36" x 66", and then depress the floor about 18" so that you have to step down to enter the shower. If you plug the drain, it becomes a tub, and that's what it's designed for. Most have a low curb across the front, about 4" high, to help you stumble into the tub. This one has a sliding glass door, I have also seen them with shower curtains. My concern with the second trap is just what you sayu...one more dam thing to get clogged with hair.