I recently downloaded the free version of sketchup to play with. It’s a pretty cool tool, I just need (a lot) more practice to get the AutoCAD out of my system.
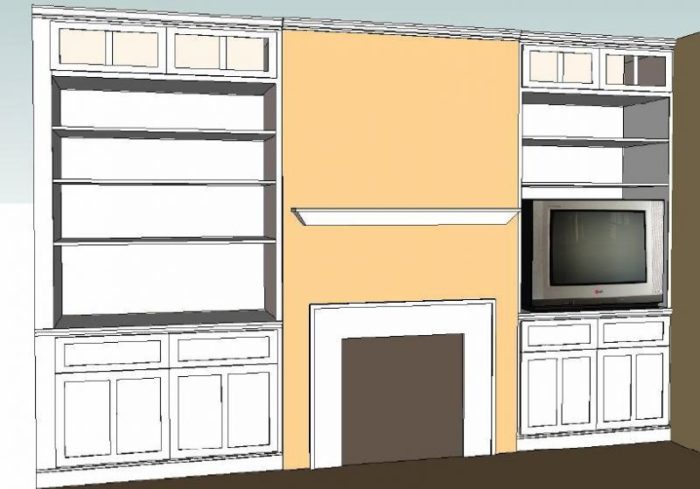
My question is related to Sketchup but more likely it has more to do with my computer then the program itself. When I create a drawing (like the one attached) it looks like the lines are a bunch of little steps rather than smooth lines. It looks like this on the screen and this is how it looks when I print from Sketchup. If I create a drawing in AutoCAD, it looks a little “steppy” on my screen but the printed drawings look great. Are there any settings or drivers I can change on my PC to make this look smoother and better?
“The significant problems we face cannot be solved at the same level of thinking we were at when we created them.†– Albert Einstein


Replies
I'm pretty sure that is a graphics card issue.
Go to your desktop screen. Right click. Look at Settings.
Mine on which both AUTOCAD and SKETCHUP are nice smooth lines is set to Screen Resolution of 1280 x 1024. Some older graphics cards won't support that high resolition.
To see if it is SKETCHUP related you can try importing an AUTOCAD DWG file & see if it is less smoth in SKETCHUP than AUTOCAD. I doubt it will be.
The import takes a little time if the AUTOCAD file is large.
What are your line rendering settings?
I believe that the free version prints and displays at a lower resolution than the purchased version.
According to the Sketchup website, http://sketchup.google.com/support/bin/answer.py?answer=36201&query=drawing%20resolution&topic=&type= ,
Sketchup Pro 5 (the version you have to pay for) allows you to:
"Print and export raster images at higher-than-screen resolution."
Jen
I was going to say in previous reply and got interupted; I think if you are doing construction type drawings and all ready own and are proficent with AUROCAD you will find SKETCHUP frustrating. Its something a hacker would enjoy fooling around with.
On the other hand SKETCHUP is realy great for pasting photo quality surfaces on AUTOCAD 3-d drawings. Much faster and nearly as good quality as using material rendering in AUTOCAD. You can take photos of roofs, brick, siding, boards, tile, etc and resize the photo image so that it looks real-life then use it for paste on.
Its something a hacker would enjoy fooling around with.
I disagree. I've got a friend who teaches college level drafting classes and he uses Sketchup for some of his class projects. For the price, the Pro version does great 3D images. Autocad LT doesn't do 3d for squat and the full version is out of reach for the casual to moderate user. It's also easier to learn than AutoCAD. And finally, I don't consider myself a hack. (if your webcam isn't working, I'm sticking my tongue out right now). ;-p
I like the product for basic drawings and the 3d really helps with presentation. It sounds like I just need to bite the bullet and get the pro version.
“The significant problems we face cannot be solved at the same level of thinking we were at when we created them.” – Albert Einstein
I disagree.
View Image
I assume you're using the pro version? Where do I find the line rendering settings you mentioned above?“The significant problems we face cannot be solved at the same level of thinking we were at when we created them.” – Albert Einstein
No, the free one is what I use.
Settings for lines, etc., are found in VIEW, RENDERING up on the up-top tool bar. You'll see jitter edge, etc. X-ray is handy sometimes, as is wireframe.
Explore around in the CAMERA area and find ways to turn perspective on and off, and to use the standard views TOP, RIGHT, etc. That, combined with section planes, allows SU to become a powerful tool for making working drawings of your models.
Gene,
Your drawings are just awesome!! I really need to get more proficient with SU If I could make drawing like that, man I could really help my guys understand things better.
I did the tutorials, but I can't seem to draw things like rafters very easily. Got any tips?
Nice work with ACAD too in a recent post. I can't draw 3D there either, but I figure that I'll learn SU.
Try this, Tim. Build the simplest of little framed sheds as an exercise.
Make a 12' x 16' deck by doing a rectangle and extruding it up (push-pull) for a thickness of, say, 10 inches.
Now go to work with your tape measure tool and learn how to snap lines all over the deck. The CTRL key is the answer. You'll see.
Just like you might do out in the field, you can use the tape and CTRL to snap lines for the rafters, right on the deck, then make them and rotate them, and place them up on the wallplates with the MOVE tool.
Here is a primo tip. Group everything that is a one-time part, immediately after making it. Select it, use EDIT, MAKE GROUP, and you've done it.
And for something you'll make once but copy and place around in arrays, like common rafters, make them components after drawing them, and do it immediately. You can edit a component and the edit will apply to all other copies of it. Example: want a decorative end cut on your rafters, after they are all up? Edit one, apply, and it is done to all.
Gene, those are great tips. Thanks!
Allen
BTW, Tim, did you notice on that house model, that it's stickframed where it needs to be, but on the gabled dormer, we'll use little trusses, even up on the lay-on?
As I have said before, the key to successful truss building is to use CAD, or your calculator, or slide rool, or trig tables and paper and pencil, and PROOF THOSE SUBMITTAL DRAWINGS before the trusses get made. Then you get exactly what you want, and things pop into place, fast and easy.
Thanks Gene. When I get back I'll goof around with this some more. Those are great tips.
I agree with your second post and did noticed the blend of trusses and framing. I'd like to be able to make some simple drawings like the drawing I did over at JLC and then do it in 3D to better teach my guys.
Thanks again for the tips.