*
While we’re on this subject, can somebody explain how to find the bevel on this “valley board” so the sheathing lays nice and flat? Thanks.
Discussion Forum
Discussion Forum
Up Next
Video Shorts
Featured Story
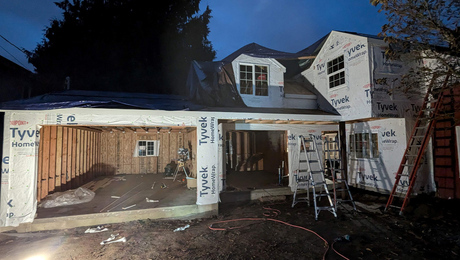
The FHB Podcast crew takes a closer look at an interesting roof.
Featured Video

Highlights


"I have learned so much thanks to the searchable articles on the FHB website. I can confidently say that I expect to be a life-long subscriber." - M.K.


Replies
*
This should be pretty basic but it has me stumped.
I'm joining a garage roof to the main house which runs perpendicular to it. Both are built with trusses. I have the house sleeted with 7/16" OSB iSOBhe area that the two will meet. I plan to install a 2X6 ridge board and 2X6 rafters. The roofs are both 6 in 12 pitch.
What is the proper way to attach the cheek cut end of the rafters to the main roof? to nail them directly to the osb jsob doesn't seem sound. I thought about nailing a 2X6 flat on the main roof and landing them on it but the size won't match, would I match the heel or the toe?
Please help
Sylvan Marks
*Sylvan, some around here do lay the rafters onto the osb without a problem. It does seem a little weak however, but I don't thnk that I'd lose sleep over it if it was done to my house.We generally use a "valley" board made out of 1x material. It's main function is to provide the exact location of the valley line. I've also used the 2x6 method. It is indeed much stronger.Your question however deals with the difference in the dimension of the 2x6 on the flat and the length of the cut on the rafter. Around here, we are required to carry the heel. The thinking is that the rafter will split with age and loading if the heel isn't carried. But we also want the toe properly located. So, we usually place the 1x to carry the toe, and slip in another smaller 1x to carry the heel. Maybe you can effectively cover the entire bottom cut with two 2x4's or some combination of 2x6 and 2x4. We've also used wider stock when the pickings were slim. I think a 2x10 would easily carry a 6/12 2x6 level cut rafter.blue
*Thanks Blue,That makes since, I'm on it! thanks for the fast reply! I'm just one guy building my own house and no one to set me straight. This forum helps alot.Thanks againSylvan
*I've always used a 2x valley board just like Blue suggests, however, I've never really sweated how much of he rafter was in contact with the valley.I have the rafter toe to the edge of the valley board just so I've got something there to nail the plywood to but If the heal hangs off an inch, so be it.Maybe it's important but I just never thought about it. I suspect it won't be the weak link anyway.
*This is called a "Scotch Valley"
*I've seen people set the valleys directly on the OSB, but some of them come back and block underneath if part of the scarf cut doesn't fall on a rafter or truss.
*While we're on this subject, can somebody explain how to find the bevel on this "valley board" so the sheathing lays nice and flat? Thanks.
*I've never ripped a bevel on the vally board, just held it back so the high corner planes out with the top of the rafters. But I'm sure Joe Fusco and others here can tell you how to figure the bevel mathmatically.Chuck
*Charles, I set mine back the same as Chuck but have run into a few situations that required the exact bevel. I can't really remember but I'm pretty sure that you would have to use the bevel that corresponds to the pich that is laying on.And you might have to use that degree, while cutting from the edge.Those are the types of things that I can quickly figure out onsite, but find it difficult to remember while I'm sitting in my skivvies.grandpa blue
*Charles, I set back by snapping a line from the very end overframe ridge, held to the overframe rafters' plane, at the sheathing the valley board lays on. Then climb back up to the where the overframe ridge dies into the sheatthing. Measure square off the ply to the corner of the ridge until the number reads the same as the thickness of the valley board material you are using. At this point, then measure perpundicular off the ridge to the line you snapped, and hold this distance from the valley board to the line. I'm pretty sure this is how I did those things, but I guess I'm sort of like Blue, I tend to relearn a lot of those kinds of things.except, I have more clothes on
*Around here, woe-is-you if you leave out the valley board. The inspector will be on you like stink on ****. Then you spend an hour or so blocking under the sheathing.By the way, for any of you interested in trivia, we call this a blind valley.