
Installing Rooftop PV
Get a detailed overview of how homes are evaluated for solar, how a photovoltaic system works, and how it’s installed.
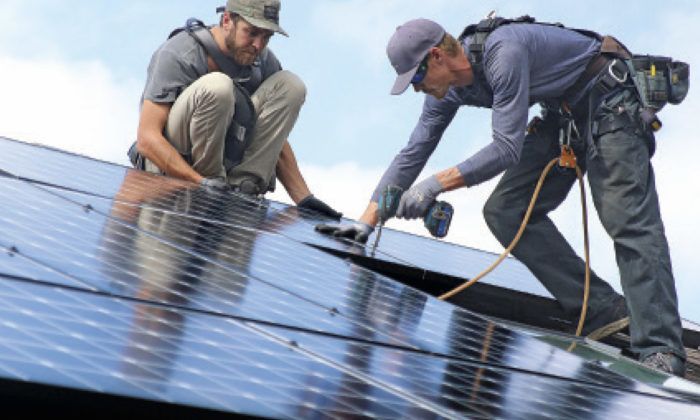
Synopsis: Jim Bakhaus, PV installer, describes how a photovoltaic (PV) system works and how it is installed, from positioning the electrical equipment at the meter, to running conduit and pulling wires, to laying out the feet and rails—known as racking—that hold the modules on the roof. This article includes sidebars that point out the code-compliant components of PV systems and the difference between grid-tied and off-the-grid systems, as well as a specific example of material and installation costs and net costs after tax benefits.
Lauren Coyne is the director of member collaboration at Amicus Solar. Before taking her current position, she worked with us at Namasté Solar, an employee-owned cooperative based in Denver, Colorado. Despite the fact that she’s spent the last decade working in the solar industry, Lauren has never lived in a home with a photovoltaic (PV) system—until now. We recently installed a 7.93kw system on Lauren’s house.
Though each job we do is a little different depending on how the home was designed and built, the type of roofing, and even the city we are working in, Lauren’s project is a good example of how we evaluate and install new systems on most existing homes. At Lauren’s house, the four-man crew simultaneously installed electrical equipment at the meter, ran conduit and pulled wires, and laid out and installed the feet and rails—known as “racking”—that holds the modules on the roof. All told, the system took two days to install.
Solar sayings
Grid tied: The most common type of PV installation is grid tied. When a gridtied system is producing more electricity than the home requires, the additional power is fed into the grid. In most cases, these systems will not continue to provide power to the home if the utility grid goes down. This is meant to prevent electricity from being fed into the grid while utility workers perform maintenance on power lines.
Net metering: The process of measuring a homeowner’s electricity consumption relative to the amount of solar energy their system has produced is called net-energy metering, or net metering for short. It’s a type of debitand- credit system that many electric utilities have put into place to determine exactly how much electricity has been provided to the homeowner directly by the utility company.
Off the grid: Batteries are most commonly incorporated into PV installations where there is no cost-effective access to a reliable utility grid. These off-the-grid PV systems can provide reliable power for a range of two to 10 days depending on
system design and weather conditions. Battery storage can also be effective in grid-tied systems where utility rates spike during peak hours of the day, or when the utility grid goes down.
Code-compliant components
|

Evaluating a house for PV
Most homes are great candidates for a PV installation; the exception is if they are significantly shaded. The systems are most effective when they are installed facing south. East-facing arrays are our second choice due to the development of afternoon clouds in our area, but west-facing roofs are still viable, just slightly less productive. North-facing roofs are typically not used for PV installations.
For optimal efficiency, modules would ideally be tilted to an angle that matches the location’s latitude. Unfortunately, this is rarely possible. For our location, the ideal pitch is approximately 39°, since Denver is at 39° latitude. In actuality, this roof had two pitches: The south-facing roof is tilted at 45°, and the east-facing roof is tilted at 30°. With these conditions, there is only a minor reduction in estimated electrical production.
For most of our customers, the goal is to design a system that will produce 100% of their annual electricity demand. In many cases, this goal is achievable and cost-effective. For other customers, the goal might be to install a smaller system to offset a portion of their energy use based on their budget, or to only install modules on a specific roof surface for aesthetic reasons.
We expect this system to produce 10,054kwh per year. The kilowatt-hour production will vary based on the time of year, but local net-metering laws in our area allow homeowners to bank kilowatt hours at the retail rate when they are produced and use them when their system is generating less electricity. Lauren’s system will offset 82% of her current consumption. But we have found that in many cases, the system raises the homeowners’ awareness of their electrical consumption habits, leading to lighting and appliance upgrades and lifestyle changes that will then further increase their initial offset.
While customers often have enough money and enough roof to produce more electricity than they need, this isn’t always a wise investment—the costs and credits vary by state. For example, the average cost of electricity in Colorado is just over $0.11 per kwh, but if Lauren’s system overproduces on an annual basis, she only receives $0.01 to $0.03 per kwh for her excess production. As a result, her primary motivation is to offset the $0.11 per kwh charge, but it isn’t financially beneficial to oversize the system and become a power producer to earn the additional $0.03 or less per kwh.
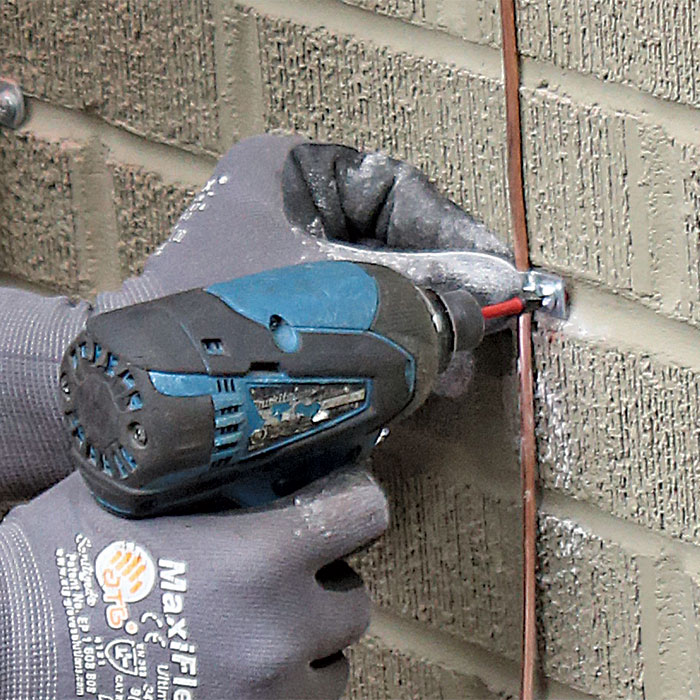
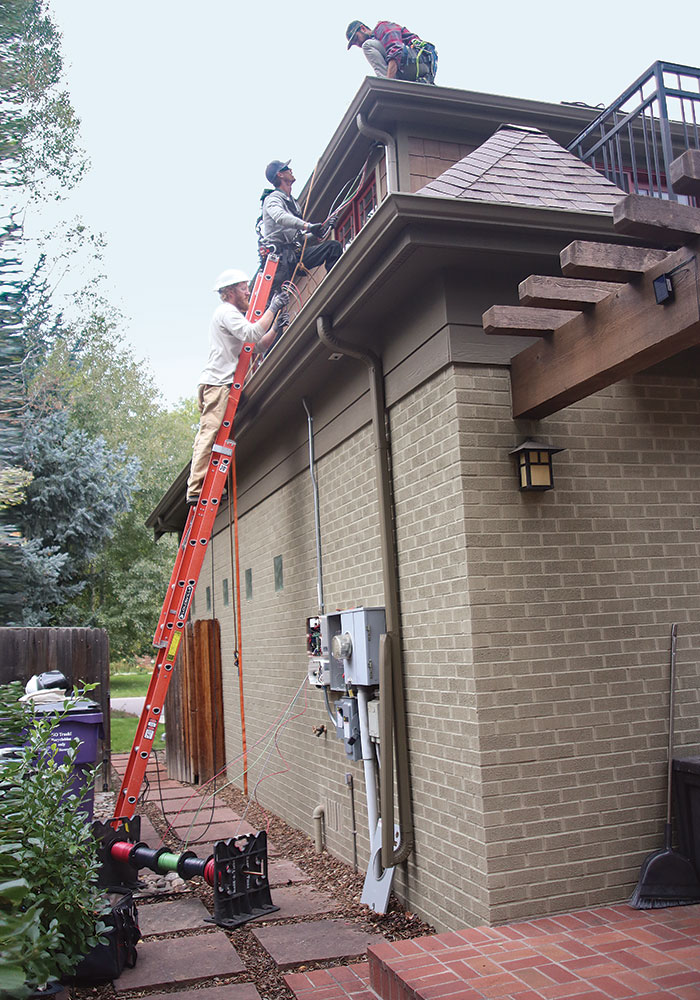
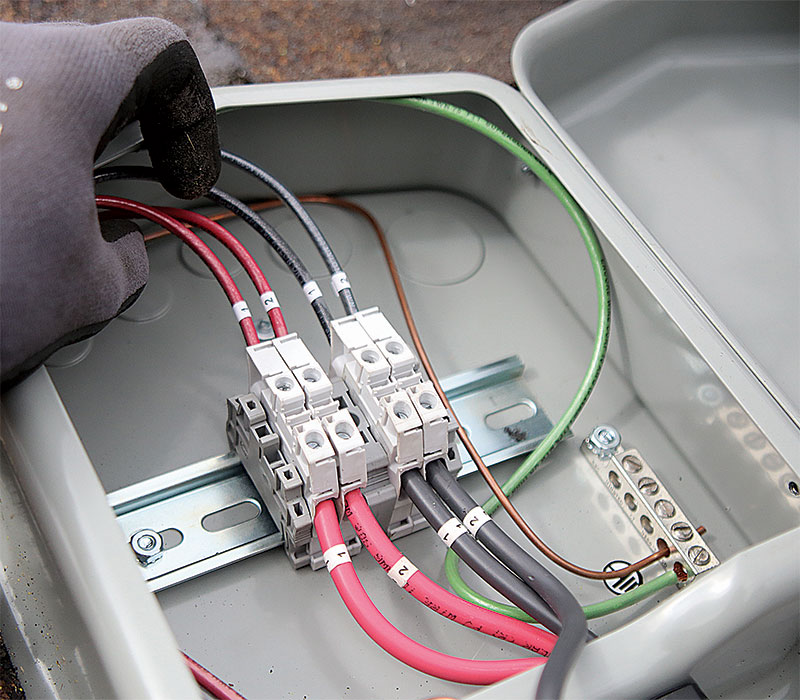
Wiring the system
 |
 |
A system of components
The most basic components of a typical PV system are the feet and racking, solar modules, and inverter. It is common for systems to also include power optimizers, a production meter, electrical disconnects, and a system-monitoring device. The type and quantity of these components will vary depending on the local electric utility’s requirements, state and municipal inspection requirements, and specific customer requests.
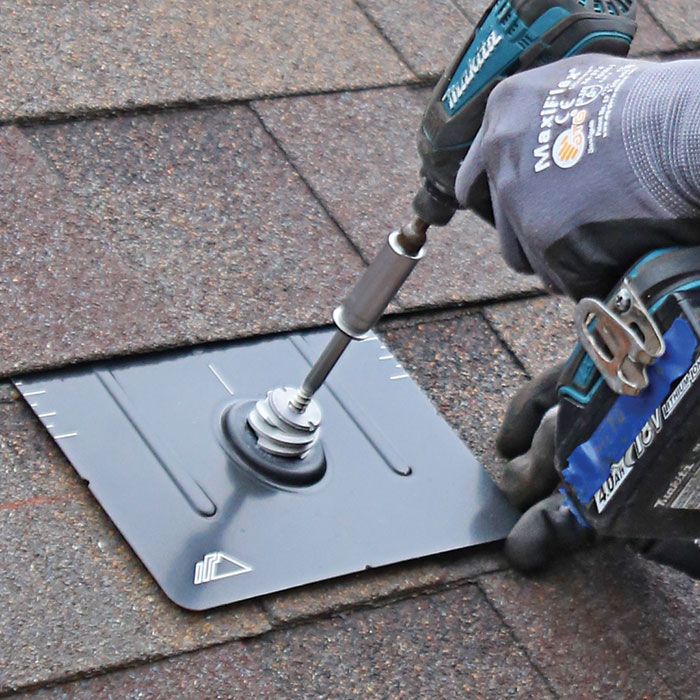
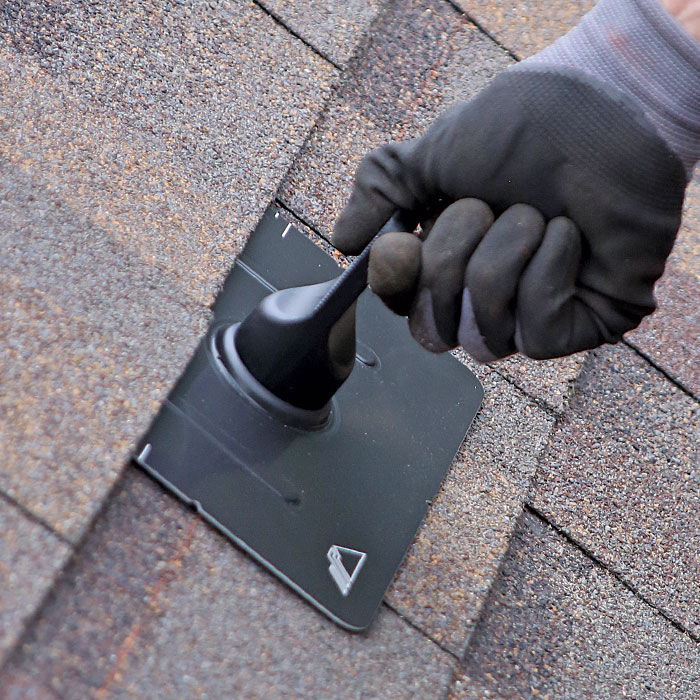
We use a racking system from IronRidge. We like it because of its simplicity, flexibility, and durability. The aluminum feet have integral flashing and no exposed rubber seals, which are common on other systems and tend to degrade. In addition, the IronRidge rails are designed to reduce torsion on the modules in a high-wind zone, like the Denver area.
We installed Hanwha Q.Peak-G4.1 305w solar modules on Lauren’s house. These are our go-to modules for most installations because of their high quality, 25-year warranty, and fair price. At each module, we also added a power optimizer.
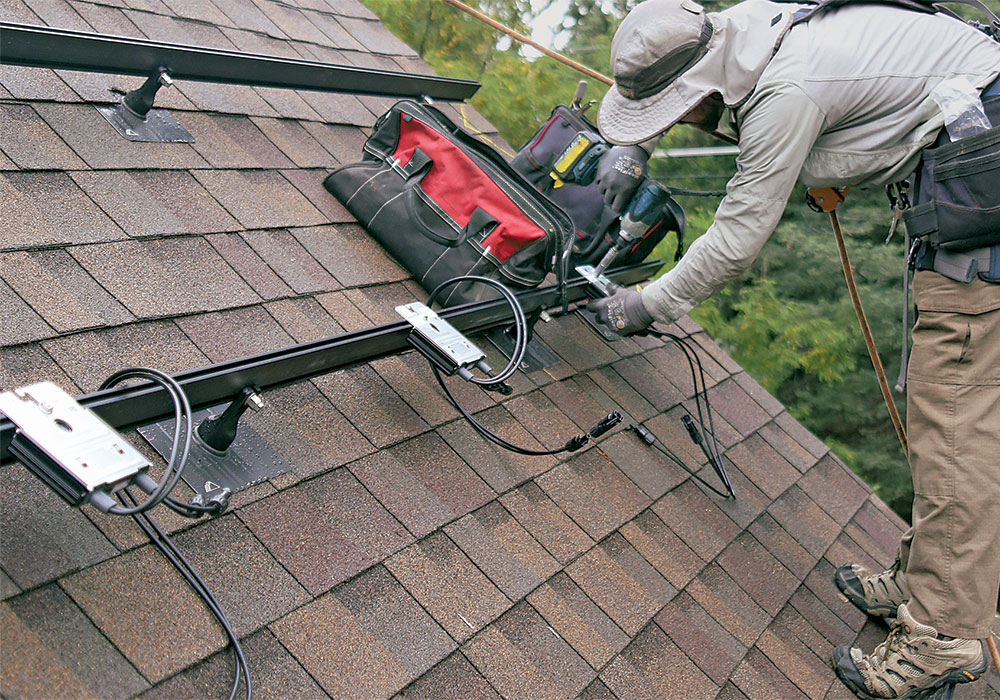
The SolarEdge P320 power optimizers meet electrical-code requirements for rapid shutdown when the power grid goes down, and they have some other nice features, too. First, they maximize system efficiency by mitigating different types of production losses—from partial shading, for example. Second, they allow for module-level production monitoring, which means that not only can Lauren monitor her system’s performance 24/7, but she will know exactly how much power each module is producing. And should the system fail in any way, we’d know exactly where the problem lies.
Solar modules create direct current (DC) electricity, which needs to be converted to alternating current (AC) through an inverter. For this project, we used a SolarEdge SE7600A-US-U inverter. These inverters are easy to install, they pair with the SolarEdge power optimizers, and they have wireless, cellular, and Ethernet connectivity options to provide system monitoring through an interface on the homeowner’s computer or phone. They also have built-in arc-fault protection and rapid-shutdown capability, which are code requirements for the system.
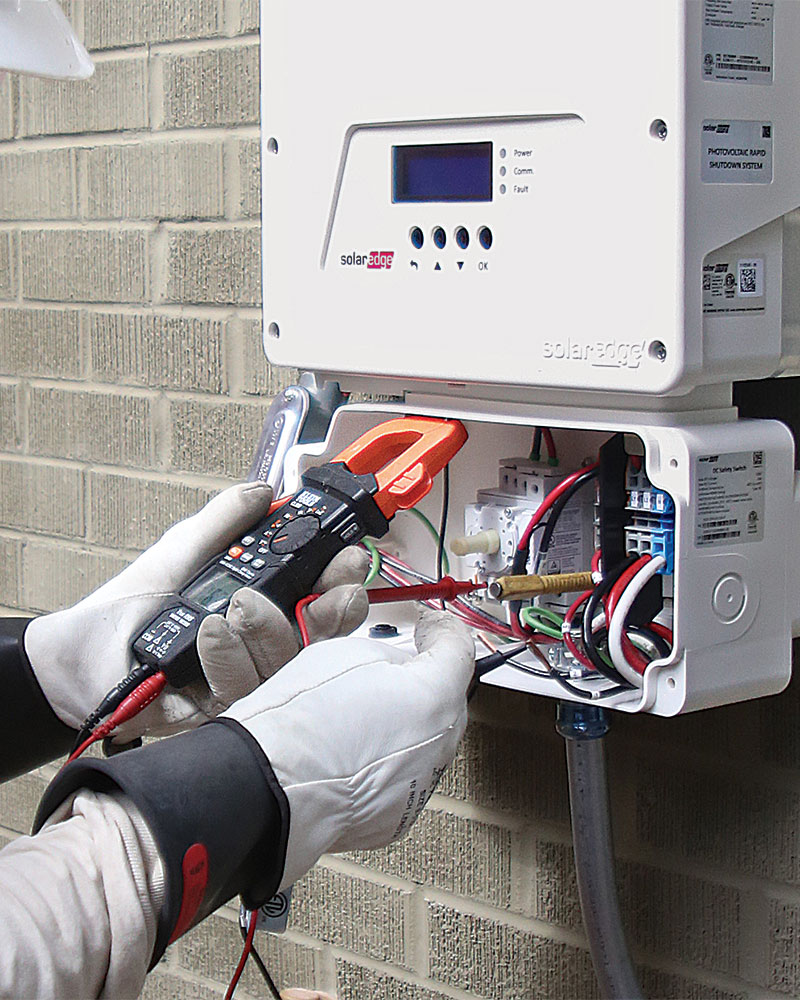
Lauren’s system also has a dedicated production meter to monitor the amount of electricity the system is producing. Though this is not necessary for the system to operate, the local utility requires it. In addition, we installed two electrical disconnects, one on each side of the production meter. These are also required by the utility here in Denver. The disconnect between the production meter and the usage meter is fused to protect from overcurrent, and the system also has a dedicated grounding rod.
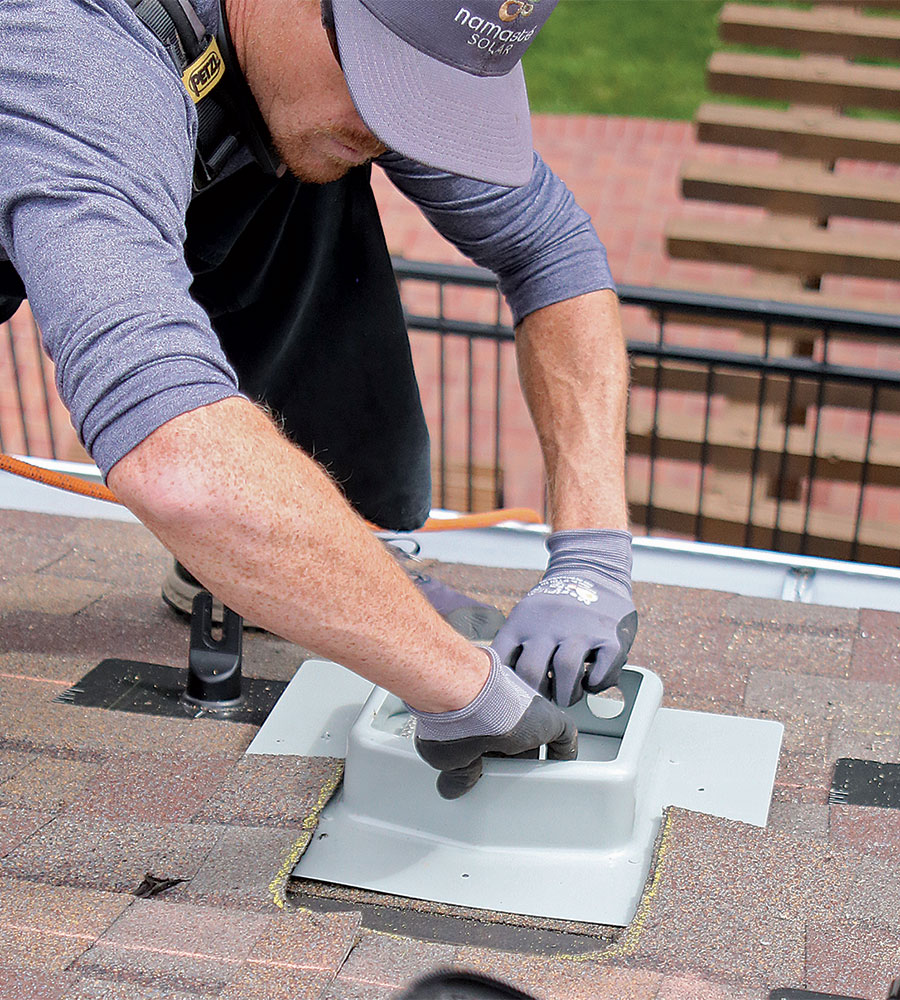
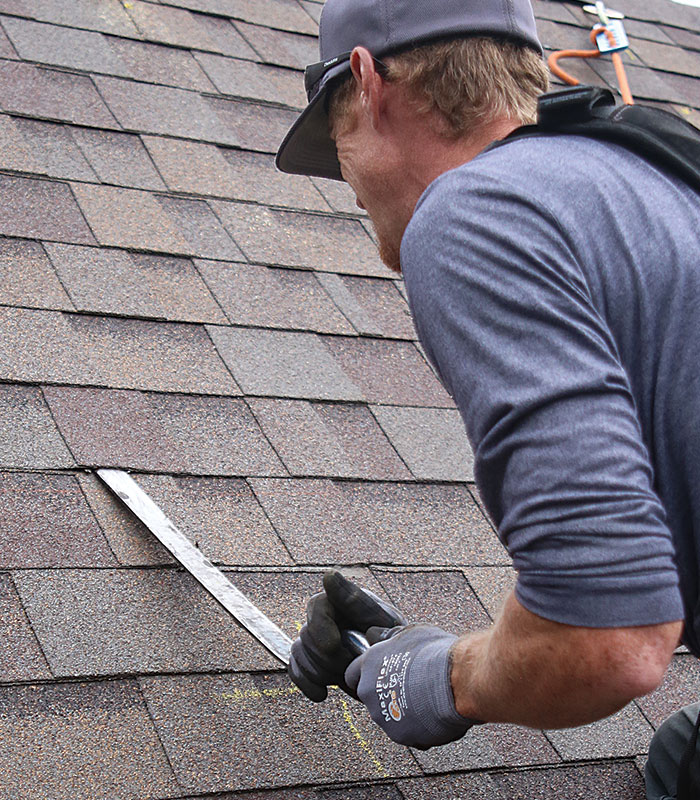
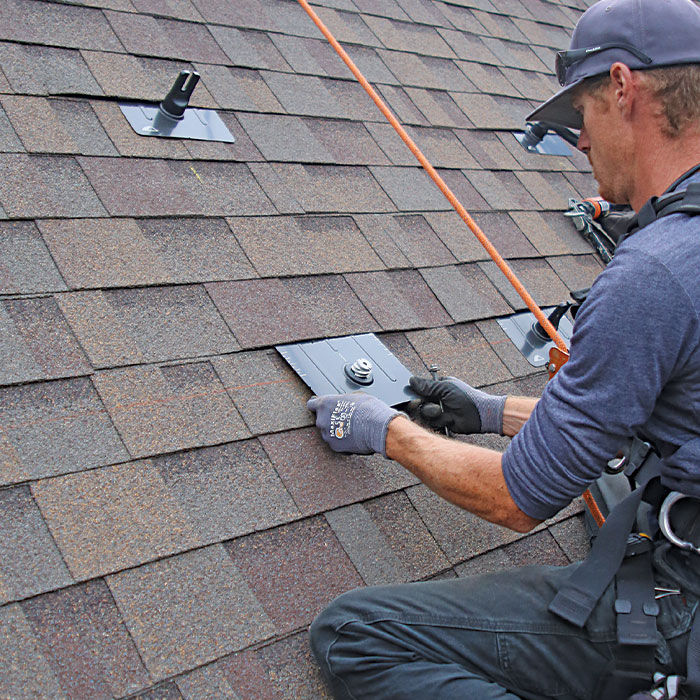
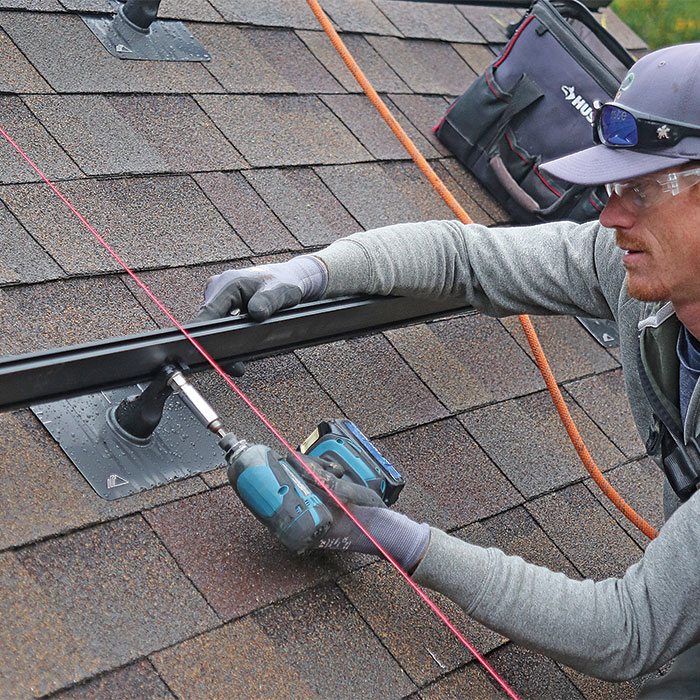
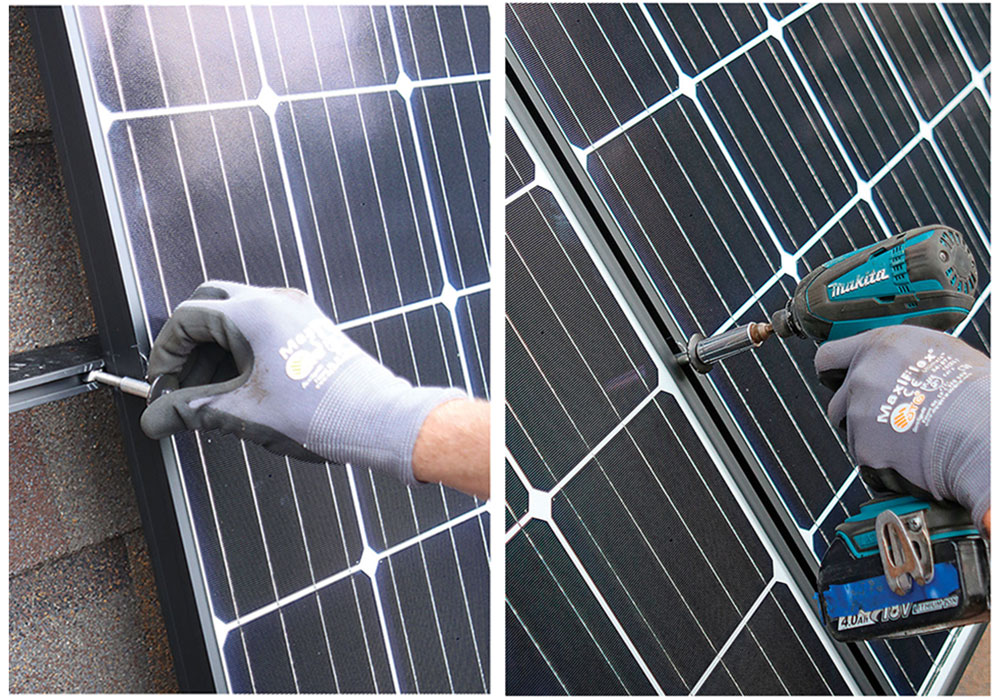
Installing the feet and rails
A PV array (a group of modules) is first positioned on the roof for maximum performance. At that point, aesthetics can be considered. We always align the array with the ridge, the eave, and the shingle courses, if possible. If the shingle courses are not in line with the ridge and eave, we go with ridge and eave alignment. While each system is engineered for the specific house, in general there are two feet installed on the array’s outermost rafter. In between, the feet are staggered between the top and bottom rails.
 |
 |
 |
 |
 |
 |
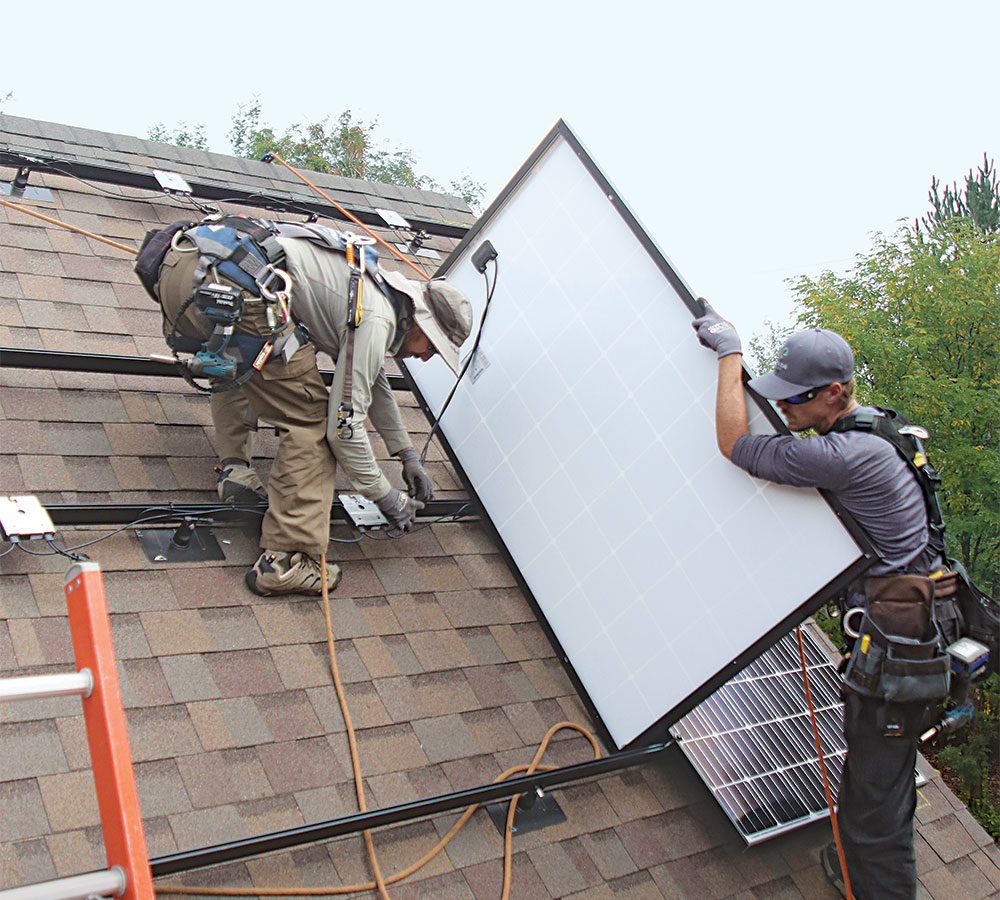
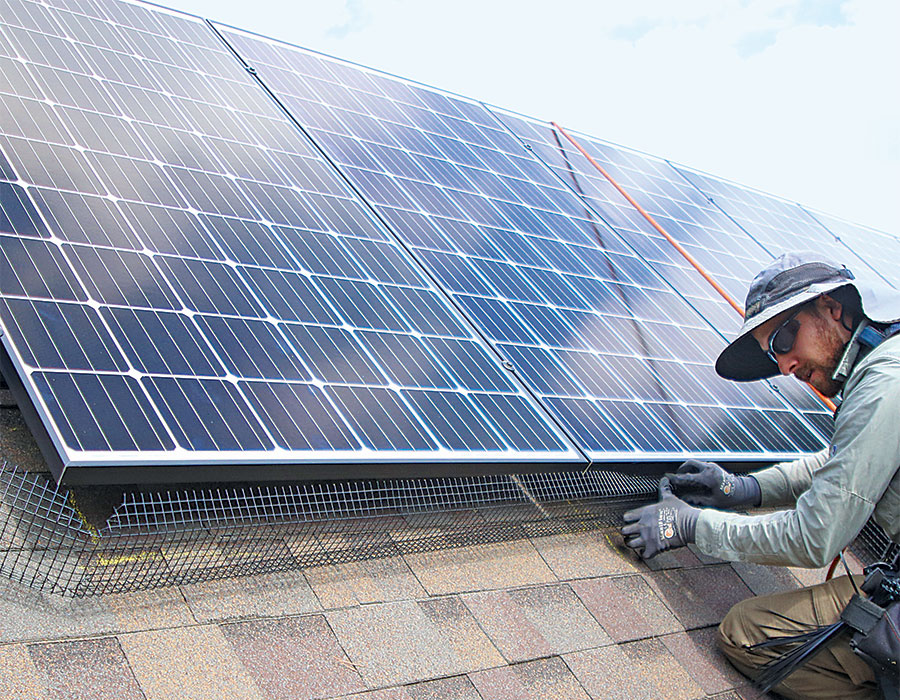
Connecting the modules
While the modules are light and the remaining wiring work is a simple matter of making the male/female plug-and-play connections, the modules are large and susceptible to damage, making this a two-person job.
 |
 |
Protecting and testing the system
 |
 |
Installation, cost, and payback
Solar modules are expected to last for 25 years, so we recommend that a homeowner take the age of their roof into account when choosing to install a PV system. In general, we recommend that a roof have at least 10 more years of expected useful life. The system can protect the roof surface beneath it, but this is not necessarily a meaningful benefit since most homes have the entire roof replaced at the same time, and most PV systems only cover a portion of a home. In instances where a roof needs to be replaced, we will take the PV system off prior to roof replacement and then reinstall the system after.
The IronRidge racking system we use is very intuitive. The self-flashed feet include a lag bolt that’s driven into the roof rafters. Often, all we need to do is pull a few roofing nails to make way for the flashing to slip beneath the shingles. The rails mount to the feet and the optimizers and modules to the rails with specialty bolts provided by the manufacturer. Even the wiring is mostly plug-and-play, though we do have to use home-run conductors from the last module back to the inverter to complete the circuit. For this, we can sometimes add a SolaDeck (a rooftop junction box) and run the wiring in the attic. In situations like Lauren’s, where the house has vaulted ceilings, we have to run all of the wire in exterior conduit.
This system cost $22,545 for materials, installation, permit fees, and taxes—but Lauren will benefit from a 30% federal investment tax credit on the total system cost. The net cost after the tax credit is $15,781. Based on a conservative assumption of increasing electricity rates, the system will pay for itself in 11 years. In our experience, PV systems also increase a home’s value by roughly the amount of the after-tax-credit cost of the system.
– Jim Bakhaus is former residential operations director at Namasté Solar in Denver, Colo. He’s now CEO of Florida-based Solar Impact, Inc. 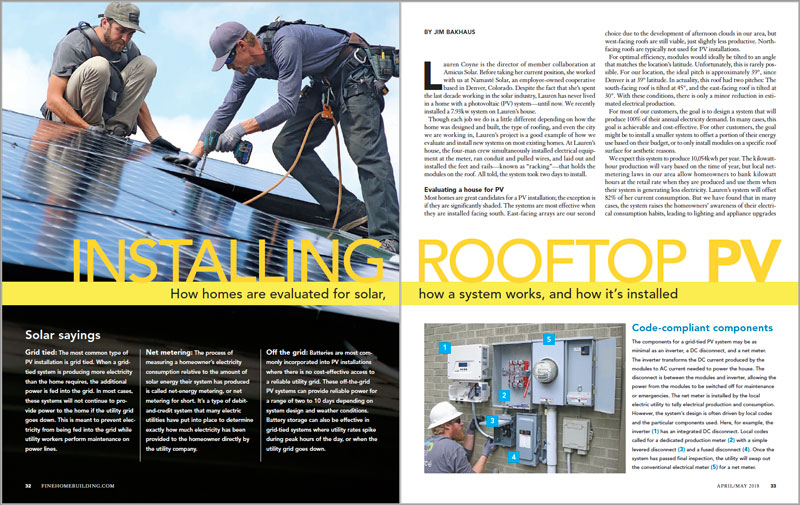
Photos by Brian Pontolilo.
For more information and photos, please click the View PDF button below.
From Fine Homebuilding #274
Fine Homebuilding Recommended Products
Fine Homebuilding receives a commission for items purchased through links on this site, including Amazon Associates and other affiliate advertising programs.

Shingle Ripper

Roofing Gun

Ladder Stand Off
