Synopsis: An experienced trim carpenter explains the old adage about installing crown molding: cut it upside down and backward. He also covers measuring, marking, coping and installing.
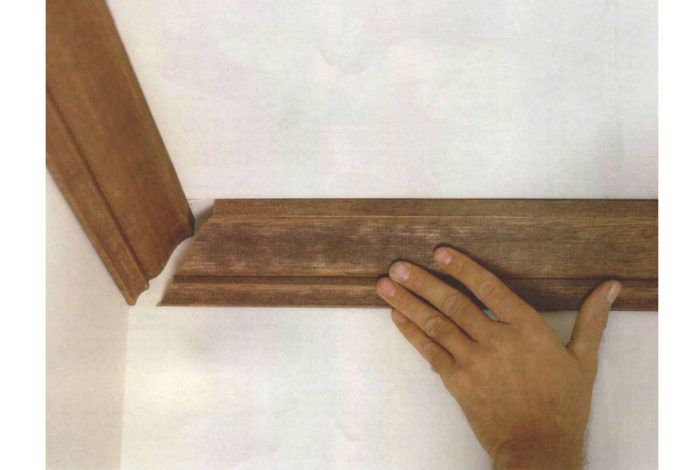
The old-time carpenters I learned from used to amuse themselves by quizzing young apprentices about the trade. If you could answer the easy questions, the last question would always be: “How do you cut crown molding?” And when you looked puzzled, they’d go off, chuckling to themselves something about “upside down and backwards.” Of all the different moldings, crown molding is the most difficult to install, largely because of how confusing it can be to cope an inside-corner joint.
In classical architecture, crown molding (sometimes called cornice molding) is the uppermost element in the cornice, literally crowning the frieze and architrave. These moldings were functional parts of the building exterior when the ancient Greeks used them, but they have been used for centuries on interiors purely as decoration.
Crown molding is installed at the intersection of the wall and ceiling. Originally crown molding was triangular in cross section—the portions abutting the wall and ceiling formed two sides of a right triangle, and the molded face was the hypotenuse. But only the molded face is visible, so much of the solid back has been eliminated to save material. Also, by eliminating part of the back, only two small portions of the molding bear on the wall and ceiling surfaces, which makes crown easier to fit to walls and ceilings that aren’t straight or that don’t form perfect right angles.
The crown tools
When I cut crown, I like to work right in the room where the molding will go so I can orient myself to the wall I’m working on. If a room is finished, however, I may have to do the cutting somewhere else. Then I have to imagine the molding in place when I’m positioning it in the miter box (and believe me, this can get tricky with crown molding).
I cut and install crown molding with hand tools. I use a wood miter box because it’s the kind I learned on, but also because my view is not obstructed by the electric motor of a power miter box. Installing crown molding is slow and calls for careful work, so the production speed of an electric miter box is not required. I cut miters with a standard 26-in. handsaw (10 or 11 point). Miter cuts are made through the face of the molding, and a sharp handsaw will do a better job than a dull circular-saw blade will do.
For this kind of work, I prefer a workbench to a sawhorse. Mine is just a simple frame of 2x4s and 1x4s with a 2×12 top. It stands 34 in. high, which is a more convenient height to work on than a sawhorse provides. You don’t need to deliver a lot of power to cut trim. A broad bench top is also convenient for holding tools.
For more photos and details on installing crown molding, click the View PDF button below.
Fine Homebuilding Recommended Products
Fine Homebuilding receives a commission for items purchased through links on this site, including Amazon Associates and other affiliate advertising programs.

Smart String Line

100-ft. Tape Measure

Plate Level


