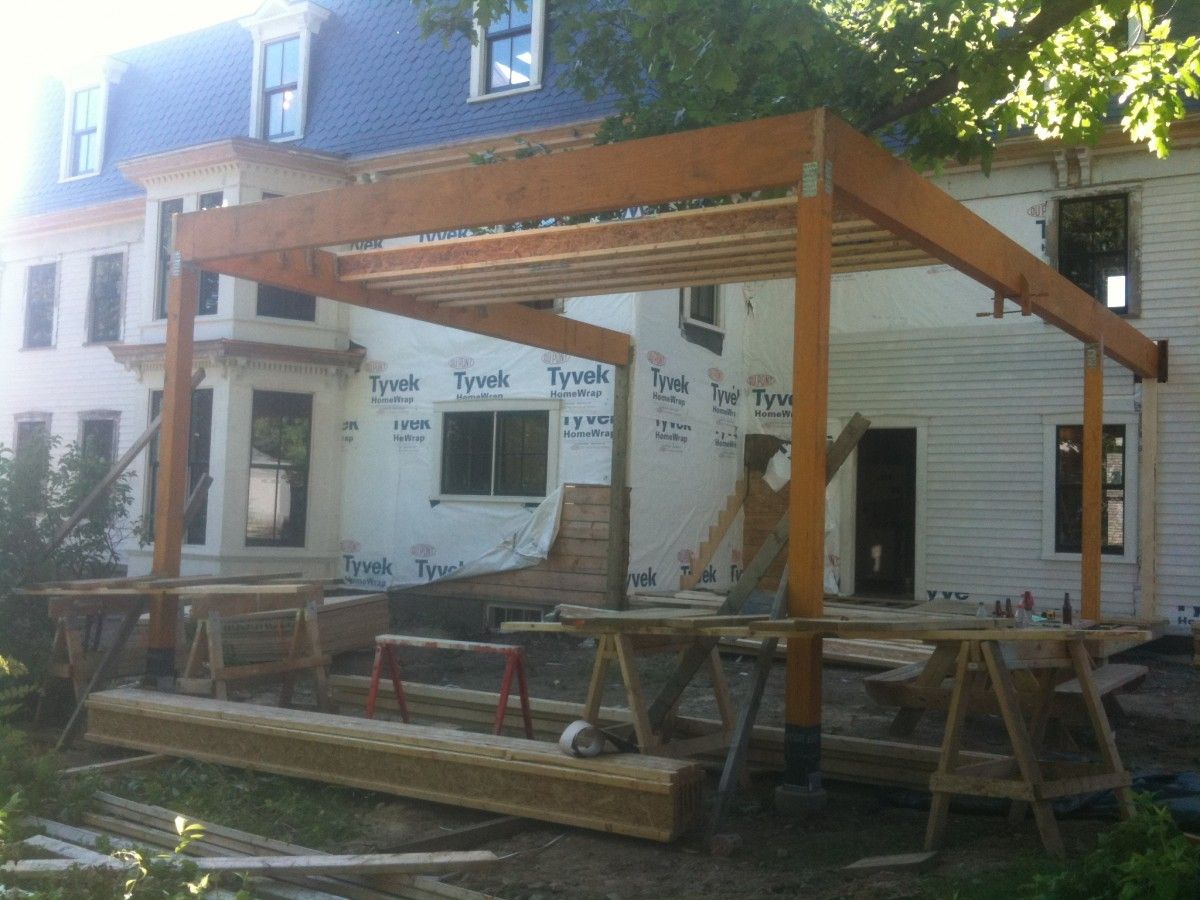
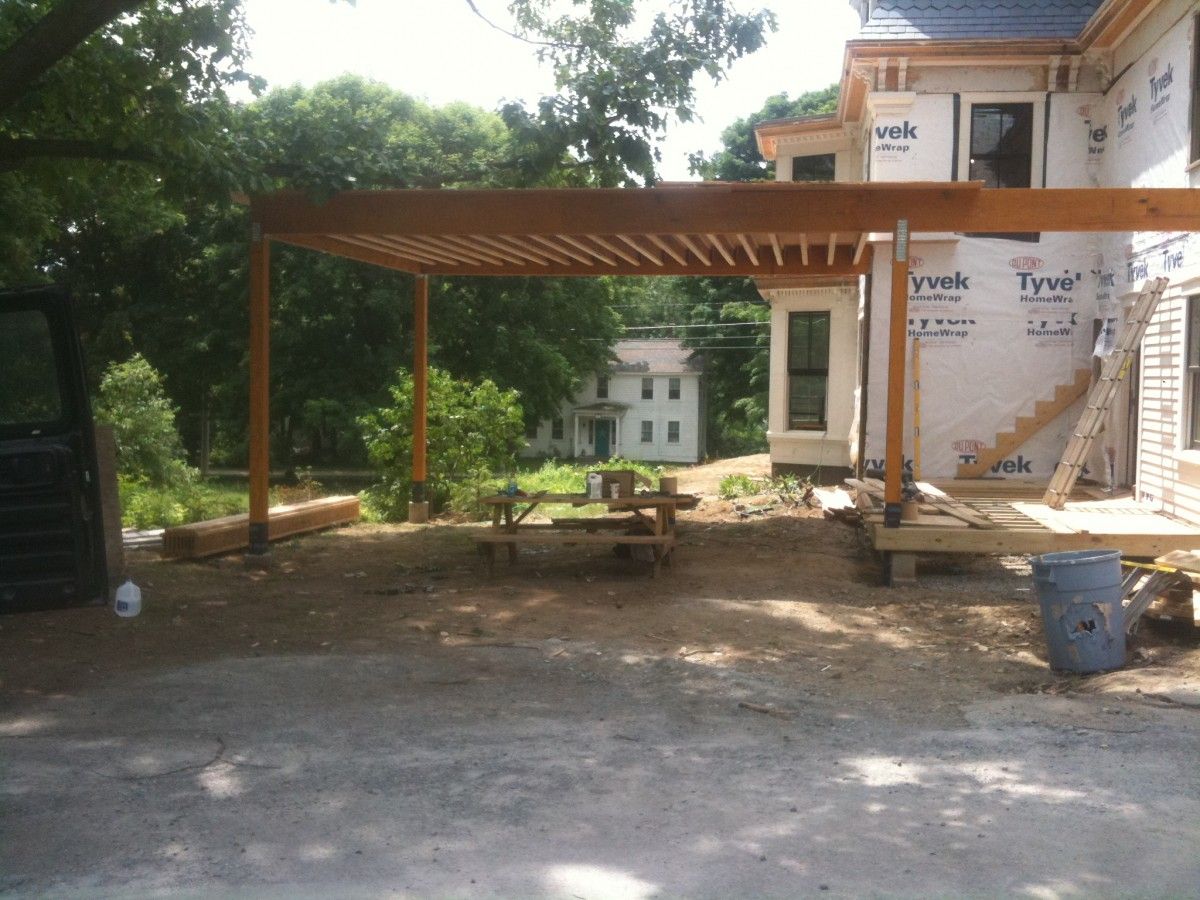
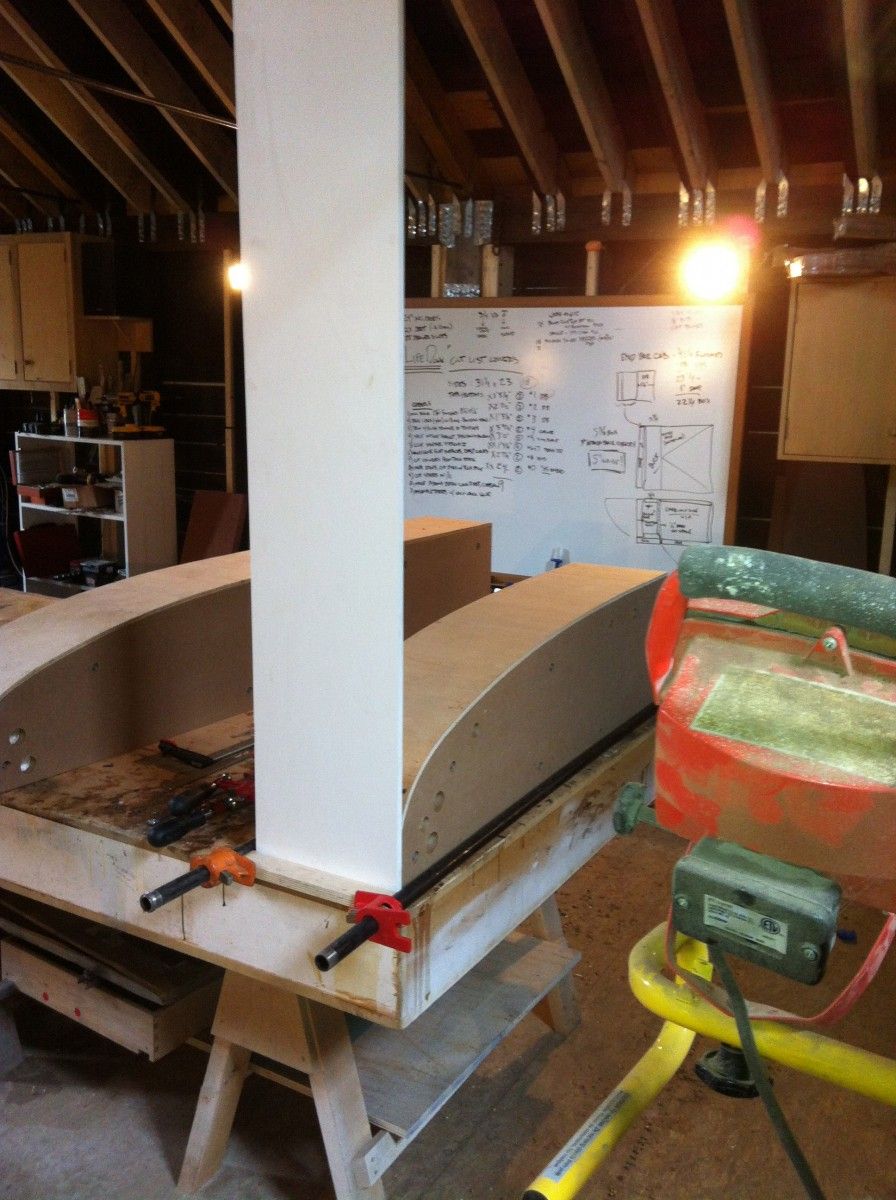
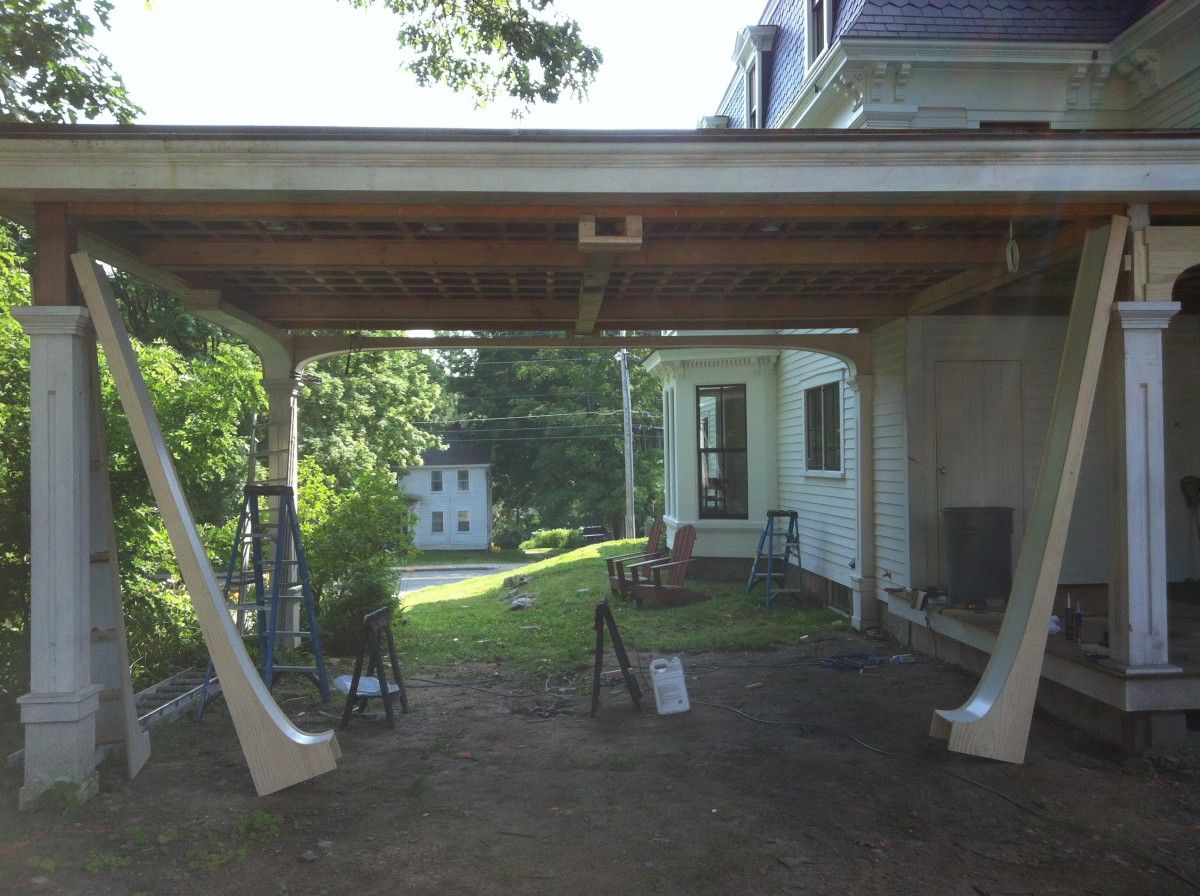
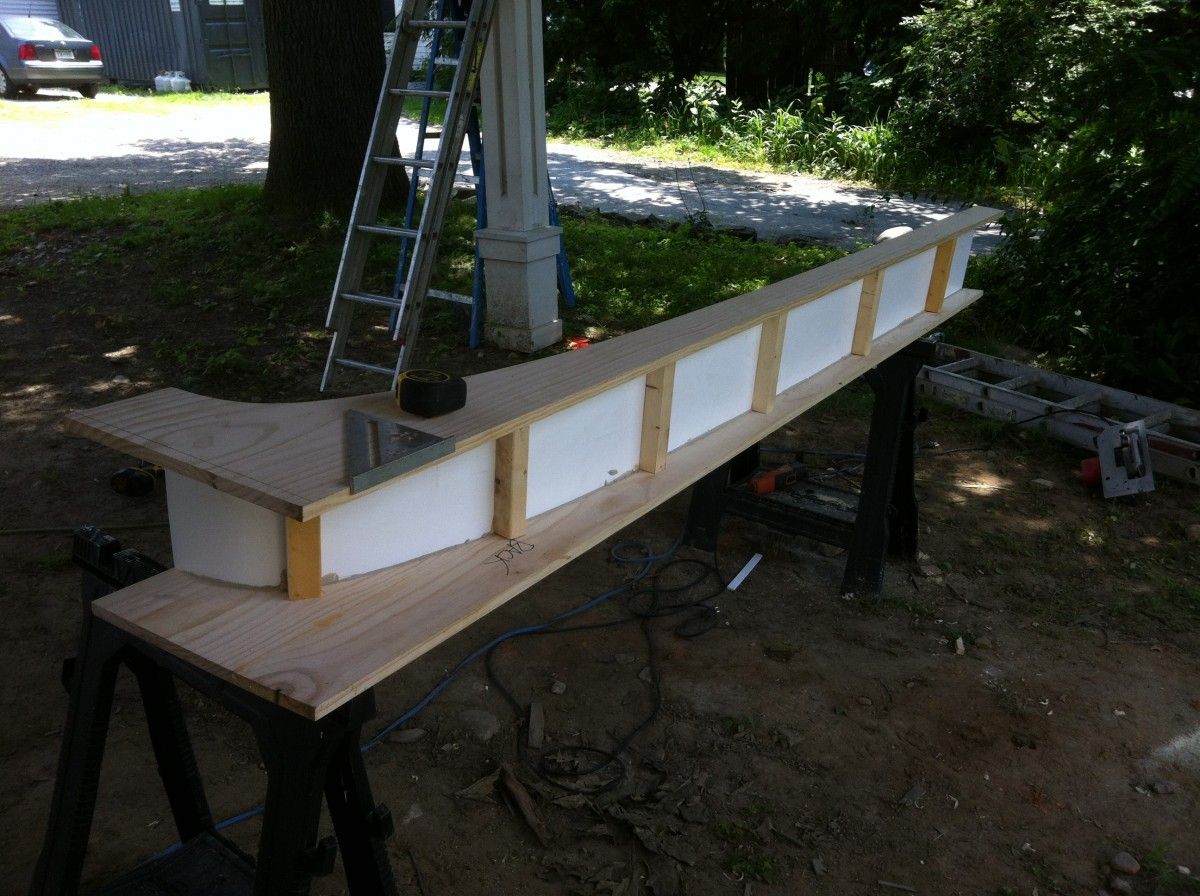
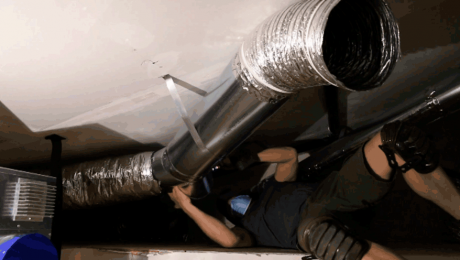
Building a porte-cochère is a straightforward framing project. Using engineered lumber, in our case 14″ LVL’s doubled up around the perimeter, and 9″ I joists at 12″OC, we were able to create the 30′ x 18′ structure. All the footings were set at 5′ below the surface and 8″ sonotubes filled with concrete brought us up to grade. We left a J Bolt at the tops to attach a Simpson post connector that kept the post end grain off the concrete. I like to slather the post bottoms (end grain and about 1′ up) with a couple coats of West System epoxy to help seal them. The support posts are 6×6 engineered lumber. Since the challenges of this project are trimming it out I will start with the raw frame built. I am not the greatest writer, so I am hoping the pictures below help clarify the process. I apologize in advance for any confusion….!
In this case, the frame sat for a year before the finishing started, and some birds moved in. When we finally got to it, we built around the birds and made birdhouse “raceways” hidden in the finished vaults under the car port, making 4 trimmed out openings for the birds to come and go. The house stays protected as the birdhouses are located 15′ away from the building.
The trimming out process went as follows:
1) Finish all soffits and add one piece fir gutters on all 3 sides, sloping the gutters away from the house.
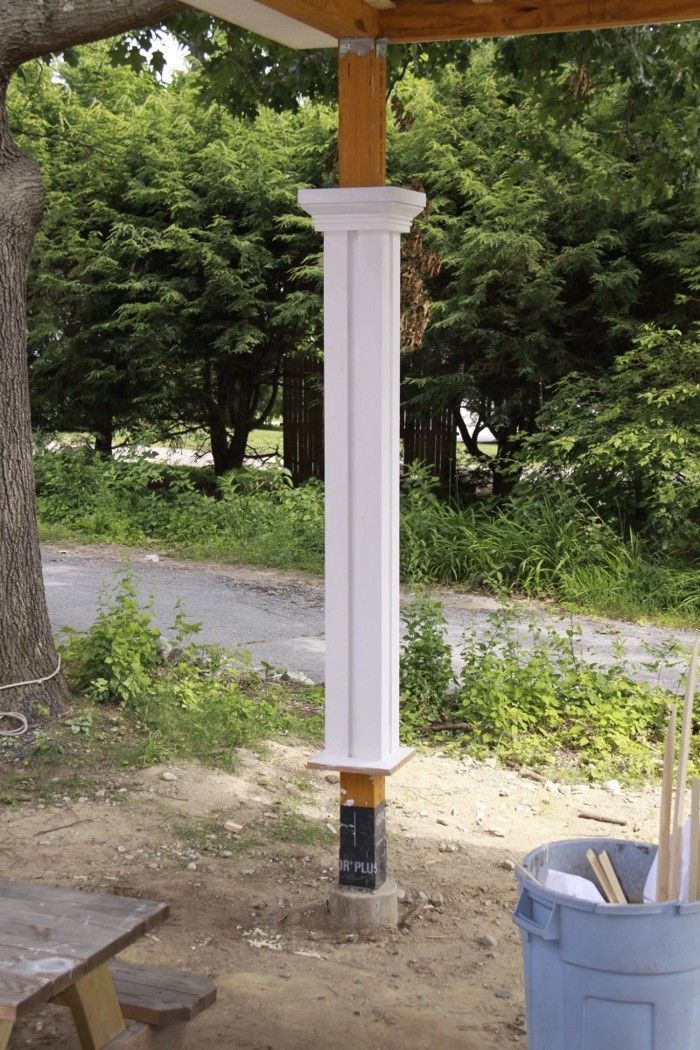
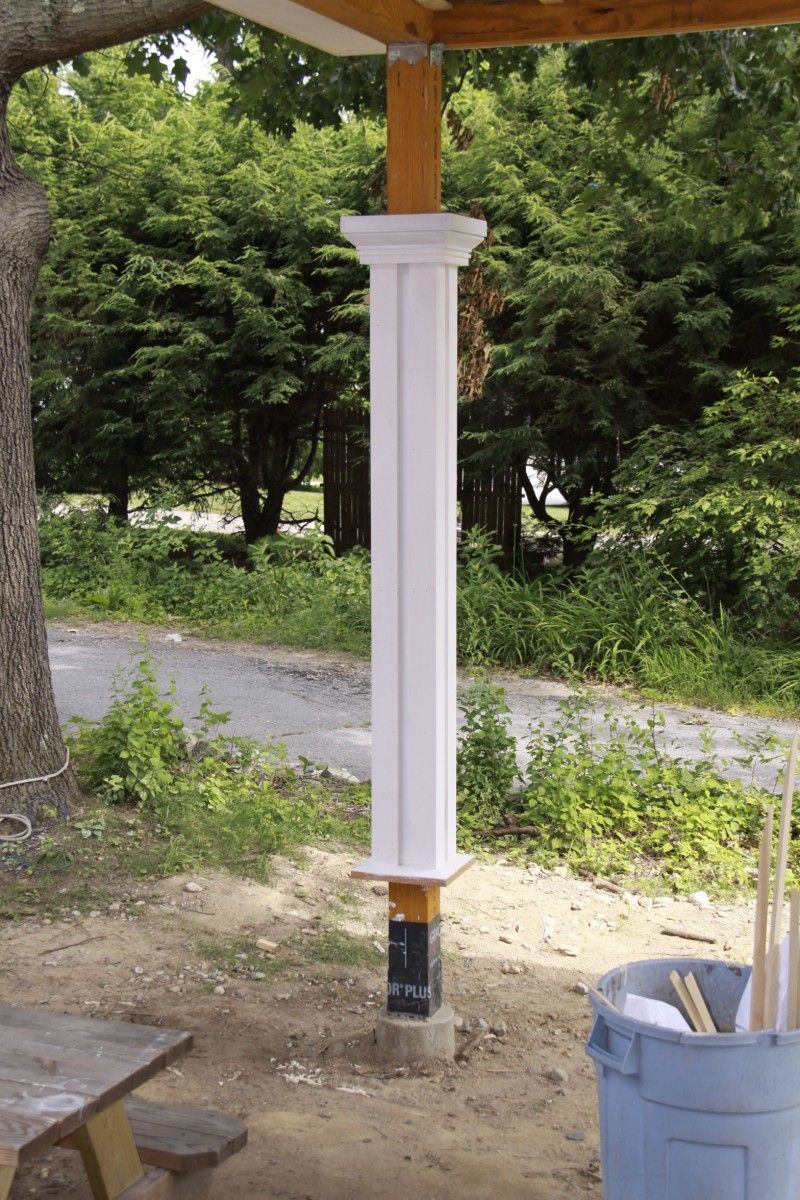
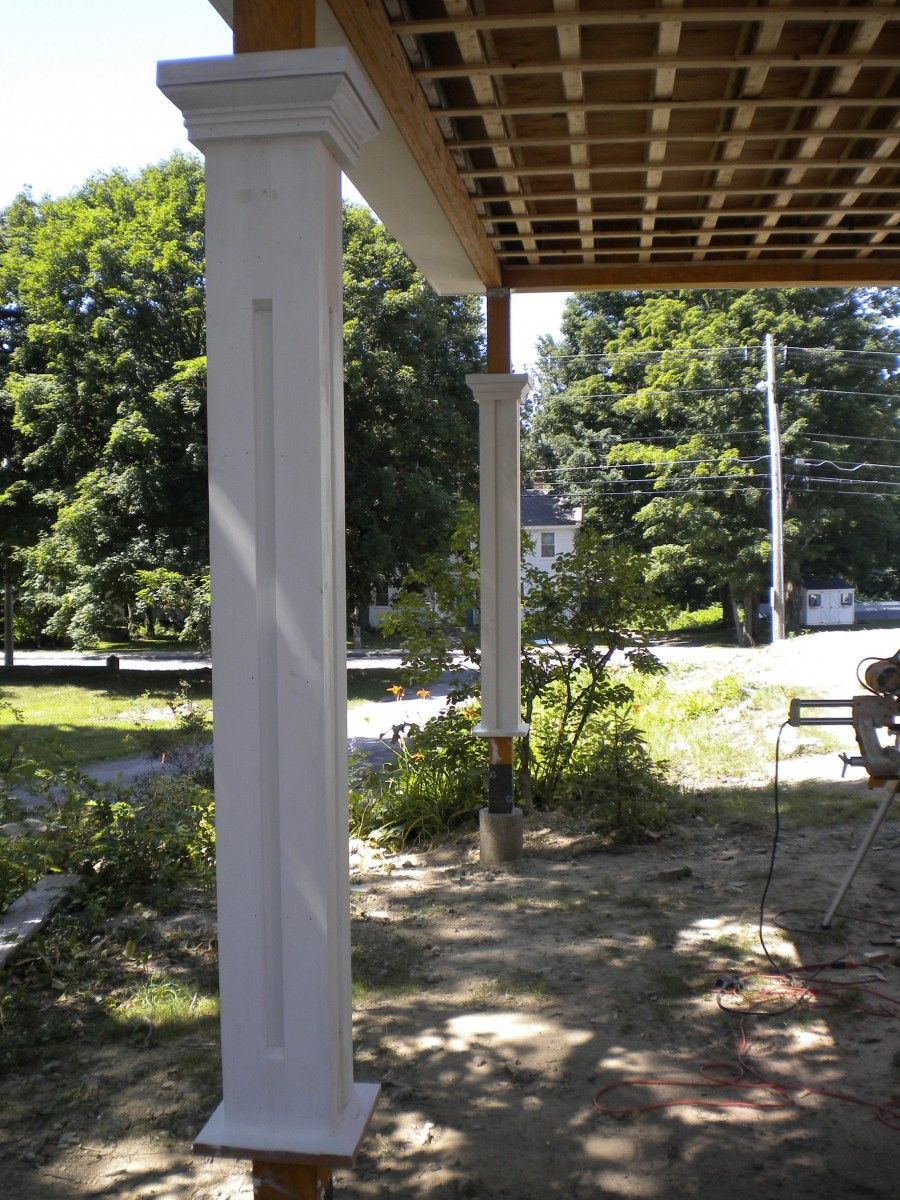
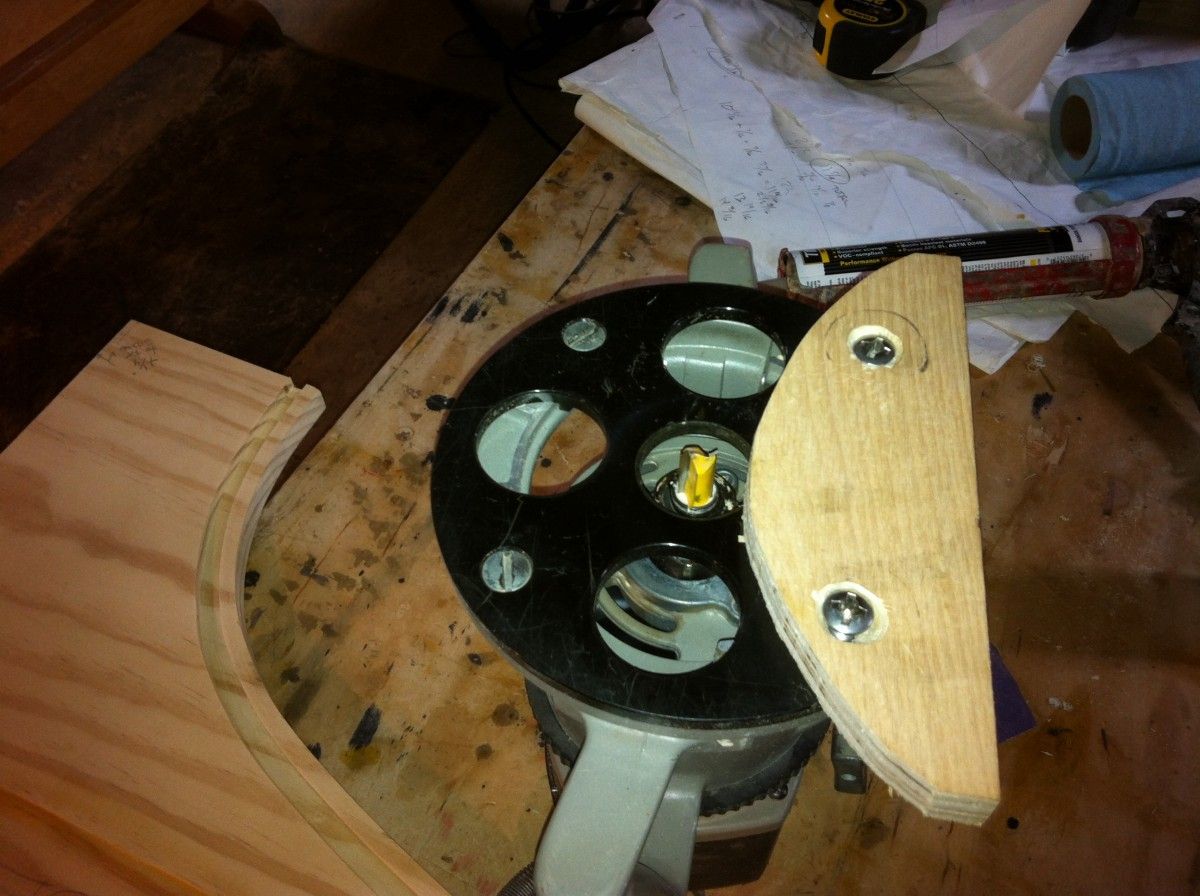
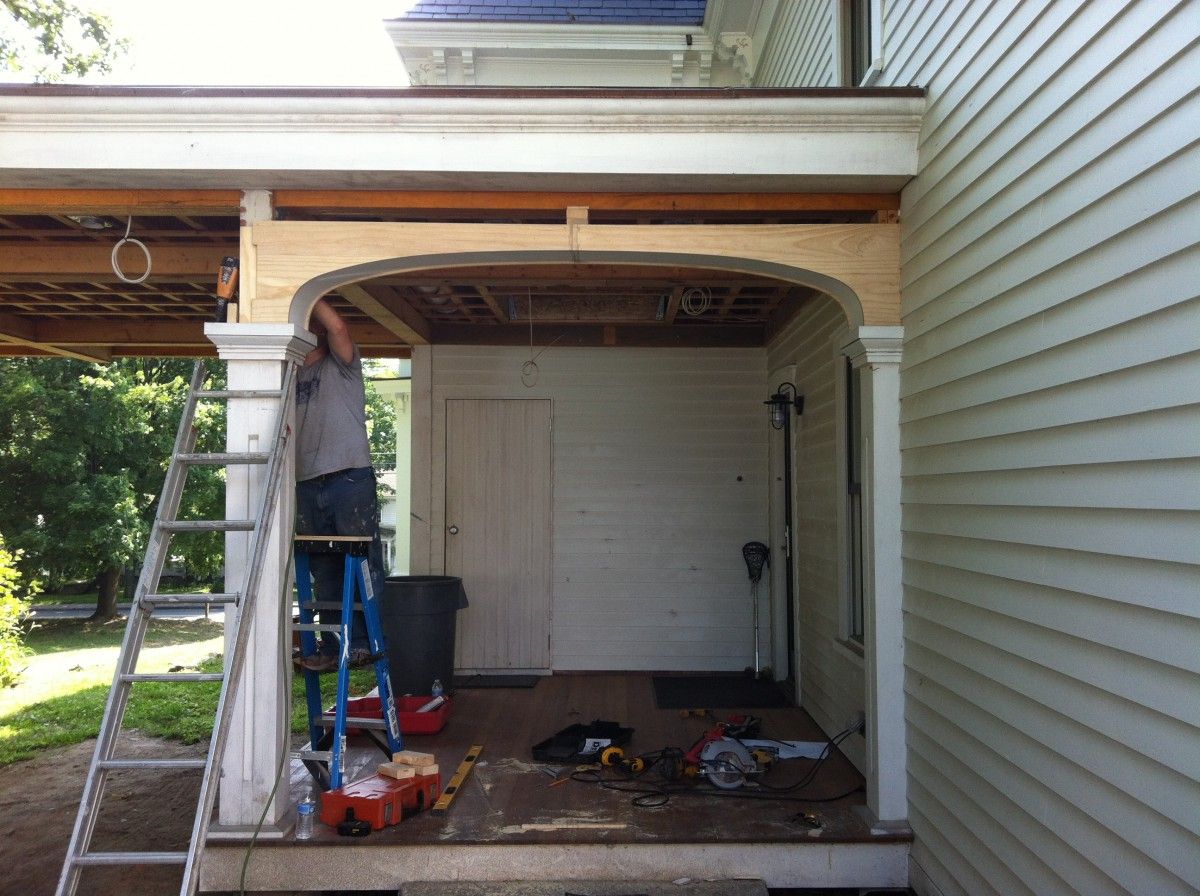
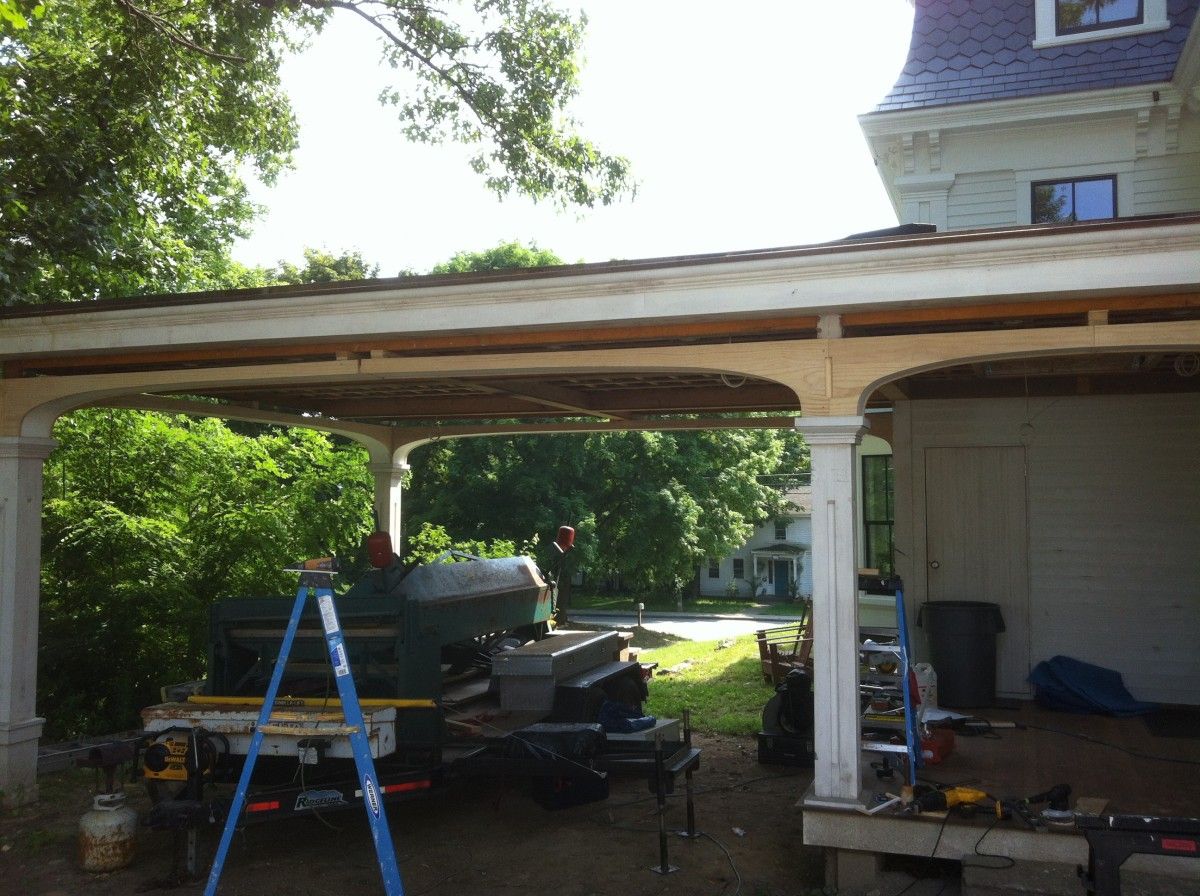
2) Trim out all the posts copying details of the original house for continuity. This house has simulated long corner columns with a capital that is trimmed in a molding detail that also repeated on the pilasters that were on the front porch. These moldings were duplicated using simple cutters on a router table, a table saw, and a curved card scraper. The columns only required about 20′ of custom moldings so the little effort here was well worth it to have exact details. The other molding used was a standard 2-1/2″ bed molding. The off the shelf variety matched the original perfectly. The trim work is clear pine (except for the PVC arched components) that we pre-primed with oil based primer all around. We would also be sure to spray prime all cuts and “glue” joints together with caulking. I like Phenoseal for this. The columns were all initially wrapped with MDO and primed.
 |
 |
 |
| Wrapping Columns with MDO, begining to add capital details | Column details, setting the capitals for arch location | A completed column with capital and base |
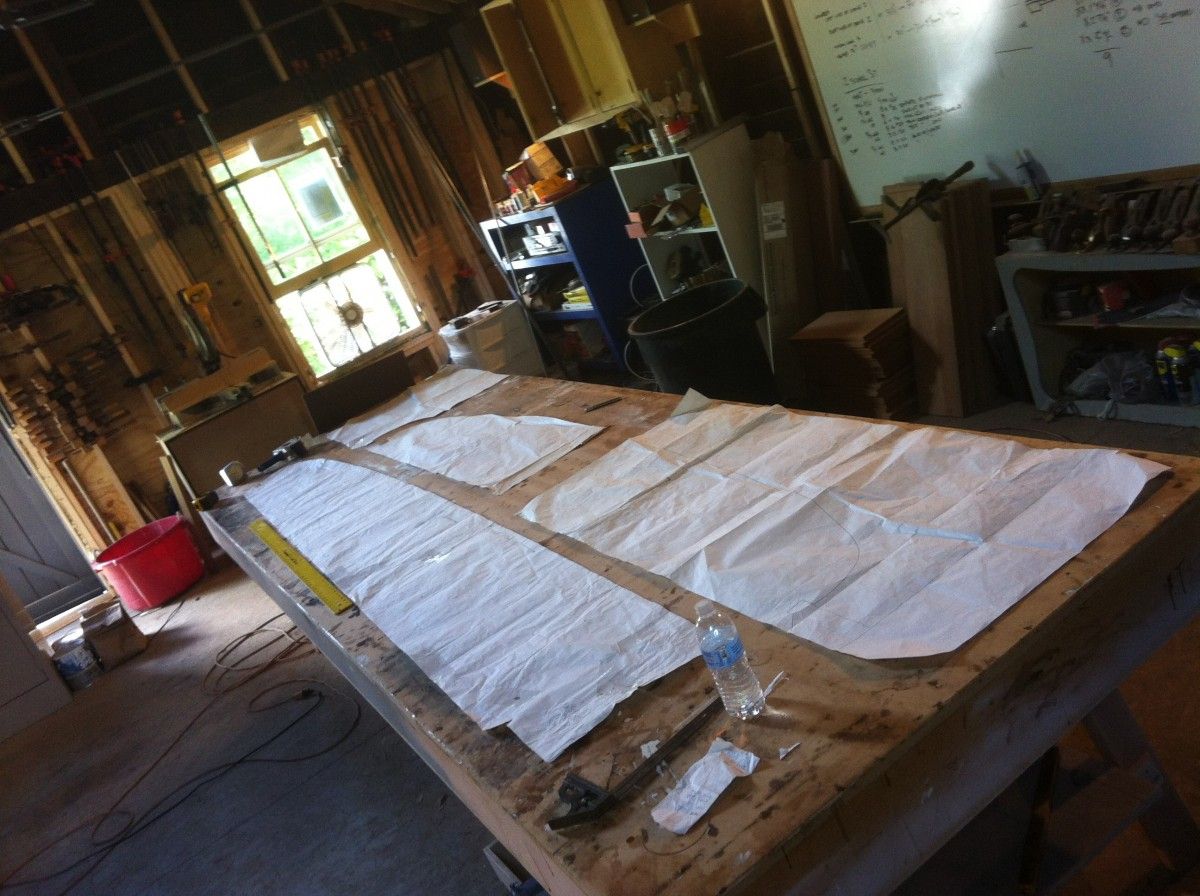
3) With the Column Capitals built and level with each other the lengths of the arches could be determined. I asked our architect to print out a full scale arch – about 6′ of it to create a line to build off of. This could also be drawn on a template and shaped to a pleasing 1/4 ellipse. Using the print out arch, I cut on the line and transferred the shape to a masonite template. We need to generate two things from this – a mold to shape the undersides of the arch, which will be made with 12″ wide 1/2″ PVC, and a template to flush trim the faces of the arch. This template becomes very important so it is worth the time it takes to shape – I like a rasp and files here – and then sand the template to a point where there are no visible imperfections. Running ones finger over the shape will reveal any subtleties that need correcting.
 |
 |
| Paper printout of the arches | Making the molds and the side templates |
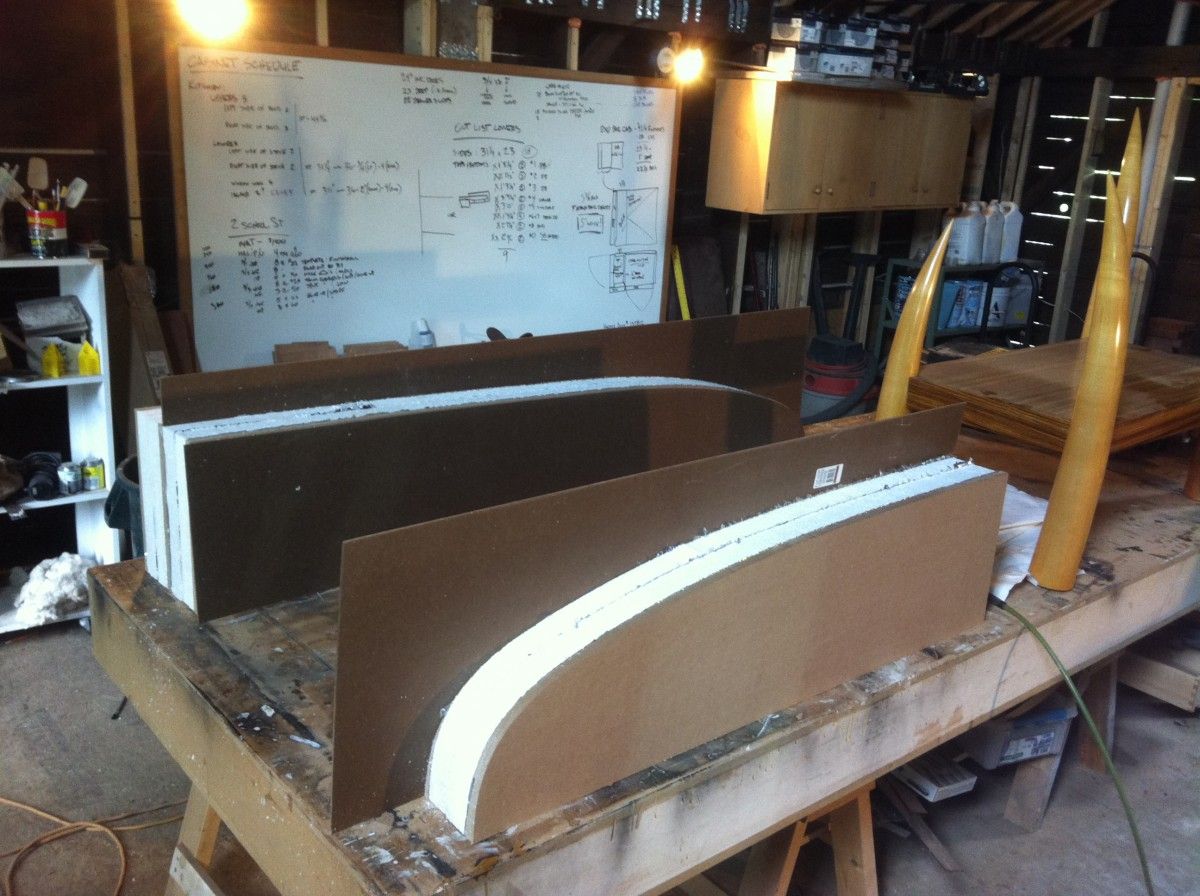
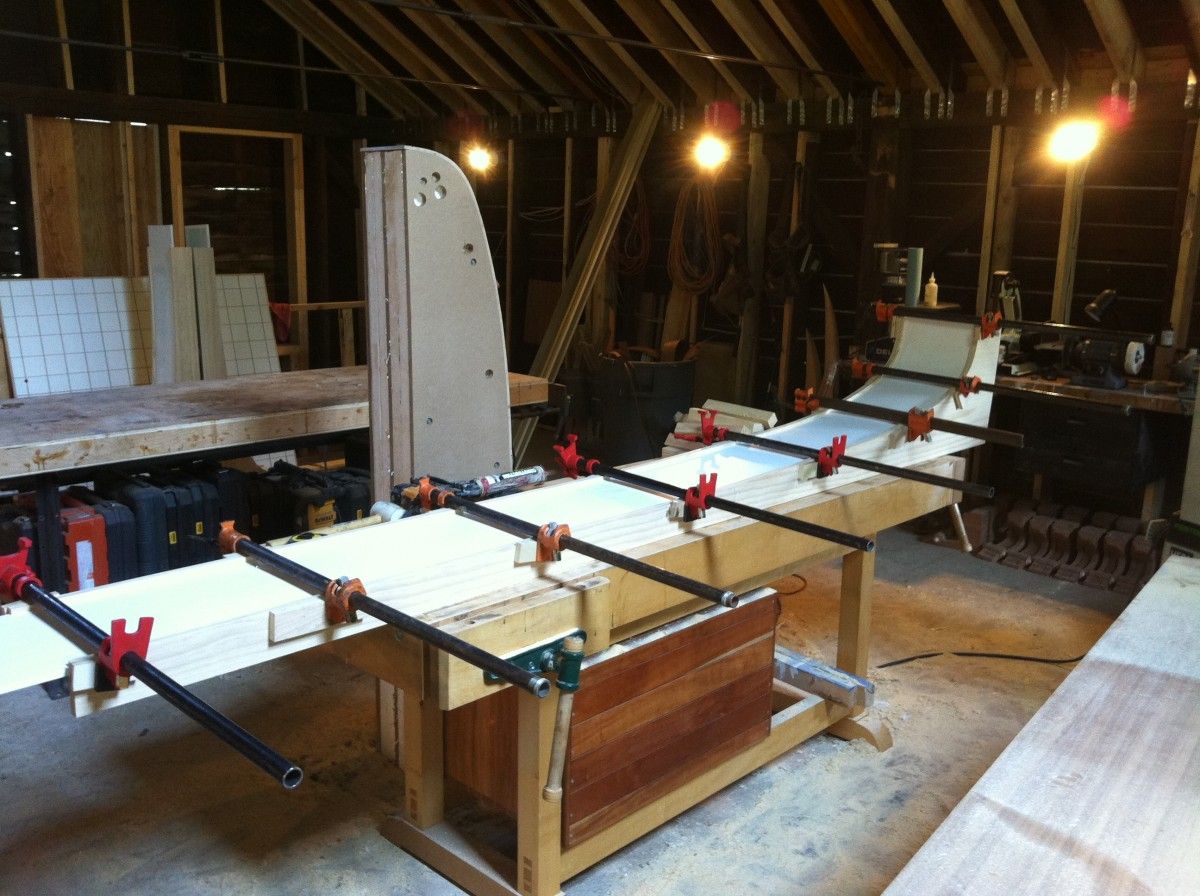
4) Using the template we made two molds – each arch was made with two identical pieces that were joined in the center. The molds are used to bend and shape the PVC arch underside. This design has one short arch at 8′, 2 long arches at 18′, and one at 16′. Making two molds was necessary to accommodate the short section – the long sections could use the same mold and just be trimmed. The ideal arch will gradually arc the entire way and only flatten out for the middle joint. The object is to have a smooth flowing line rather than two lines gradually rising, meeting at a point in the middle. In order for this to happen the arches need to be worked independently. Where the arches originate (or terminate) at the columns, they are the same, this is the 1/4 ellipse that is the same for all the arches. it is after that point the arches need to be adjusted for length. The template is used to make two sides for the molds – i rough cut the shape on 3/4″ MDF leaving it about 1/8″ strong, then screw the template to it and flush trim the 3/4″ MDF. I made 4 of theses to make the two molds. These are the sides – I then screwed 2″ thick rigid insulation to the MDF, again a little proud and flush trimmed this to the MDF. I did this twice with each side giving me a finished mold that is 9-1/2″ wide (2(3/4″) + 4(2″)). Taking a few 10″ screws I lined the two sides up and screwed them together. With the body of the mold made I attached a layer of masonite that is nailed over the shape (i used pneumatic staples). The longer mold was 7′ long – this would allow the shape to be made and the excess hanging over could be trimmed as needed. The shorter 4′ mold was adjusted to make sure when the middles met the arch was pleasing. SO, before assembling the sides of the mold, I laid the sides on the bench to create the arch visually. I made cuts and adjustments until the arch was just right. This, being the short arch, has to be more precise than the others since the arc happens over a much shorter distance.
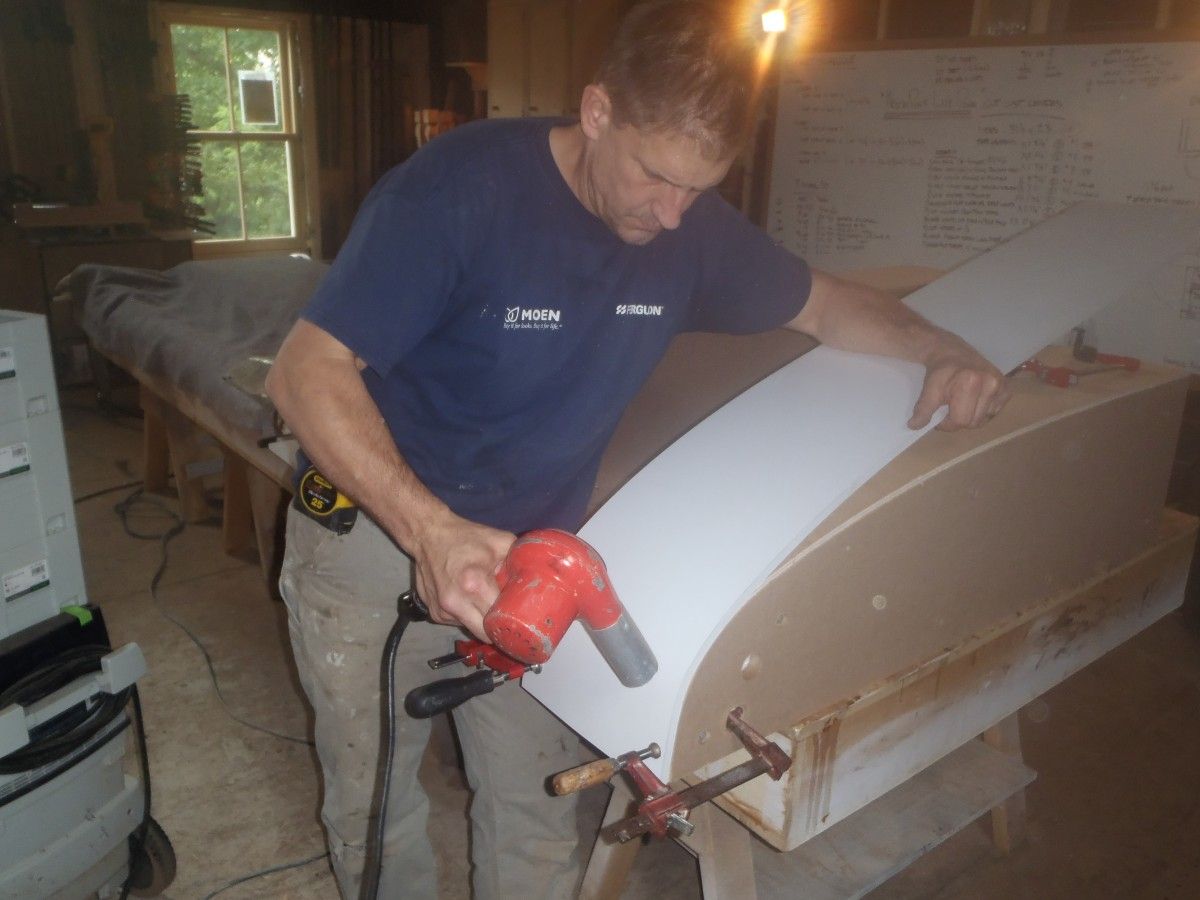
5) With the molds made, the white TREX sheets purchased (4’x12’x 1/2″) were ripped into 10″ widths. These will be the bent pieces that make up the underside of the arches. In the molds you will notice I cut some holes for clamps to hold the Trex sheets in place. The sheet starts vertical, clamped to the mold, and heat is applied with a heat gun to soften the PVC. Keep heating, and shaping, clamping the PVC down as you work your way to the back. After about 15 mins the PVC was cool enough to remove from the mold. There was a little spring back, but the shape is easy to bend back when the time comes. Make the 8, 1/2-arches with this method.
 |
 |
| Applying heat to PVC and bending along the mold | Arch clamped and setting |
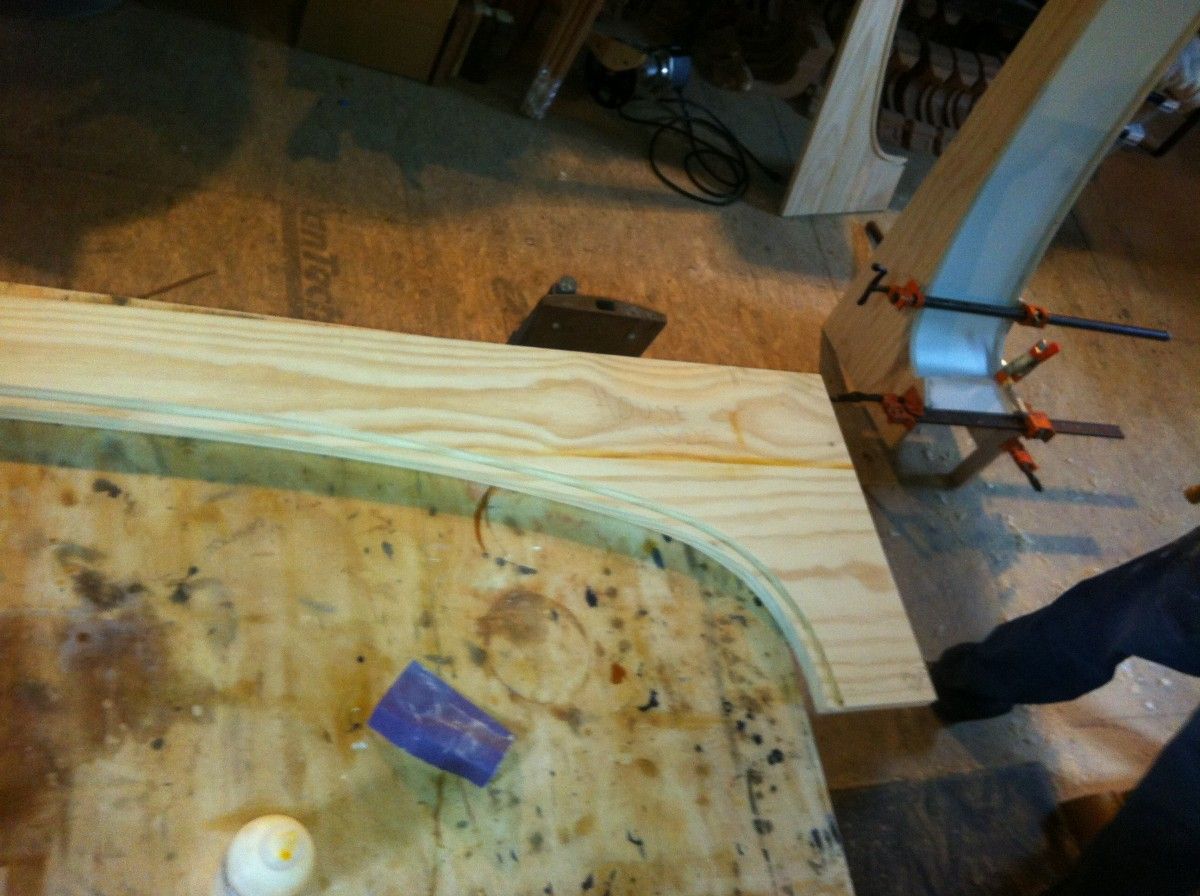
6) The arches are made into boxes. There are two arched sides with a groove in them, the PVC arch goes in the groove, and the sides are attached with short 2×4 ribs. The arch sides will require a new template to flush trim against. This is because, the sides will have a slightly different, larger arc since there is a 1/2″ reveal where the bent PVC will fit in a groove set 1/2″ back from the edge. I make this template right off the mold. I place the masonite against the mold, using a half inch block, I set my pencil on top of the block and run it along the mold drawing the larger shape on the masonite. Cut and shape this like before. I use this “side template” to flush trim all the sides. These finished sides will need to be individually worked as complete arches. Measurements need to be taken now between the columns. The arches will sit on the column capitals and go between the posts. Once these measurements are taken, each arch can be analyzed for the right arc. After the sides were cut, I laid them on the ground making the actual arch, with a little extra length, about an inch or so. Here, I can correct any imperfections, flat spots, or anything that just doesn’t look right. When I’m satisfied, I will use the corrected arcs to flush trim identical pieces to complete the sides, leaving me with two identical opposite arches cut to length, plus an inch, for the opening. I will do this for all 4 openings that have arches.
 |
 |
| The router set up to cut the groove on the inside of the two sides | Half of an arch clamped and being initially fit |
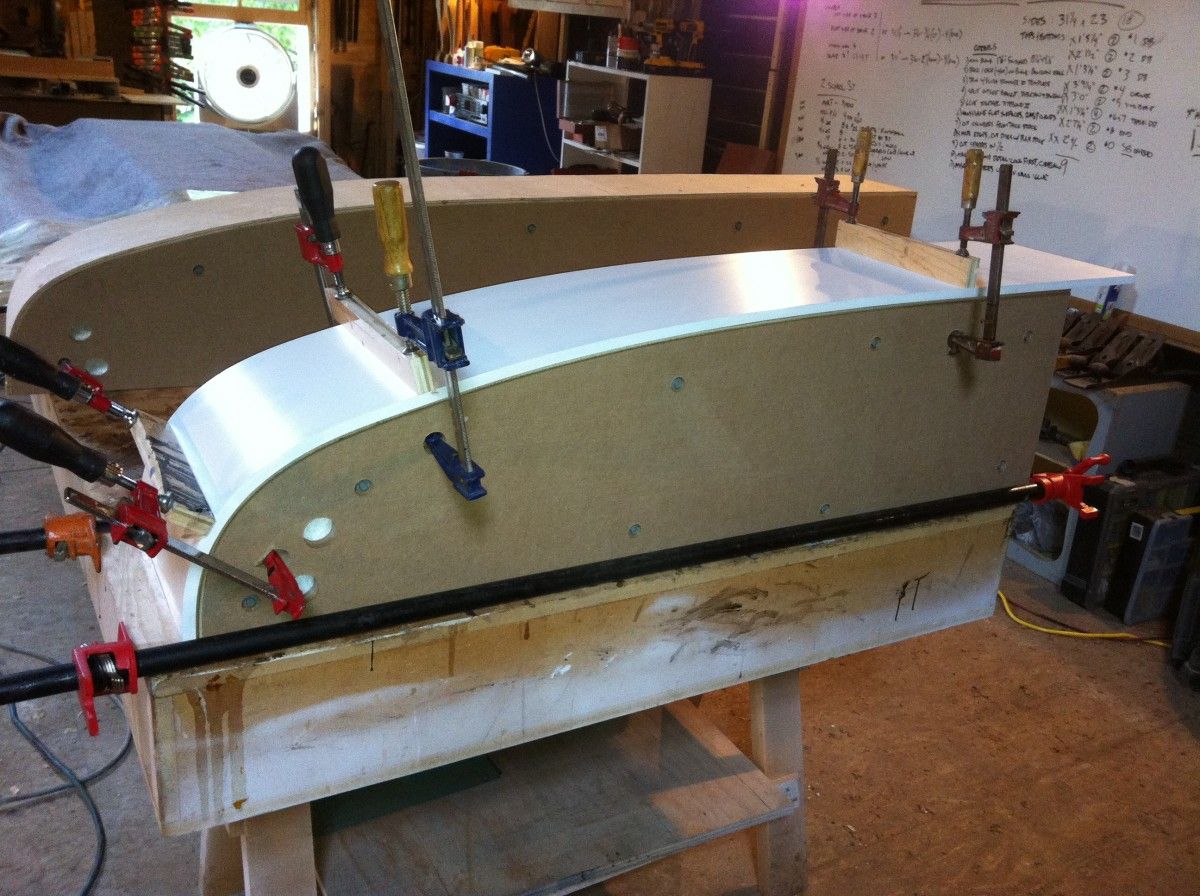
Next is to cut a 1/2″ slot in the sides, 1/2″ from the inside edge to put the PVC arches in. This is done with a 1/2″ straight bit and a arced fence I screwed to the router bottom – see picture. This gave me the slot necessary for the bent piece to fit in. It will require a little wrestling to get the PVC in the slot. A mallet, some clamps, and two more hands are necessary for this process. (I think I would have taken the PVC through the planer a pass, prior to bending it, to make it a little thinner to make this step easier, in hind sight…) Have a stack of cut 2×4 spacers available to assemble the boxes -These will back up the PVC and make the box rigid. Since the PVC is only 1/2″ thick fasteners can not be relied on to hold the sides in place with just the PVC. These ribs are glued with construction adhesive to the PVC every 16″ or so and nailed through each side. I found by clamping the ellipse side and working my way along clamping and mallet-ing as I went, the box went together pretty well.
7) Installing the arches went easier than I thought. Installing one side, then fitting the other proved the most efficient. The arches should all have been left a little long to accommodate this. I left off the 2×4 ribs along the tops so I could set them on the 14″LVL’s. So, this step is about blocking – adding it in several spots to support the tops of the arch boxes. These we applied as we needed as we went along. The arches are rigid to start with so we don’t need too much, plus there will be more elements added after. I did find here that in order to get the second arch in each opening, the PVC needed to be cut back about 1/2″ – a piece that can be replaced after. (Note: I found that this small piece, glued in, will be problematic. Since PVC shrinks the long way, opposite the way wood does, there is a noticeable line that appears at this joint. This is the only downside to PVC, I applied a 1/4″ thick strip to this, covering the problem joint and it looked good locating the center. But, in the end I wanted it cleaner and removed it opting for a couple of caulk and paint applications. Its had 2 seasons to move and seems ok to me now)
 |
 |
| Small arch going in | The far long arch is in, the closer long arch ready to install |
 |
 |
| Arch box supported with glued and nailed 2×4 ribs | All arches in place |
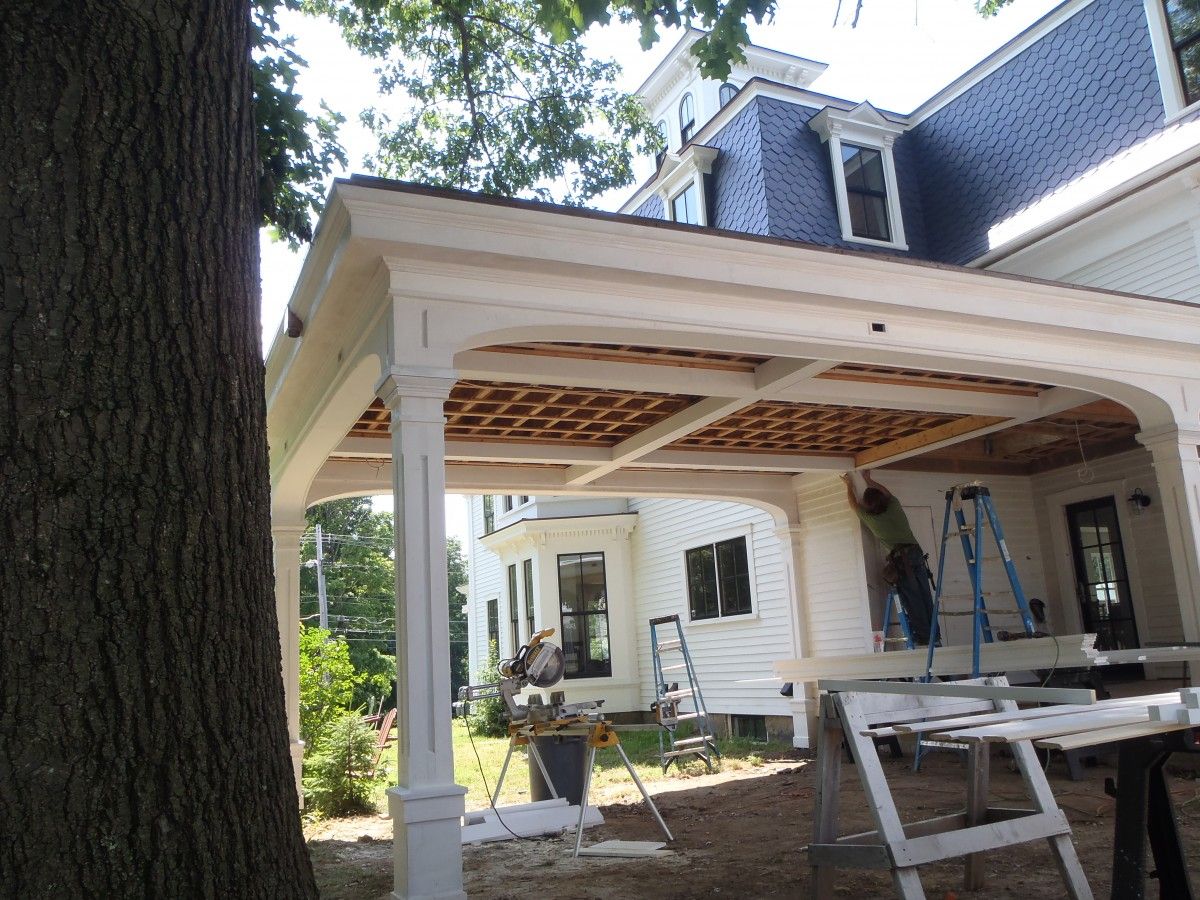
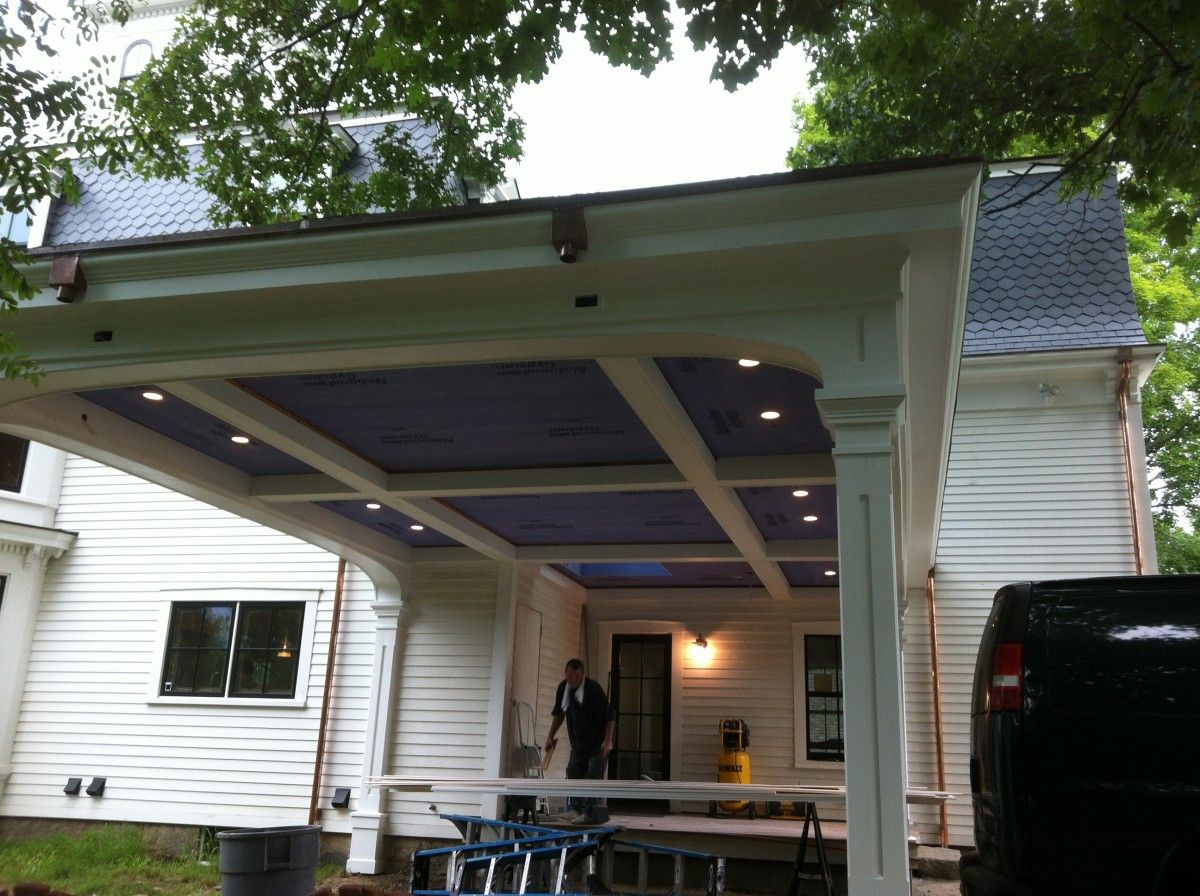
8) Now the rest of the trim work can be completed – this was another piece on top of the arch filling in between the arch and the soffit, a beveled astragal on that joint, a chamfer cut into the edges of the arcs, a vaulted ceiling, and bed molding put in all the corners. There is a lot of this, probably the most tedious part of the project. We had considered bead board for the ceiling areas but the cost was prohibitive. We used outdoor drywall and taped the joints. USG recommends their “Exterior Gypsum Ceiling Board” for these types of applications with a setting type compound (Durabond 45).
 |
 |
| All trimmed out, ready for outdoor drywall | Drywall and light cans installed |
The gutters were lined with copper and custom bent to go from the gutter to the roof edge. The rubber roof on the car port is bonded to the copper drip edge. The gutters will drain toward 2 rain chains furthest from the house that will eventually fill 2 polished concrete bird baths that will sit as a cap on the stone wall. The overflow from the bird baths will go into the underground pipe system that carries rain water away from the house. Belgian stones were added under the porte-cochère and the driveway was sloped down flanked by rock walls. All the rocks are from the site, where we excavated the basement and removed a foundation wall from the barn.
Fine Homebuilding Recommended Products
Fine Homebuilding receives a commission for items purchased through links on this site, including Amazon Associates and other affiliate advertising programs.

Not So Big House
A House Needs to Breathe...Or Does It?: An Introduction to Building Science

A Field Guide to American Houses
-
Wrapping Columns with MDO, begining to add capital details
-
Initial Framing - LVL's with I joists and Posts setting the frame. All standard engineered lumber
-
Column details, setting the capitals for arch location
-
Complete Frame
-
A completed column with capital and base
-
Paper printout of the arches
-
Making the molds and the side templates
-
Applying heat to PVC and bending along the mold
-
Arch underside clamped and ready to be heated and bent
-
Arch clamped and setting
-
This is a section of a "side" with the groove cut in, to accept the PVC arch
-
The router set up to cut the groove on the inside of the two sides
-
half of an arch clamped and being initially fit
-
small arch going in
-
The far long arch is in, the closer long arch ready to install
-
Arch box supported with glued and nailed 2x4 ribs
-
All arches in place
-
All trimmed out, ready for outdoor drywall One of the 4 birdhouse openings is visible in the center
-
Drywall and light cans installed
-
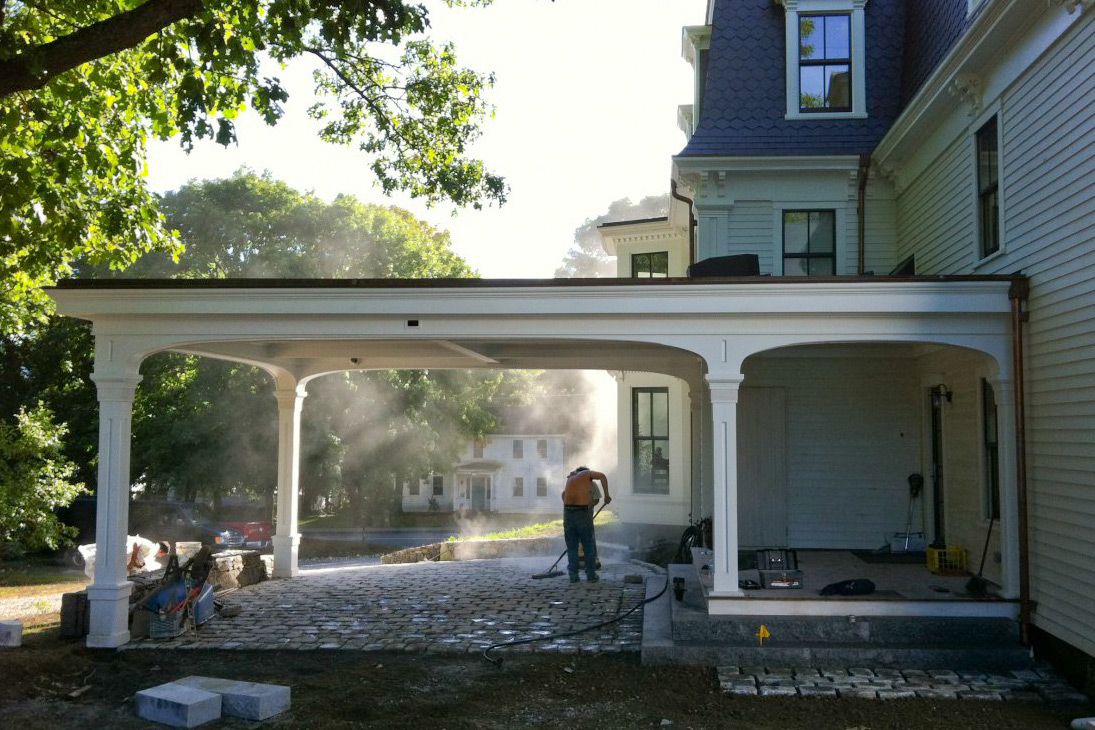
The final step of building our porte-cochère: Sweeping the polymer stone dust inbetween the Belgian stones


View Comments
That turned out very nice.