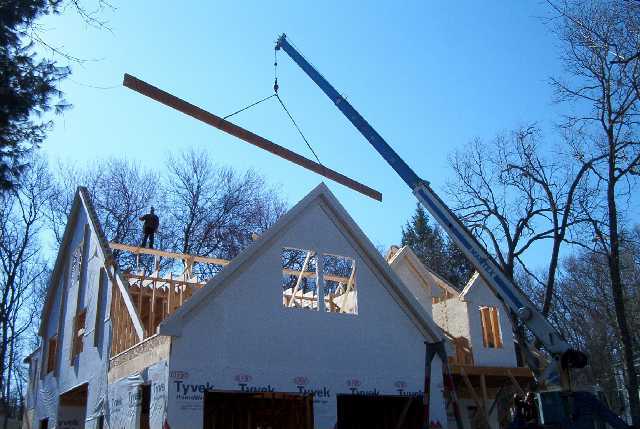
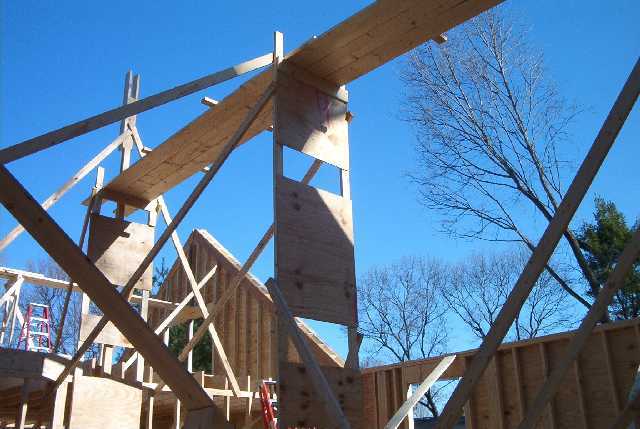
Well, yesterday we had a large boom truck come out to the site to assist in setting these ridge beams. The first ridgebeam is a 48′ long built up, double 18″ LVL. The second one for the master bedroom is a 26′ long built up double 18″ LVL.
The truck showed up at about 9:30ish and was gone by 10:45. Easiest check I ever wrote! After the truck left, we dropped the belts and started muscling all the commons up to the attic deck. Yes, we have a machine, but we couldn’t get them all the way up to the attic because of site restrictions. There’s no way to move stock longer than 18′ around the sides of the house because of the neighbor’s trees. So we went ‘old school’ and dropped the belts for awhile. Felt good. We stacked the master bedroom roof first…. 2X10 hem-fir 22’ers… cathedral ceilings with the ridge sitting 22′ above the deck. Yeeeehawwww.
Next we moved on to the main roof…. 2X10 hemfir 26’ers. 70 of ’em. It was a great day. The setting of the ridges went flawlessly. Literally couldn’t have gone any better. Followed that up with a good old-fashioned hard day’s work.
I love this stuff. Here’s the goods….
I’ll break it into two posts…


Replies
Round two....
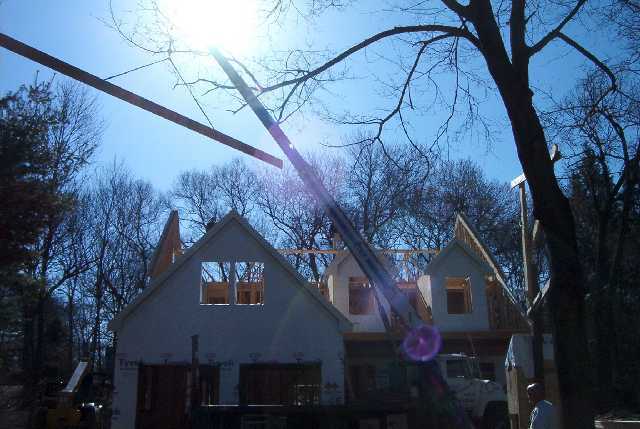
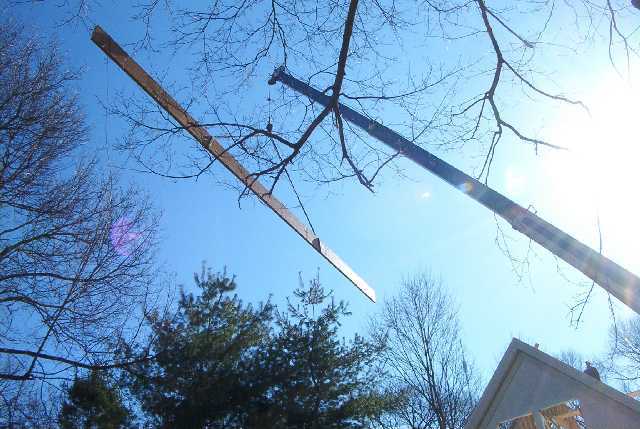
We don't get to work with cranes or boom trucks that often, so I've included a bunch of pictures. I thought it was just awesome to watch it swing those big mamma jammas into place so effortlessly. That main ridge, the 48'er, weighed almost 900 lbs... 880 IIRC. That's a lot of muscle!
I know it's a lot of pictures, but a few of you requested, in the original thread, that I keep posting pics of this job through to the end. Just keepin' my word and trying to share what I think is some really cool stuff.
Enjoy!
Brian
Nice looking work. Keep the pic's coming.
I do cabinets and finish work so I never get to see this side of it, and my body thanks me for it!
How bout them Bosox! (had to throw that in, just read about last nights game)
Doug
So much for walking the ridge .no wonder u had to build scaffold.looks narrow.They probably would of called for a 8"x18"out west here.the engineers out here are nuts.sheeting should be fun.watch out for the hose.
Bend one , Drop one , Drive one.
Nice work Brian,
You amaze me. When houses started getting that big is when I found other work to do.
You must have gotten an adrenaline rush when the crane pulled up, and do tell us, how many times did you build that whole day in your head at night when you were SUPPOSED to be sleeping??
I miss work like that, and the weather this week probably almost made up for all that white shid that fell from the sky.
Whens the roof party??
Thanks for the pic's, I really enjoyed them and I'm sure others will too!
EricI Love A Hand That Meets My Own,
With A Hold That Causes Some Sensation.
[email protected]
That is remarkable work and those are remarkable photos. You have every reason to be proud. I am quite envious!I also have a few questions:How much did the boom truck cost? Priced by the job or hourly? I don't even know, but I am certain it was a cost savings along with the obvious time and energy savings. Did the lumberyard provide the truck or was it a sub?When you doubled up the LVLs did you use lagbolts or nails? PL too? Did you build it at ground level or on the deck(s)?How did you assure the beam did not have a sag once it was set? Seems to me a 4' level would not be enough. Did you use a jet-line (framer's dental floss)?Why didn't you use rafter hangers at the ridgebeam? Seems to me that they would have made it easier to align and plumb the commons.Was that all done in one day with only the 4 of you working?I am impressed with the staging and walkboards. Great solution.Wish I was there. I would have worked for free. Have I written that I am envious?F
Awwww... yer makin' me blush Frankie. Seriously, thanks for the compliments... it's nice to hear.
To answer some of your questions.... like I said, the check for the boom truck was the easiest I ever wrote.... $100/hr at a two hour minimum. I used a local boom and crane company... had nothing to do with the lumberyard . We were sitting and having break when they delivered those LVL's one afternoon last week. It got really quiet and then one of my guys asked the obvious.... "how the he11 are we going to get that UP?" Good question.
That particular ridgebeam is just nailed together. I've done the carriage bolt routine (on the first floor, in fact), the adhesive routine and the good old fashioned nail routine.... it all comes down to what is speced on the plans. I build exactly what's on the plans to the best of my ability. I'll give more if it's asked for... but I'm a big fan of CYA (cover your azz).... so I stick to the plans as long as they are code compliant.
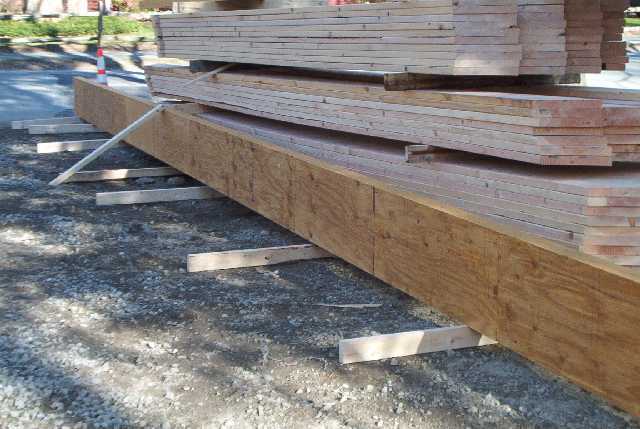
We knocked it together and layed it out on six saw horses in the dirt and used a string to get all the horses in the same plane so we didn't built any nasty whips into it. We staged it against the racks of rafters on edge for the night so it would stay true.
As far as sagging goes.... as long as your walls are straight and plumb, the rafters will let you know exactly what's going on with sag. FWIW, it did catch about a 1/2" sag mid span that we worked out quite easily.
No hangers on the ridgebeam because the drawings didn't call 'em out. If the builder or inspector wants them, I'll install them for a fee, but it's not my job to engineer this bad boy. (More CYA)
We set those two main ridgebeams in the pictures, spread out the sheathing, packed the rafters, and installed all the common rafters you see in the pictures in about 8 hrs. Myself and those three handsome devils in that last picture.
I think the staging is key. It really doesn't take all that long to build and all the lumber will be used elsewhere in the frame. The prep work is key. Do a good job with your prep work and it goes together like Legos with everybody reasonably comfortable and safe.
Yer welcome to come on over and play with us anytime you like! But you'll probably find it's not quite as much fun as it looks most days. Yer right on though.... that was a pretty good day to be a framer.
Great shots. Cranes are the best. They're really the only way as far as I'm concerned. A buddy of mine owns one and when I built my addition we set a 3.5"x14"x 38' LDL as a ridge, just the two of us, took us 25 minutes, and he charged me $80. Done. I want one just to play with in my back yard.
Looks good keep em coming. Sheeting that roof is gonna be creative. That harness is gonna pay for itself now.
"A problem cannot be solved by the same thinking that created it." Albert Einstein
Well I finally got around to taking a couple pictures. We finished the house in the original post last week. End up taking about 9 weeks to do what I bid on... then spent another week and a half or so doing change orders and additional work on the house. I did pretty good on it financially but would have liked to shave a week or two off the total time. Hey... we're still learning, right?
Anyway. I had a few days to kill before the next job and the builder approached me about building a playhouse for his kids. What the heck? Could be fun, right? Here's some pics of what we did today... tomorrow we're going back to add a little multi-level deck on it as well as a swing set, monkey bars, and a slide. The deck frame, swingset, and monkey bars are all clear cedar with Trex decking. The floor in the playhouse is shiplap pine and there's a loft with a ladder inside. I'll take some more pics as it comes along. It's really been a nice change of pace and we're really having a ball working on it. This things probably gonna run about 7K when we're finished but the builder is totally psyched about it.... mind boggling. Pays the bills, right?
Cool. I've been wondering but not wanting to push. I know how I am about getting pictures of things. Fun little filler project to mess around with for a couple of days. I can't picture a deck on there.
Shout out to Andy C. Namaste my friend.
http://www.hay98.com/
See that gable end with the hole in it? That's where the deck will be... projects 4' off that gable. On the other side of that hole (the inside) is the little loft. So the kids can go inside, climb the ladder to the loft, and go out that gable door onto the deck. From the deck, the kids will be able to either swing out onto the monkey bars, or take a step up onto the next platform and go down the slide. The slide will be facing toward the front of the house, and the monkey bars run to the left of the deck.... out the gable door, across the deck, onto the monkey bars.
Get it? Tough to describe. Guess you'll have to wait for more pictures!
Tough to imagine. Yea Pictures. :)
Shout out to Andy C. Namaste my friend.
http://www.hay98.com/
Why not use the crane to lift all those raftersand plywood onto the deck while it's there?
Better yet, frame the roof on the ground, put ply on 3/4s of the roof.Then get 2 cranes & boom the whole Chimichanga!
But it also helps to have a big flat area to do this!
I remember see on a TV show where a burnt out 3 story Queen Ann was rebuilt.It have a very elaborate roof. They used truss and built it on ground and then lifted it in place.I don't remember the numbers, but I think that it was somthing like 75k savings rather then stick frame it in place.It was a gonner until they came up with that idea. Otherwise it would have been torn down.
I did that a few years ago.A garage with a 3' stem wall, 10' studs, and a 12/12 pitch roof with dormers. The idea to use a crane was a great one. Here are a few poor quality pictures of the process.#17- The "clean slate"#10- The trusses erected on top of the framed walls still lying flat#7 & #8- The roof going up!
Jon Blakemore
Hey Jon...Could ya MAKE those pics just a bit bigger ?; )Yeesh.: )
A person with no sense of humor about themselves, has no sense at all.
might as well take to the 3MB limit..
Life is not a journey to the grave with the intention of arriving safely in a pretty and well preserved body, but rather to skid in broadside, thoroughly used up, totally worn out, and loudly proclaiming
WOW!!! What a Ride!
Forget the primal scream, just ROAR!!!
Whatever you say...Broadband is calling.
Jon Blakemore
The only thing Broadband is telling me is "neener-neener".; )Not available in any form whatever where I am.
A person with no sense of humor about themselves, has no sense at all.
Go for it..... I'll stick with my way!
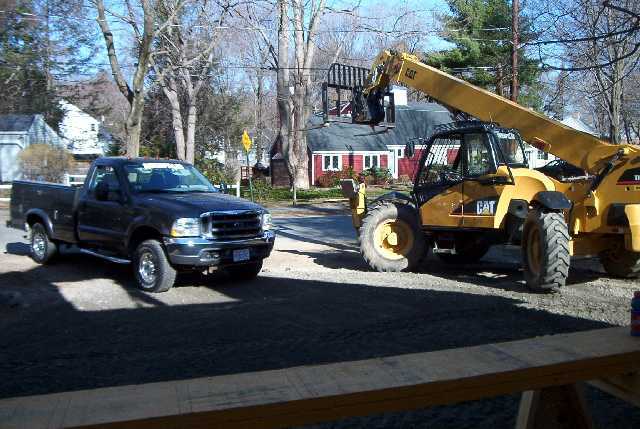
My forklift can get the sheathing up there without a problem. Problem with jacking all those rafters up there is weight. Didn't feel comfortable setting those two big packs of 26' 2X10's up on the joists... too much weight on one particular spot for me. Gotta remember that there's no blocking at the end of the joists at the outside walls... they're just waiting to roll.
Another thing I don't like about dropping the packs in one shot is they will all be sitting parallel with the ridge. Now you still gotta try to spin those 26' long suckers around and into place while you're tripping over the pile. Some guys would argue with me, I'm sure, but that's my opinion and since it's my show.... my opinion wins! It's not that time consuming to drag 'em up there.... we just boomed them up to that garage window and they were already facing the right direction.... just had to drag 'em up one floor and lay 'em down on the deck in the appropriate bay. It's not time consuming, just takes a little elbow grease. We would have used the forklift for the rafters, but you can't get around to the back of the house with long stock like that. With the forklift, we could just pull them off the lift and drop them where they go.
If I can steal a quote from Blue..."just cuz you can, doesn't mean you should!".