signed on as a kitchen cab installer …
so naturally I call the PE and round up a crew of buddies to set steel and LVL’s.
the problem … little 2ft wall at the end of the existing cab run … “just cut that out”
they say …
so … we find out the existing beam is slightly undersized as it is. So I need to add 1/2x 11 steel flitch plates on each side of existing … then add two 1 3/4x 11 7/8th LVL’s on the “front” of the beam … and somehow fit in one piece of the same 400+ lbs steel plate in the back and one more of the LVL’s.
No room to do anything but thread all that weight behind the existing(and to be demo’d) support post … 24″ out from the backwall.
length of the beam … 21′ 1″.
she was big.
Got it all drilled on Fri … got the front half set with the help of me and 4 other guys on Fri … had to throw in the towel and regroup for another assualt on Monday. Got the back half up on Monday … to find to no one’s suprise … the bolt holes were a hair off … as we had to drill the “existing beam” holes in place.
Went shopping and got my head straight Tues … got all 28 bolt holes thru and bolted tight on Wed. Stripped off the safety braces and cut out the center support today.
only an 8th drop in the center.
I have a pic of the “slot” I made for the steel to ride up in on the “inside” …
On Fri … had the steel set … had rented a Genie Materials Lift … hand cranked fork lift … weight capacity of 650lbs and reach of 16 or 18 ft … and when we lifted the doubled up LVL’s … something shifted and the steel flopped!
luckily … or by excellent design? … the bottle of the steel stayed on the safety catches and jacks … she just laid down flat … and onto the arms of the lift … and the LVL was centered and balanced enough she just laid down and see-saw’d a bit.
So … wanting to avoid any such near heart attack stuff on Monday … I decided upon the “slot” method.
The steel … 1/2″ wide. Plan was to ride it up the face of the jacks … as the top plates were already cut out … and simple slide forward onto the jacks. See .. that sounds easy?
So … I got some 3/4 ply … and nailed it as a spacer. Then … after lifting the steel onto the 3/4 … we nailed an extra 2x to “trap” the steel in a locked and upright position … and cranked her up.
nailed security blocking across as we went … so she never had far to fall … in the event …
the pics are taken after I chopped the tops of the “slot studs” off for better access … but they ran tall so the top of the steel couldn’t “flop” at any time.
That made life lots easier.
Jeff
Buck Construction
Artistry In Carpentry
Pittsburgh Pa
Edited 10/20/2005 7:03 pm ET by JeffBuck


Replies
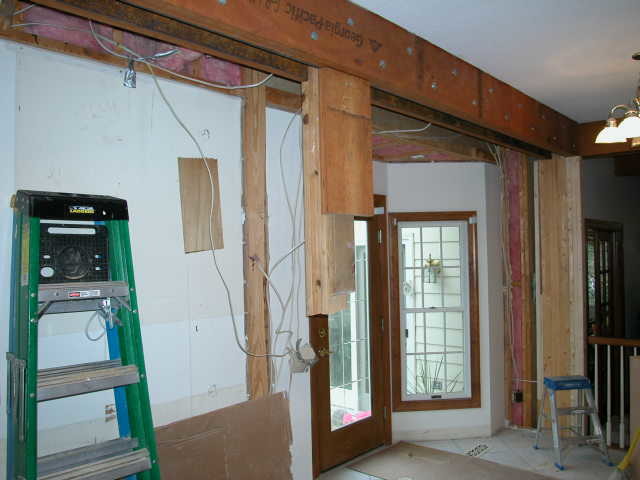
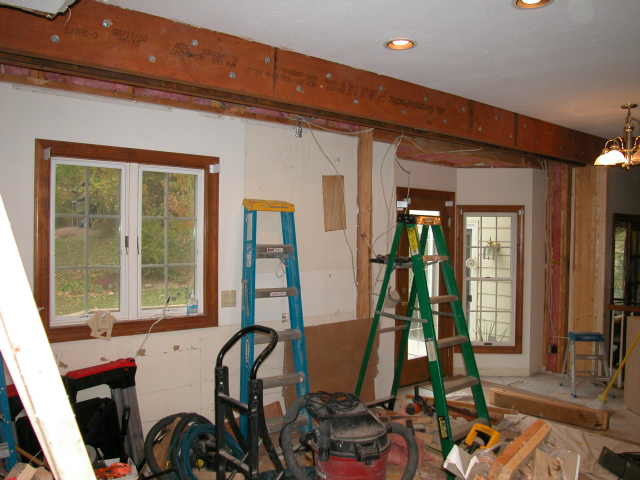
Remnants of the load bearing wall ...
View Image
Buck Construction
Artistry In Carpentry
Pittsburgh Pa
Hee hee heh...you didn't back prime Anything..gonna rot I tell ya. Spheramid Enterprises Architectural Woodworks
"We adore chaos, because we love to restore order"
Mauriets Chavailier Escher
picture it with the bottom of that support left ...
that's the needle we had to thread with 400+lbs of steel 21' long.
View Image
Buck Construction
Artistry In Carpentry
Pittsburgh Pa
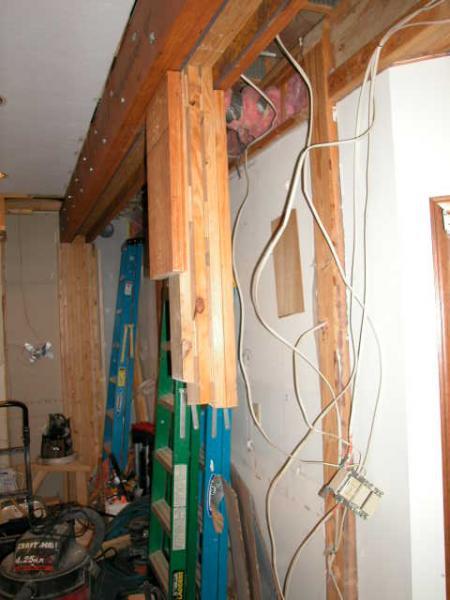
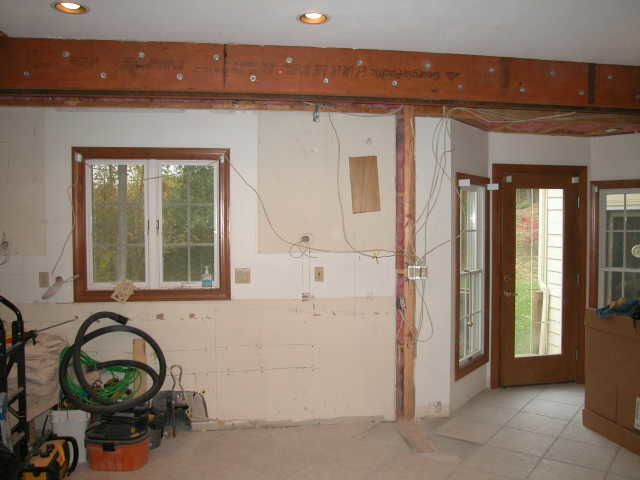
existing and new parts and pieces ...
and luckily they ran some plumbing right where we had to go to make the fit tighter ...
View Image
Buck Construction
Artistry In Carpentry
Pittsburgh Pa
its amazing how plumbers know how to run pipes in the most inconvenient places.
nice work, BTW. How many cases of beer was it worth for your crew?
What did you do AFTER lunch?
Jon Blakemore
RappahannockINC.com Fredericksburg, VA
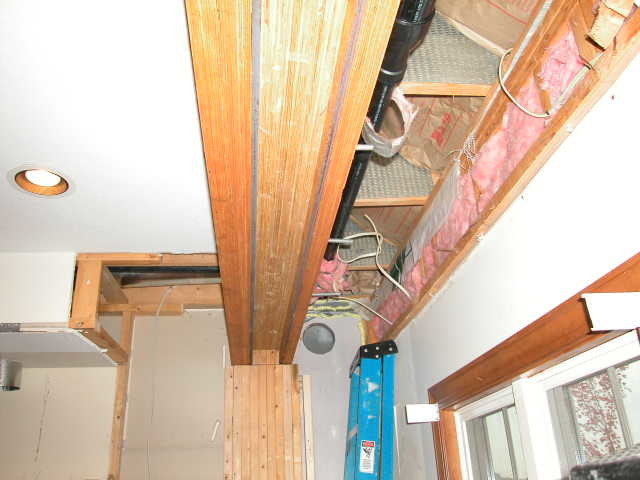
decent picture of the "beam slot" I made with the ply spacer.
see ... the steel ran flat along that last jack ... the stud on the outside of the ply ran taller ... before I chopped it off ... and gave the steel no where to tip but in.
View Image
Buck Construction
Artistry In Carpentry
Pittsburgh Pa
21ft 1 inch of beam ...
steel yard said 400lbs ... each ... we thot closer to 900?
View Image
Buck Construction
Artistry In Carpentry
Pittsburgh Pa
Looks like a mother of a job.Are those roof?/floor? trusses above this beam?It looks like a truss plate on the side of those framing members.If they are, are you moving the point load fromthe old to the new beam, possibly causing problemswith trusses?You may have explained this in your first post andI missed it.Thanks for taking the time to post these pixs.
it has a little bit of everything in there ...
the pics should show the ####-end of the bump out trusses ... as they span a whole 24" ... 6 / 12 ... just little triangles nailed up there. They're attached above the existing beam ... pretty much doing nothing. No load to even think about.
Then ... there's also the second floor joists/ aka first floor ceiling joists ... that second floor is what sits on top of the old/new beam. The ceiling/floor had dropped a bit more than a 1/4 inch .... so we had to jack up the whole load to get that new/straight doubled LVL into place. The objective wasn't to fix a sagging ceiling ... just happend to be part of the end result.
I have no idea why they trussed that little bump out area ... and why they had such big truss plates? It's a 6/12 roof over a 24 inch span ... pretty sure they could stick framed it!
Musta been on sale. Found some lumber in a non-load bearing wall ... padded out from the stair wall ... for a 'fridge nook. The plan was to hopefully move the duct work and recess the fridge a bit more ... the nonload bearing wall was framed outta lumber still coated with cement!
They musta took the sidewalk and driveway forms and used them for punch list blocking.
Had to laugh ... the engineer said in all seriousness ... he couldn't decide if the beam was undersized ... or that 2x6 support wall was overloaded?
Jeff Buck Construction
Artistry In Carpentry
Pittsburgh Pa
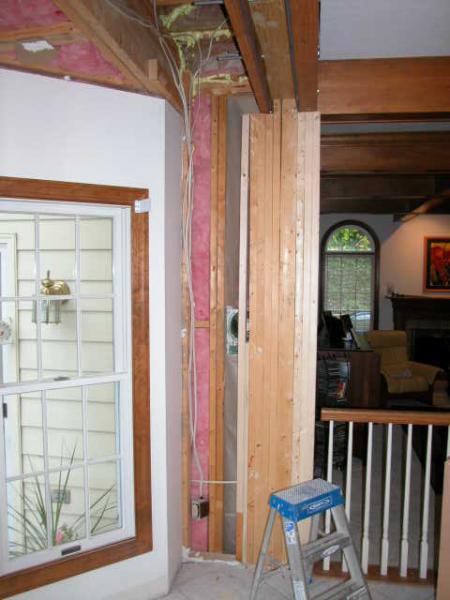
all that for this?
see the missing coupla floor tiles?
did I mention this is a brand new floor we got to work over? Not even 2 weeks old at the time ... nice scheduling ... lay floor first ... support back half of house next ...
View Image
Buck Construction
Artistry In Carpentry
Pittsburgh Pa
Looks hard Jeff. Thanks for the pics.
blue
Hey Blue ...
so whadda ya think about my brain storm ... the 3/4 "slot" ...
no one on site had any idea what I was talking about till I boggered(sp?) it up.
then ... they saw the beauty ....
btw ... is it two "o's"?
boogered?
curious ... now remember there was that full supporting wall in the picture ... what would have you come up with? Been driving me nuts I couldn't have come up with something easier ...
all interior ... big kitchen but no room to more ... heavy stuff ... etc.
It's done and looks great ... still can't help think that couldn't have been an easier way ... probably not ... still heavy no matter how ya slice it. But any suggestions are appreciated for the dreaded next time ...
Jeff
Buck Construction
Artistry In Carpentry
Pittsburgh Pa
Jeff, the use of slots is a classic boogerin' trick. It's useful because you can then focus all your energy on the lift, rather than having to devote some precious manpower to balancing the load. I used to use that technique in many different ways before I switched to cranes and forklifts. Of course those machines are useless in remodeling. In side some one's kitchen, you have to summon all your boogerin' ideas.
I thought it was brilliant.
blue
Shoot, your engineer must'a missed the recent discussion here that proved that flitch plates are a waste of good steel...hee,hee....
(did a few myswlf way back when...1/4, maybe 5/16 inch...1/2 inch! yowza! )
over new floor...OMG.....
I know this much ... all that extra wood and bolts is to keep the steel from twisting!
Jeff Buck Construction
Artistry In Carpentry
Pittsburgh Pa
Flitch Plates must be a regional thing, cause around here cause I am the only Person, who even knows what they are.
Flitch plates pretty well disappeared from the scene about the same time as Microlams became commonplace.
I used to work in a steel supply shop when I was 18 and we used to sell them regularly every other day or so. They were used primarily in 16 foot garage door headers.
blue
Yeah, thats what I had always figured on, but I know that glulams were, and are really popular around here, in fact my house has some that are 12"wide, and 60" deep, and I would bet that they are a good 80' long. It makes for a really open floor plan in that area.
Hey Jeff,
Hate to be the one to tell you this but I think you may have to take that beam down. Cant clearly tell from your pictures, but I think you got the writing upside down on that LVL ( :=) ).. What a pain in the......backside. Makes the beam "retro-fit" we're in the middle of look like a piece of cake.
-m2akitaLive by the sword, die by the sword....but choose your sword wisely.
"Shoot, your engineer must'a missed the recent discussion here that proved that flitch plates are a waste of good steel...hee,hee...."I must of missed that discussion also. There used all the time around here. must be one of those regional discussions. I've used a comnpany called "Better Header" before and they come all together in one piece. Theyt even make I-beams already packed out.http://betterheader.com/Joe Carola
Nice link....reminds me a a "compression ring" detail I've seen in an industrial size truss detail.....
Nice work. Never saw a cab installer go to that much trouble to make sure he had good backing material to screw the uppers to. You must really care.
solid blocking really makes for an easier install in the end ...
just reminded the customer ... as she lamented that maybe the unworkable cab redesign would have been the better option ... that the 3 week "beam delay" is still better than the 4 to 6 week cab reorder delay!
She actually thot I was kidding ...
Jeff Buck Construction
Artistry In Carpentry
Pittsburgh Pa