Got some shower tile repair goin’on here
rez
| Posted in Construction Techniques on
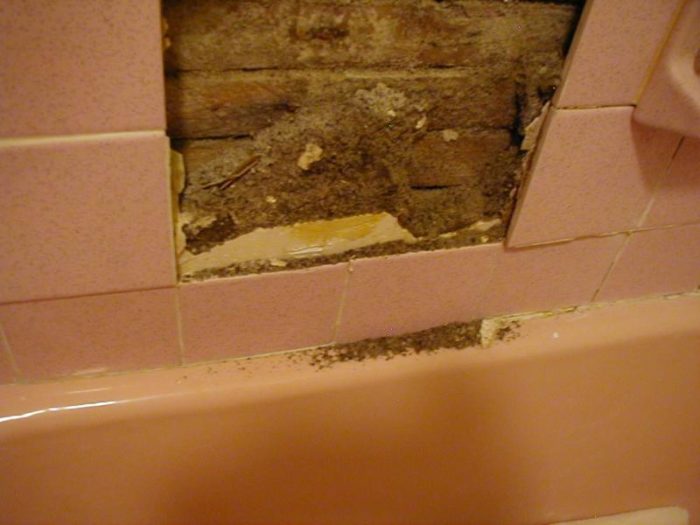
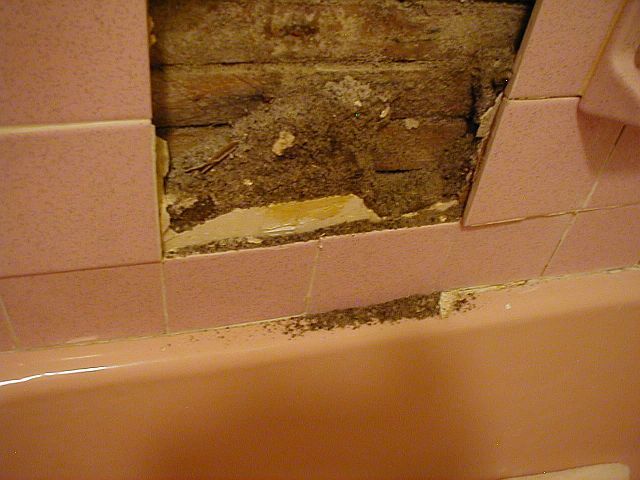
Looks like ye old grout leak routine that got bad enough to seep to the downstairs kitchen and hence the discovery.
Never seen this thick of plaster on the lath before and am wondering if it was a special thickness to fit the tub.
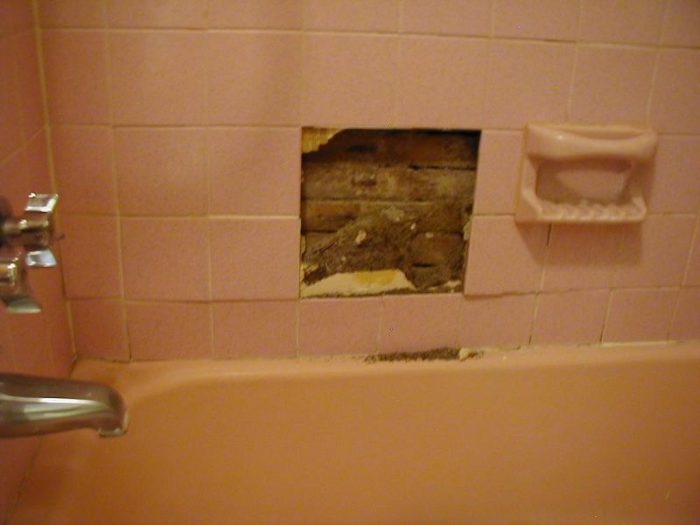
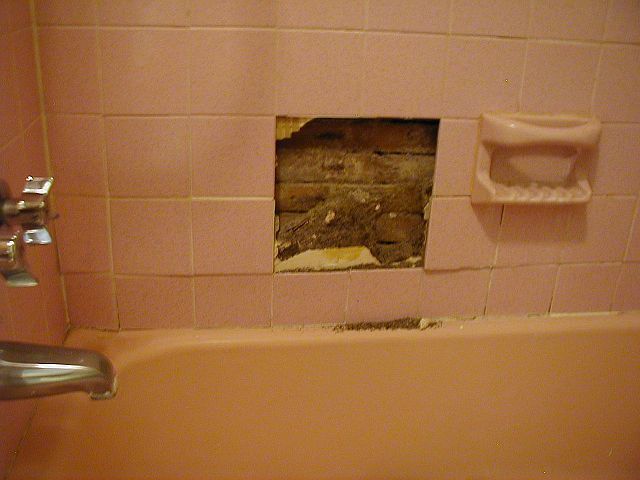
The wet damage doesn’t extend past the right of the soap dish so I’m figuring removing one tile line past there and one tile line above from the left corner over.
Of course HO’s dollar involvement warrants thrift not going beyond what is necessary and she likes the pink so no, there are no plans to rip it all out.
Should I be able to just furr out with ply and hardibacker cement board to adjust to matching the existing tile when reinstalling?
Thanks
Edited 7/11/2009 4:44 pm ET by rez


Replies
Times are tough aren't they? Is that brick or wood lathe back there?
Looks like it's over sheetrock too?
Do what ever you need to to get 3-5 years out of it.
"When the spirits are low, when the day appears dark, when work becomes monotonous, when hope hardly seems worth having, just mount a bicycle and go out for a spin down the road, without thought on anything but the ride you are taking." — Sherlock Holmes, 1896
Regular wood lath with a thick plaster coat, no drywall. That white atop the base coat seems to be a thin coat of something before the adhesive was applied. Makes me wonder if it might have been an old mastic.
Hope the wet is centralized down low and the rest untouched. Will know when the rest is removed.
Was wanting to away from removing the soap dish but that ain't going to happen.
Crumbly where wet and the tiles clean easily.
However not all are cleaned so easily.
Some tiles have a rock hard cement that does not want to be removed from the back of the tile.
Might anyone have a recommended solvent to help ease the removal as days soaking in soap water have failed to help loosen some of these.
seeking ease for these, please.
Angle Grinder.....
Was afraid of that.
Always hoping for the miracle shortcut.
Might be time for an accent row.
If I were King- I would ban ceramic tile in showers , and force the acrylic shower stall makers to make a wider variety of styles and sizes.
I am happy you are not king then, and that you live in a republic. :)
If you've managed to save the removed tile without breaking them, then you have 90% of this job done.
If not, say LOTS of prayers on the way to the tile store.
And yes -- patch the substrate in whatever way you need, so long as the final install is even with the old stuff; and so long as you think its waterproof enough.
90% my ####:o)
There was an apparent bow in the framing or someone just blew the original application which lead to as much as a half-inch variance in the depth of the old mortar on the wall between the ends of the tub.
'Course it meets a straight edge on the lip of the tub so it is making for an exciting time furring it all out to receive the hardibacker.
Why do I do this to myself.
seeyou invented the cruel world
Edited 7/30/2009 12:10 pm ET by rez
I wouldn't mess with wood, cement board or anything other than cement morter to level the wall and to create the base for the tile. Michael Byrne explains this procedure in his books and video. Basically you can pack sticky morter onto the wall and screed it with a notched board that rides on the surface of the remaining tile. Once set, this morter is the perfect base for your thinset and tile. Install a vapor barrier behind the morter or use Redgard or similar on its surface.