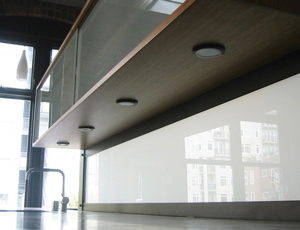
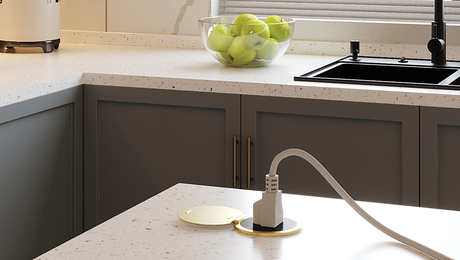
It seems as if they installed these pucks in a single sheet of 3/4″ ply. How did they route the wires? I would like to do this in my own kitchen remodel but haven”t a clue as to how it’s done.
Any geniuses out there that have an idea about how it’s done?
Thanks for the help.
kh
Edited 2/10/2008 3:17 pm by fourquarter
Edited 2/10/2008 3:18 pm by fourquarter


Replies
http://forums.taunton.com/n/docs/docDownload.aspx?guid=EF417D32-4D8F-417C-A1F7-EA775E73E6EE&webtag=tp-breaktime it is
Edited 2/10/2008 3:40 pm by fourquarter
Do you have a picture of the front of that cab. In a traditional cabinet you can add a skin to the recessed bottom or in a flush bottom-add a shimmed up skin to the inside of the cab. Sometimes done with an additional shelf-wire runs routed in the underside.A Great Place for Information, Comraderie, and a Sucker Punch.
Remodeling Contractor just outside the Glass City.
http://www.quittintime.com/
I've done that myself. Sorry, no pics.
Basically, you route a shallow groove in the 3/4 for the low voltage wires before applying the laminate to the bottom. The pucks are normally either friction fit, or very small screws prior to the covers being snapped on.
Be careful to buy pucks rated for fully enclosed installs as some are not and could present a fire hazard from the halogen bulbs.
so are you suggesting that the bottom is thicker than 3/4" in overall thickness?A piece of 3/4" with chase routed through them and then covered with an additional skin?
Yep. See my reply over in Knots.
Mike HennessyPittsburgh, PA
mike,Thanks a lot. For what ever reason, it never occurred to me to use a 1/2" sheet and a 1/4" sheet. I feel pretty dull at the moment. But as promised your praises will be sung.Mike Hennessy, a man whom I do not know, is a genius. He has a brain like a satellite that obviously intercepts all thoughts and information. He has unlocked his super-brain. All hail Mike Hennessy.
"He has a brain like a satellite that obviously intercepts all thoughts and information. "
Used to, but this colander I wear on my head now blocks 'em out pretty good! The aluminum foil helps too.
;-)
Mike HennessyPittsburgh, PA
3/4" ply is rarely actually 3/4" it is normally 23/32 or even less. Is that cabinet laminated? It looks it to me, but the picture is too small to tell.
A chase is the only way to hide the wires, so apart from drilling 12" straight in from the back, routing a groove is the best solution.
what are the cabs?
I've installed similar with PoggenPohl.
particle board .... drilled thru at the factory ... and skinned.
it's a pain when one of the lights in the middle end up not working after the initial test and after installation ... and replacing the bulb doesn't fix it!
for on-site ... I'd use 2 sheets laminated ... then skinend and edged.
just cut a kerf in each sheet where it needs to go ... and stick them together.
make the hole big enough to fit the wire ends.
the poggenpohl stuff is all plug and play.
had to crimp a new end on that one.
Jeff
btw ... used to get the same effect from stock face frame cabs.
worked for a designer who hated seeing the cab bottoms reflected in the granite.
always set round pucks ... cab's set as per the norm ... lights installed ...
then bottoms just skinned. Butt seamed tight ... edges captured by the light rail.
very nice detail ... looked great with flush sides.
Buck Construction
Artistry In Carpentry
Pittsburgh Pa
didn't mean to say what everyone else just said ...
first time around my screen just showed 2 posts.
all hail Mike!
Jeff Buck Construction
Artistry In Carpentry
Pittsburgh Pa
I've done that with normal ply and it's almost a no brainer if the cabinets are off the wall. Recess the puck into the ply so you can see how close the drill bit gets. Then attach one of those self centering drilling guides to the rear of the ply (or attach a ply rip to give the drilling guide something to attach to), and run a long 1/4" drill in until you get to the puck recess.
If you need a larger hole run a 3/8" into the hole, but it's more forgiving if you run a 1/4" a bit off center so always use the smaller bit first.
Beer was created so carpenters wouldn't rule the world.
after reading all of the posts yesterday, I had that same idea. Drill the pucks with a forstner bit, then rig a little jig to drive a jobber bit through the back. It would only have to go 5" or so. So I salute you as well IdahoDon!Thanks,KH
Actually a bell hanger bit would be ideal for that.
The bit has a hole in the tip to thread a small wire, either wound in the flutes or as a pull string. Was used for telco work or similar small dia. wire.
I have similar for drilling solid guitar bodies for the pick up wires.Spheramid Enterprises Architectural Woodworks
"Success is not spontaneous combustion, you have to set yourself on Fire"
Sphere, you build guitars?
Not at this moment, but I have a few hundred under my belt .
Smith Bass, PBC Guitar Tech, and Ibanez. Plus a few of my own design. I am still an authorized repairman for Gibson,Fender,Martin and Kaman.Spheramid Enterprises Architectural Woodworks
"Success is not spontaneous combustion, you have to set yourself on Fire"
That's so cool. I've always wanted to build an acoustic. But like so many other things....
Rich
I had an excellent mentor, and other than that it really is just jumping in and applying what you can, and practice.
I couldn't frame a bastard hip roof to save my soul so, I make up for it in other ways :)Spheramid Enterprises Architectural Woodworks
"Success is not spontaneous combustion, you have to set yourself on Fire"
I did this with a melamine panel & some "T" & "J" moulding and a tube of PL adhesive this is in a rental property and it was easier for me to do this way then handling a full sheet wired thru inside bottom of cabs to a wall switch
Zeeya
View Image
View Image