FHB Logo Facebook LinkedIn Email Pinterest Twitter Instagram Plus Icon Close Icon Navigation Search Icon Navigation Search Icon Arrow Down Icon Video Guide Icon Article Guide Icon Modal Close Icon Guide Search Icon Skip to content
Subscribe

In every issue you'll find...

  • Expert insights on techniques and principles
  • Unbiased tool reviews
  • Step-by-step details to master the job
  • Field-tested advice and know-how
Subscribe Now!
Subscribe
  • How-To
  • Design
  • Tools & Materials
  • Videos
  • Blogs
  • Forum
  • Magazine
  • Members
  • FHB House
  • Podcast
  • Join
  • Log In
Subscribe

Discussion Forum

Discussion Forum

How to trim this window? – First time

Amodedude1 | Posted in General Discussion on July 28, 2021 02:10pm

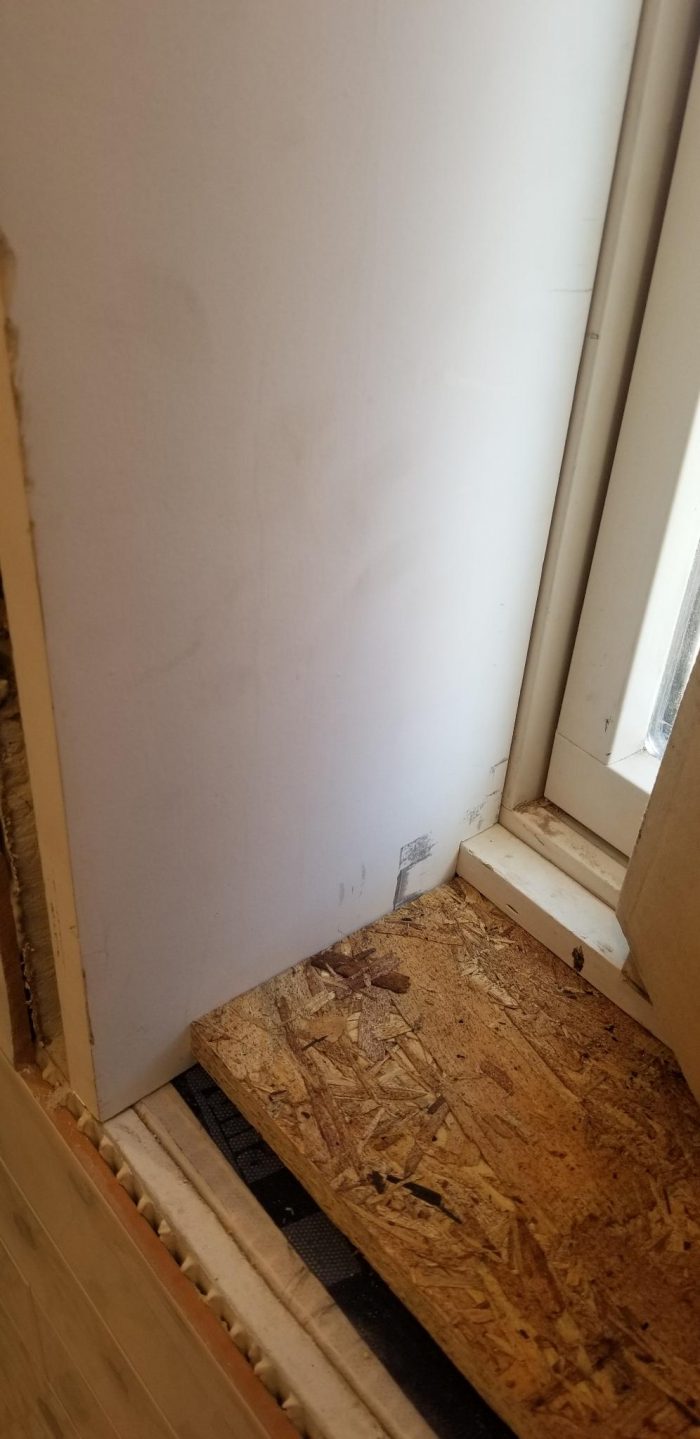
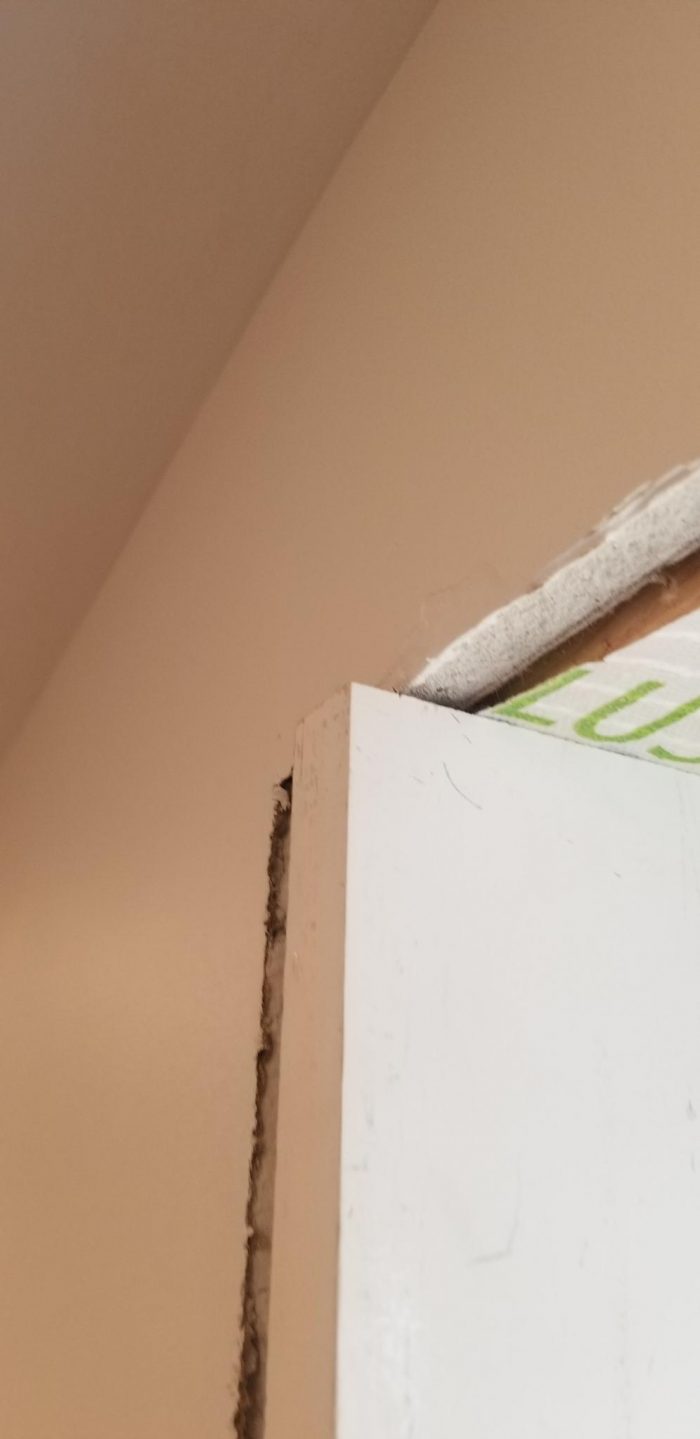
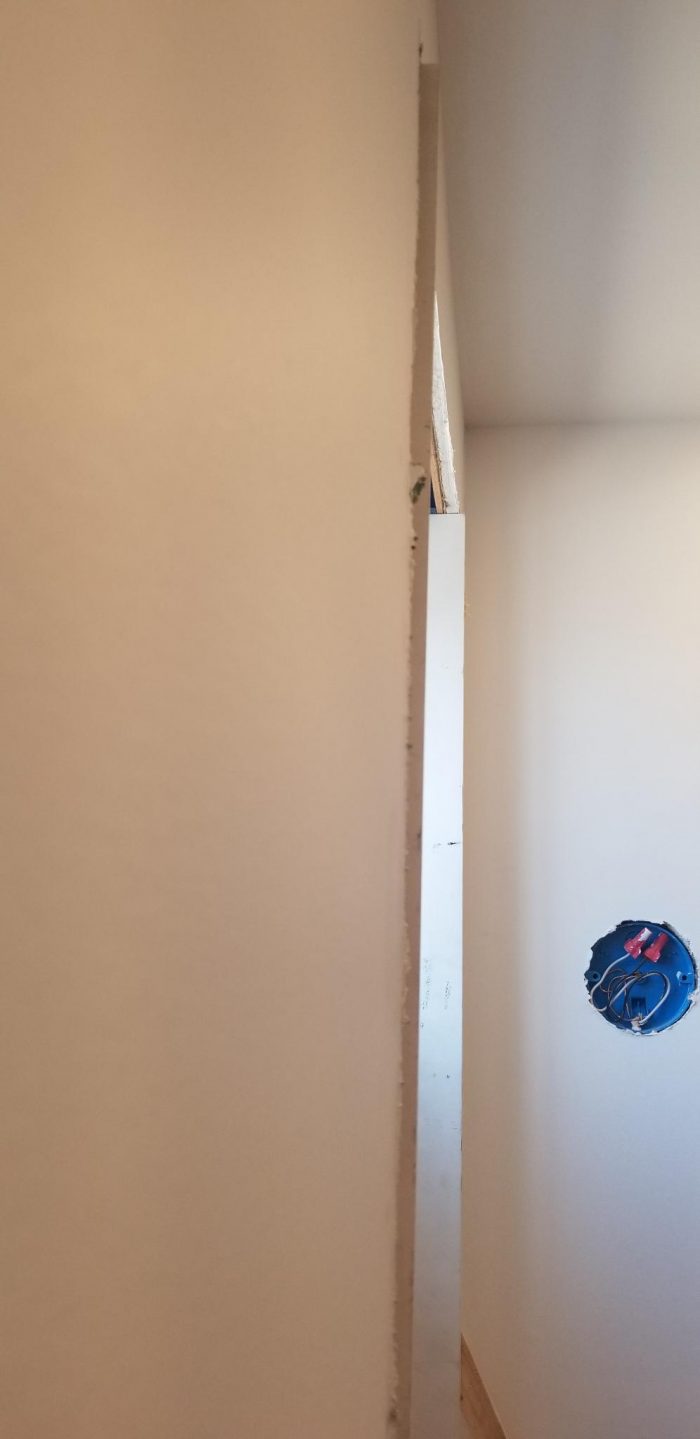
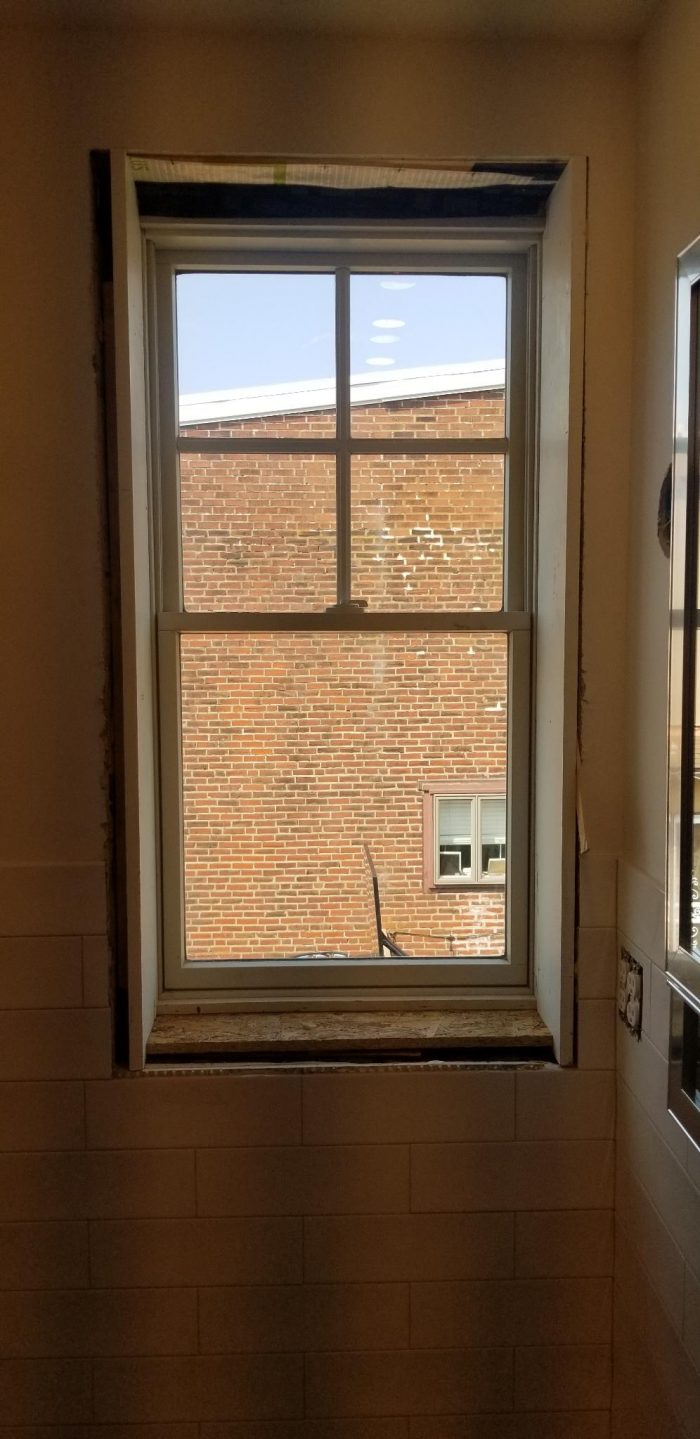
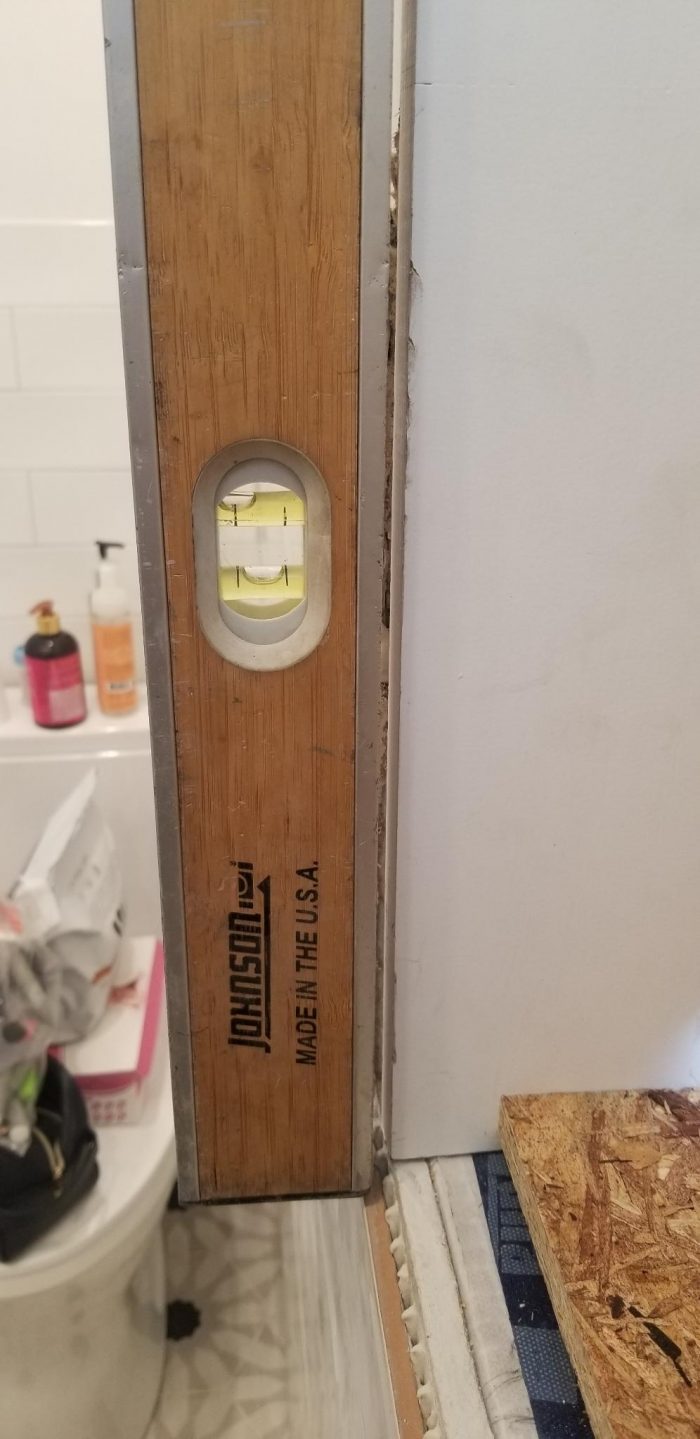
This is my first attempt (ever) at trimming out a window. I’ve cut out the extension jambs but realized they are too long and sticking out past the drywall. To complicate the issue further, my tiles are sticking out past the jamb and the jamb sits un-level. 

Any suggestions on how to proceed without ripping it all out and starting over?

Reply

Replies

  1. Amodedude1 | Jul 28, 2021 02:13pm | #1

    Just to clarify, my end goal is to get something that looks like this type style which I believe is "craftsman"

    1. calvin | Jul 30, 2021 03:16pm | #6

      I have done many trim outs in the detail you show. I make the extensions as true as possible but keep a straight line to the edge I will apply the trim to.

      I do the same with the sill, fastening it to the extensions.

      Then I build the entire casing structure on the bench using pocket screws on the backside to join the head and sides. Trim out the crown and take the whole pc and fasten (screw) it to the sill from below Nail off the casing and head with the proper reveal to the extensions.

      I’ll put a couple of blocks sized for the extension reveal to the window on each side to solidly fasten the thing in place.

      Glued and screwed, the pcs will never separate or crack during seasonal changes.

      With several like window sizes it’s production speed.

      Caulk any weirdness to the wall side of the casing and extension to window.

      If it’s one stink’n window, forget the above…..

  2. User avater
    unclemike42 | Jul 28, 2021 08:09pm | #2

    An excercise in applied geometry.

    Shims are your friend.

    https://s3.amazonaws.com/finehomebuilding.s3.tauntoncloud.com/app/uploads/2021/07/28140952/signal-2021-07-28-110616-3-700x1439.jpg

    Looks like you do not have enough room for a frame that matches your photo. wall with outlets and tile seems a little too close. But you could make it with narrower side parts.

    If the boards you have on the sides are parallel and even with the tile surface, you can make up a face frame, and place it on them, and fill the gap to the drywall with narrow wood strips to make the frame thicker (some caulk can cover some degree of mismatch)

    If all else fails, you can cover it all up with some curtains.

  3. user-6785380 | Jul 29, 2021 04:48am | #3

    Your extension jambs need to be measured carefully (top and bottom measure is usually different) or fit and scribed. You should strike a pencil line on each and recut and fit. You need an extension jamb for the top and bottom as well. The side casing will need to be hollowed out in the back where it will sit on the tile. Totally possible just need more fussy cutting and fitting.

  4. User avater
    mistered1957 | Jul 29, 2021 08:21am | #4

    If you're a member of the Fine Homebuilding website, there's an excellent article entitled "Trimming Windows" by Jim Blodgett and Andy Engel did the photos. The article emphasizes the importance of getting the extension jambs flush with the drywall to make the rest of the process easier, so get the jambs flush with the drywall before trying to complete the job. "To get the trim straight, you might have to install crooked jamb extensions."

  5. gonefishn | Jul 29, 2021 11:56am | #5

    Decent replies so far.

    Depends how much fussing you're willing to put in, availability of certain tools & *how proficient you are with them - 100% transparent/blunt/honest. Theres some 'give and take' options you have to choose from but will depend on details you run into in spots and processes you're good with investing time & patience in.. details, details, details.. thats really the question. Fit and finish. Do you care if its gaped and filled with filler/caulk in spots or do you desire a joiner's approach where all surfaces are mated flush.. thats where some major differences in approach, process & time/effort lay in how you'd do it ..I'd do it. soo...

Log in or create an account to post a comment.

Sign up Log in

Become a member and get full access to FineHomebuilding.com

Video Shorts

Categories

  • Business
  • Code Questions
  • Construction Techniques
  • Energy, Heating & Insulation
  • General Discussion
  • Help/Work Wanted
  • Photo Gallery
  • Reader Classified
  • Tools for Home Building

Discussion Forum

Recent Posts and Replies

  • |
  • |
  • |
  • |
  • |
  • |
View More Create Post

Up Next

Video Shorts

Featured Story

Trip-Saving Tool Hauler

This combination wheelbarrow and dolly from Worx shines as a tool cart.

Featured Video

Video: Build a Fireplace, Brick by Brick

Get an overview of the process of creating a traditional-style fireplace that burns well and meets current building codes from experienced mason Mike Mehaffey.

Related Stories

  • Podcast 533: Missing-Middle Housing, Collateral Damage From Demo, and Midwest BS Symposium
  • Podcast 533: Member’s only Aftershow — Training for Tradework
  • Insulation Project Guide
  • Insulating a Roof: Getting Higher R-Value

Highlights

Fine Homebuilding All Access
Fine Homebuilding Podcast
Tool Tech
Plus, get an extra 20% off with code GIFT20

"I have learned so much thanks to the searchable articles on the FHB website. I can confidently say that I expect to be a life-long subscriber." - M.K.

Get home building tips, offers, and expert advice in your inbox

Signing you up...

This site is protected by reCAPTCHA and the Google Privacy Policy and Terms of Service apply.
See all newsletters
See all newsletters

BOOKS, DVDs, & MERCH

Shop the Store
  • 2022 Fine Homebuilding Archive
    Buy Now
  • Code Check Building 4th Edition
    Buy Now
  • 2023 Tool Guide
    Buy Now
  • Pretty Good House
    Buy Now
  • Shop the Store

Fine Homebuilding Magazine

  • Issue 313 - Feb/March 2023
    • Practical System for a Seismic Retrofit
    • Fine Homebuilding Issue #313 Online Highlights
    • Practical System for a Seismic Retrofit
  • Issue 312 - Dec 2022/Jan 2023
    • Tool Test: Cordless Tablesaws
    • Gray-Water System for a Sustainable Home
    • Insulate a Cape Roof to Avoid Ice Dams
  • Issue 311 - November 2022
    • 7 Steps to a Perfect Exterior Paint Job
    • Options for Smarter Home-Energy Tracking
    • The Fine Homebuilding Interview: James Metoyer
  • Issue 310 - October 2022
    • Choosing a Tile-Leveling System
    • Choosing Between HRVs and ERVs
    • Custom Built-in Cabinets Made Easy
  • Issue 309 - Aug/Sept 2022
    • 10 Steps to Install Crown Molding on Cabinets
    • How to Get Sturdy Walls Without OSB
    • Choosing the Right Construction Tape for the Job

Fine Homebuilding

Follow

  • twitter
  • facebook
  • instagram
  • pinterest

Newsletter

Get home building tips, offers, and expert advice in your inbox

Signing you up...

This site is protected by reCAPTCHA and the Google Privacy Policy and Terms of Service apply.
See all newsletters
See all newsletters

Membership & Magazine

  • Online Archive
  • Start Free Trial
  • Magazine Subscription
  • Magazine Renewal
  • Gift a Subscription
  • Customer Support
  • Privacy Preferences

Taunton Network

  • Green Building Advisor
  • Fine Woodworking
  • Fine Gardening
  • Threads
  • About
  • Contact
  • Advertise
  • Careers
  • Copyright
  • Terms of Use
  • Site Map
  • Do not sell or share my information
  • Privacy Policy
  • Accessibility
  • California Privacy Rights

© 2023 The Taunton Press, Inc. All rights reserved.

X
X
This is a dialog window which overlays the main content of the page. The modal window is a 'site map' of the most critical areas of the site. Pressing the Escape (ESC) button will close the modal and bring you back to where you were on the page.

Main Menu

  • How-To
  • Design
  • Tools & Materials
  • Video
  • Blogs
  • Forum
  • Reader Projects
  • Magazine
  • Members
  • FHB House

Podcasts

  • FHB Podcast
  • ProTalk

Webinars

  • Upcoming and On-Demand

Account

  • Log In
  • Join

Podcasts

  • FHB Podcast
  • ProTalk

Webinars

  • Upcoming and On-Demand

Popular Topics

  • Kitchens
  • Business
  • Bedrooms
  • Roofs
  • Architecture and Design
  • Green Building
  • Decks
  • Framing
  • Safety
  • Remodeling
  • Bathrooms
  • Windows
  • Tilework
  • Ceilings
  • HVAC

Magazine

  • Current Issue
  • Past Issues
  • Magazine Index
  • Subscribe
  • Online Archive
  • Author Guidelines

All Access

  • Member Home
  • Start Free Trial
  • Gift Membership

Shop the Store

  • Books
  • DVDs
  • Taunton Workshops

More

  • FHB Ambassadors
  • Reader Projects
  • Podcast
  • Customer Support

Account

  • Log In
  • Join

Newsletter

Get home building tips, offers, and expert advice in your inbox

Signing you up...

This site is protected by reCAPTCHA and the Google Privacy Policy and Terms of Service apply.
See all newsletters
See all newsletters

Follow

  • twitter
  • facebook
  • instagram
  • pinterest

Join All Access

Become a member and get instant access to thousands of videos, how-tos, tool reviews, and design features.

Start Your Free Trial

Subscribe

FHB Magazine

Start your subscription today and save up to 70%

Subscribe

We hope you’ve enjoyed your free articles. To keep reading, become a member today.

Get complete site access to expert advice, how-to videos, Code Check, and more, plus the print magazine.

Start your FREE trial

Already a member? Log in