installing stair treads and risers
I am wanting to install oak treads and risers. Would it be better to install then finish OR finish then install? I have never attempted this before. Any hints/cautions/tricks that would aid in this project? Any feedback would be appreciated!


Replies
i like to fit them in place,then when all done take them out to the shop and finish. be sure to number and mark each side so you know exactly which way they go. then fill the hole with putty after there nailed. i would guess you could get a better job of fitting and filling if you did it in place,i've just never done that. larry
hand me the chainsaw, i need to trim the casing just a hair.
Standard practice is to finish in place.
While I can see why you might want to finish first to protect them, my experience has been that as long as they get sanded and 1 coat of poly before the rest of the world starts walking on them, they'll finish up fine. Typically, risers are glued into the back side of the cut on the skirt, and nailed thru the back into the tread too, so the glue ooze, etc gets scraped off before finishing. I like doing the one coat of poly thing before my painter comes in when I can, then my hardwood guy does the last two coats when he does the floors; usually the last guy I let in the house before I turn over the keys, more or less. That way, anything that might have marked them during the finishing touches part of the house gets "erased" right at the end.
Bing
Can anyone here comment on how to go about cutting the skirt board on the visible side of an open staircase? (I'm attaching a picture to show the type of staircase I'm talking about).
So what's a good way to make all the cuts that need to miter into the finish risers? Sliding chop saw? Circular saw using a guide?
Also, is it better to cut this skirt board to fit existing conditions, or is it better to cut the skirt board "perfectly" to the theoretical rise and run, and then shim the treads and risers to match in with it?
I use my 12" CMS to cut the mitered skirt. Finish with a hand saw.
I scribe the skirt to the existing stairs, you have to dance with who you brung, know what I mean?
I haven't done it on a 200 yr old house either, only on a few of the houses I framed.
Thoughts determine what you want,Action determines what you get
you have to dance with who you brung, know what I mean?
I just read this expression for the first time last week -- I like it!
I didn't do the rough framing on these particular stairs, and they're a little bit off (+/- 1/8"). Furthermore, the subtreads vary a bit in level (some tilt a bit left, some tilt a bit right, etc.). Of course, these are small variances, but they'll need to be addressed one way or another. That's when I started thinking that it might make more sense to shim everything to fit the theoretical geometry defined by the mitered skirt.
I just scribed what was sitting there, theoretically thinking leads to migraines. I will remember before I forget.
Take it up a notch and learn to make level and plumb cuts on your open skirts. Most rough stringers are going to bow towards the cutouts, no matter how carefully they were cut.Level across the rough strings at the highest point and make a mark on your uncut temporarily affixed skirt. You'll need to make a straight stick to span the strings. Butt it to the inside of the skirt, and put a level on top of it. Next, lay your level front to back on outboard run and see if it matches up level with you mark. If it does, fine, make a line on the skirt with the top of you level. If it didn't, move your level to your mark, and do the same.Same sequence for the risers.Then lay your marked skirt on the bench, put the same level on the lines you scribed, and mark the real lines.Cut them on a slider. Circular saws work, but you might need a left and right blade. Shim the risers and treads to the skirt.Nothing worse to me than seeing an open skirt that doesn't have plumb and level cuts.Not trying to bust your chops, but if you wanna dance this step, learn to lead<G> Outside of the gates the trucks were unloadin',
The weather was hot, a-nearly 90 degrees.
The man standin' next to me, his head was exploding,
Well, I was prayin' the pieces wouldn't fall on me.
Nothing worse to me than seeing an open skirt that doesn't have plumb and level cuts.
I was concerned about that possibility, too.
Thanks for the input -- I have a stair project coming up soon, so it's timely advice.
I'm planning on using lags with those half-circle washers to hold down the (solid) newels. I was toying with the idea of putting in two lags per newel. What do you think of that idea?
Also, how do you recommend securing the treads? I was figuring to use a generous amount of adhesive and face nailing six or eight 15ga x 2-1/2" finish nails.
Thanks again,
Ragnar
Edited 3/31/2007 11:37 pm ET by Ragnar17
If this is what you're talking about, and you have some framing to lag into, they work great. If you have to angle the bolt into the framing, you can bend it to get it plumb. Get a ratcheting wrench, a regular closed end doesn't have enough throw in a 1" hole. Outside of the gates the trucks were unloadin',
The weather was hot, a-nearly 90 degrees.
The man standin' next to me, his head was exploding,
Well, I was prayin' the pieces wouldn't fall on me.
Yep, that's the hardware I'm talking about.
Do you think two per newel is overkill?
Also, did you have any advice on the treads?
I've found one per newel to work just fine. It will take a few tries to get the newel to sit flat to the floor and still be plumb, but take the time. The bottom can be back cut slightly, but newels are subject to a lot of yanking, so don't overdo it.Unless it's a retrofit, we always install the treads raw. Before you install the treads sand off all pencil marks, mill marks, dirt, whatever that is near the skirts and risers. It's very hard to clean anything there up later without marring something. Usually stairs are toward the end of the really messy stuff going on, if not and you cover them, be careful to cover the whole tread, sunlight oxidizes most woods and it might mess you up in the finishing stage. Outside of the gates the trucks were unloadin',
The weather was hot, a-nearly 90 degrees.
The man standin' next to me, his head was exploding,
Well, I was prayin' the pieces wouldn't fall on me.
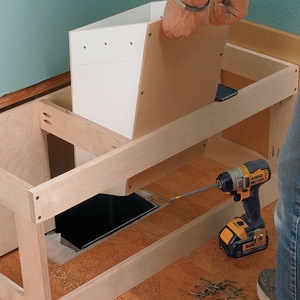
I've gotten away from face nailing by screwing the risers to the treads from behind with an angle drill. Some others I know are using their battery impact drivers. A cleat pre-nailed to the underside of the tread holds the front of the step in place till the glue sets.
After setting the risers, dry fit your first tread untill its tight. Reach over the top riser and mark the position of the lower riser and stringers on the underside of the tread with a sharp pencil. Turn the tread over, carpenter glue and nail a 1"X 2" block probably between 12 and 18 " long to fit tight to the riser and between the stringers on the underside of the tread.
I use a bead of carpenters glue on the back riser and closed skirt, (saves alot of squeeze out after screwing). I use PL-400 or PL Premium construction adhesive applied heavy on the stringers and a thin bead on the top and back of the lower riser where it will meet the tread cleat.
Drop the tread in place and kneel on it while screwing through the riser into the tread from behind. Nail through the lower riser into the cleat, to hold down the front of the tread. Nail high enough on the riser so the holes will be covered with a moulding Keep traffic on the stairs to a minimum for a day or longer to give the glue a chance to set.
It amazes me that some contractors will close down a jobsite for 2 or 3 days while the floor tile sets but won't give a finished set of stairs an hour before sending a dozen guys up and down it.
Gord
Nothing worse to me than seeing an open skirt that doesn't have plumb and level cuts.
I agree. I hate seeing things 1/8'' out of plumb/level outside on the exterior finish. It's ten times worse inside.
I understand where Stilletto's coming from but I think I'd prefer to do the theoretical cuts and adjust the rough stringers to the theoretical cuts. I'm no expert on this stuff though....I have never did a cut and mitred skirtboard out on a "real" house. I did one in carpentry school, way, way back in the 70's I think!
I don't suppose I should mention that I backed the blade in using a porter cable sidewinder..... then finished with a handsaw and sanded.....Those were the days before they had right and left saws. I think today, I'd probably still do it the same way but the idea of using a 12" saw makes more sense.
blue"...
keep looking for customers who want to hire YOU.. all the rest are looking for commodities.. are you a commodity ?... if you get sucked into "free estimates" and "soliciting bids"... then you are a commodity... if your operation is set up to compete as a commodity, then have at it..... but be prepared to keep your margins low and your overhead high...."
From the best of TauntonU.
Oh, I forgot to say that a picture would be worth a thousand words Holley. If you ever get a chance to take pictures of the technique that you've described, I'd be interested in seeing it. Maybe if I ever get back to NC, I'll just bop over and have you explain it!
blue"...
keep looking for customers who want to hire YOU.. all the rest are looking for commodities.. are you a commodity ?... if you get sucked into "free estimates" and "soliciting bids"... then you are a commodity... if your operation is set up to compete as a commodity, then have at it..... but be prepared to keep your margins low and your overhead high...."
From the best of TauntonU.
Hey Jim,I might have some pics, I know I didn't explain it too well...I'll look. I didn't mean come across as slamming Stilleto, I was taught to do skirts exactly the same way. I didn't want to mention backing a circular saw in to make the miter either! Scariest thing in my carpenter career was one second backing an 8 1/4 Sawcat into the miter on a cupped skirt, next second seeing that saw with the blade spinning at 6000rpms heading straight for my schnahze, and you've seen what a target that is<G>. After I changed my pants, made me think of a better way, fast LOL.Hey, did I ever tell you that your slam and jam technique worked on that old PC 815 that was loaded with dogfood? A friend's using right now to whack 6x6s...man, that thing never woulda jumped out of the cut! Outside of the gates the trucks were unloadin',
The weather was hot, a-nearly 90 degrees.
The man standin' next to me, his head was exploding,
Well, I was prayin' the pieces wouldn't fall on me.
I cut them with a circ saw, finish with a hand saw leaving the pencil line whole just enough to see a hair of wood on the waist side and the sand to the line. Palm sander and a mill file.
Use a combination square to check your progress. Miter and for square.Best to you and yours, Chris.
Building as thou art paranoid never harmed anyone.
Fledgling,
Does your project look anything like the picture I posted?
I prefer them finished before the install. I use a ton of glue when installing hardwood treads and risers. Its alot easier to wipe glue off a finished surface than to sand out an unfinished corner.
How you do anything is how you do everything
Ditto about wiping off glue. At least get the stain on first, you'll be avoiding squeezeout preventing penetration of the stain. If you want to get a sealer coat on in the shop, that's fine, but I like the final coat of finish applied to the completed assembly.Cutting riser return miters - Circular saw usually, sometimes a sled on the table saw, then a sharp block plane and sand to the line.
Just thought I would let you know that if you go to L.J. Smith web site you can download their installation guide free. It is an excellent step by step guide that even I can understand. I keep it in a folder and use it all the time.
James