Plastering: DIY for reno – best sources
That is kind of a cryptic subject I know. Here is the situation.
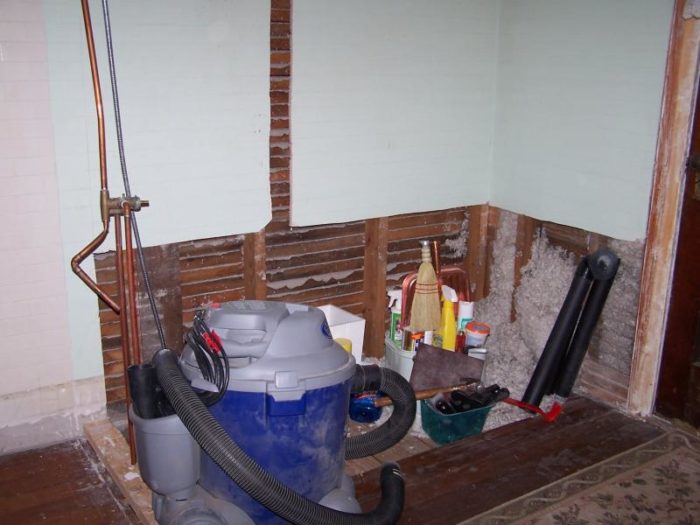
We recently removed a year 2000 tub & shower surround from our 1918 home. The lower 2/3 of the bathroom wall is scored plaster to look like subway tile. The upper 1/3 is smooth. When the tub was installed, the previous owners had about 18″ of plaster removed as well as the wood lath. Additionally, there is a 3″ channel that runs up the wall and along the top where the shower enclosure installed. So we need to repair the smooth area, rebuild the scored areas and blend into existing areas.
You can see photos (attached).
We have a couple of issues:
1) We have never plastered before, so it’s a little intimidating. Are there good videos/DVDs that show and explain the process? I looked at the Plaster Man’s website, his DVDs looks like a good resource, but the price tag ($195) seems steep. We’re knee deep in a couple of projects right now and that $200 is needed elsewhere.
2) Plastering must really be a dying art…we can’t find the materials we would like to use around here (NW Ohio). Are there any companies that sell via mail order/internet?
3) My significant other is very good at almost everything he does (annoyingly so), but he’s a perfectionist. He seems reluctant to try to do this ourselves, probably based on the “you have to have a professional” statements he’s read/heard in the past.
We contacted a pro, he wanted a great deal of money to do the job and cancelled on us many times over a 3-4 month period.
Is this something we can do ourselves?
4) What’s the best way to proceed? Restore the wood lath and the 3 coat plaster we have? Use plasterboard and then finish on top of that?
Any help you can provide will be appreciated.
Karen


Replies
i'd take the lath & plaster down and put Durock up, then plaster over that with either Durabond 90.. or i'd do a scratch coat and finish coat with Diamond
Diamond is a little more forgiving than Imperial
find a closet, buy some blueboard, and practise with the Diamond... scratch coat & finish
plaster is fun
Durabond is pretty similar to plaster
get a hawk, a good mixing paddle for a 1/2" drill, a nice PLASTER trowel ( different than a drywall trowel )... don't make your mix too stiff.... you should be just able to pour it
and no plaster fights.. makes a big mess !
Karen, 1st question..what do you inrtend to do with the wall space later, i.e. tile,install new tub, install shower surround, leave as exposed wall, etc....?
As to the plaster repair, you can put "nailers" behind the existing to catch the installation of new blueboard, to which you will apply the skim coat veneer plaster(Diamond is on brand,as mentioned by Mike). There is no need to put durock or any other cement type backer board UNLESS you plan on tiling for a shower or tub. (get me an answer to that quest. and I'll explain more on the backer board).
The blueboard comes in 1/2" thichness, so you will have to shim out the nailers so the blueboard is just below the finish surface of the existing plaster. Once shimmed you can apply your skim coat so that you blend it into the existing surface, then you can strike the new fake subway tile pattern on the lower sect. and blend the upper for the smooth finish.
Since there was a "professional" available to do this, I would assume the materials are available locally thru a drywall supplier.
Since the upper area is just a 3"-4" wide channel it should be relatively forgiving in your skim coating it, the lower section,I'm guessing, will most likely be covered by a new tub or shower unit, so it's appearance is not critical either.
I think if your hubby reads up on technique he could achieve results acceptable to even his "annoying" self.. :)
Plastering is indeed a dying art, but it is a superior finish to any drywall/mud finish you could ever come up with, it is more durable(doesn't dent as easily) and is a better surface for painting or papering, and there's far less dust to deal with during install, and there's no coat it, let it dry, sand,coat again, let it dry,sand, coat again, let it dry, sand, routine, one coat, maybe a light sand, then prime and paint or paper!
Geoff
Geoff & Kevin:We have installed a clawfoot tub with a shower ring. It's sitting in the same area, but the back wall is visible (although slightly camouflaged by the shower curtain). I purchased an old, old book (circa the same time the house was built) as a reference guide. While I realize there are newer materials available, I figured it would give us a good primer on things.We love the plaster. We like the feel of it and the sound of it. We like the insulating value we have with it. We still have original windows and doors - with single pane glass, but we do pretty well on heat (a massive fuel oil furnace w/ blower that the inspector told us was burning cleaner than most natural gas ones he measured). At some point (probably in the early 1950s the owners had insulation blown in the exterior walls (you can see it in the photos on the original post. Should we clear that out and use the fiberglass insulation instead? One of the walls is an outside wall, the other is interior. We have the typical cracks here and there but nothing major. At some point, the living room, dining room and family room were texturized. We're unsure why - fashion or unsightly cracking. We will eventually take that off and restore the smooth walls, so we may be in for some additional work.We don't have children and although he can be messy, the spouse doesn't splash much. So I don't think water will be an issue. Additionally, we will paint the lower walls a high gloss oil based enamel. We did that with our kitchen to get a nice subway tile gleam on the lower wall. It looks great and the oil based paint holds up well to the occasional wet mess.Speaking of paint, I think one of the reasons our plasterer was so hard to nail down was 1) he works on important restoration projects of historic buildings (the nerve!) and 2) the 'curing' time between coats. How long between coats does one wait? How long after the finish coat before you can paint? We're in Northwest Ohio, so we run the gamut of humidity and temperature, but typically, what's a good rule of thumb?Thanks for all your help, guys. I appreciate your patience.Karen
Plastering is a dying , if not a dead art. I have done much of it over the past 3 decades. First, is the area in question a water area as with a shower? Plaster is no good for wet areas. Otherwise, plastering can be learned. so take your time and patience. The best approach is to fill the voids with 1/2" or 3/8" sheet rock and screws, back side out. This will be a base for the plaster and take the place of the brown coats. The sheet rock should be 1/8 " in, or there about, from the existing wall suface. For the plastering you need both Gauging Plaster and Finishing Lime, a 12" plastering hawk, a 12" plastering trowel, a plywood mixing board, 5 gallon buckets, a 4" painter nylon brush and a medium masons point trowel, which you should be able to get from a good Mason Yard ( Not from Home Depot, they know nothing). You will slack the lime over night to make a paste like consistancy. To do this take a 5 gal bucket and fill it 1/3 full with cold water. Slowly pour the lime onto the water a little at a time, letting the accumalating powder sink into the water. Continue this untill no more lime is sinking. If there is dry powder on the top it will absorb water over night. If done correctly the lime will be a heavy paste in the morning. This slacked lime has a VERY long shelf life if kept covered. Now take a clean board of 1/2" plywood on horses as a work station. Thorughly wet the board with clean water and 4" synthetic paint brush. At the start of each process clean and then brush the board with your clean water. Take enough slacked lime (use a margin trowel or medium pointed trowel to remove the lime from the bucket) to make a 12" to 15" circle or ring on the board about 2" wide and 2" high. Use your 12" plasterer's trowel to make the ring. Now add clean water from a second bucket to the circle, filling it about halfway. Slowly sift the gaugeing plaster evenly onto the water, letting the plaster to be absorbed. Use a small saucer or plate for this. Enough plaster is added to give a similar consistancy as the lime. While the plaster is absobing water take the paint brush and wet the area to be repaired completely. Now take 1/3 pie cut of the circle and mix the lime and plaster together well. A note; the plaster can not sit in the water too long or it will harden and the mix will also harden but a little slower. Practice will help. You can also use retarder but I dont think it is needed. After you mix the 1/3 together pull part of the mix onto a 12" wetted hawk. At the repair trowel plaster into the area pushing it into the area, dont try to fill it completely. Continue filling and mixing, building up to the wall surface. When you have an area filled take your brush with water, brush the plaster wetting it and with the trowel polish and smooth the repair. A plaster white cream will develope and you will use this to smooth all the low spots. Finish with a final wet brush and polish. Remember to always keep the trowel, hawk, and mixing board clean. Do areas small enough to handle and finish in your alotted time, stay calm and practice. Good luck