Replacing a broken terra cotta chimney tile and over-the-hill chimney cap.
The top terra cotta tile/stack of my chimney has a corner broken off. Too much missing to cover with a bolt-on chimney weather cap from Home Despot. Ugly. I purchased a new section of tile, about 36″ in length. Heavy. The cracked cement chimney cap needs replacement anyway, but before I start the demolition phase, something tells me I should ask around for advice: 1) Are there terra cotta-appearing standard-sized tile sections available that are made of a lighter, possibly composite-type material? This monster is so heavy it will squeege the mortar out of the joint and leave me sleeping light nights. 2)Any pointers on the mortar? Sand/lime/cement ratio? Additives? Consistency? Tile alignment gadgets or innovations? Set-up time before continuing with the cement chimney cap phase? 3) Any advice on pouring/floating the chimney cap? Redi-Mix? Reinforcing steel? Mesh? I’ve tied rebar, laid mesh and poured slabs before but something tells me this thin cap with recurring hot/cold phase, not to mention possible building code issues, needs a closer look. Plus, this is a free-hanging structure hanging onto the inside chimney perimeter by its fingernails to keep from belly flopping into the fire place. I don’t want to wing this one. Thank you everybody.


Replies
PEX
What does "PEX" mean?
On Idaho's comment,it looks
On Idaho's comment,it looks like he was intending to reply to another thread about a plumbing question. I just saw that same comment on another thread.
Hopefully, somebody with more knowledge than I have will be along shortly to provide more info.
I think the first thing everyone will do, is to warn you that you should inspect the whole flue carefully to make sure the rest of the liners are not cracked. Often a cracked liner is indicative of over-heating / chimney fire, etc. If that's the cause, the whole chimney probably needs relining.
You should not use regular mortar. I know that from experience. My chimney liner was installed with regular mortar. The flue was for a wood stove. The mortar didn't last though one season before it started cracking & falling out. Around here I've heard the proper product referred as "fire clay", but I just did a search on that & would recommend you wait for input from somebody that knows what they're talking about.
Ed
Ed,
Got it.
Thank you.
I'll
Ed,
Got it.
Thank you.
I'll do a search etc on "fire clay" and follow threads.
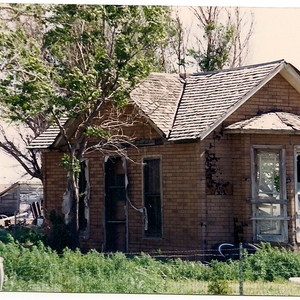
This tile, the last one extending above the brick chimney, was broken off during the original build. I can see the evidence of a clumsy attempt to refit the large piece that has probably been missing since then.
I will inspect everything thoroughly, so thanks for that heads-up.
I have previously paid a price for doing demolition without a researched game plan and will not make that mistake a again, especially when playing with fire.
John.
Ed,
Mark H's referrals
Ed,
Mark H's referrals (above) were useful.
No doubt.
J.
First off, I know nothing. But I became interested in this issue because I have an unused lined chimney I have been considering converting for use with a woodstove. I need to check it out for suitability before even thinking about the woodstove idea.
Some interesting info I found...
http://inspectapedia.com/chimneys/Chimney_Rooftop_Repair.htm
http://www.heatstoprefractorymortar.com/index.html
http://www.heatstoprefractorymortar.com/faqs.html
Mark,
Got it.
Thank you.
John.
"Fire clay" is available at brick/masonry supply houses as is info on how to mix it. Doubt you can find it at the big boxes. That being said, it's not really necessary at the top of the chimney. No framing to catch on fire up there.
On replacing the tile: If you are going to pour a new wash/crown, cut the old tile off as low as possible after the old wash has been removed and cut a new piece to replace what you cut off. Pour the new wash with concrete, not mortar. Use backing rod around the flue for expansion and caulk that joint when it's cured with heat resistant caulk.
Got it.
Thank you.
Found a gallon bucket of fire clay in town, but sounds like I can save 20 bucks there if not needed.
Probably a mini skilsaw with diamond blade is my best bet for a clean, square and even cut which will mate up with the factory edge of the replacement tile to avoid a lopsided tile at the top.
Found a cap replacement article by Fred Lugano in an old issue which pretty much echoes your advice there, so I'm feeling pretty good about this now.
Game time.
J.