The gap widens – carpenter’s suggestions
GreatWhiteNorthGuy
| Posted in Construction Techniques on
Hi Fellas!
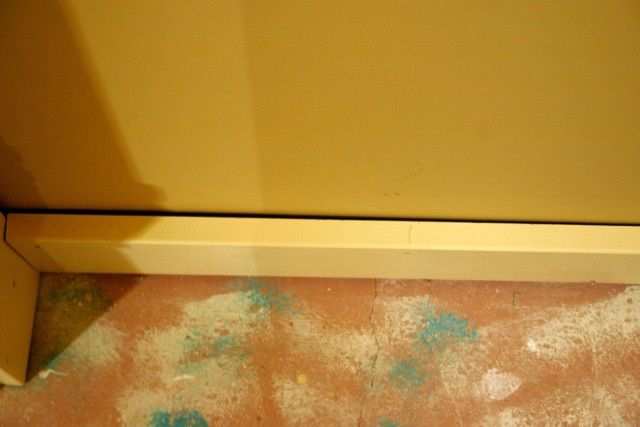
Does anyone have an easy way to get baseboard to fit snug to the wall and follow “most” of the ins-and-outs along the way? This is 5″ high MDF (3/4″ thick) stuff so there’s not a lot of flex. I have seen unforgiving oak boards installed in old homes and the fit is spectacular. I don’t like to caulk and if it were stain grade then caulk wouldn’t be an option. I can “hunt” for studs with a stud finder, but insulation and 24″ on center make for few mounting points except for the 2 x 4 base plate. Thanks to all for your help.
Cheers,
Ken
“They don’t build ’em like they used to” And as my Dad always added… “Thank God!”


Replies
Alexplus
cut the really high spots on the DW and caulk the rest..
Life is not a journey to the grave with the intention of arriving safely in a pretty and well preserved body, but rather to skid in broadside, thoroughly used up, totally worn out, and loudly proclaiming
WOW!!! What a Ride!
Forget the primal scream, just ROAR!!!
I was afraid that you'd say that. Would you still use caulk if it was stain grade baseboard? It still amazes me how perfect some guys can get this stuff to fit. Ken"They don't build 'em like they used to" And as my Dad always added... "Thank God!"
MDF is stain grade???
Life is not a journey to the grave with the intention of arriving safely in a pretty and well preserved body, but rather to skid in broadside, thoroughly used up, totally worn out, and loudly proclaiming<!----><!----><!---->
WOW!!! What a Ride!<!----><!---->
Forget the primal scream, just ROAR!!!
stain grade gets the walls refloated to the trim...
Life is not a journey to the grave with the intention of arriving safely in a pretty and well preserved body, but rather to skid in broadside, thoroughly used up, totally worn out, and loudly proclaiming<!----><!----><!---->
WOW!!! What a Ride!<!----><!---->
Forget the primal scream, just ROAR!!!
Oh yeah, almost forgot, this technique works best with a pneumatic gun and does NOT need to be in a stud.
James
better known as stitching.
3/4x 5 MDF base boot pressed and stiched to the DW isn't going to stay put..
the scalloped / wavey base is going to look terrible....
Life is not a journey to the grave with the intention of arriving safely in a pretty and well preserved body, but rather to skid in broadside, thoroughly used up, totally worn out, and loudly proclaiming<!----><!----><!---->
WOW!!! What a Ride!<!----><!---->
Forget the primal scream, just ROAR!!!
Well, looks like cutting out the high spots and a bit of Alex-Plus is the best way to go. Plus, I'm going to try "stitching" it too. Thanks guys.Cheers,
Ken"They don't build 'em like they used to" And as my Dad always added... "Thank God!"
when ya cut back the high spots go for a happy medium...
don't cut too deep...
Life is not a journey to the grave with the intention of arriving safely in a pretty and well preserved body, but rather to skid in broadside, thoroughly used up, totally worn out, and loudly proclaiming<!----><!----><!---->
WOW!!! What a Ride!<!----><!---->
Forget the primal scream, just ROAR!!!
You can kerf the back side of trim in multiple, shallow, partial passes (miter saw works great - set your depth if you want) to allow a whole lot of flex and 'fastenability' into it.Wait - yes - I do see how the planer would work better for this!
Edited 12/6/2006 10:40 am by Steddy
planer seems to work better for that...
but why flex it to the wall.... float the wall and get a better all around job...
Life is not a journey to the grave with the intention of arriving safely in a pretty and well preserved body, but rather to skid in broadside, thoroughly used up, totally worn out, and loudly proclaiming<!----><!----><!---->
WOW!!! What a Ride!<!----><!---->
Forget the primal scream, just ROAR!!!
Press against it with the sole or side of your foot (shoe) and nail 1 1/2 inch finish nails at opposing angles right next to each other, parallel to the direction of the base against the floor. Nail it at the top as well as the bottom ( in the bottom plate).
You may have to apply this technique to several areas as some framing is pretty bad.
James
so how do you get rid of the scallop effect???
Life is not a journey to the grave with the intention of arriving safely in a pretty and well preserved body, but rather to skid in broadside, thoroughly used up, totally worn out, and loudly proclaiming<!----><!----><!---->
WOW!!! What a Ride!<!----><!---->
Forget the primal scream, just ROAR!!!
Add a cap of a much smllaer, flexible profile. Quarter round, cove, whatever.
"When asked if you can do something, tell'em "Why certainly I can", then get busy and find a way to do it." T. Roosevelt
For the base to run straight I like to use a combination of bridging low areas and trimming the back of the base on high spots.
If there is only one small low spot and it isn't caulked the base can't go in straight.
Likewise, if you bridge the gap on either side of a high spot the base will bow out around the bump.
An electric hand plane is essential to speed up the process, although a belt sander with the coarsest belt will accomplish the same. A table saw can be handy to take down some areas, but it isn't nearly as useful as the plane. Of course a good manual hand plane should be handy.
I also like to have a 2" wide carbide scrapper to remove any small high points on the wall. Sometimes the drywall needs to be beaten a little, or cut out to allow the base to either sit plumb or hug the wall closer.
Even stain-grade base needs to be run straight or it doesn't look right.
Stain-grade base, at least my stain-grade base, is always caulked, but not with a huge bead of bright white. Using a pastry bag and a fine tip, a clear caulk is applied to just cover the crack and it's essentially wipped off the top of the base. Then it's painted to match the wall.
Good basing!
Beer was created so carpenters wouldn't rule the world.
Could it be that with nailing to the bottom plate, you are rocking the base because of the bevel on the drywall ? That's an awful long gap with no apparent high spot.A great place for Information, Comraderie, and a sucker punch.
Remodeling Contractor just outside the Glass City.
http://www.quittintime.com/
Quite possibly, Calvin. However, even when I nail near the top into a stud gaps still occur between studs. "Stitching it" as suggested earlier seems to help. That, plus some caulk, a little scraping of the drywall and the occasional bit of "persuasion" to the DW seems to make it look better, too! Thanks for your comments though.Cheers,
Ken"They don't build 'em like they used to" And as my Dad always added... "Thank God!"
Try and get that base down as straight as possible because it will trick the eye into making a crooked wall look straight, almost. I agree with the idea to use a top cap like quater round or cove to hide the gaps, and for the floor I would use a shoe or quarter round.
A fairly standard detail around here was a quite high baseboard---- maybe 8"--- with a shoe mold at the floor and a ogee cap molding at the top.
I don't think it would have ben possible to suck a oak 1x8 tight to an irregular wall-especially pre-dating gun nails--even considering the back of the base is "relieved"
Stephen
I saw that too...
I am wondering if there are blobs of mud down low that need to be scraped flat..."Dogs don't follow an emotional leader. They follow the dominant leader. We are the only species that follows an unstable leader. "
Cesar Millan, The Dog Whisperer, in an interview in National Geographic Magazine
Don -
You fill a pastry bag with caulk and then do the caulking, eh? Are you using metal tips, and is the set up a throw away when finished? Do most of you caulk base to floor as well?
Don - You fill a pastry bag with caulk and then do the caulking, eh? Are you using metal tips, and is the set up a throw away when finished?
Do most of you caulk base to floor as well?
I've been using the metal tips and can't say I have a complaint, other than the metal leaves a slight gray mark where it contacts painted surfaces.
To clean the tips I like the tiny brush sold to clean frosting out of the tips. It's small, but hard to replace with anything nearly as effective.
For the bags I've switched to the disposible bags, not to throw them away after each job, but they just seem to last longer than the others. Double them up and you're good for a few weeks of use.
To store without having the tip get dried and clogged, wrap it in a damp cloth. For longer-term storage, wrap with a really damp cloth and put in a ziplock or aluminum foil.
As for caulking base to the floor, it doesn't seem like a good idea. It's much harder to get a hidden line, and unless it's 100% silicone the caulk line will turn dirty looking and be even more noticeable.
Fitting base to the floor is essential for a clean job and there are always an electric hand plane, manual hand plane, beltsander, jigsaw and scribe handy for just such things. For the most part, careful use of the electric plane is super fast and will take care of 95% of all cutting.
Scribing base is often a matter of the right tools for the job. A handful of 1/16" thick popcycle sticks allow quick level positioning of the base. A 7mm or 5mm mechanical pencil makes a nice sharp line, and when used with popcycle sticks to regulate the height it's easy to make marks in 1/16" increments to fit the situation.
Have fun basing around!
Beer was created so carpenters wouldn't rule the world.
Who let the painter in before the carpenter was done? I usually back butter with drywall compound for big gaps. A damp rag handy and I aim for the stud and either side of the gap. Stitching other wise. Then sand the excess when it dries --Caulking only where potential cracking accrues.
But only if I beat the painter to the job.
Thing about most base is: you'll never see it...it's mostly behind furniture. Concentrate on making the show spots "look" straight and square...if the walls are wayvy, cut into the sheetrock a little at the wows, and float the dips.We call "stiching:" cross nail and glue...the glue being a big player in the system. Simply cross nailing into sheetrock, trying to hold an ornery piece of any material, is going to show up as a crack or gap sometime.If the base is tipping because of the sheetrock bevel, as cal suggests, we use 2" piffen screws into the bottom plate as tweakable shims, also works great for tightening up those inside corners. Oh God said to Abraham, "Kill me a son"
Abe says, "Man, you must be puttin' me on"
God say, "No." Abe say, "What?"
God say, "You can do what you want Abe, but
The next time you see me comin' you better run"
Well Abe says, "Where do you want this killin' done?"
God says, "Out on Highway 61."
I am surprised you'd cut the corners at 90 degrees -- done at a 45 you have the ability to jamb the end in and it is pinned tight to the wall for a short distance -- cutting at a 45 verses a 90 today is just a matter of routine and does not take any more effort --
Thanks, Dudley, but that's not baseboard I'm intersecting - it's the door casing (3 1/2"). Anyway, I've got great suggestions from everyone and I especially like the use of Piffin screws or trim-head screws. OK, back to work. Have a great day!Cheers,
Ken"They don't build 'em like they used to" And as my Dad always added... "Thank God!"
Ok, sorry, I'm new here and did not see the previous post.
Chris M
Well don't let it happen again!
Actually it happens all the time. Especially in a long discussion when someone responds to an early post when there are already 30 more after that. The only thing you can really do wrong here is not post a response, cuz you might just have an important comment, or the "aha!" answer. Well, driving a Ford is another bad move too.
"When asked if you can do something, tell'em "Why certainly I can", then get busy and find a way to do it." T. Roosevelt
Have you tried using small headed trim screws? They will pull a lot better than nails.
Chris M
Apply glue to the back of the trim and apply it to the wall. Then take and place a block on the floor parallel to the wall about a foot away and attach it to the floor. then cut a piece perpendicular to that, just a little shy of the trim and shim it the rest of the way and let it dry. Let it sit for awhile and it won't come off
Then take some filler and fill the hole in the floor,sand and re-poly the floor where you damaged it by attaching the block to it.
Don't forget the block was nailed through the cat's tail, who then scratched the #### outa the floor in a big circle, that needs to be sanded and refinished too._______________________________________________________________
Rock is dead. Long live paper and scissors
I was thoinkng the saem thing. The cure is worse than the problem.
"When asked if you can do something, tell'em "Why certainly I can", then get busy and find a way to do it." T. Roosevelt
That's called "Good" by "Hometime" standards.
Is there something that's holding the base away from the wall at the floor level?
Well, woodway, I managed to snug that one up with some stitching and other forms of persuasion. Seeing as I'm working on a concrete floor the suggestion to nail cleats to the floor and install braces until an adhesive takes hold, as another poster suggested, would be labor-intensive. Plus, I'm under the gun to get this done ASAP.Carving the back of the MDF in places certainly helps, as well as carving drywall gobs off the wall and paring down the corner bead mud up to about the 4 1/2" mark. Making a nice "flowable" slurry with my D-Mix fills the gaps along the top almost perfectly. Then the painter, in this case, my wife, touches up the gap fills at the same time as she fills nail holes. And using the Starret mitre gauge (http://catalog.starrett.com/catalog/catalog/groupf.asp?GrpTab=Feature&GroupID=703) has made the odd-ball cuts much easier to transfer to the saw. One day left and Mr. Carpet arrives. Can't wait to put this one behind me - my knees are killing me! Shoulda been a banker or something.Cheers,
Ken"They don't build 'em like they used to" And as my Dad always added... "Thank God!"
Sounds like you've got it under control. I was going to suggest trim head screws which would suck it in nicely but, as others pointed out, you don't want to have a wavy base either so filling in gaps with D mix is the best way to go. Painter are suppose to fill in the gaps, that's their job. I wouldn't say that to your painter though.One problem I've run into many times regarding painted base. The G** ?Dam** carpet installers run the edge of the carpet against the newly painted base and put all kinds of scratches in the paint. When they flip the backing over onto the tack strip, the sharp edges of the backing naturally come up against the base and if carpet installers are a bit lazy then they just let it hit the base and your left with the fix up. It's a big hassel to get scratches out without it showing through, especially high gloss paint. Your nearing the end...congrats