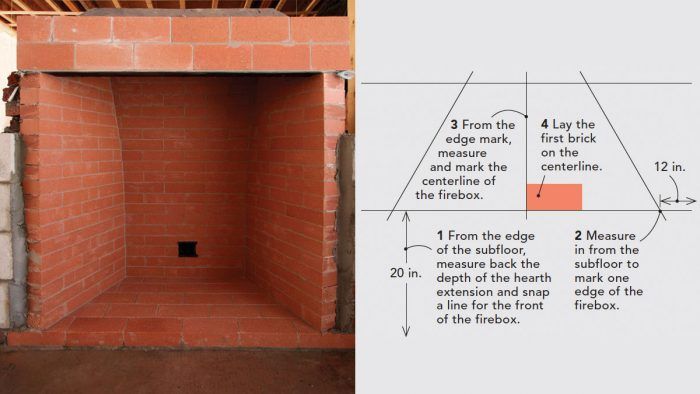
Synopsis: A Rumford fireplace is wide, tall, and shallow, with sides that angle in from the back and allow heat to radiate from the firebox. Mason Mike Mehaffey has adapted Rumford’s principles to modern aesthetics and code, building a firebox that is not shallow but still produces ripping fires that warm the space. In a series of step-by-step photographs, he explains how to lay the hearth, build and curve the back of the firebox, and then add the lintel and the damper.
In some parts of the country, a house isn’t considered a home unless it has a fireplace. A fireplace isn’t necessary for heating or cooking as it was just a couple centuries ago, but it’s still the centerpiece of many new homes, providing ambiance and, hopefully, supplemental heat. I say “hopefully” because some builders and designers don’t take into consideration that how a fireplace works is at least as important as how it looks.
As Sir Benjamin Thompson—better known as Count Rumford— realized in the late 1700s, most of the heat coming out of a fireplace isn’t dancing off the flames; it’s radiating from the firebox walls. To make the most of this, he designed a fireplace that’s wide, tall, and shallow, with sides that angle in toward the back to radiate heat out into the room. Prior fireplace designs—and many since—have sides that go straight back or angle only slightly, radiating heat toward each other rather than out into the room where it’s wanted.
The one knock against Rumford fireplaces is that the original versions were often so shallow that the fire very nearly spilled out into the room along with the heat. But the idea behind them does work for heating a room, and so people frequently ask me to build them.
I’ve adapted Rumford’s principles to modern aesthetics and code to build fireplaces that produce ripping fires that warm the space, but are also deep enough to assuage any concerns about safety. While the International Residential Code (IRC) has an exception for shallower Rumford-style fireplaces, my version is a hybrid based on the IRC’s standard firebox dimensions, which means it doesn’t require any special parts, and it won’t get any side-eye from code officials.
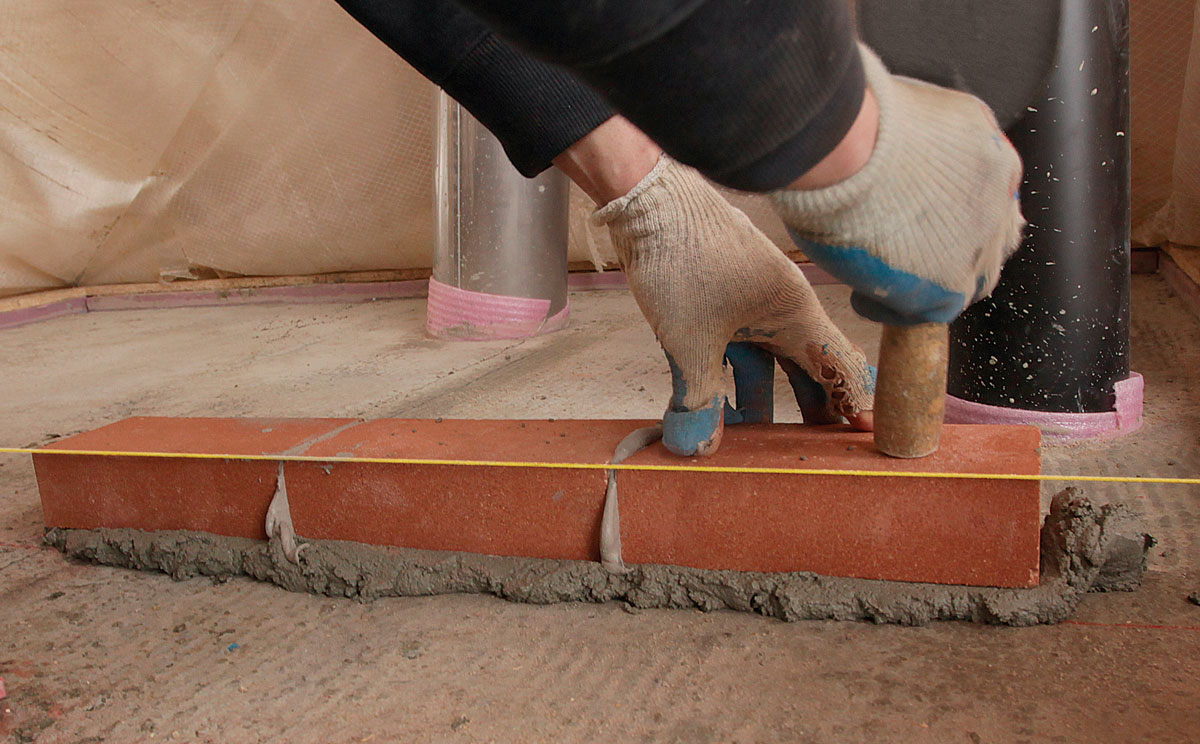
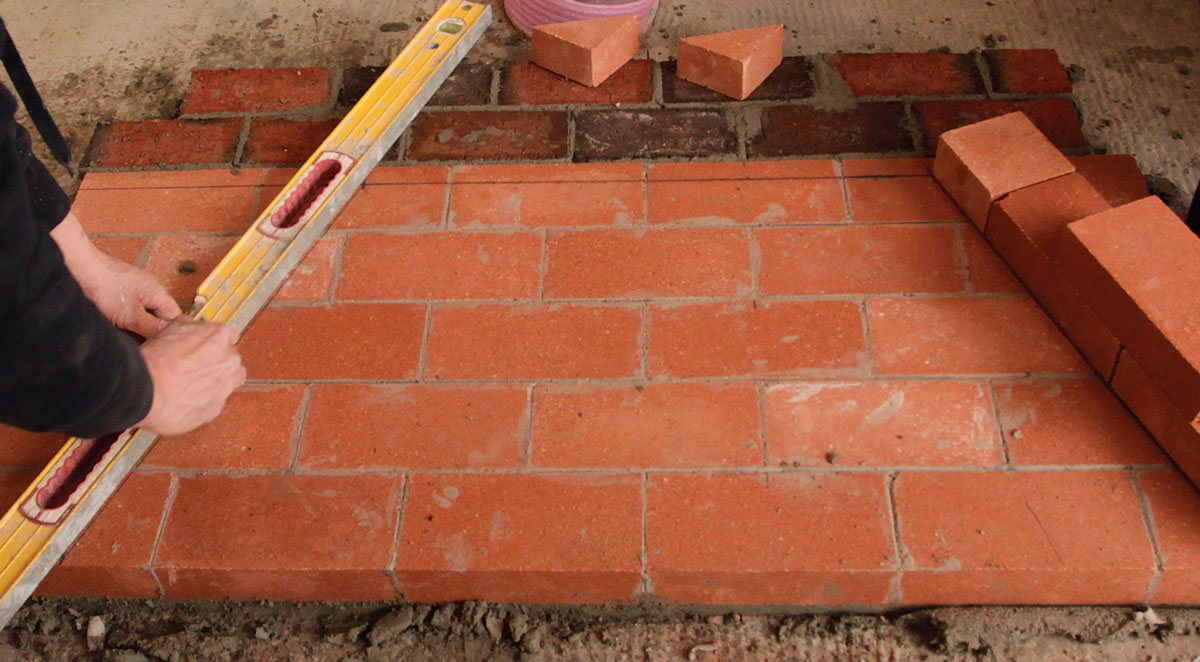
Lay the Hearth
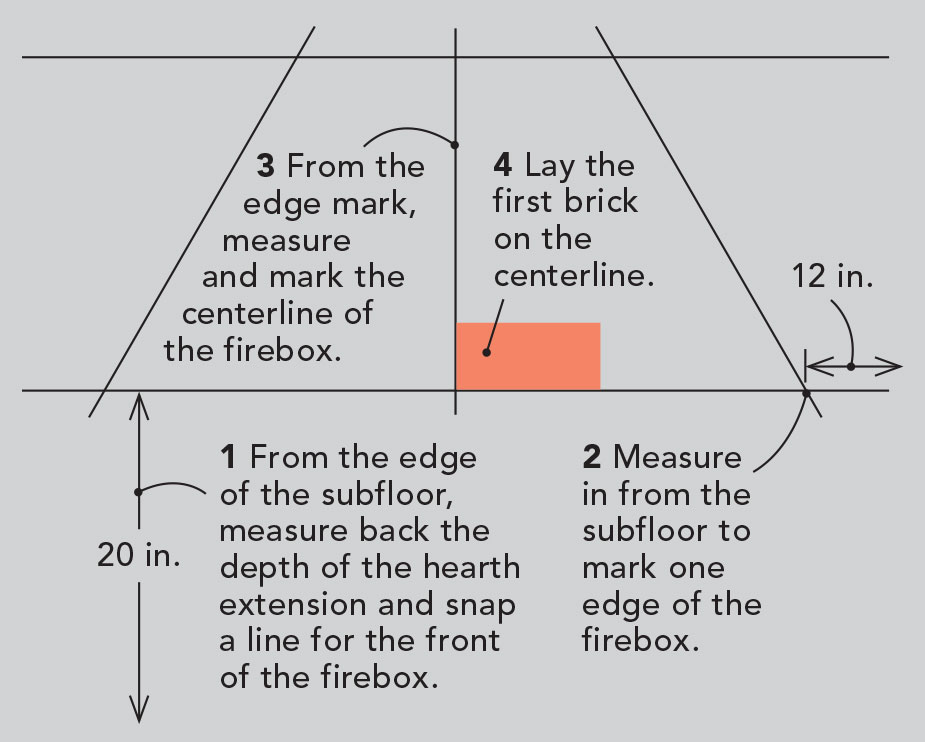
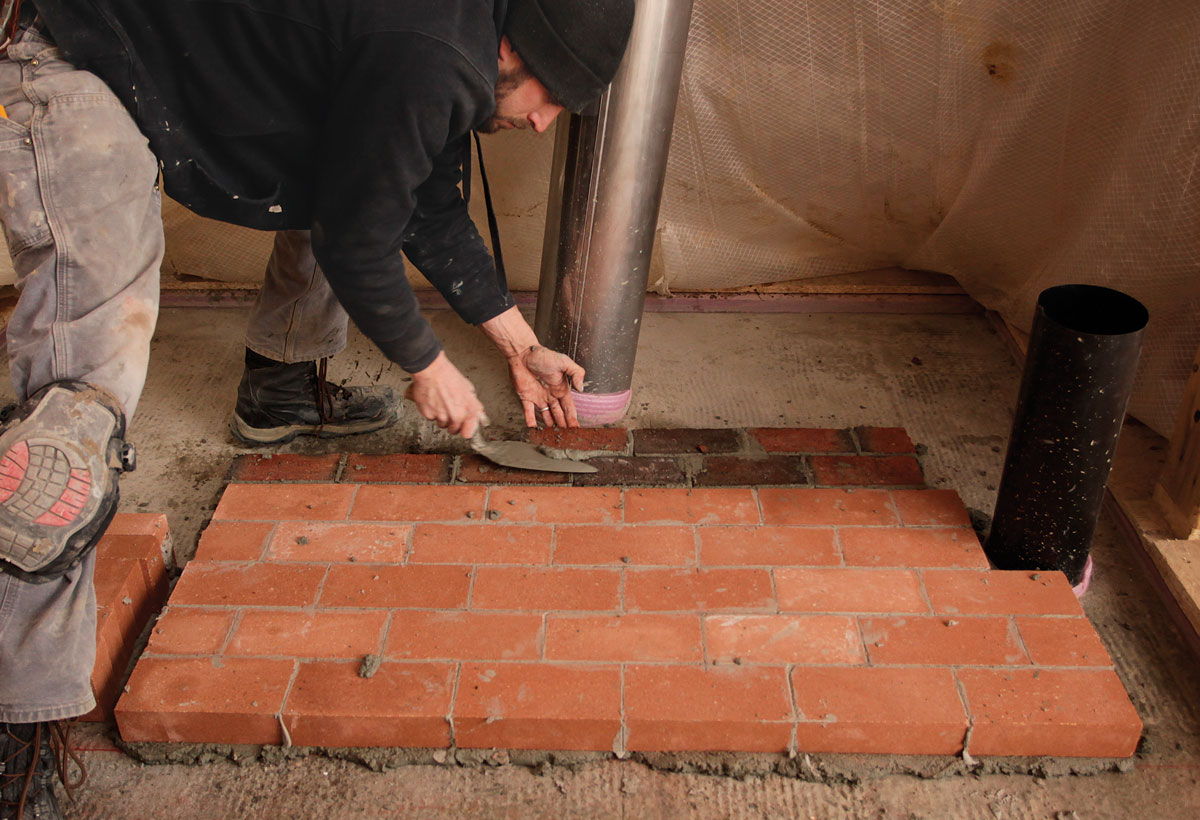
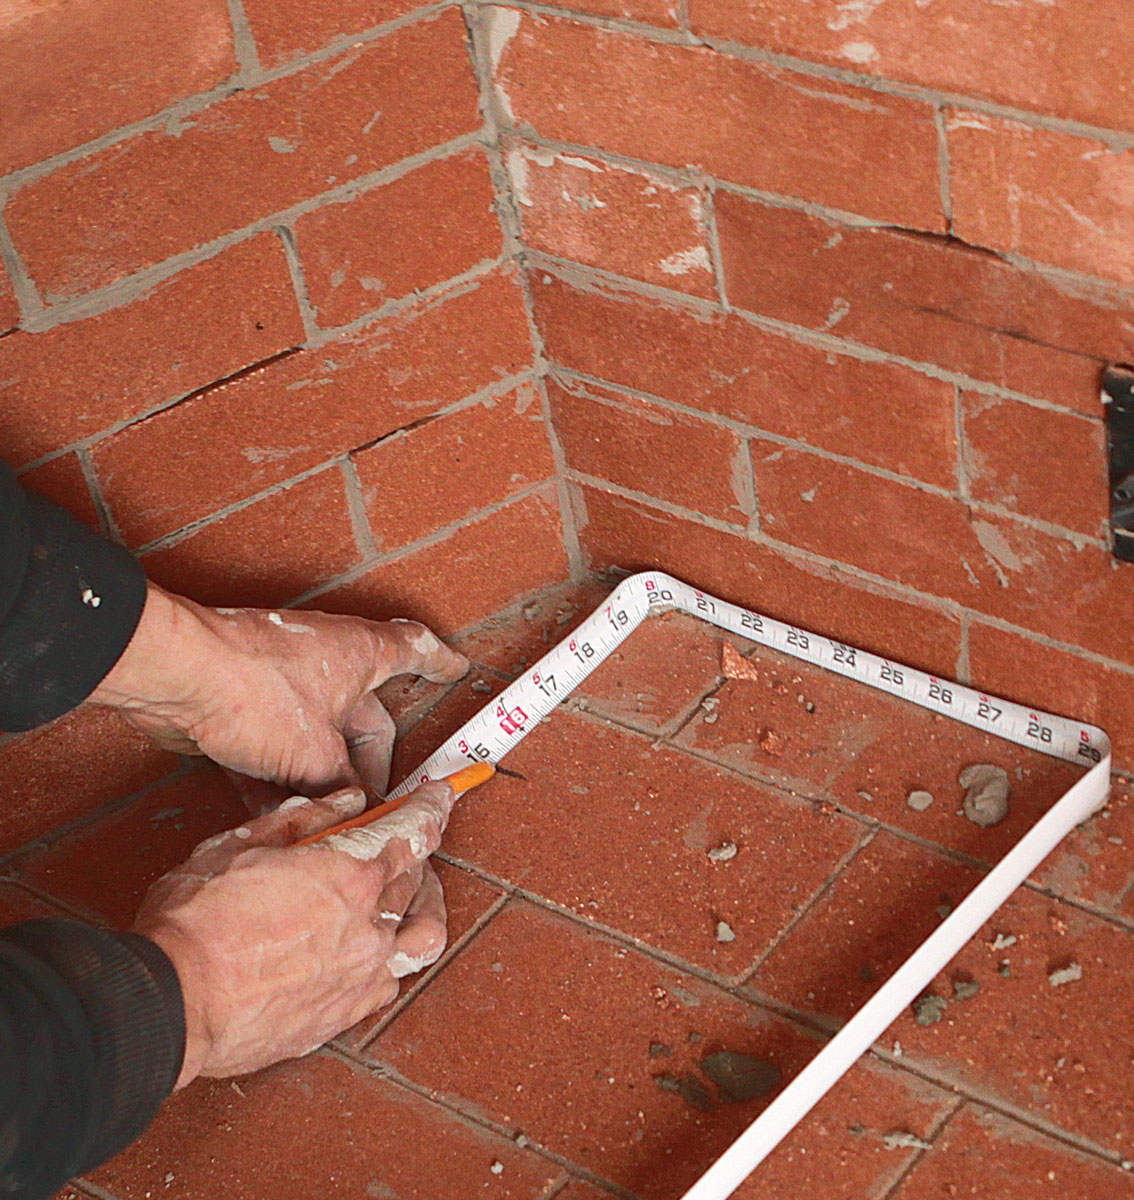
When laying the hearth—the floor—of the firebox, work from the center out to help keep joints aligned. Code dictates how far the firebox must be from combustible materials based on the size of the firebox opening. This one is 42 in. wide and 42 in. tall.
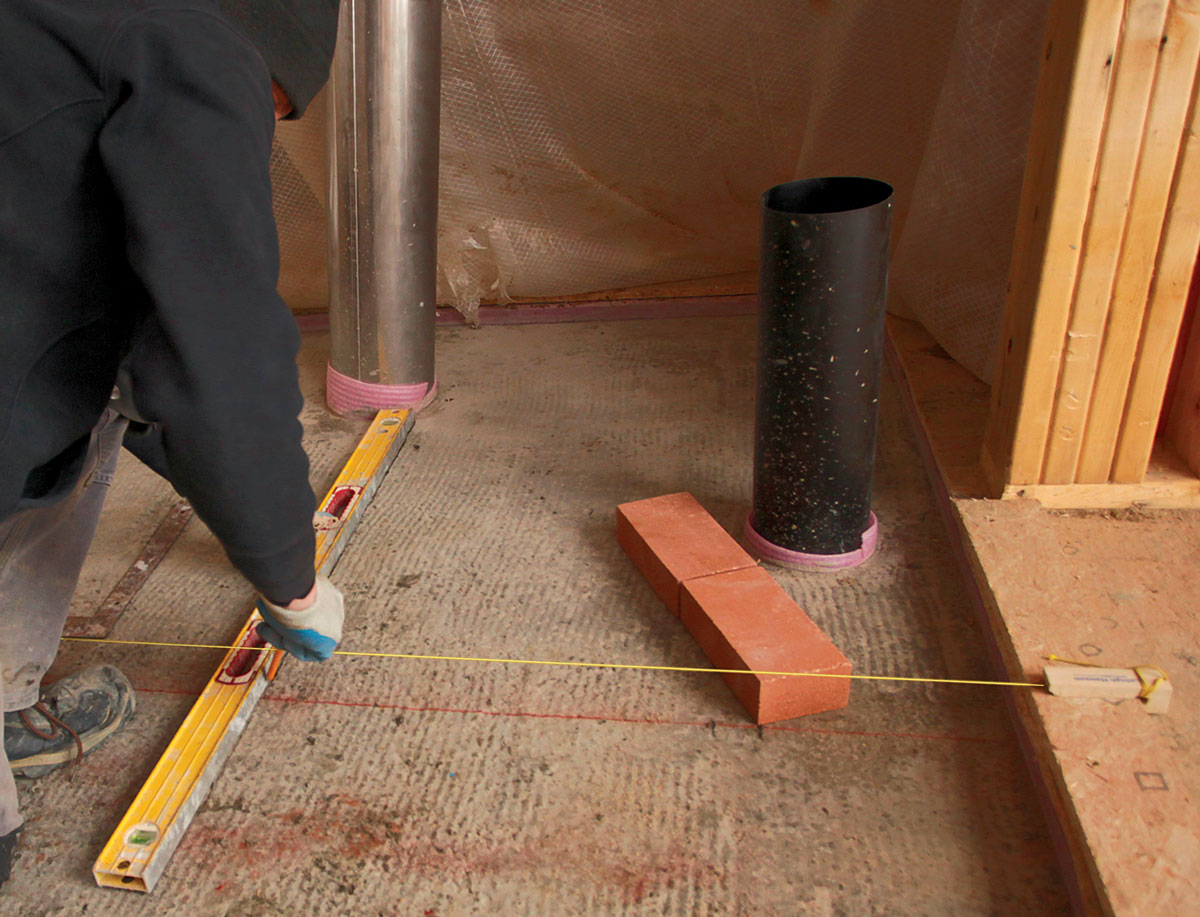
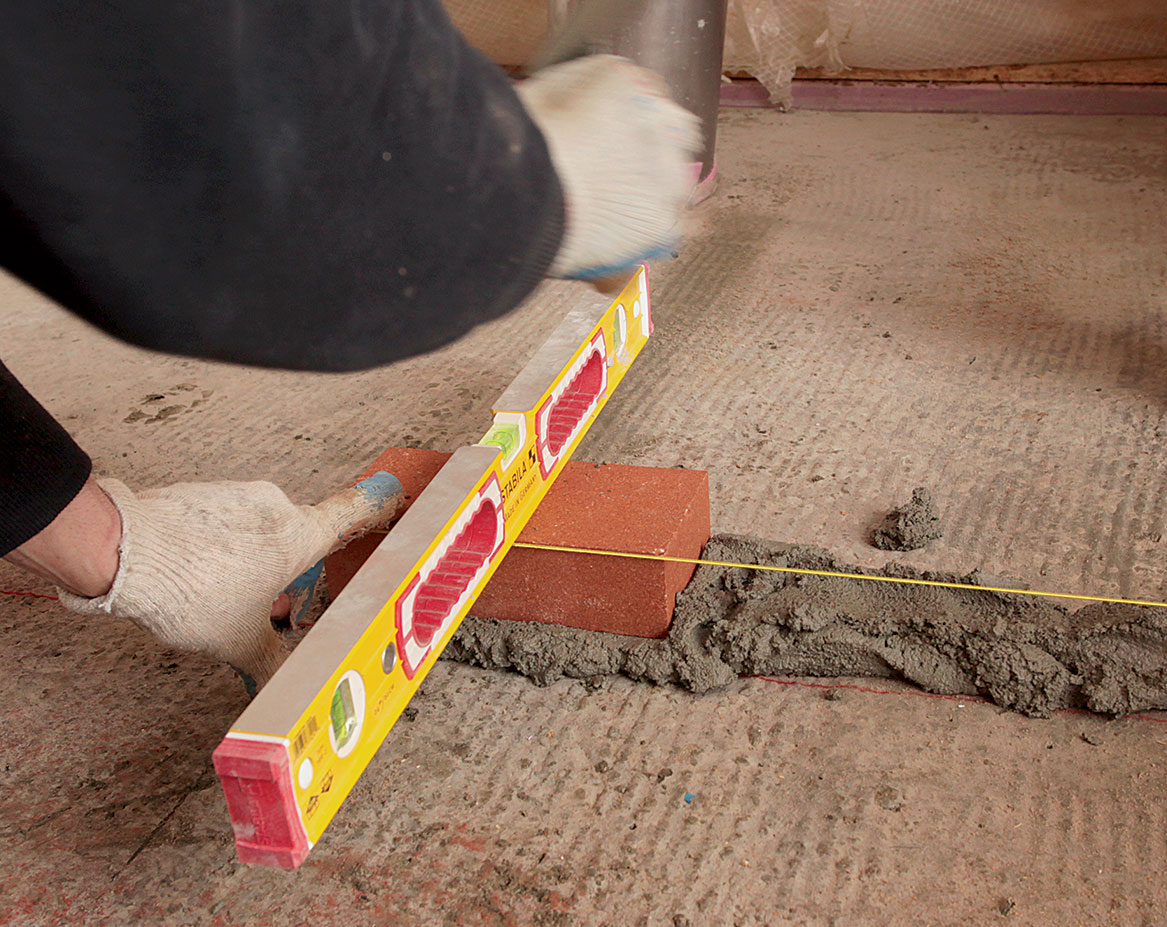
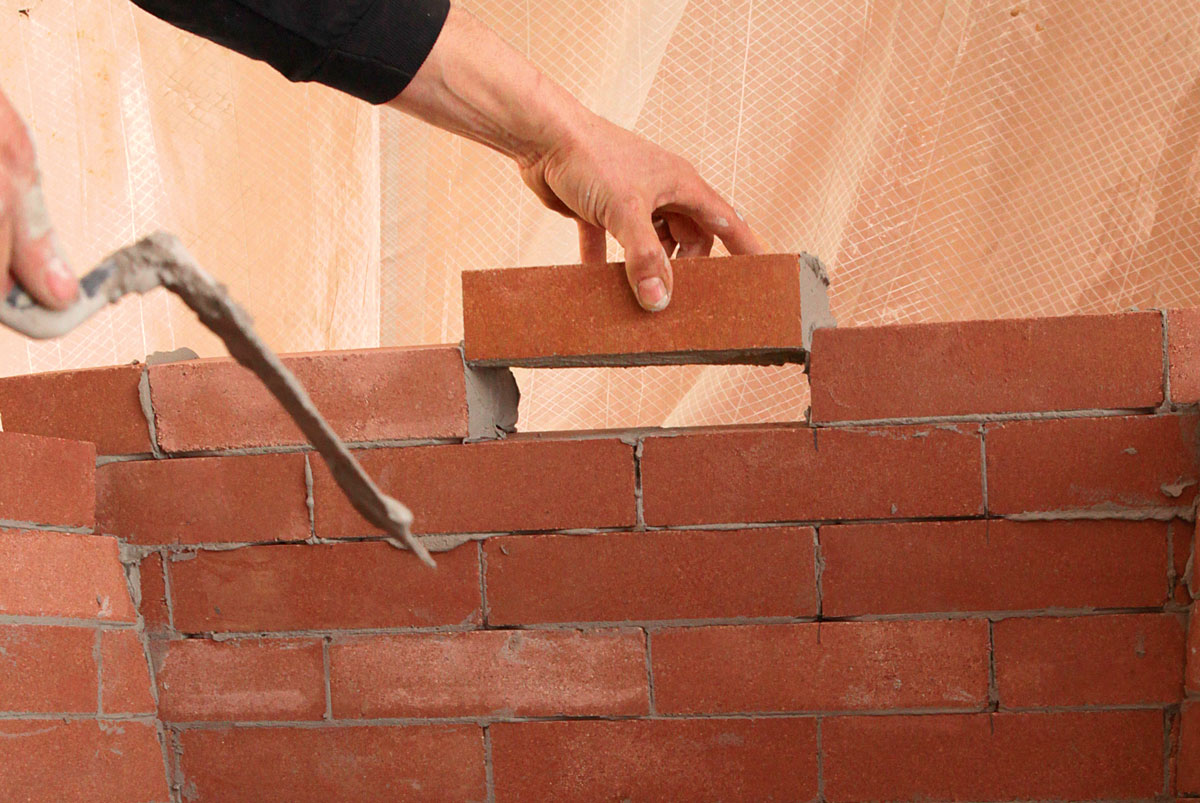
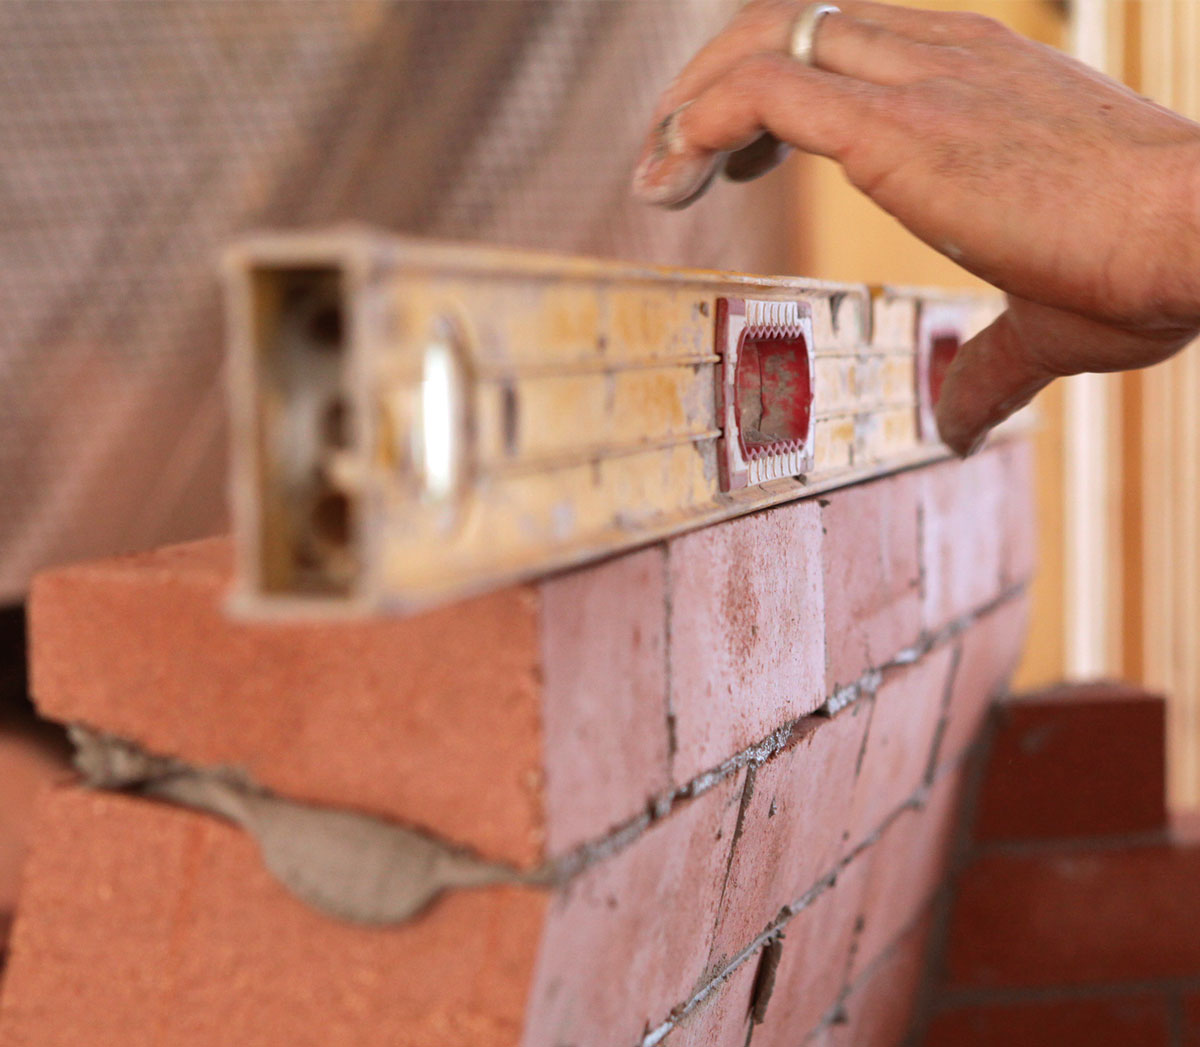
Mark the center. Measure off of the adjacent subfloor and mark the centerline of the firebox perpendicular to its front edge.Work from the center out. Lay the end of the first brick for the hearth on the centerline, and level it both along its length and width.Line and stick. Use a stringline as a guide to keep the bricks in line and in plane as they’re tapped down to the proper elevation.Stay on bond. Mark the center of a brick in the preceding course to help keep the bond pattern perfect. Keep joints tight at about 1⁄16 in.Stay on bond. Mark the center of a brick in the preceding course to help keep the bond pattern perfect. Keep joints tight at about 1⁄16 in.Backer brick beyond. Use firebrick and refractory mortar in areas of the firebox exposed to fire, and less expensive backer brick and Type-S mortar in areas that don’t get direct fire exposure.
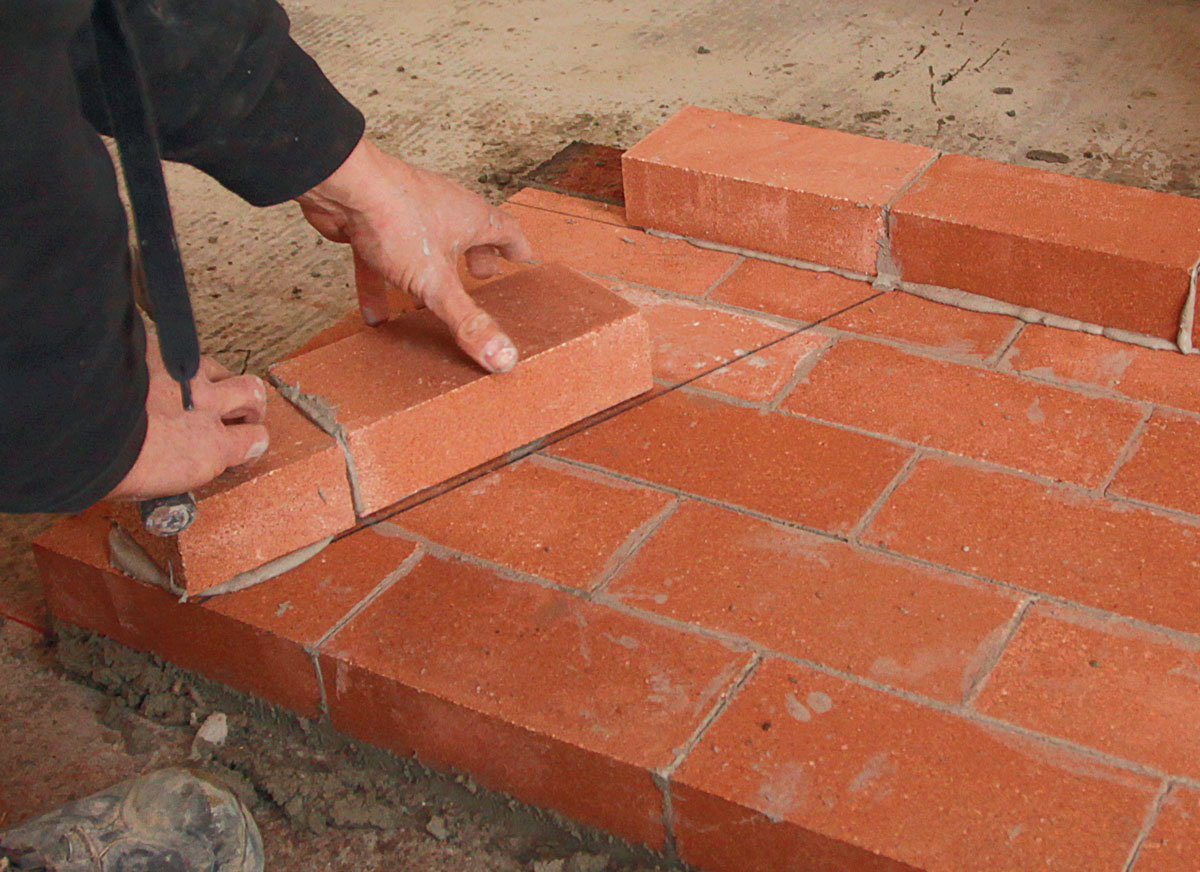
Build the firebox
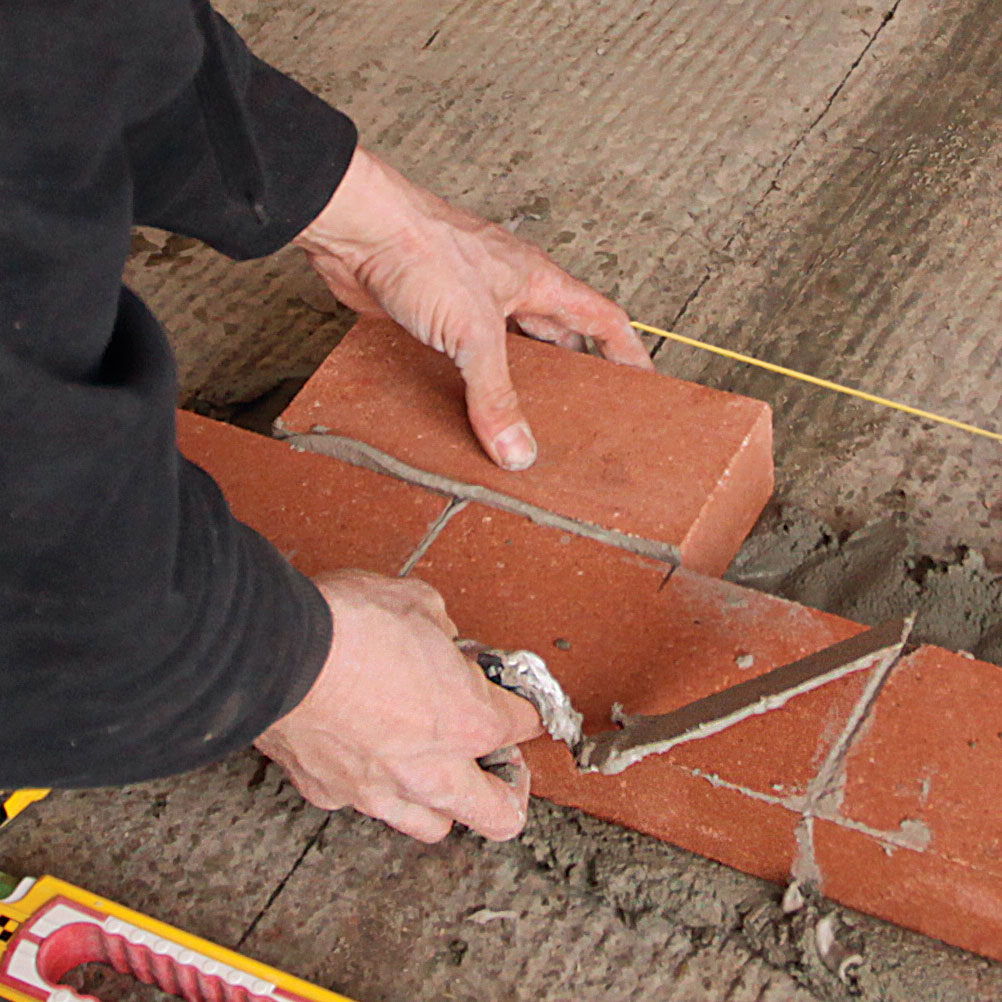
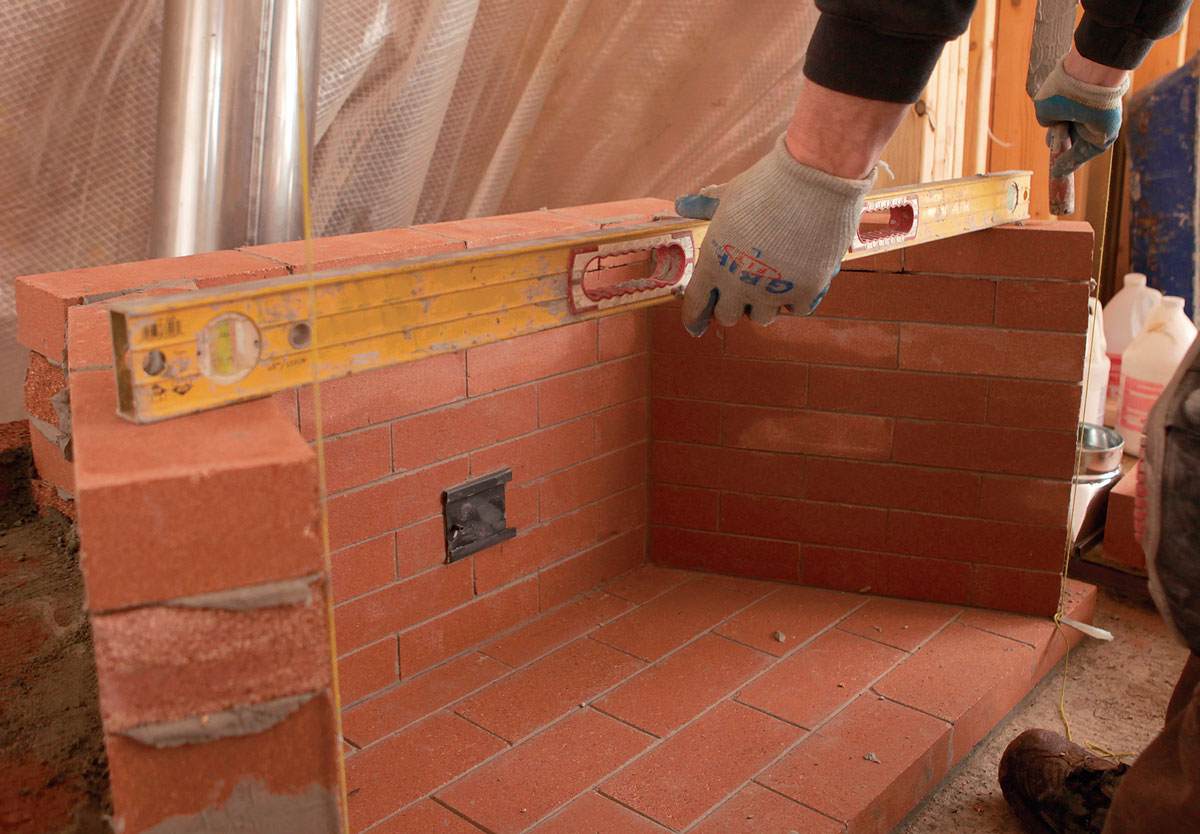
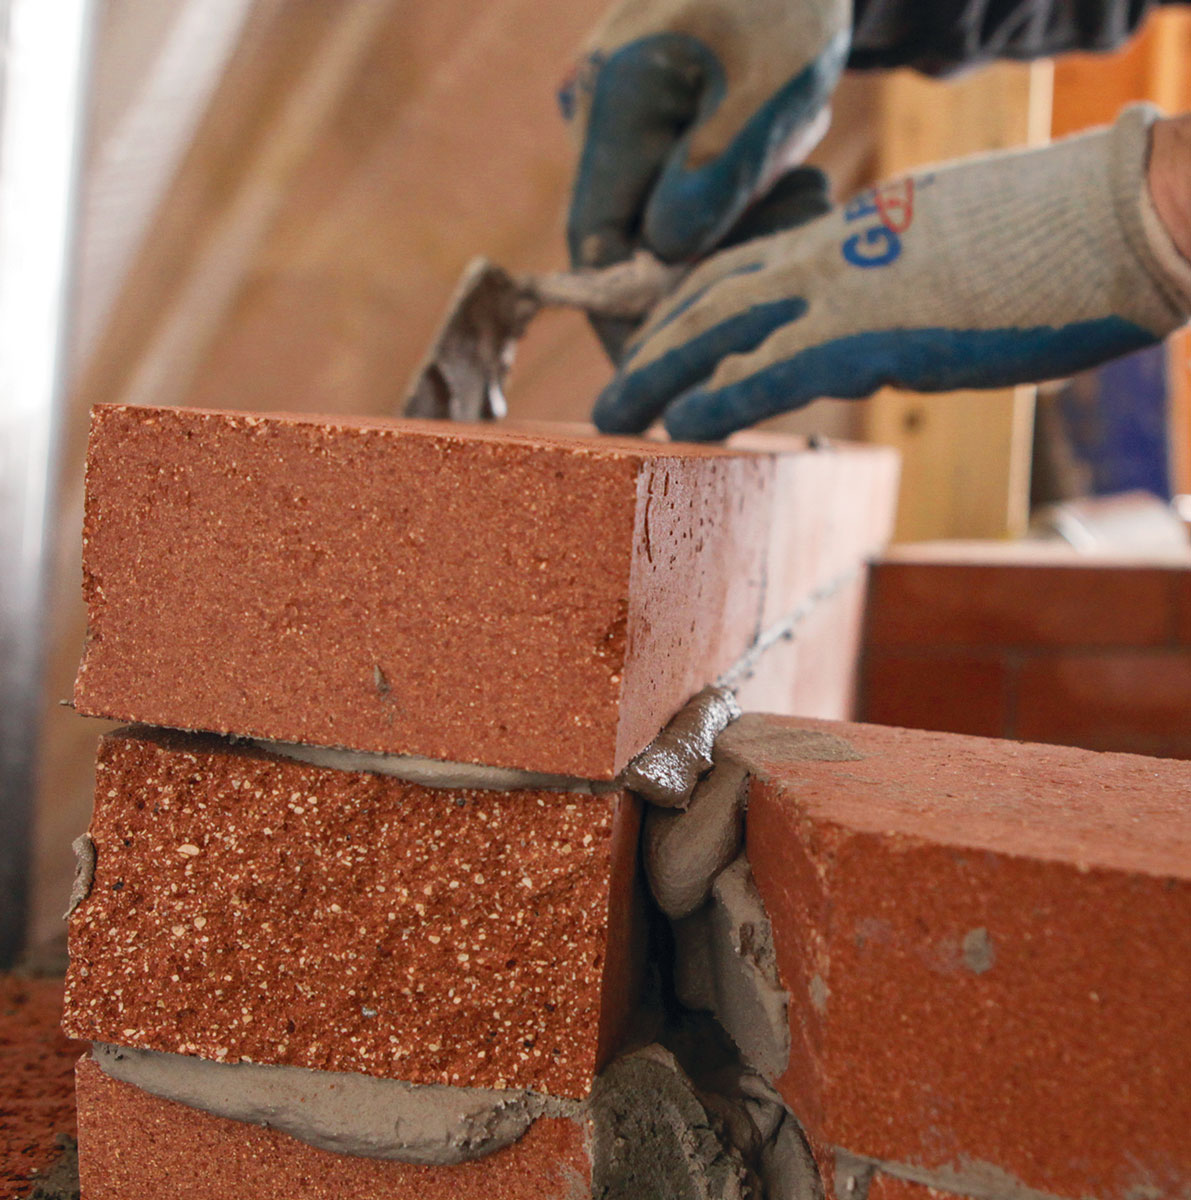
The key here is to keep everything symmetrical. Measure from the center out to make sure the sidewalls leave an equal exposure of the bricks in the hearth below.
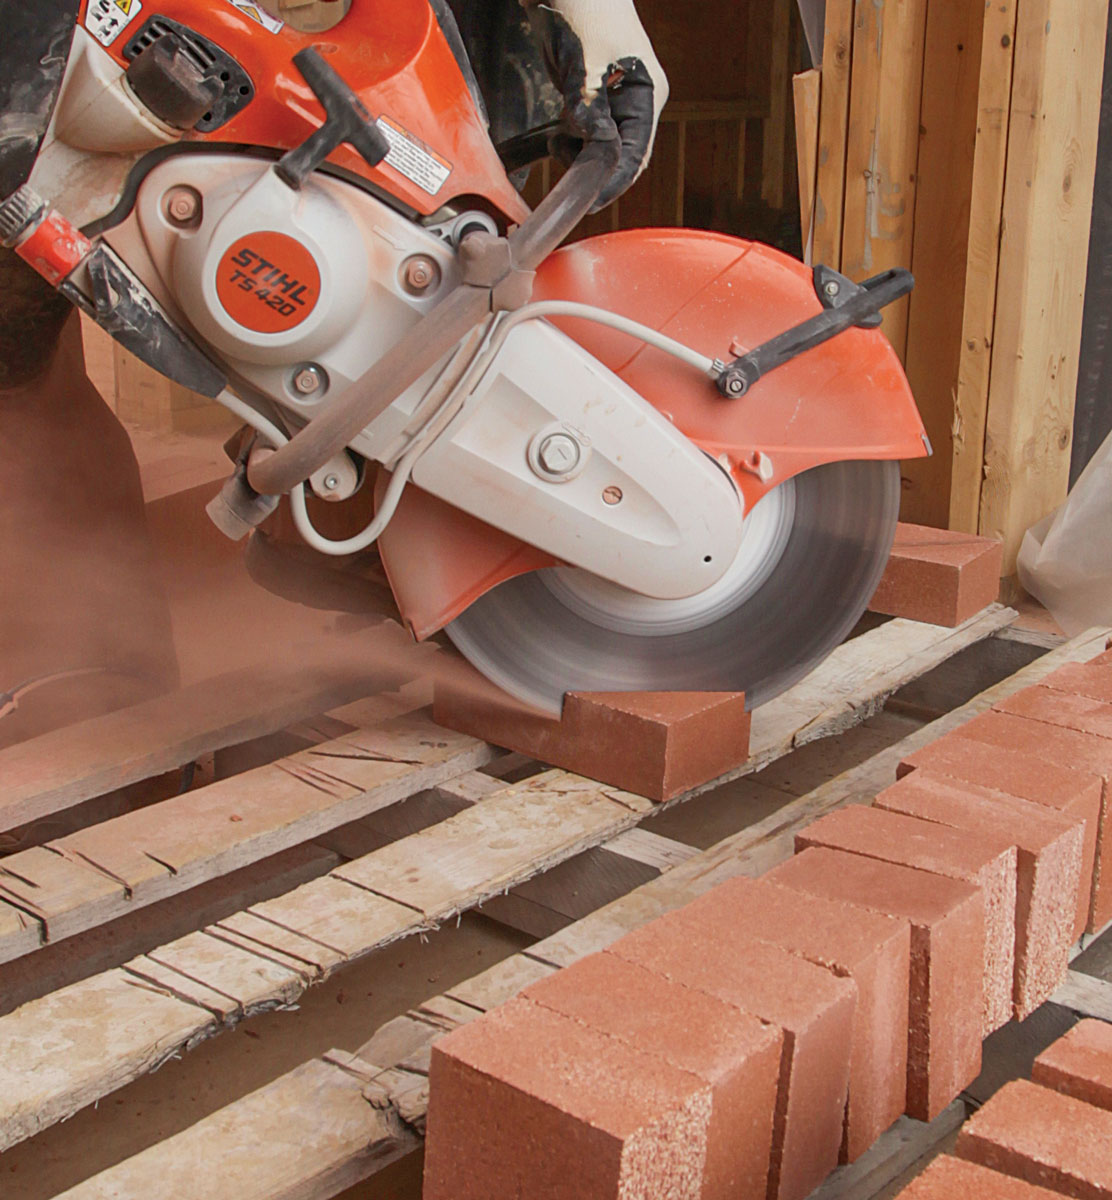
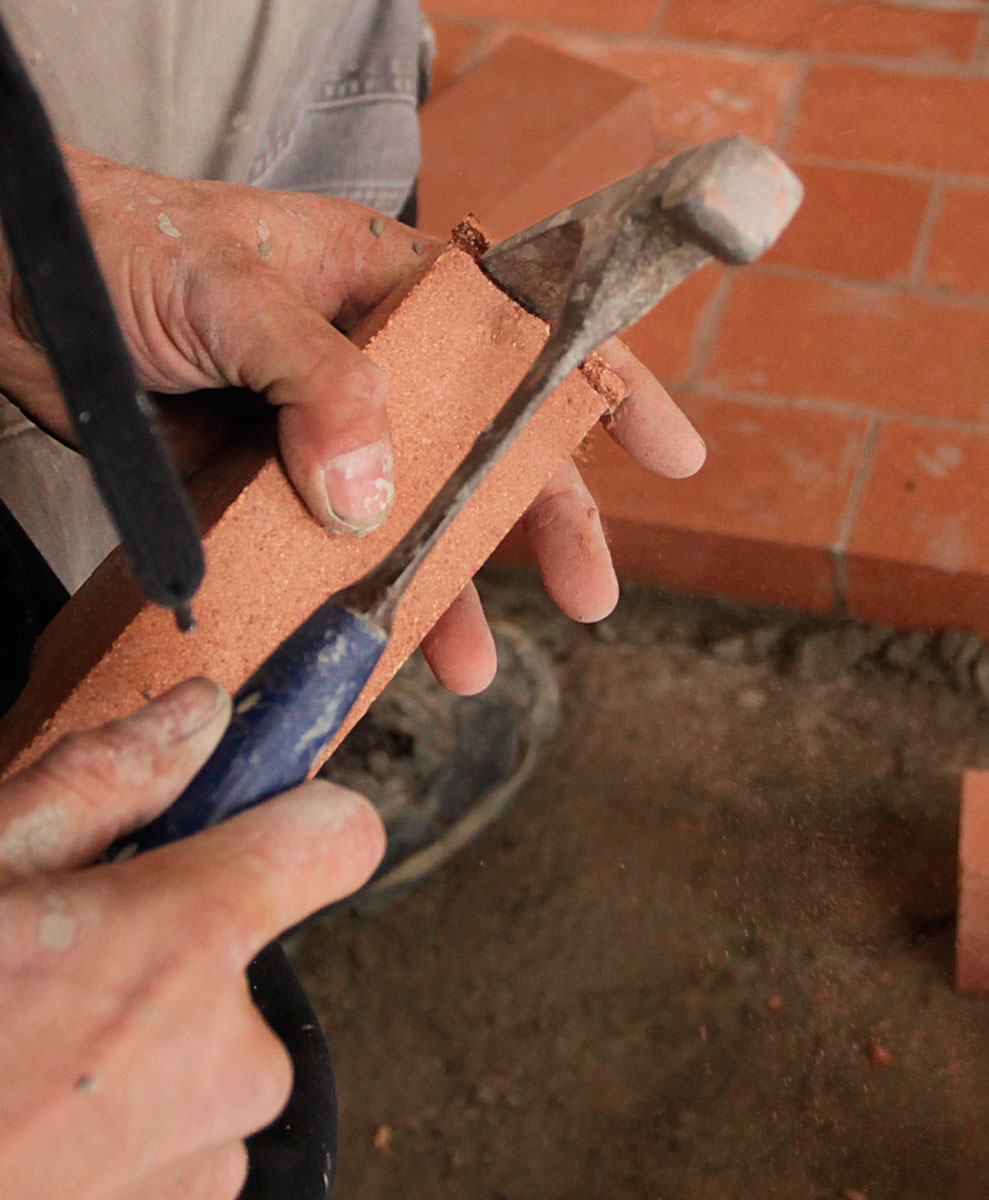
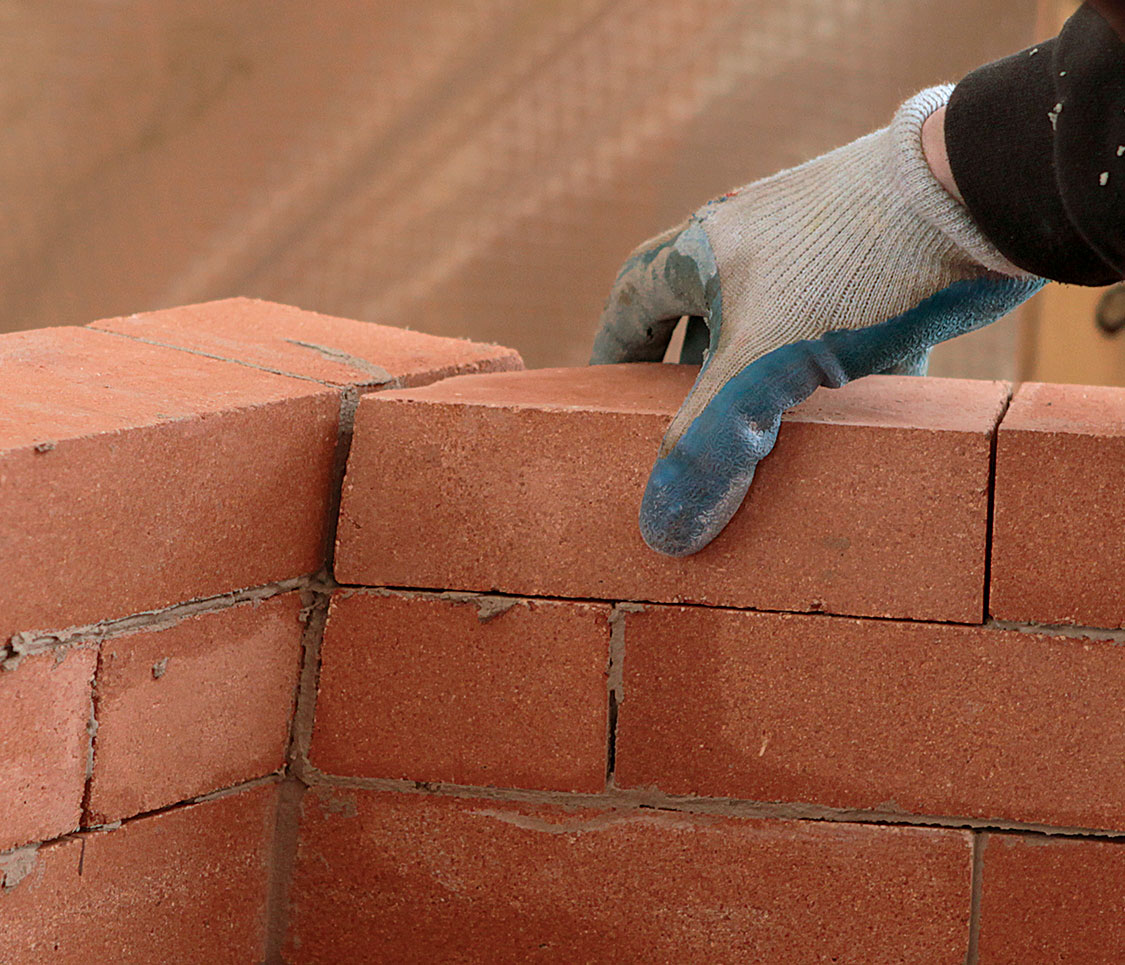
Angle in. The sidewalls should ideally face the room, not each other, to radiate heat into the room. Dry-lay in the first course on one side to establish the angle, then replicate it on the other side.Back, then sides. For each course, lay the back first, and then lay the sidewalls, starting at the front edge and working back.Precut sidewall bricks. Use a power saw to cut half-bricks and miters for the sidewalls. Use a rafter square to mark straight lines for the cuts.
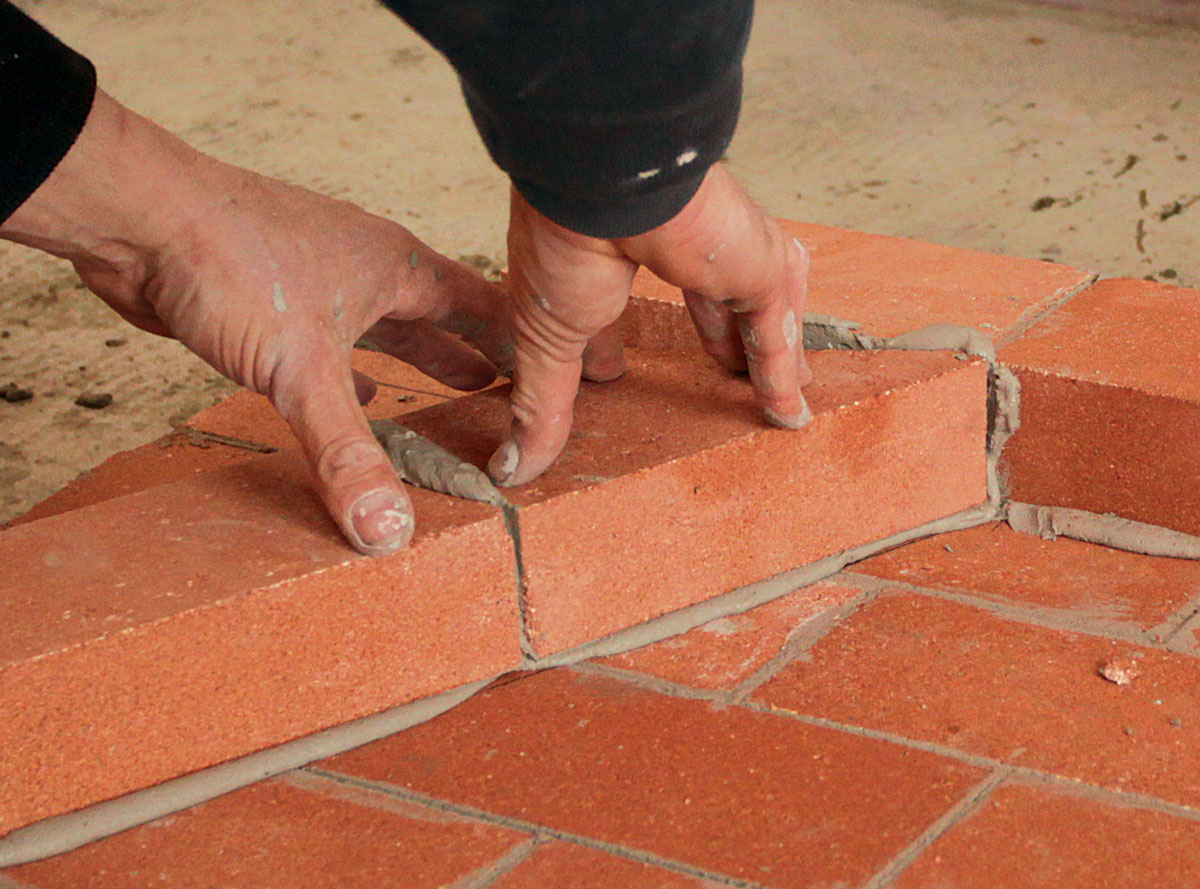
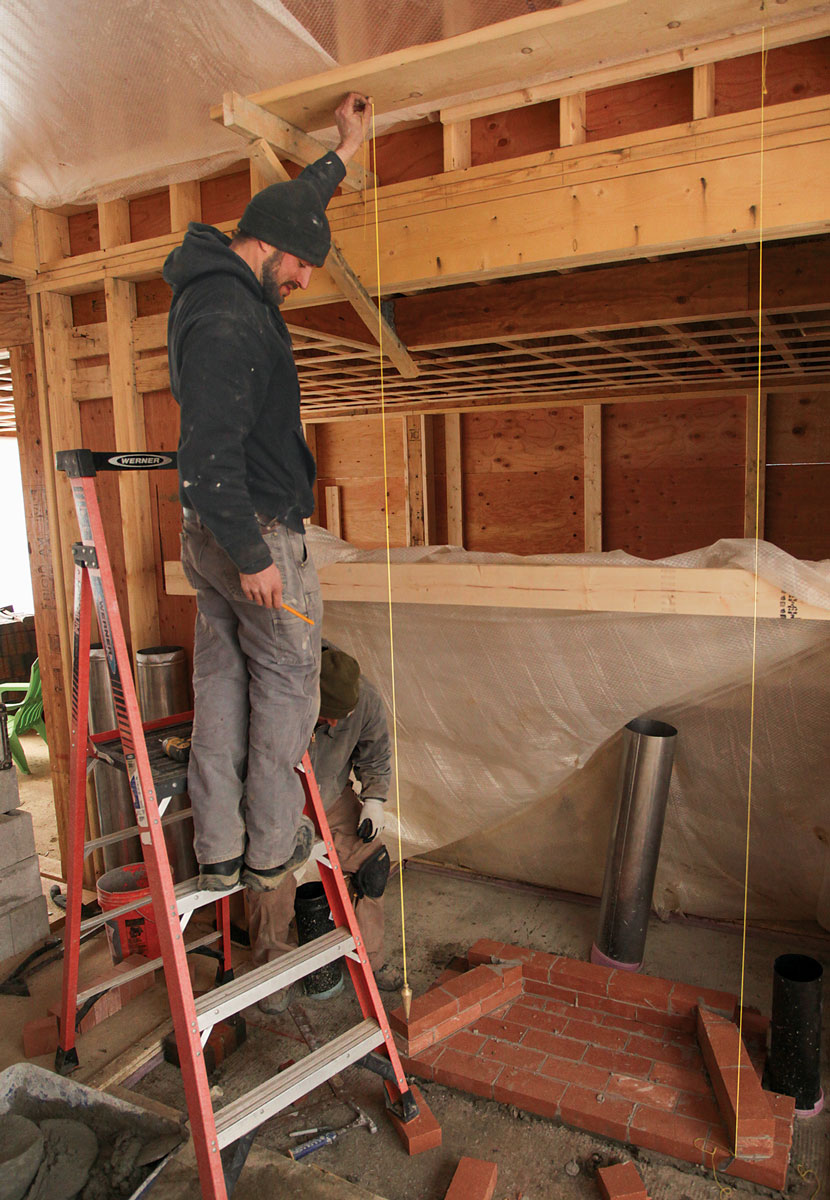
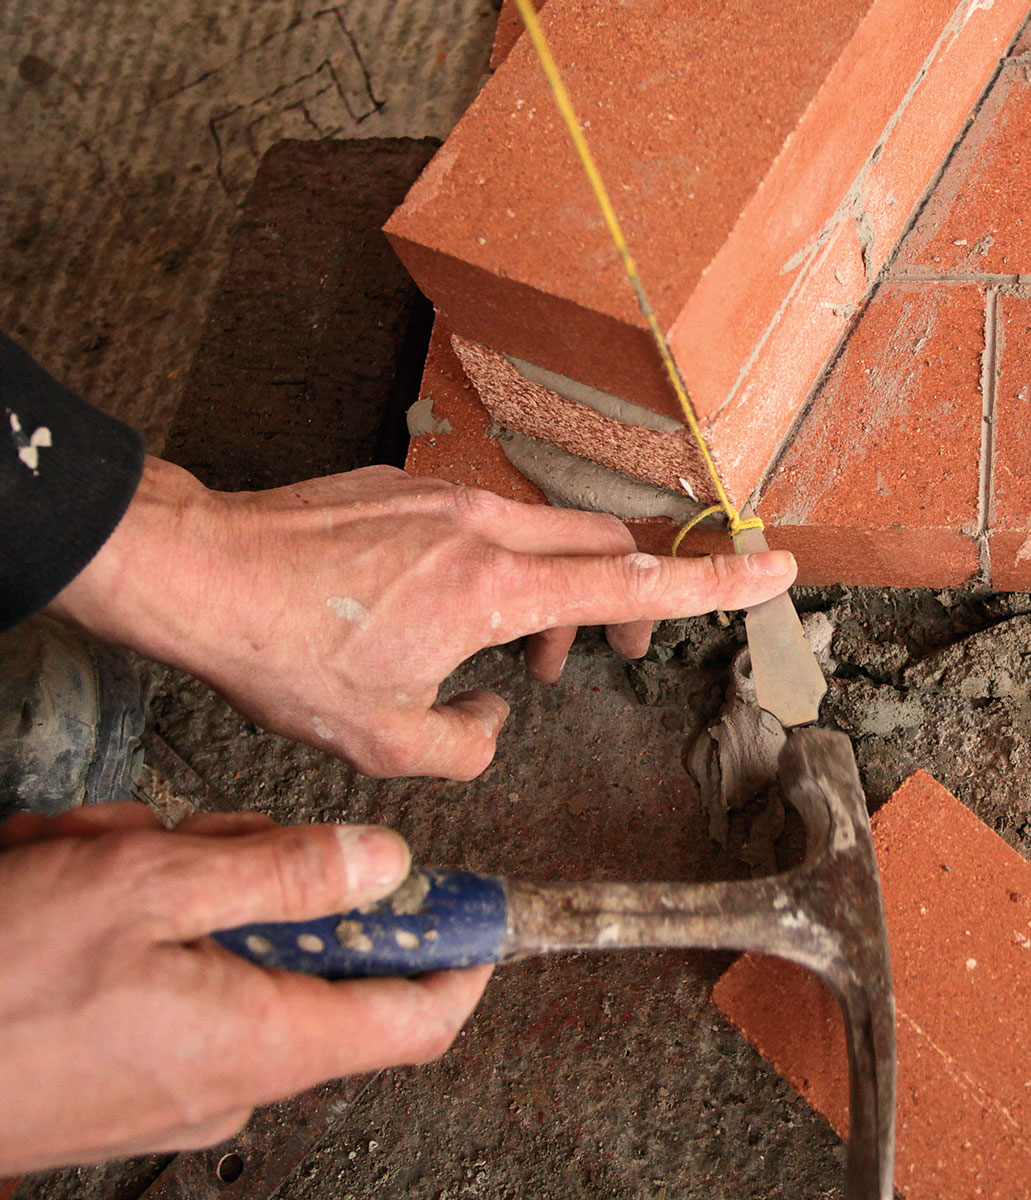
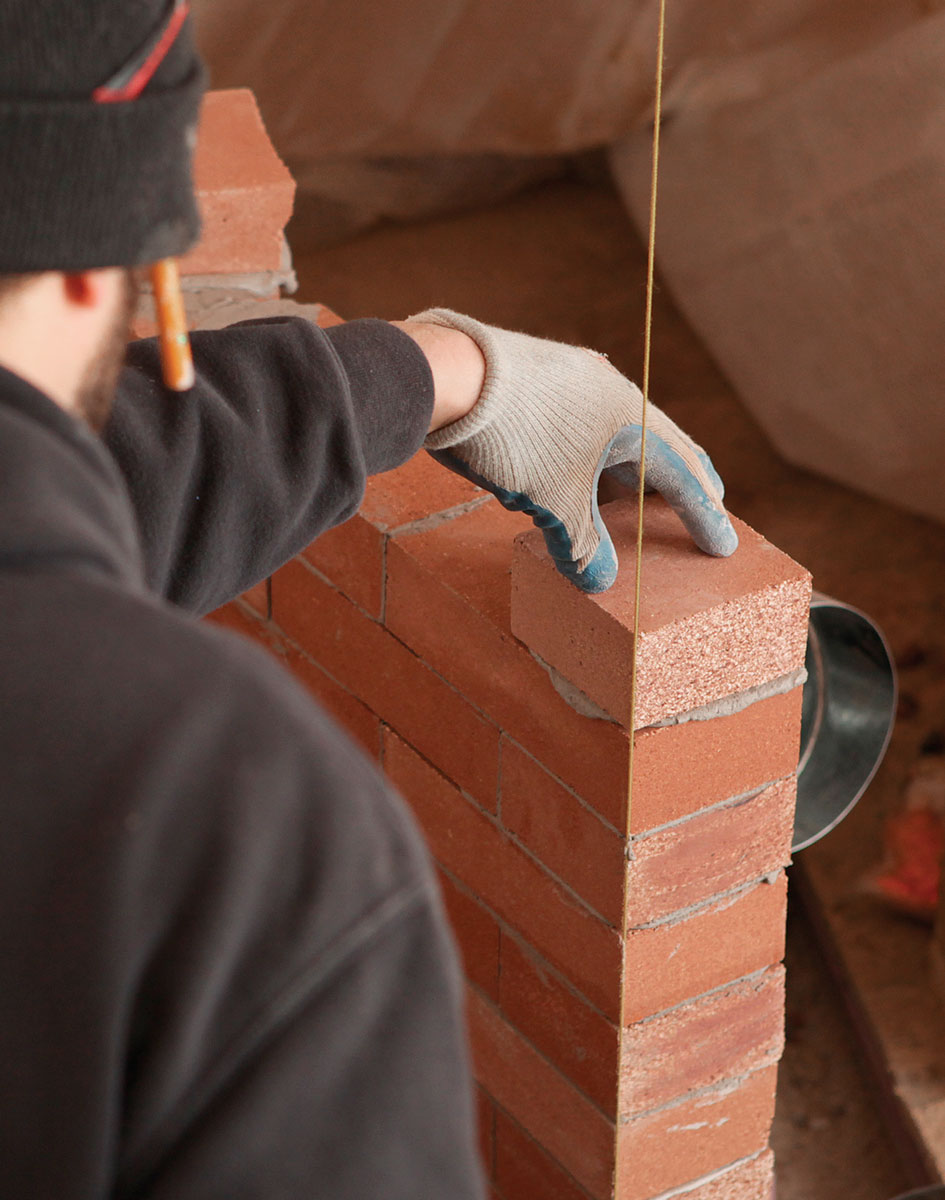
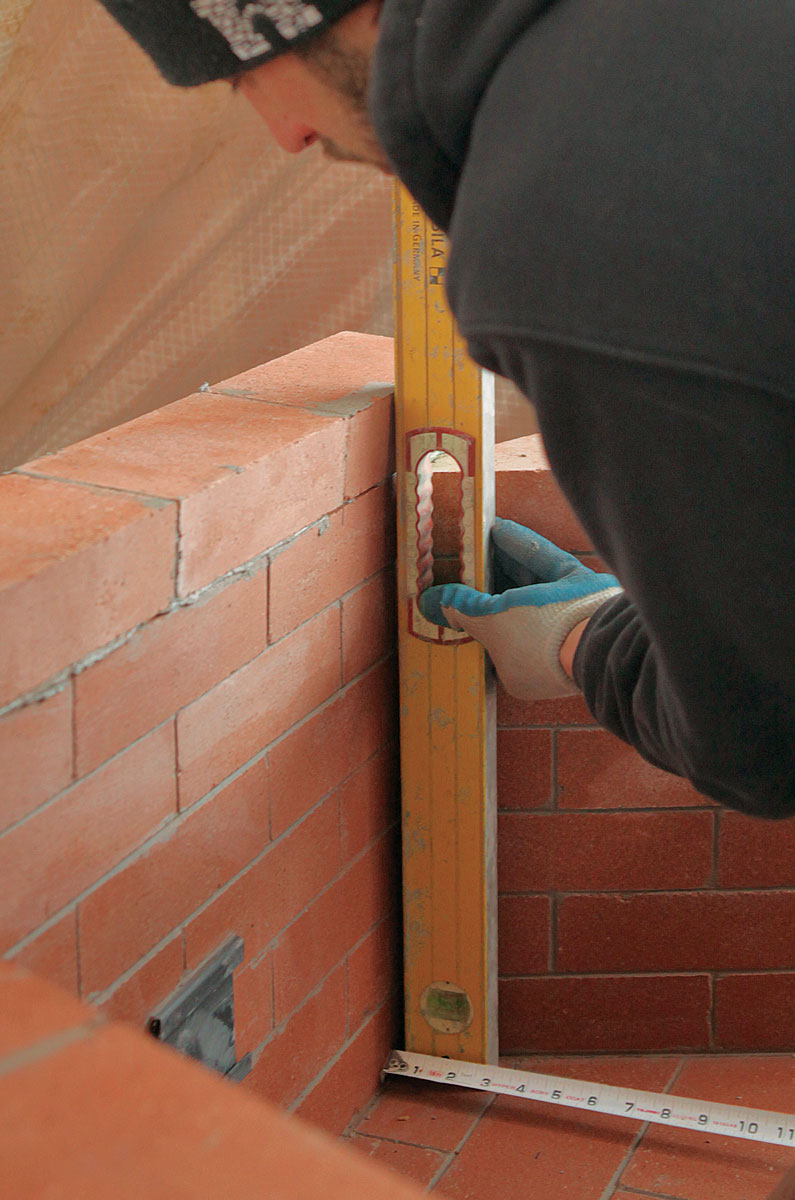
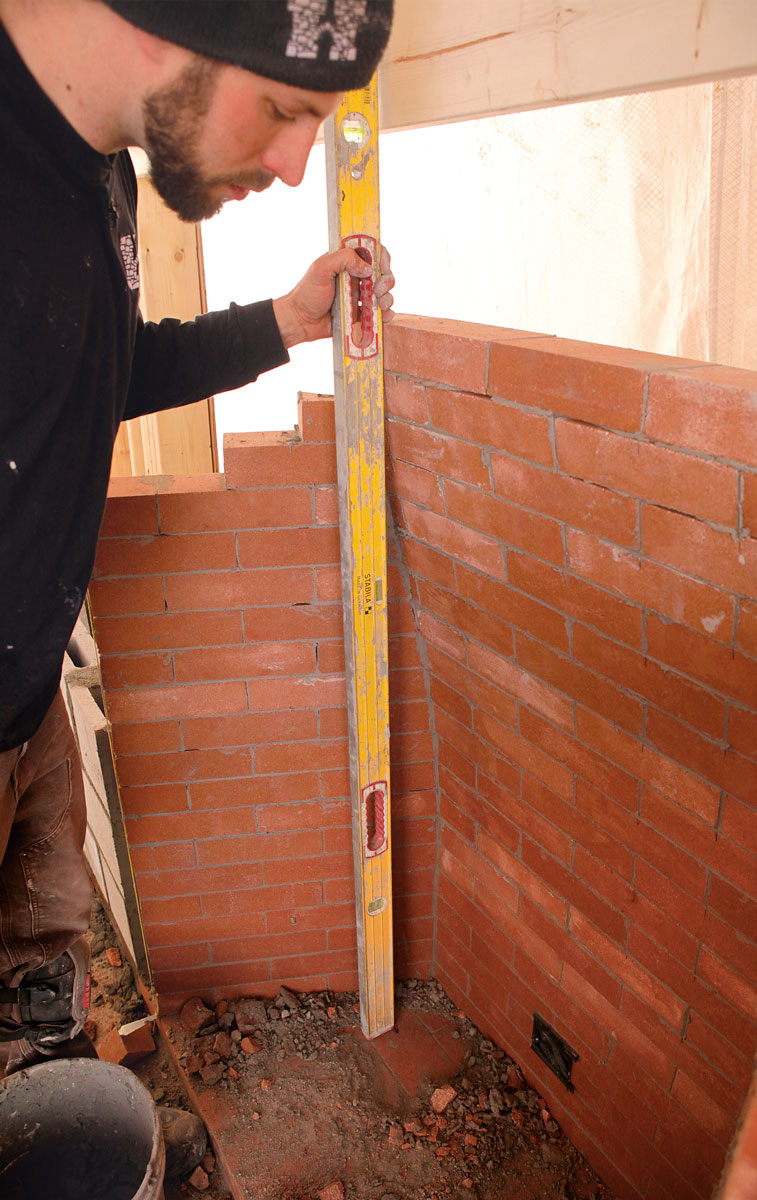
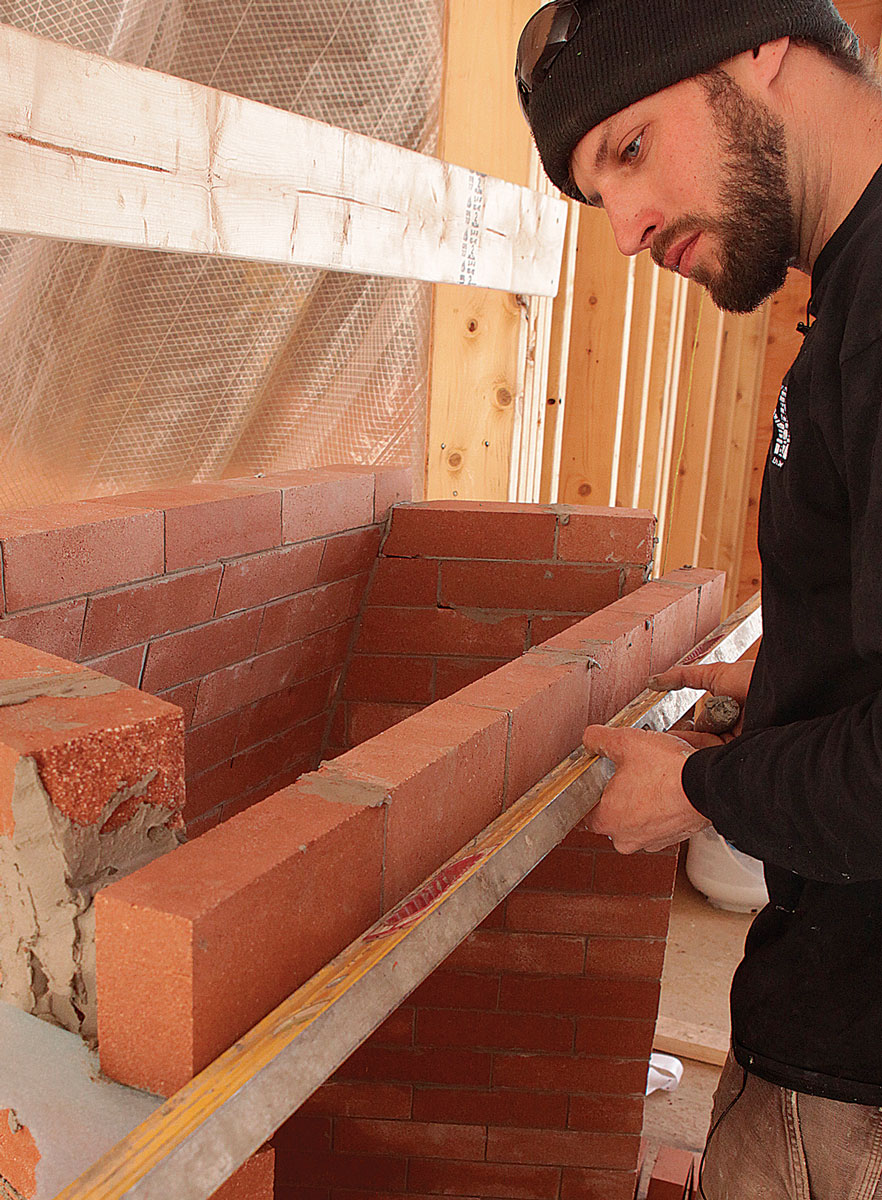
Fill the gaps. Trowel refractory mortar into the gaps where the sidewalls meet the back.Trim to fit. Use a brick hammer to trim the miters of bricks that butt into the back wall. Support the back of the cut with your hand.Keep it level. Use a level frequently to ensure the walls are level, in plane in every direction, and plumb.String for plumb. Use stringlines where possible. Here, stringlines plumbed down from a temporary outrigger aid in laying the front edge of the sidewalls plumb. Screws hold the lines in place above, and line pins secure them under the first course of bricks.
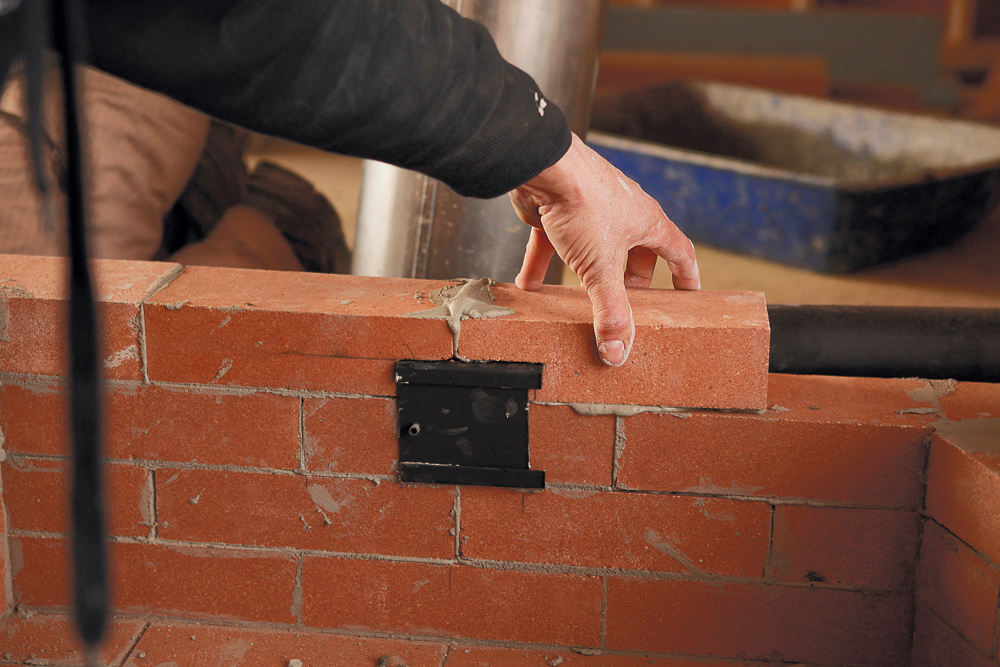
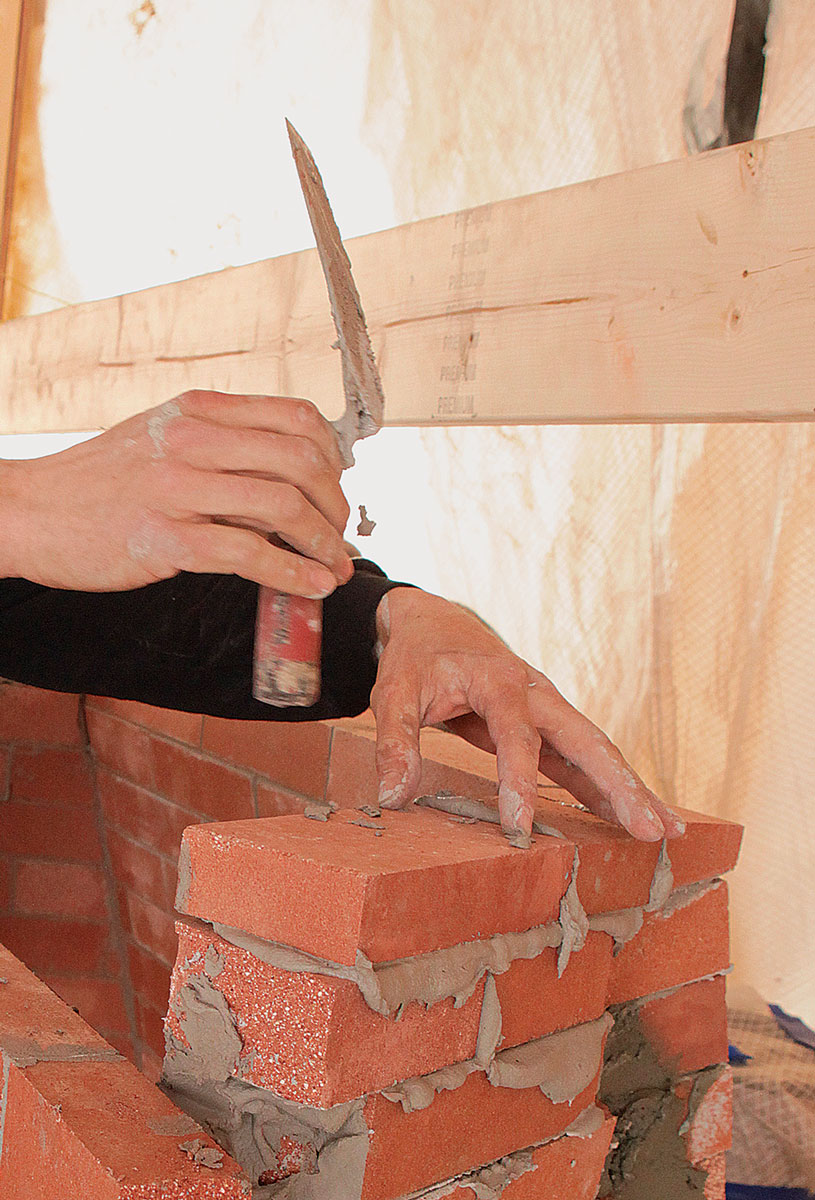
Get some air. If makeup air isn’t supplied to a room mechanically, supply vents are required in the firebox. Follow the manufacturer’s instructions for supply-vent installation.Level across. Lay a long level across the sidewalls for each course, and tap down bricks as necessary to keep their heights even.Strike that. Fill any gaps in the joints and strike them after the mortar has set up slightly. Use the thin edge of the brick jointer to recess the joints roughly 1⁄16 in.
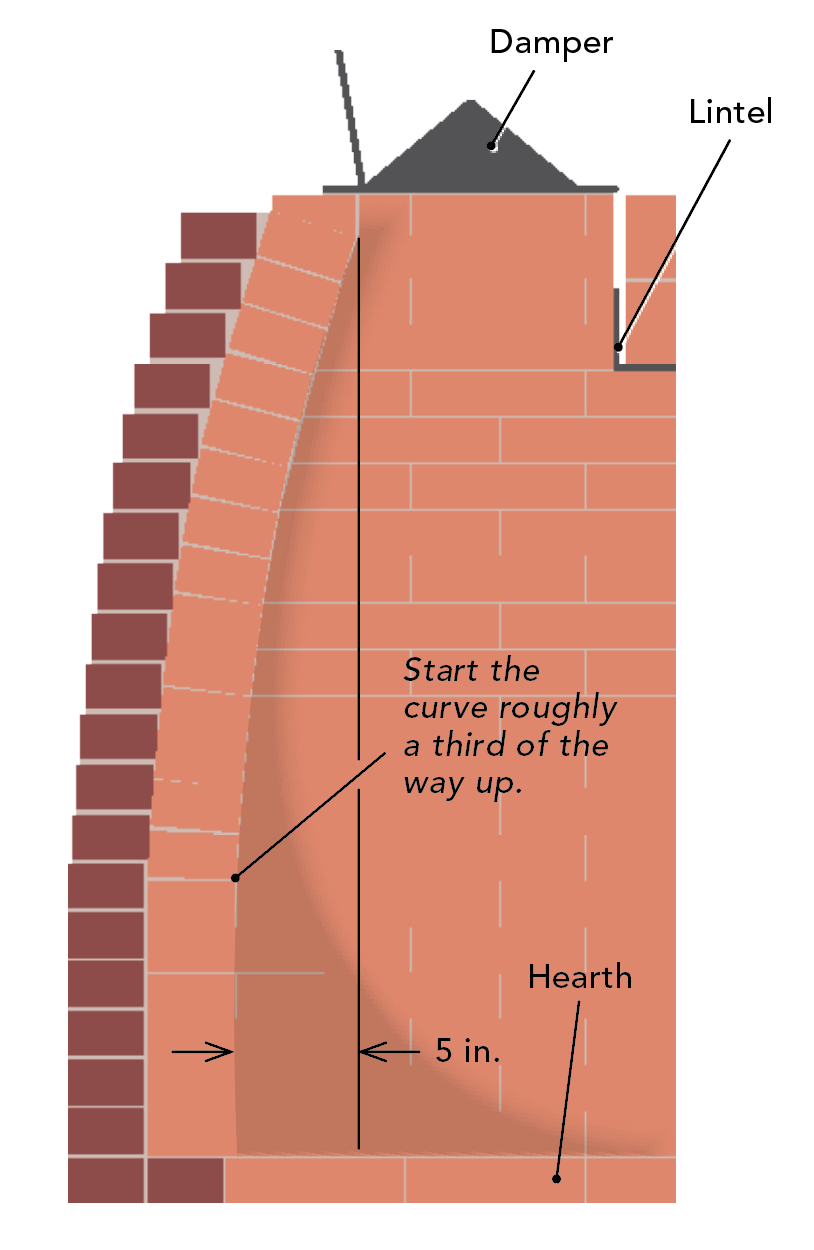
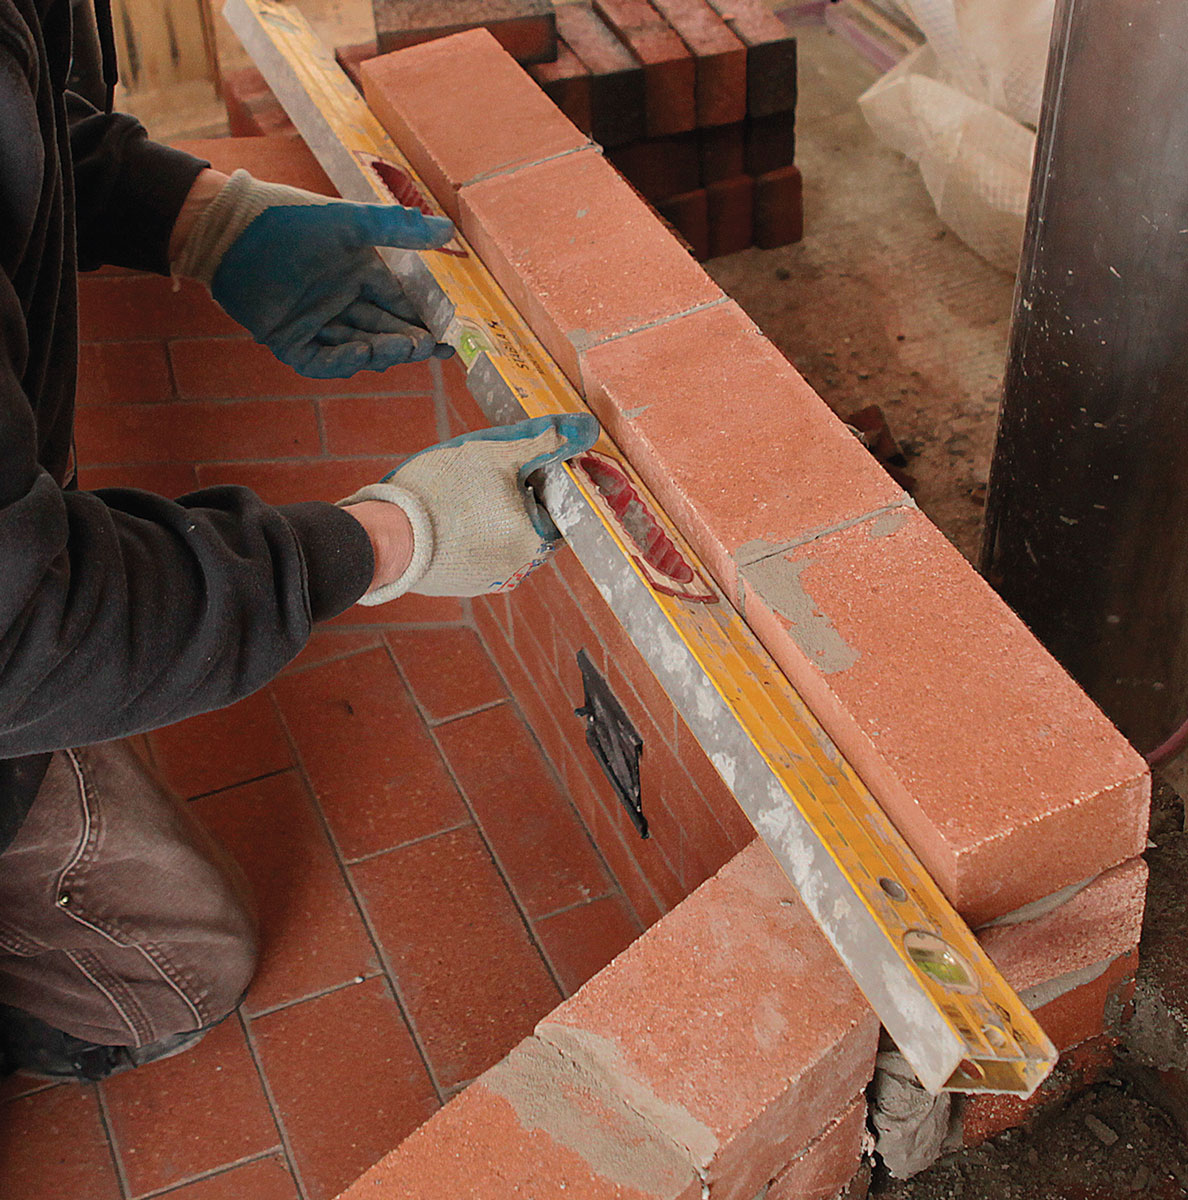
Curve the back
The back walls of standard-depth fireboxes typically lean toward the front to carry the damper. Creating a curve provides an elegant, flared appearance.
Profile in curvage
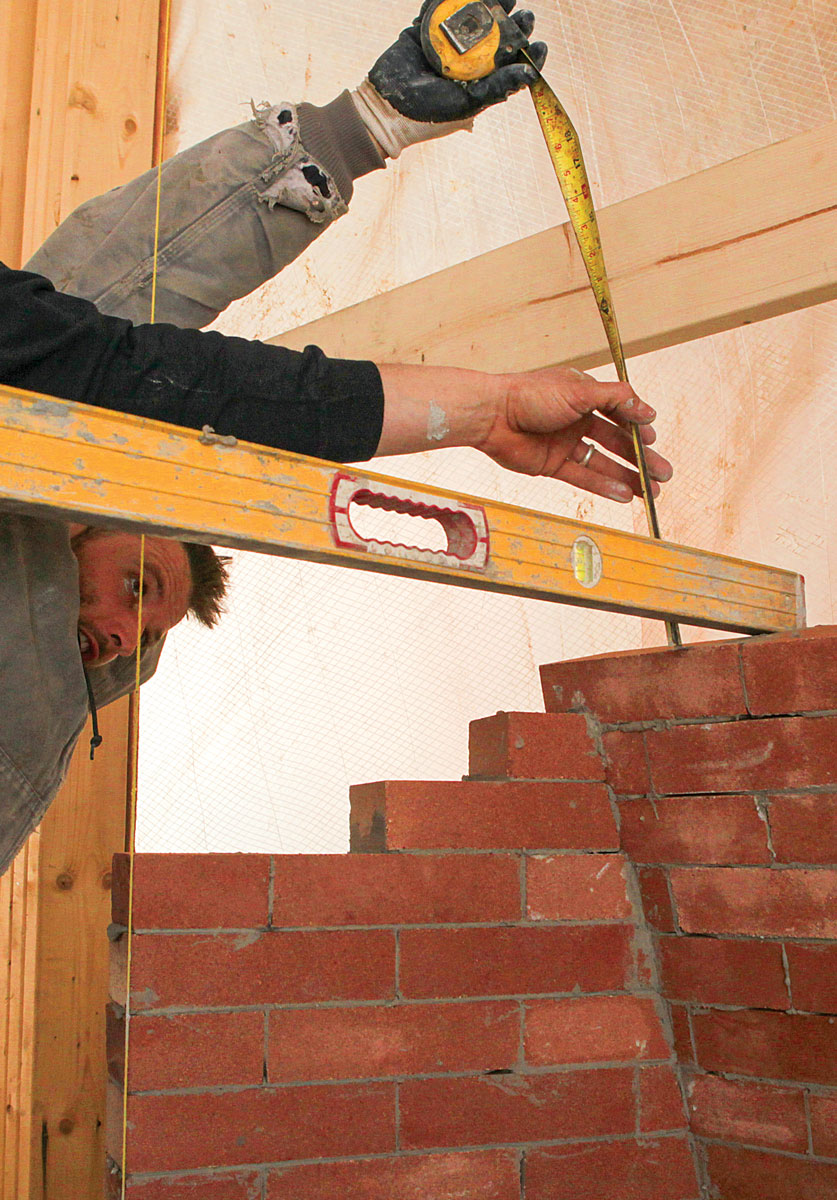
Start off the curve slow, as the tilt of lower courses adds to those above it. If the curve starts to steep and then lessen, the joint between the back and sidewalls will appear as an S-shape. For beginners, building to a template can be handy.
End of the curve. Determine how far the back wall has to come in to carry the damper, and mark it on the hearth at both ends to guide the curve’s construction.Tilt it slightly. Start the curve at the seventh course by laying the bricks with joints slightly wider at the back—1⁄32 in. or so to start—than the front.Check your progress. Use a level and tape measure on both ends of each course to see how far the curve protrudes into the box to keep it even and check progress.Keep it plane. Hold the level against the face of the walls to ensure the bricks in each course are in plane with each other.Follow the curve. Trim the sidewall bricks to follow the lean of the back wall and test their fit before mortaring them in.The sidewalls get progressively shorter in length as the curve goes up, and the sidewall bricks that abut the back become shorter and shorter.Head lock. Work from the outside in as the curve gets steeper; the mortar in the head joints—those on the ends of the bricks—helps keep individual bricks from sliding off. The exposed bed joints in the curve should have the same thickness as the bed joints in the courses that were laid level.Stop the curve. Use a level and a tape measure to determine how much needs to be trimmed from the bottom of the last course of bricks to level the back wall.Top it off. Custom-cut and lay the last course of the firebox’s back wall level and plumb to carry the damper.Lay sidewall bricks as necessary to stabilize the curve, but leave space for the lintel, and fill in the sidewalls level with the back wall after the lintel is set.
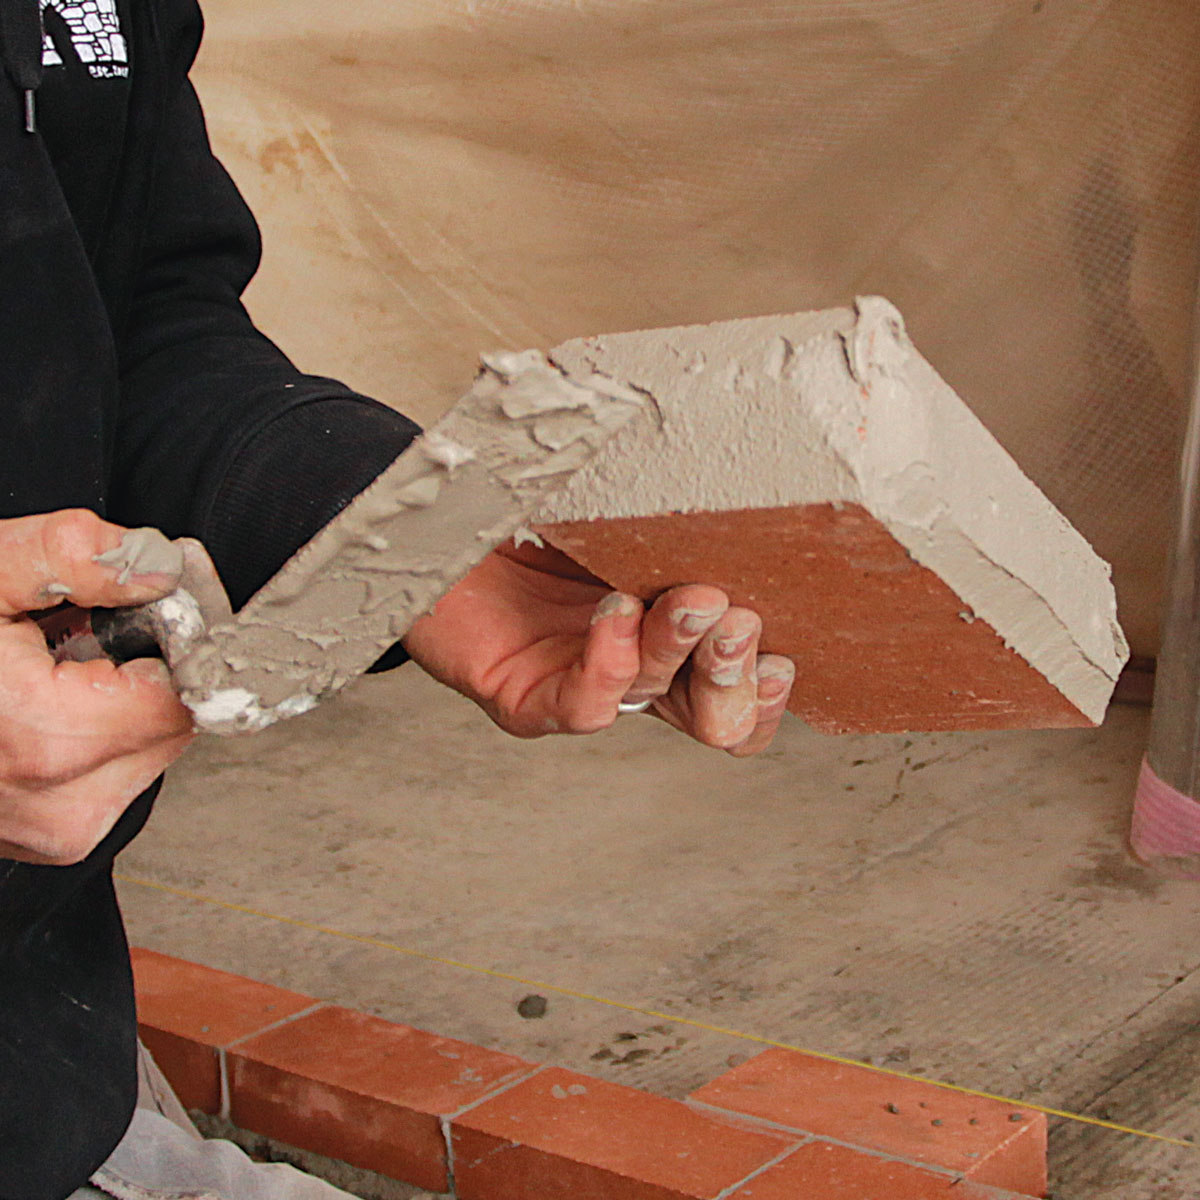
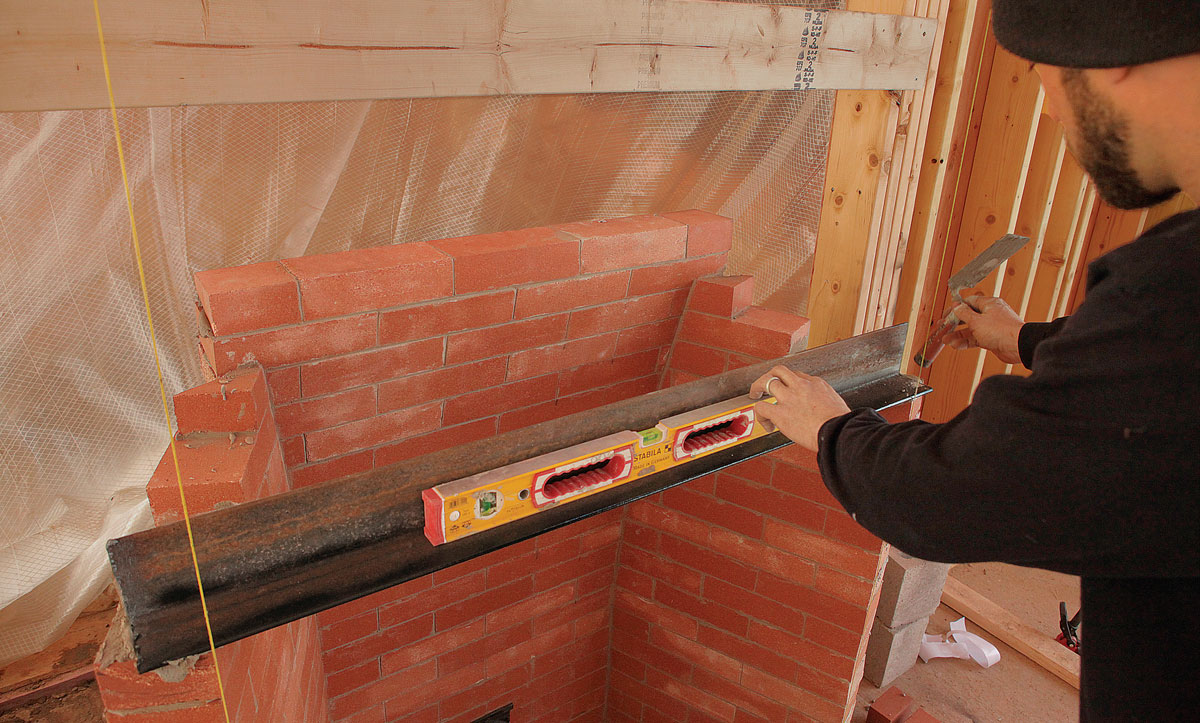
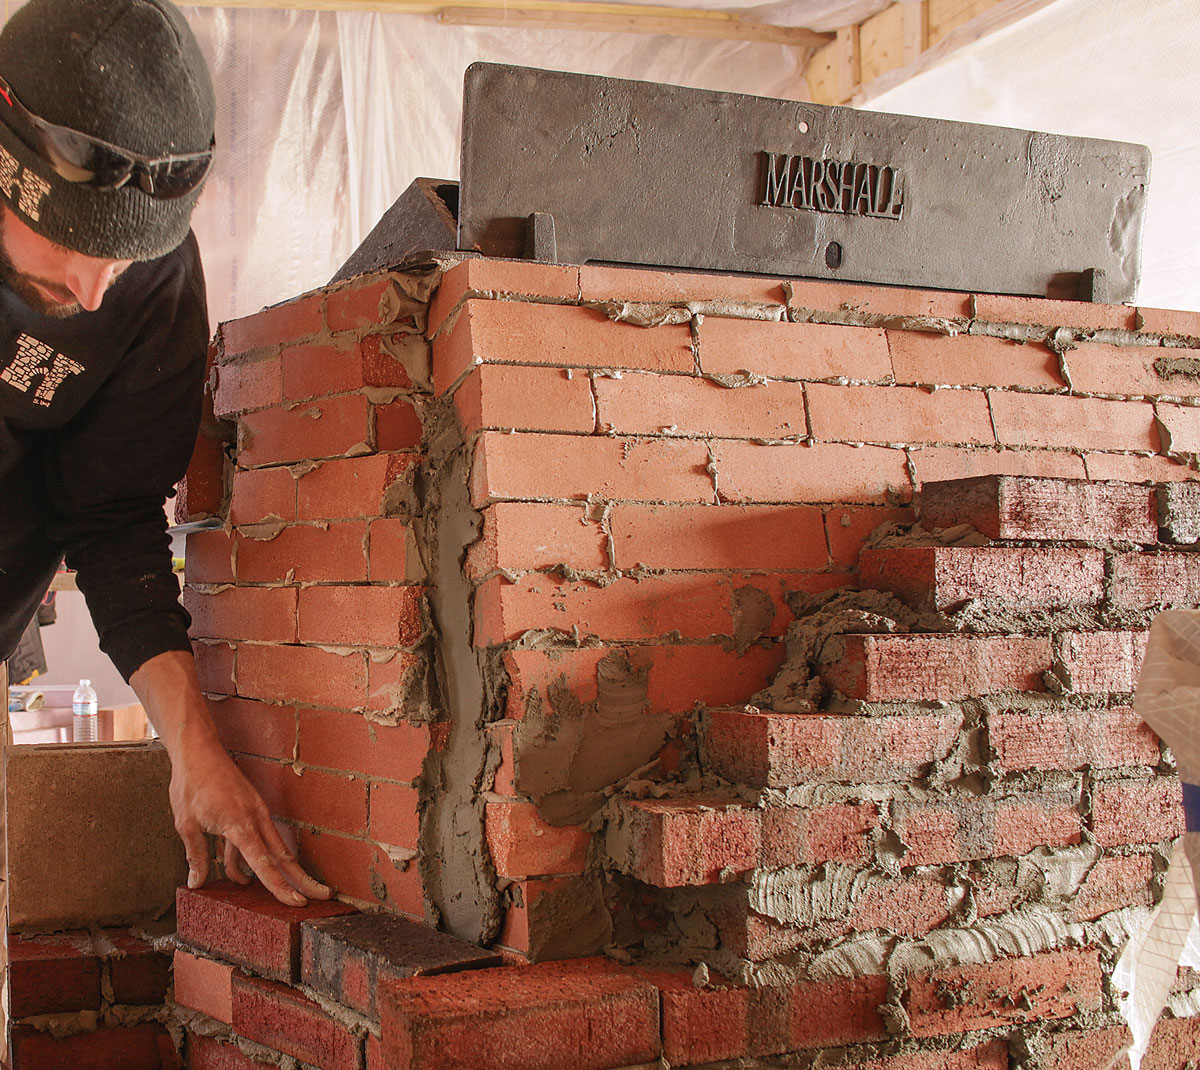
The firebox tops out with a lintel in front, which carries the weight of the masonry above, and a damper behind, which seals the fireplace from the flue above when not in use. The damper must sit at least 8 in. above the bottom of the lintel on standard fireboxes.
Hit the mark. The face of the top course should be plumb up from the mark on the hearth floor.
Add the lintel and the damper
The firebox tops out with a lintel in front, which carries the weight of the masonry above, and a damper behind, which seals the fireplace from the flue above when not in use. The damper must sit at least 8 in. above the bottom of the lintel on standard fireboxes.
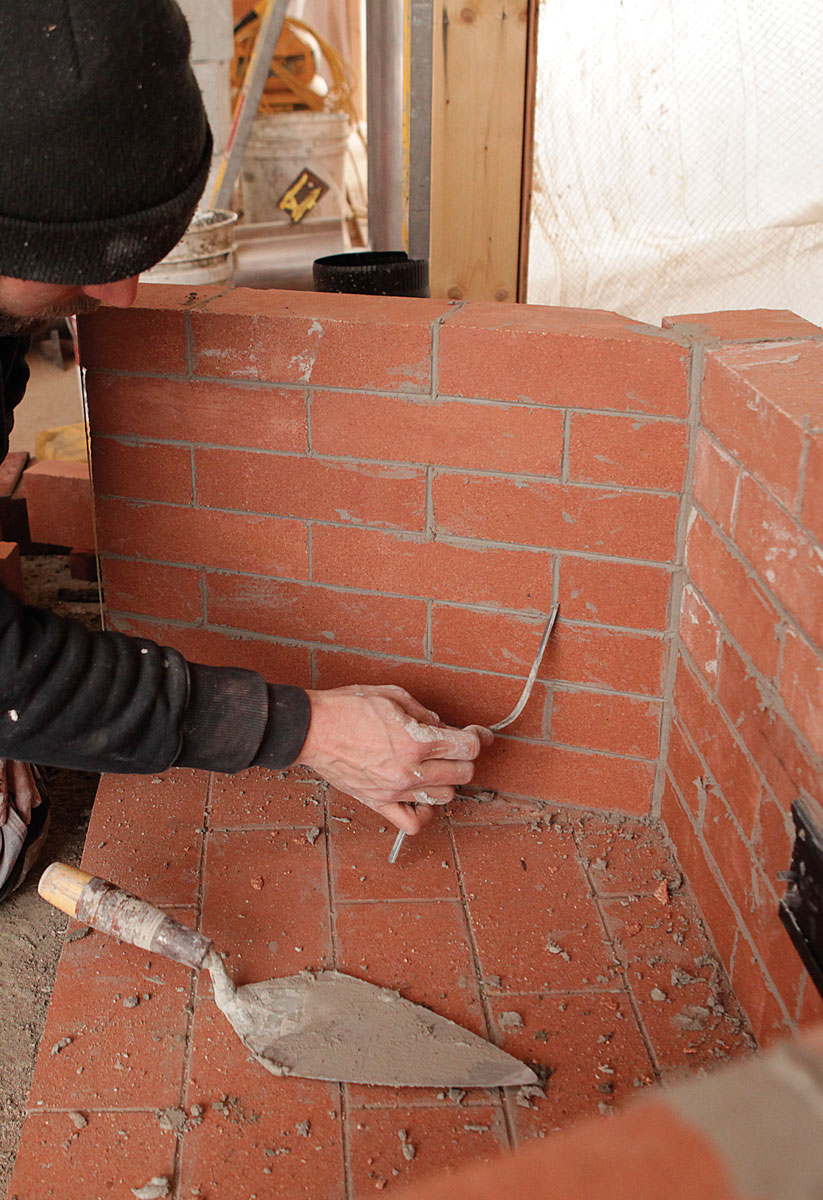
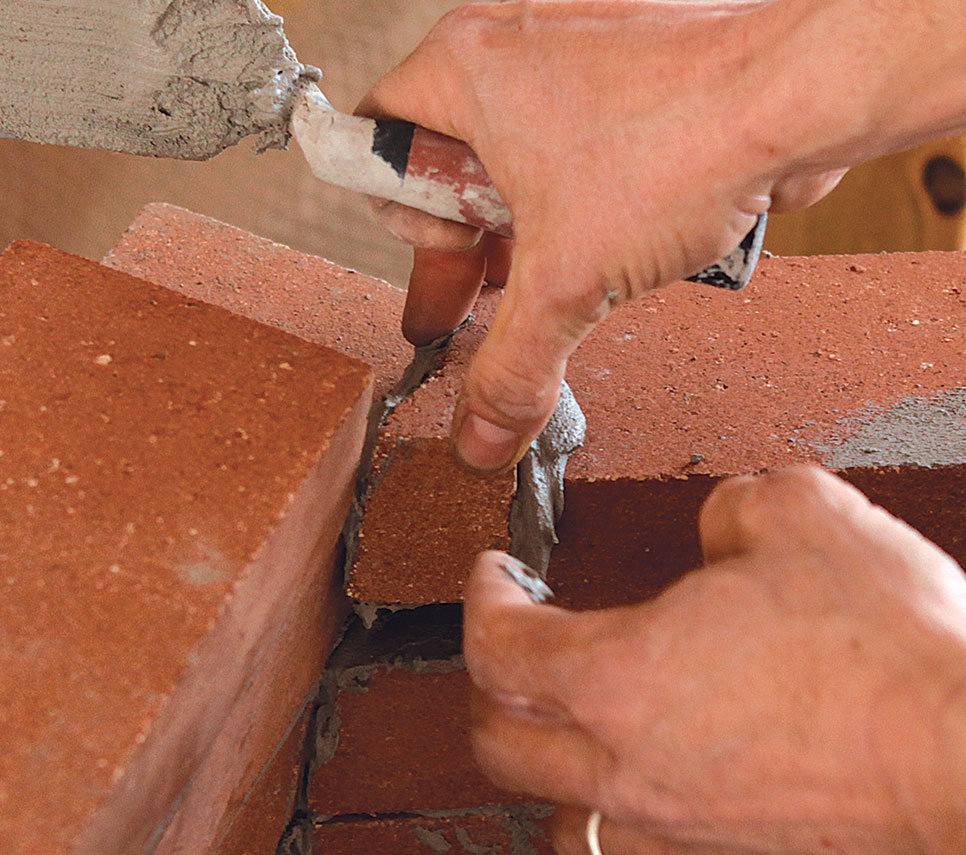
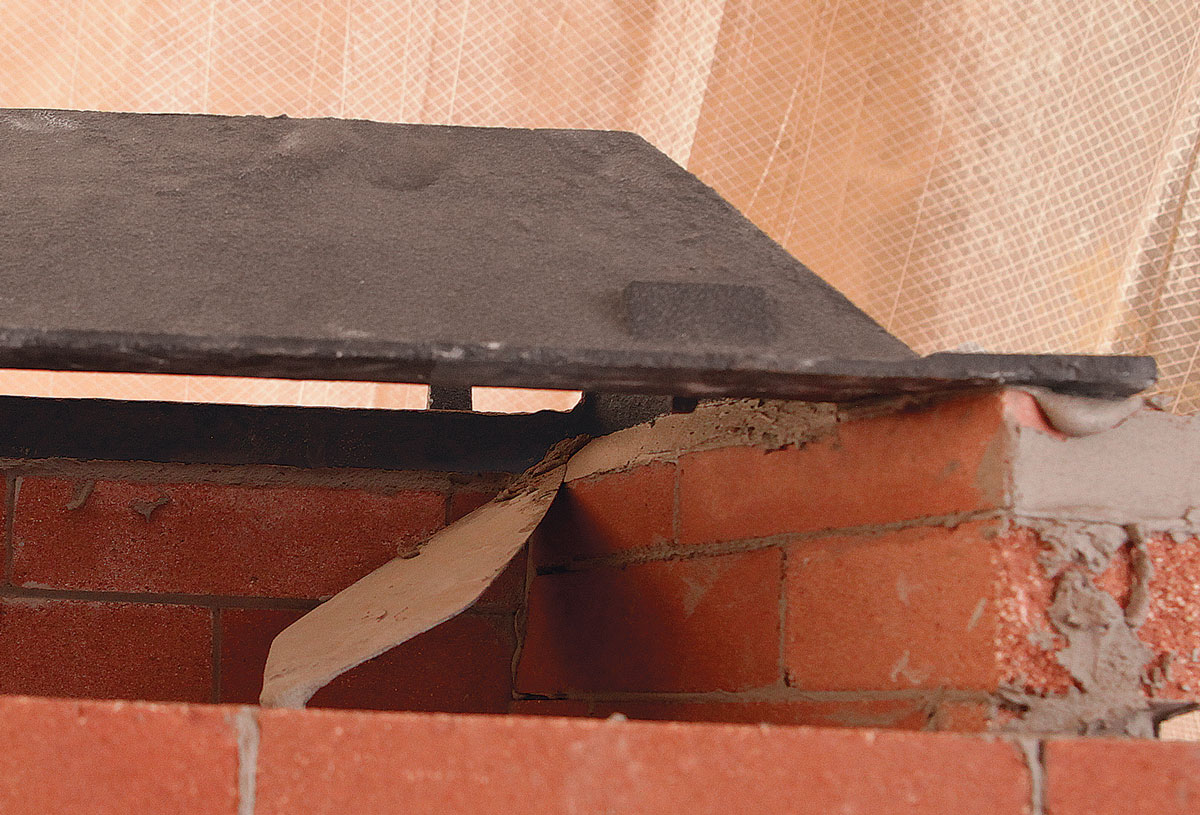
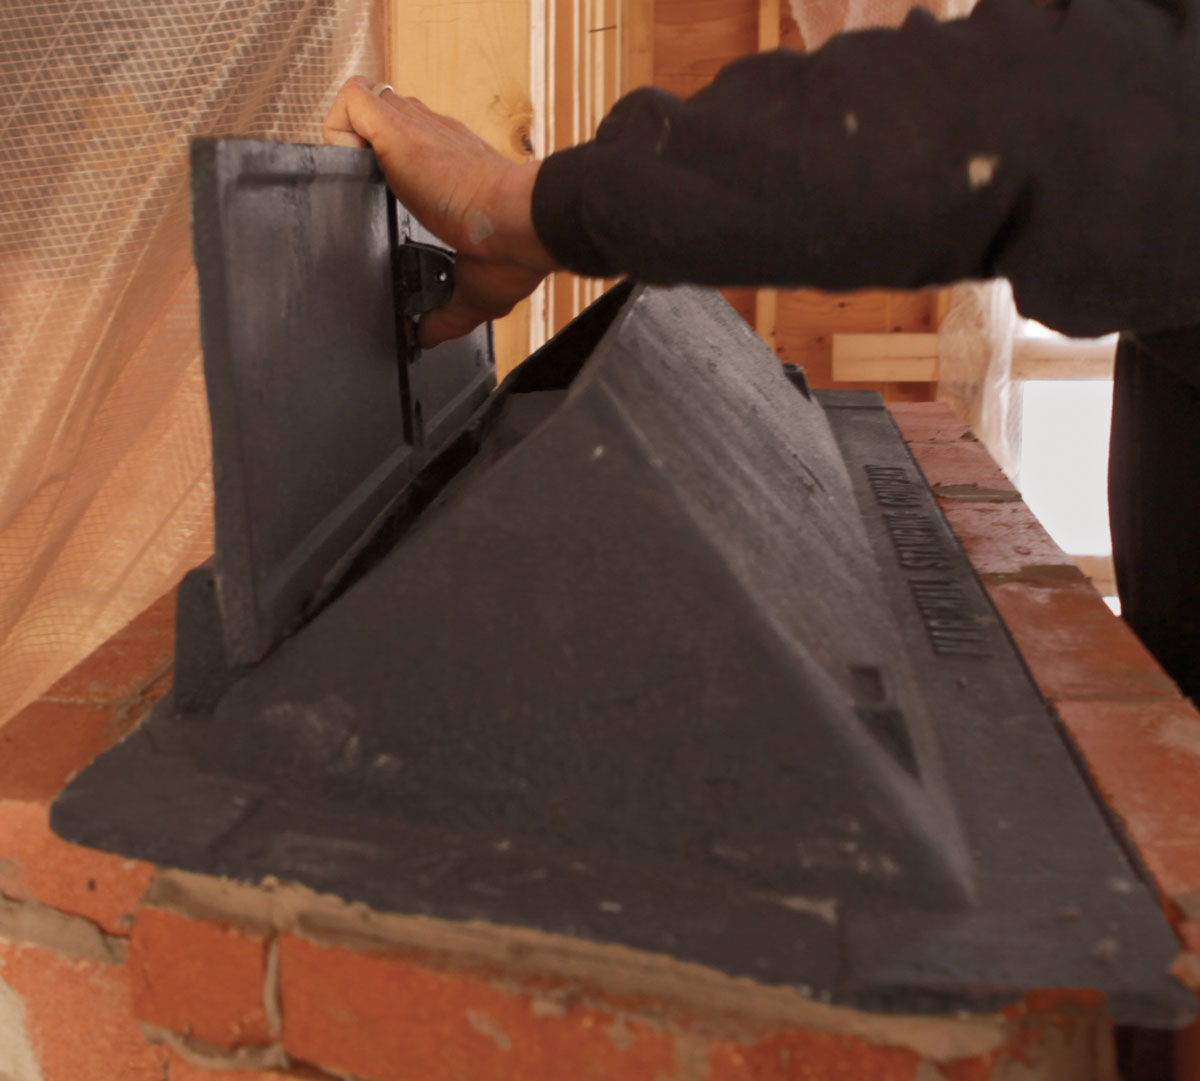
Level the lintel. Set the lintel in refractory mortar, flush with the front edge of the firebox opening. By code, the lintel must bear at least 4 in. on each of the sidewalls. Remove rust from the faces exposed to the firebox, and coat with high-temperature paint.
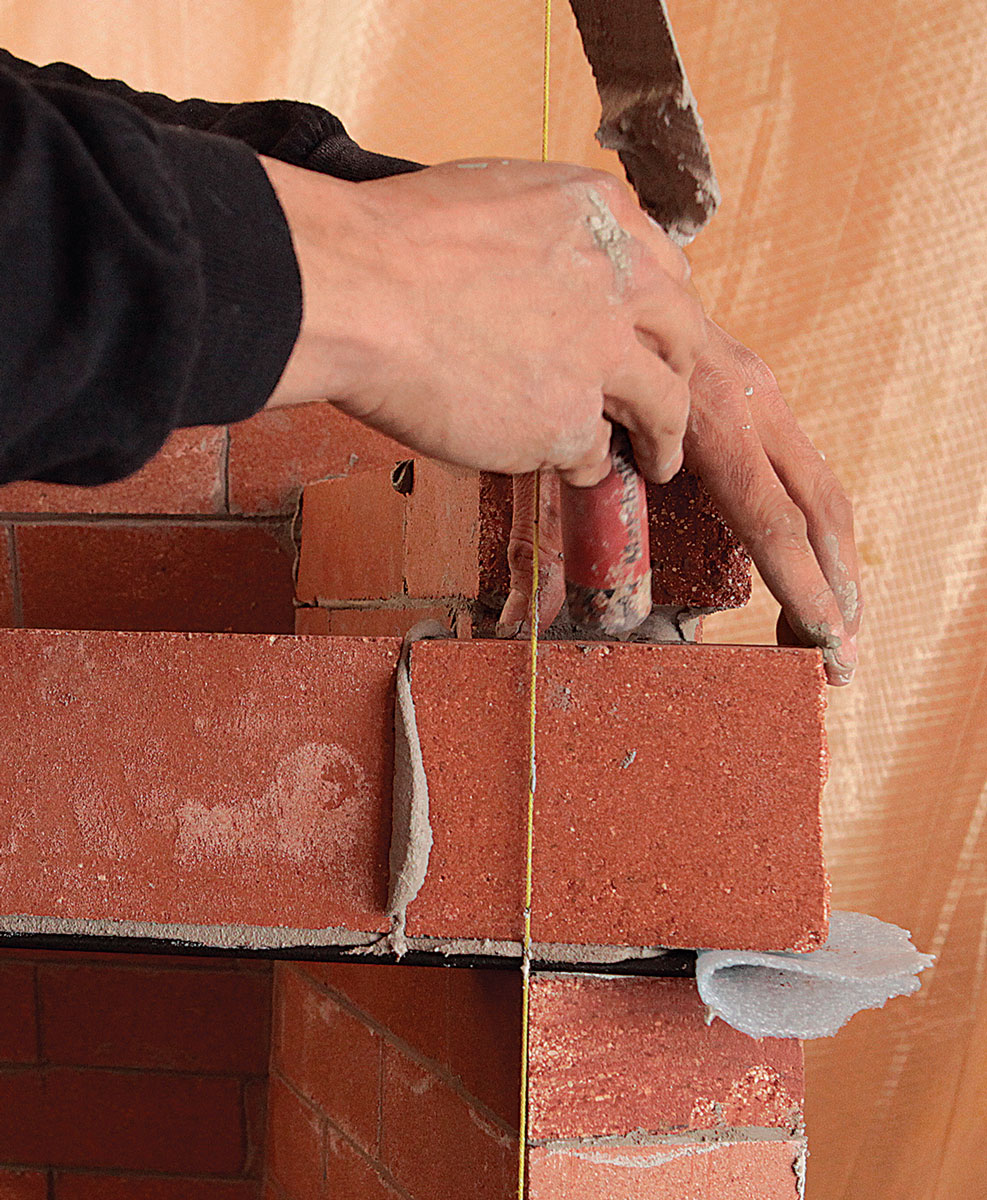
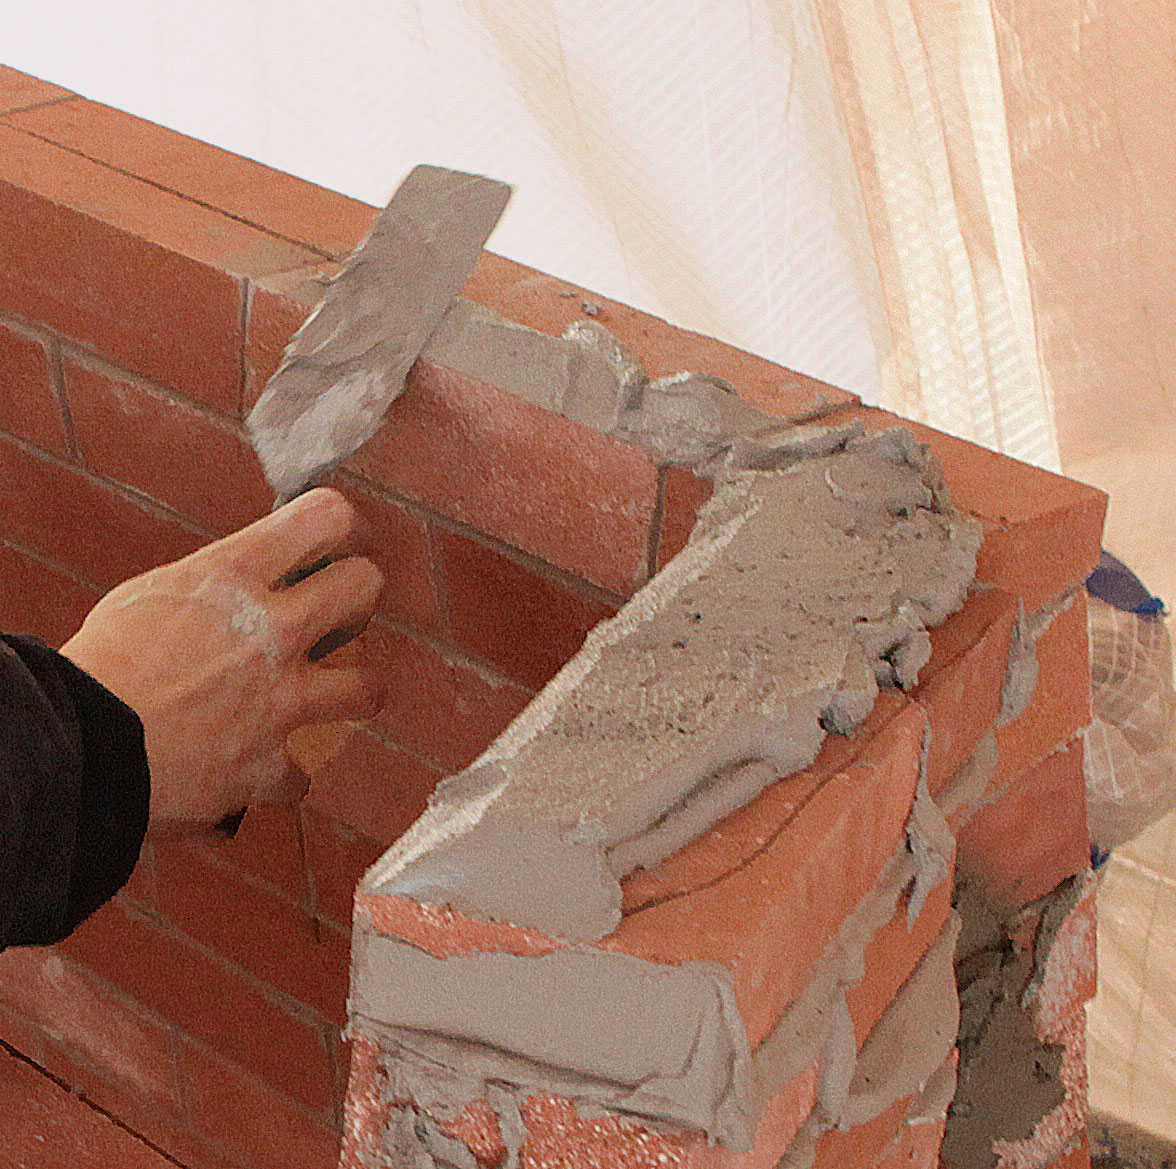
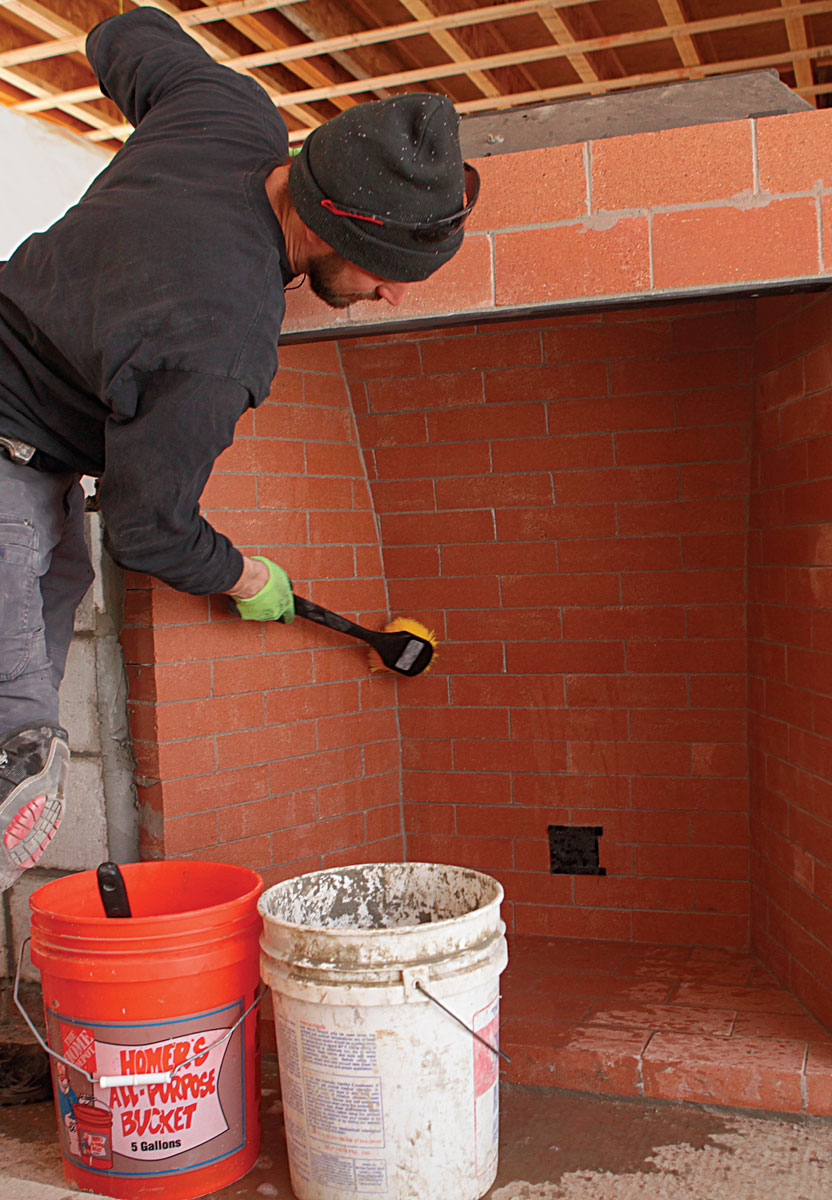
Break the bond. Don’t bond the bricks on top of the lintel to the walls below; this allows the steel lintel to expand and contract without pushing on the masonry.Plane it out. Use a level to make sure the bricks atop the lintel are in plane to provide a flat surface for the fireplace surround that comes later.Fill the sidewalls. Once the lintel is set, fill in the sidewalls level with the back wall, cutting bricks as necessary to provide a flat surface to carry the damper.Ready to cap. Dry-fit the damper, trace its perimeter, and then remove it and apply refractory mortar inside the line.Set the damper. Remove the damper’s flap to make it easier to handle and set it atop the firebox.Bevel the edge. From below, use a small trowel to neatly bevel the mortar joint between the walls and the damper.Allow for expansion. Leave a 1⁄4-in. gap between the damper and the brick atop the lintel.Backer up. Use less expensive backer bricks and Type-S mortar behind the firebrick lining of the firebox.Clean it up. Once the joints are set, sponge off the bulk of the excess mortar, then use a brush and a diluted solution of acid-based cleaner and water to scrub the walls, and immediately rinse with clean water.
Mike Mehaffey is a mason and owner of Stone Waleryszak LLC in Exeter, N.H. Photos by Matthew Millham.
This is a dialog window which overlays the main content of the page. The modal window is a 'site map' of the most critical areas of the site. Pressing the Escape (ESC) button will close the modal and bring you back to where you were on the page.