
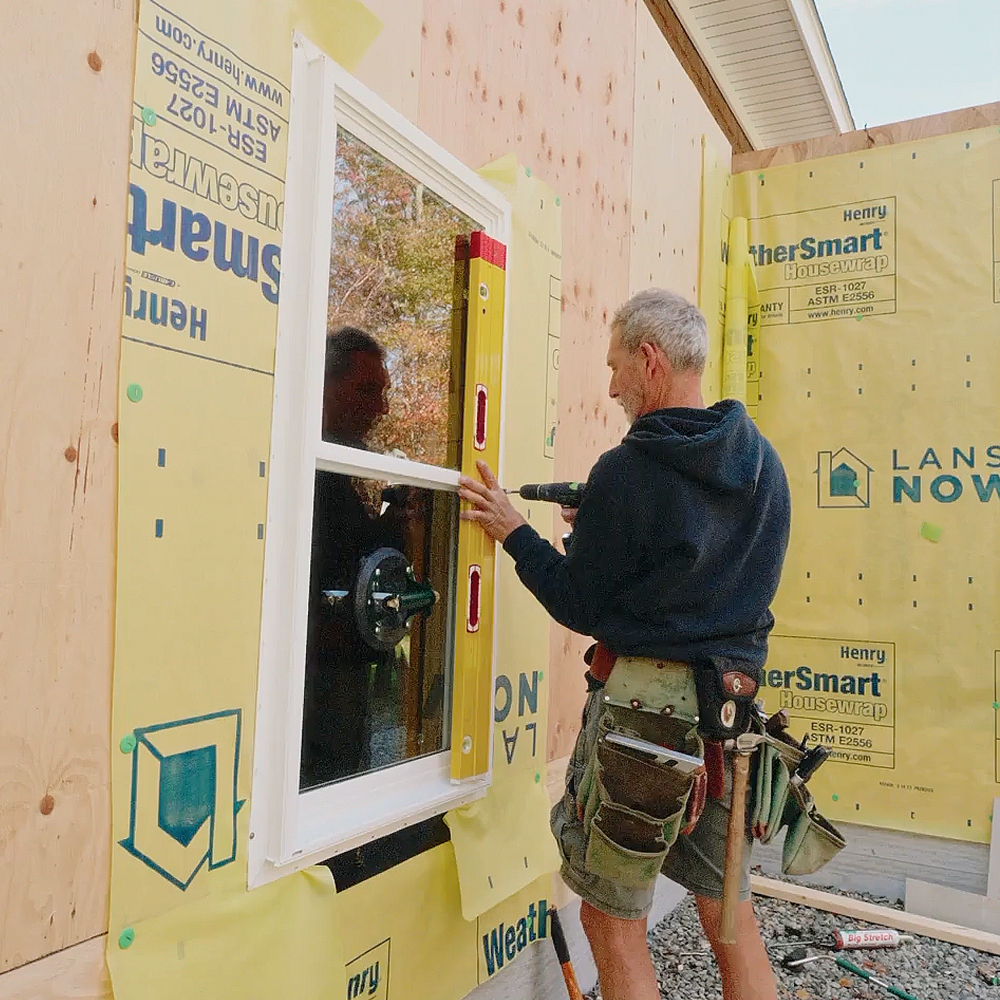
Wrap first, cut later
The easiest way to apply house wrap is to go right over the window and door rough openings. Then, you have to come back and cut through in order to install the windws and doors. For this opening, I’m going to cut what I call an “upside-down wine glass.” That’s just a term I’ve made up to help me remember the right places to make all of the cuts.
Smart cuts protect your walls
First, make an angled cut above each corner, and then a straight cut underneath the entire header, connecting those first two angled slits. That’s basically going to make a flap that gets tucked up out of the way that will eventually cover the top window flange. Then, you’re going to cut straight down the middle to about 5 or 6 inches above the bottom of the rough opening, and you’re going to go straight across and down at an angle at each side. What that’s going to do is give you the right pattern of housewrap in the right directions to shed water to the outside of the wall. Once all the cuts are made, you can fold the flaps in, cut off all the excess, and staple everything to the inside of the rough opening. Now, after the window is in, and the peel-and-stick flashing is on, everything will be nice and weathertight.


View Comments
The "upside down wine glass" method was state of the art 5 - 10 years ago. The method most window and housewrap manufacturers are moving to is a full 'I' cut where the bottom cut is straight across the rough sill.
The problem with the method shown in this video is the sill flap interfers with the sill pan flashing when you are using a self-adhering flashing tape. The flap prevents the flashing tape from bonding to the rough sill and can lead to bunching up of the membrane that may leave water puddled beneath the window.
I go one step further when cutting the housewrap from an opening. Instead of a single vertical cut in the center of the opening, I gauge in from the jack studs about 4 in. (for 2x4 walls) or 6 in. (for 2x6 walls) and make vertical cuts at each side. This leaves a large piece of housewrap that can be used in any one of a number of other value-added housewrap upgrades like a 'high pressure wind skirt' or double wrapping inside and outside corners. Very large pieces from door openings are often big enough to wrap dormer walls or spaces between windows elsewhere.
I'd like to know what type of nailer he was useing for securing the tyvek
http://www.Stingercapstapler.com