
How to Scribe Trim to Fit Against a Wall
A pencil and a scrap of wood are all you need to mark molding before cutting it to fit flush with an uneven surface.
Because most houses are full of wavy surfaces, finish carpentry is often about making uneven trim fit tight.
We often run into situations where you’re having to fit a straight piece of trim to a curved surface, like an old wall or an uneven hardwood floor. In this particular case, I’m fitting a piece of cap on top of this beadboard wainscoting. I’ve got a bump in the wall here, and this piece needs to be cut to fit that bump.
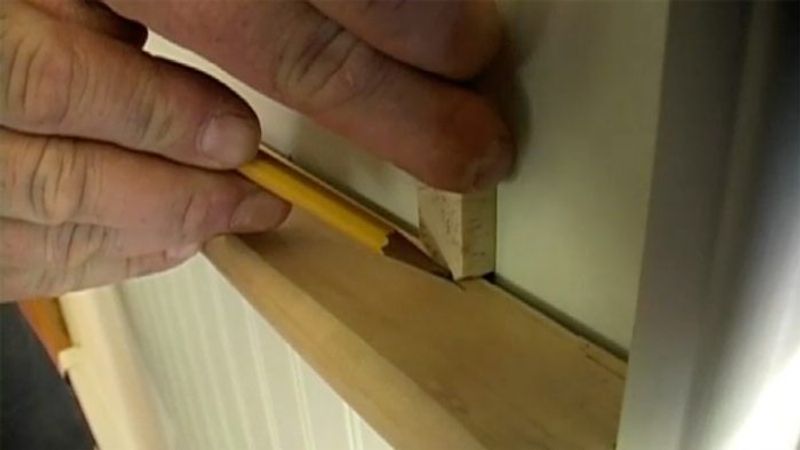
Use a pencil for scribing small gaps
The way I have this piece set up, I’m projecting evenly from each end; that way my piece is going to move in parallel to the wall, and I’m just going to trace this whole profile out. The most basic way to do this is just to use a pencil like this; it sits against the wall and follows along my piece, and it’ll mark the profile of the wall. A common pencil works great if your gap is an eighth of an inch or less; but if it’s more than that, the pencil tip is going to want to slip behind your piece. Another way I can do that is by using a small block, which sets the distance that I’m marking away. It’s a little more foolproof. I can set it like so, and just trace that profile out on my piece. It’s a nice, easy way to do it without any kind of special tools.
Back-bevel for a better fit
On a thicker piece of material, like we’re using for this cap, it can be nice to back-cut this so the top edge is guaranteed to fit tightly against the wall. What that means is you’re just taking more material off the bottom, so any small bumps in the paint or bumps in the plaster won’t keep this from being a nice, tight fit. An easy way to do that is just to angle the shoe on my jigsaw, and then the saw itself is setting that angled cut.
Only use a saw for the rough cuts
The first few times you do a scribe like this, it can be hard to follow that line with your jigsaw—especially as things get more wiggly. My advice would be to always try to leave your pencil line and a little bit of extra wood; you can always fine-tune it with a sanding block or a block plane or a belt sander. Once you go past that line, though, then you’re going to have to take that amount of material off the whole piece again to get it to fit tight. Leave your line, and work up to it later. You can think of the saw as a roughing-in process, rather than a finished product.
On small pieces like this, it can be hard to find somewhere to balance it or clamp it. You just want to be really careful about the blade projecting underneath, being able to hit something—and obviously, keeping your hands out of the way of the blade.
My scribe looks pretty good. My last step is just to scribe my two ears so it’ll fit tight against the wall.
How far you go depend on the finish
OK, well, we’ve got a pretty good fit in there. Because this is being painted, and it’s going to get a bead of caulking in there anyway, I think we can call it good. If you were a perfectionist, you could worry at it a little more with a block plane or a sanding block, but I’m pretty happy with that, the way it sits.

View Comments
Good technique; a compass will be less accurate. I would back bevel at least 30 degrees and finish off with a sharp hand plane & Makita 1" belt sander near the ears