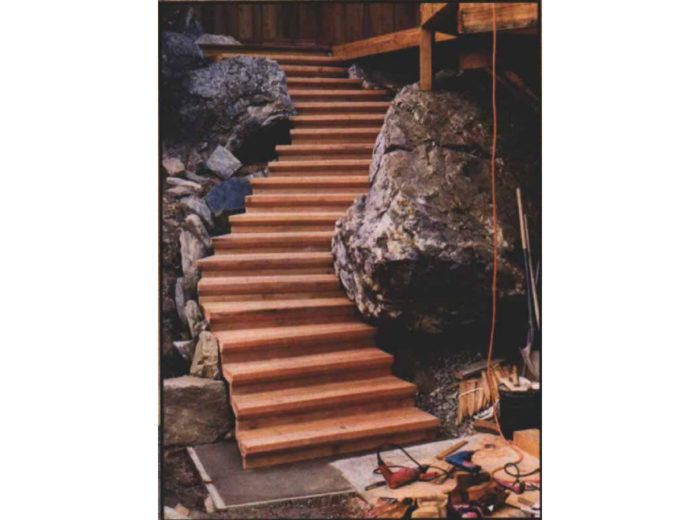
Building a Winding Outdoor Stair
Fitting stairs to a complicated site called for an accurate sketch and some job-site improvising.

Synopsis: A young builder describes a project in which he constructs a new outdoor deck and a stairway that winds its way around boulders and down a hillside. Nothing is routine, so the job calls for ingenuity and careful planning.
A couple of summers ago, I was helping my father build a house in El Portal, California, when some neighbors, Ron and Liz Skelton, asked if I’d be interested in building a deck for them. They offered to pay me for my work; my father understood the lure of fortune and fame and encouraged me to accept the job, which I did.
The Skeltons wanted a redwood deck to replace a sagging fir assembly built over a rock garden. That part of the job would be tricky enough, but there was more. Ron is the local mechanic, and he had no stairs leading from the house down to his shop located one level below. After several years of skidding down the bank to work, he was ready for a stairway. Ron described to me where he and Liz envisioned the stairs—”starting about here, winding down between these rocks and ending up at the slab in front of the shop,” he narrated while scampering down the bank around several boulders. Suddenly I felt slightly dizzy. I was barely getting the hang of straight stairs, let alone double-inflected variable-radius curved stairs. Nevertheless, I forged ahead with the deck and extended a landing from which to start the stairs.
Liz and Ron wanted a sturdy-looking stair, so we settled on 42-in.-wide (approximately) open-string stairs with 2×12 stringers and 2×6 risers, both of redwood, and 4x redwood treads. 4-in.-thick redwood can be tough to find, and we needed 4xs for the deck framing, too. Luckily, a local contractor gave Ron a tip on where to get it, and the supplier sent the most stunning redwood I’ll probably ever see—vertical grain, surfaced full-dimension 4x6s and 4x8s, 16 to 20 ft. long with hardly a defect in them. I saved the nicest stuff for the treads and sentenced the rest to life beneath the decking.
Measuring and sketching
When building an unconventional stair such as this one, it’s a good idea to start with a drawing. I mapped out a plan view first, scaled down and identified the critical elevations. That called for a few hours scaling the hillside with a tape measure, a plumb bob, and a builder’s level.
To figure out the total rise of the stair, I perched the builder’s level near the top-landing location and shot the elevations of both the top landing and the shop slab (the bottom slab of the stair would butt up level to the shop slab). Then I subtracted the top elevation from the bottom and came up with a total rise of 127 in. I don’t have a leveling rod to use with my level, but a tape measure attached to a straight 2×4 served me just as well.
Next, using framing members of the new deck as reference points, I measured horizontally and dropped a plumb bob to locate the relative positions of the three boulders around which the stairs would wind, plus the location of the bottom landing. I used all of these measurements that evening to draft a plan view of the entire project. The path the stair would have to take was now obvious, and I penciled it into the drawing.
For more photos, drawings, and details, click the View PDF button below:
Fine Homebuilding Recommended Products
Fine Homebuilding receives a commission for items purchased through links on this site, including Amazon Associates and other affiliate advertising programs.

Anchor Bolt Marker

Smart String Line

100-ft. Tape Measure


