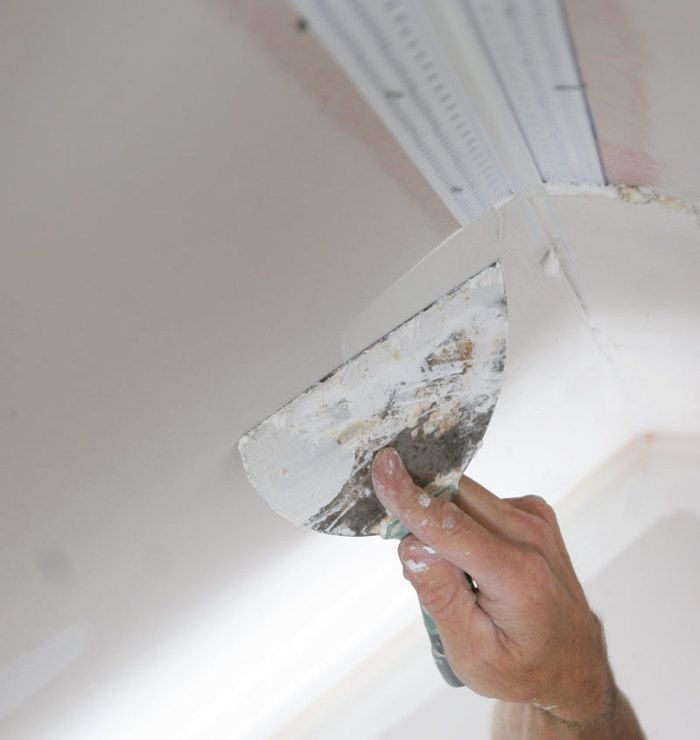
How to Prevent Cracks in Drywall
Taping and finishing drywall is one of those things you can expect to do occasionally as a remodeler, but unless you’re a full-time professional who does nothing but drywall you can also expect to run into problems once in a while. Such is the nature of the beast, and such is the experience of Howard, a general remodeler with years of experience.
He rates his drywall skills as intermediate, “by no means an expert,” but he clearly isn’t satisfied with a job that’s amateurish in any way. The ceiling he has installed has developed two problems, as he describes in this post at Fine Homebuilding’s Breaktime forum: a hairline crack 18 in. long on a joint, and a “bubble line” stretching 4 ft. to 5 ft. on a butt end that he swears wasn’t there before he primed and painted.
He’s used 1/2-in. drywall over joists 16 in. on center, with mesh tape and four coats of lightweight all-purpose joint compound.
“In my exerience with drywall I know that if the drywall has gaps at the seams the tape will bubble up but these seams are nice and tight,” he writes. “Also, I put a light across the joint before I primed and it looked sweet. I am sort of a perfectionist and it is driving me crazy having these two issues.”
RELATED ARTICLES
Questions about how the drywall was hung
At least one poster thinks 1/2-in. drywall is too skimpy for a ceiling. “Being picky, I’m surprised you used 1/2-in. on a ceiling,” writes Tyr. “It should be 5/8-in., especially if [the ceiling is] textured,” he adds, which makes drywall more susceptible to sagging.
But Liveonsawdust isn’t so sure that’s the issue. He says 3/4-in. drywall was once routine on ceilings, but adds: “I’m seeing more 1/2-in. lately. But we are using ceiling board (1/2 in.) that is much stiffer than regular 1/2 in. So I wouldn’t worry about your 1/2-in. on 16-in. centers, especially with a smooth surface as opposed to a texture.”
If there’s no general agreement here, there’s little doubt that Howard should have staggered the joints on adjacent sheets of drywall, something he says he did not do.
“Butt joints really should be staggered on walls and ceilings,” writes Calvin. ” More stress and movement on a continuous joint across several boards.” That would explain why one of the defects Howard details could run more than 4 ft. where two butt ends meet. Staggered joints limit the length of a continuous crack.
While many of us would make sure that panel ends and edges landed on framing, where they could be securely fastened, Clewless1 offers an alternative.
“One trick I learned from the guy that did my house was to, in as much as possible, never let your butt joints end up on framing members,” he says. “Best to let them ‘float’ and back them w/ e.g. a 3 in. scrap of plywood. This is good because: 1) you don’t have to measure and fuss w/ getting a 4-ft. edge to be dead center; 2) fasteners near the edge often break the drywall which compromises the structure of the joint at that point; and 3) the floating joint is actually structurally superior. Movement of framing won’t affect the joint and the joint is stronger because you don’t have to put the fasteners so close to the edge.
“This makes it a piece of cake to layout a sheet w/out having to worry about having the joint line up.”
Choosing the right tape and joint compound
Although Howard typically uses paper tape, on this job he decided to try mesh tape, along with lightweight, all-purpose joint compound. And this may also have contributed to the problems he encountered.
“I only use Durabond to embed mesh,” writes Calvin. “Dries harder and adhesive content higher. Same goes with paper, tho I don’t think that is as necessary.”
NickNukeEm has had the same experience: “I only bed tape using Durabond or general purpose, never lightweight,” he writes. “Every article I’ve ever read about bedding recommends green top mud or DB. Even so, you can get bubbles if you starve the tape by either spreading on too think a layer, or squeezing too much out after bedding. The debate of mesh vs. paper will wage on as long as both are on the shelves,” he adds. “If I use mesh–which is rare–I bed it in setting compound, and I believe the mesh tape instructions recommend this, though I’m not sure.”
Tyy, however, is certain that only a setting-type compound should be used with mesh tape, and that keeping the consistency of the compound stiff also is important.
“My preferred setting compound is Durabond-90 or -45, depending on the amount of job I’ve got,” Calvin says, referring to different versions of the same product that cure at different rates. “Regular joint compound in a bucket is also fine. You take your chances on the liteweights and bucket toppings.”
Geoffrey recommends this strategy: When using self-adhesive mesh tape, use a setting type compound (either Durabond or, even better, E-Z Sand). Apply the first coat over the tape, allow it to set, then apply a thin second coat, and touch up with a final coat as needed.
For paper tape, he adds, “Apply bedding coat of JC, apply paper tape, smooth and clean joint, allow to set-up, apply second coat, let set, apply 3rd coat if needed, sanding in between if needed, but there shouldn’t be to much sanding needed.”
Trying to pinpoint reasons for cracks and bubbles
To Megspop, the problems could have been caused by the application of too much compound.
“I haven’t used paper tape on beveled joints or butt ends in years though I have fixed many, many, many bad tape joints (mostly from DIY homeowners) when paper tape was used,” Megspop says. “I found it’s usually poor bedding when the paper tape bubbles.”
Bubbling can occur when the compound used to fill gaps sags, pushing down the mesh tape as it goes. “Check to see if there is mud or air (empty space) behind the bubble,” Megspop says. “Paper tape is easy to removed and replace. Mesh tape, not so much. It’s easier to run your knife along the crack or bubble and reapply new mesh. They also make 6-in. tape. I use 6-in. tape when repairing a DIY’ers attempt to do drywall.
“For your crack issue, is it a straight crack or does it vary? There are many reasons for compound to crack. In this case, without seeing it, I would rule out movement and lean more toward heavy compound application (too thick of a coat will crack) or again a gap. But its tough to determine without looking…”
To Boschvaark, Howard’s goal of a perfect finish may be a contributing factor.
“Perfectionism may be the problem,” Boschvaark writes. “I was a perfectionist when I first started taping, and pressed too hard, trying to get totally smooth coats. Which pressed out too much mud, allowing air in, creating bubbles on the next coat. I have found the opposite problem from you: If I don’t have a gap between sheets, I more often get bubbling. These days, I want about [1/8-in.] gap and set paper tape in mayo consistency Durabond. The thinnish consistency makes it easier for me to load mud into the gap (which seems to hold better in the long term, sort of like keying plaster when using lath), and forces me to press more lightly when setting tape, aka I go a lot faster than I did when I was new to taping.”
Two additional sources of information, as posters pointed out, include the Gypsum Construction Handbook, from the USG Corp., and Myron Ferguson’s book, Drywall, published by The Taunton Press.
Fine Homebuilding Recommended Products
Fine Homebuilding receives a commission for items purchased through links on this site, including Amazon Associates and other affiliate advertising programs.

Handy Heat Gun

Affordable IR Camera

Reliable Crimp Connectors
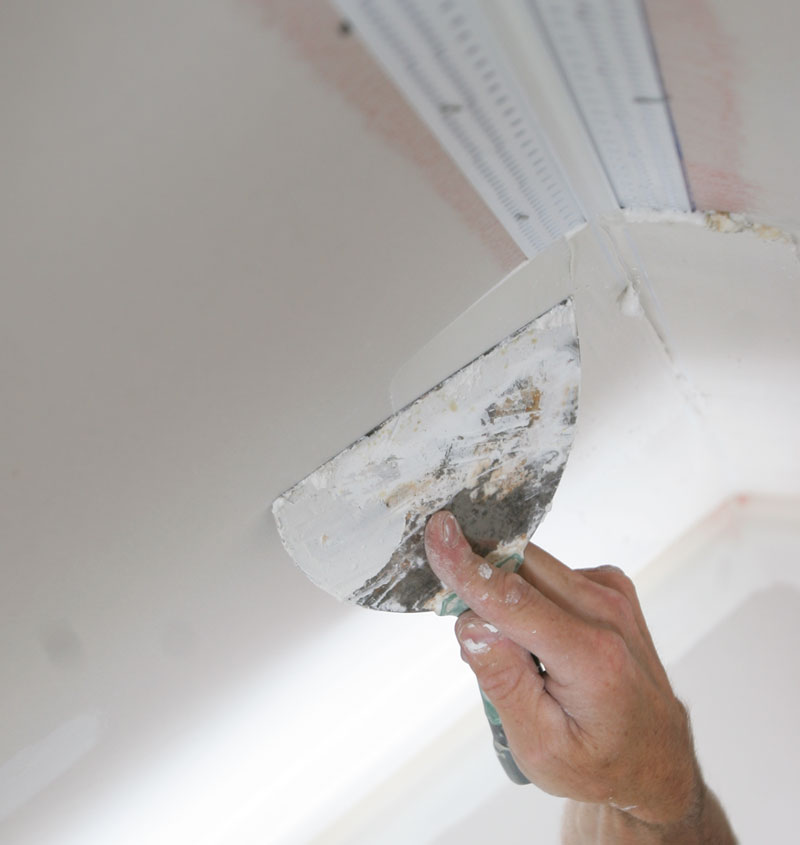
Did the wrong materials, the wrong techniques, or both cause the cracks in this remodeler's ceiling?


View Comments
Although I am not a professional drywaller or finisher I have hung and finished my share of the goods. I do have a question for someone who can recommend how to repair the following problem. I have looked at a house in central NYS where the winter temperatures have gotten to 20+ below zero this past winter. The house is 2 X 6 framed with 1/2 inch drywall. During the deepest cold this winter corner seams have cracked on the outside walls. It appears only on the second floor. A previous event with the former owner is evident since one corner has a fillet of drywall compound showing the entire vertical length. Anyone lend a thought how to repair this correctly?
It sounds like air leakage carrying moisture is wetting the interior of the wall and causing the mud to rehydrate and crack upon drying. Probably through the rim joist and into the wall cavities through plumbing, heating and electrical penetrations in the base plate.
This can be diagnosed with a blower door and IR camera.
Warm moist air from inside the home condenses when it gets into the cold wall, especially in homes with fiberglass batt insulation, since it usually is not installed tight to the drywall. This is common in homes with vinyl siding that does not have house wrap or air sealing. The repair is labor intensive, but pays off in lower heating and cooling costs.
Remove all siding and trim, seal every opening with spray foam, then install house wrap with acoustic sealant at the top and bottom, tape at all seams and proper flashing details. Then re-install siding and trim and repair drywall as needed.
After reading the article here, l thought l would reply.
I live in Ontario, Canada l have been a drywall taper since 1978 just over 33 years.
I never use mesh tape unless needed in repairing a small hole. Many tapers use mesh tape to save time, material but l prefer paper tape if needed the paper tape with bendable metal in it l use for ceiling corners l can't prefill or on corners where needed.
I prefill every gap with sheetrock 45, sands nice goes on smooth, durabond 90 l never use hard to sand for me durabond 90 was the demand in the 1980's and 1990's but up here not much now.
Here tapers again to save money time apply tape with sheetrock 45, durabond 90 l prefer using low dust purple box from start to finish, l know the younger generation of tapers will disagree with me. But l can make as much money using regular mud paper tape on all 3 coats and in the end do an excellent job.
For the part for the hairline crack on seams, when tape/mud was applied there may have been not enough screws put in board or some screws were sunk to deep on board.
Up here in Ontario hardly anyone prefill joints takes up time but will give a better finish as it will firm up joints if abit bouncy.
Sometimes if a homeowner or a beginner taper will not put on enough mud or wipe to much off causing air bubbles.
When tape is dry just cut with utility knive back on each side of bubble then replace that portion of tape.
For 1/2'' board l built 2 additions a 1,000 sq ft on my home in 1987/1988 used 1/2'' gyprock still today no cracks nothing l used 1/2'' on ceiling as well trusses 24''o/c no problems.
The above just my opinion if anyone needs a question answered on there work email me at [email protected] will be glad to help you if l can.
Thanks Jim
I'm an old custom home builder who has done a fair amount of remodeling. The older you get the more you realize you don't know everything.... but I'll give it a shot.
You got some good advice. It's better to hang 5/8" board but 1/2" on 16" centers shouldn't be a problem. And I agree that you should leave an 1/8" gap between the boards. It's important that you stagger the butt joints at least 32" apart. It's sometimes a good idea to insert a piece of pressed cardboard on the parallel joists on either side of the butt joint which leaves the butt joint slight lower than the adjacent surface. It's very important that you have adequate backing and to be sure you use enough fasteners. I prefer screws and generally install more than code requires, especially in problem areas/situations. I use glue when I can.
I generally find that paper tape produces a better product than mesh. But I do use mesh on smaller projects. I have occasionally doubled up the mesh(4" on bottom, 2" on top) and used spray adhesive to bond the 4" mesh to the board and the 2" mesh to the 4" mesh. But again, I prefer paper. If I don't use an automatic taper, I soak the tape prior to applying it on smaller jobs. I use general purpose mud for taping and lightweight topping for finishing.
I have found that almost always bubbling under the tape is because there was not adequate mud under the tape. I have occasionally had bad mud but generally it's been just not enough mud. Be sure you let the tape/mud dry thoroughly before applying 1st coat of topping. If you are fussy, sand between coats. And yeah, I know everything looks clean until you paint. The paint affects the tape differently over mud vs over an air pocket and then bubbles show or the joint shows up. Lousy timing.
I've found that cracks generally relate to again not enough mud... occasionally shrinkage of either board or mud, and sometimes structural movement.
I had a 6' joint in a 6200 sq ft house that just WOULD NOT stop moving and cracking. I eventually cut a 1/4" joint down the center, filled it with polysulfide caulking and used the 4"/2" mesh overtop. Still had some problems and believe it or not then used automotive red oxide filler/skim coat, sanded, sealed, primed and painted. Problem solved.That was 3 years ago. As of yesterday, no cracks. Who would have guessed.
Also one last idea from an old man. I sometimes have had faint lines along the joints or nail spots that I couldn't get rid off. Lighting can sometimes be a nightmare. I've let the same color paint thicken in a tray... then used a 5" drywall blade to fill the crack with the thickened paint. Let dry. Add "one more" finish coat. Imperfection gone.
Good Luck
neversawitcomin Don't know exactly what type of crack you are referring to but if its simply a small crack running down the corner, the easiest way to fix it is to take flexible caulking put a little on your finger and rub it into the crack, after it dries paint it to match and it will flex just enough so as not to crack again.
Hi...I came here get solution for my problem.I am working in R&D company in India.We are doing prefab house.For Exterior skin we using fiber Cement Board & for interior gypsum.we tried jointing compounds available in india like sheetrock but no use.
But we facing crack propagation on both walls.
We using 8 ft X 4 ft fiber cement Board & 6 ft X 4 ft gypsum.
Please advise me to solve this issues.