Finishing the Basement
Every time a line is drawn, it's crossed, and before long the basement in the FHB House is finished—economically.

I wasn’t planning to finish this walkout basement right away—partly due to the cost and partly the amount of extra time it would take. But slowly throughout the building process I kept taking steps toward finishing it telling myself each time that “doing this makes sense, and I’ll draw the line here.”
The first step was when the electric classes from WACTC got involved. They didn’t have many opportunities to wire houses, and the basement presented a good project. So I revised the basement electric plan to include a bedroom, a living area with a kitchen, and a bathroom. There was a logic to the layout and I figured it would only take a day to frame the necessary walls. The wire, boxes, and studs for walls totaled about $700.

The ICF foundation walls and the exterior frame walls had to be boarded with 1/2 in. drywall to cover the exposed EPS foam of the ICFs and the kraft facing of the fiberglass insulation. The exterior walls account for about 1/3 of the drywall surfaces in the basement, leaving only the ceiling and interior walls to be done. With the WACTC carpentry students doing most of the work the only extra cost was for drywall and screws — about $400.

I could have left the basement with just unfinished drywall but one thing lead to another and in a couple days we had the joints taped. This is where I drew the next hard line — painting. I figured the electric students could install the light fixtures, switches, outlets, and cover plates, and sometime in the future I could paint when I had time. But their schedule left about a week open before they could finish up the electric — a week where I squeezed in spray painting the primer on the ceiling and walls and sprayed the finish ceiling paint. And over the course of the next week, with Addison’s help after school, we rolled all the walls. Drywall compound and paint — $300.

When I placed the interior door order I vacillated whether to order the four doors needed in the basement. Ordered as a whole-house package the prehung doors ran about $160 each. Ordered separately the basement doors would have cost about $200 each. So ordering the basement doors along with the upstairs basically got me one free door. Doors — $650.

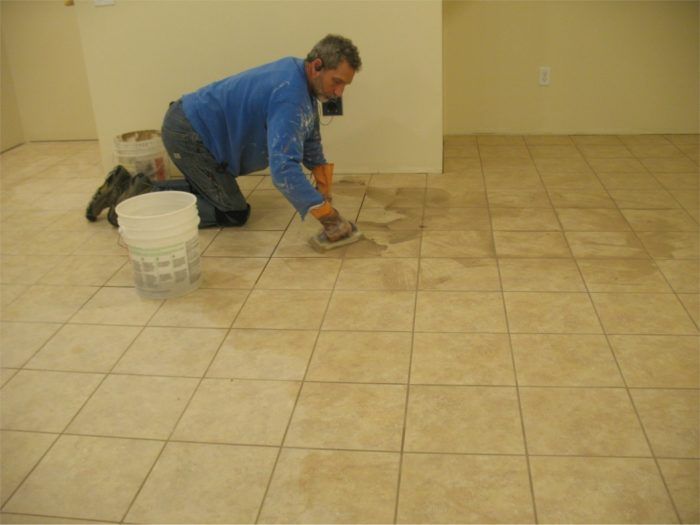
Looking at the basement at this point with the doors installed, surfaces painted and lighting installed the only thing that gave away that you were in a basement was the rough concrete floor. I shopped around for some simple economical tile and found some for 63 cents/sf. Yeah I know you get what you pay for; but I figured it was a basement and there was little risk of the glazed tiles cracking over a concrete slab. It took me a few evenings and a day to set and grout all the tile. Rob, the tenant moving into the house, came by a couple of days to help so that moved things along. 650 square feet of tile, thinset, and grout — $550.

The hard line came at finishing the bathroom and kitchenette. The future bathroom was left with untaped but primed drywall and the rough concrete floor. It will be used as a storage room for now.
I figure I spent less than $3000 in materials to finish the basement. I don’t have a tally on my labor or the free help from the WACTC electric and carpentry students, but I’d guess that would run about $10,000 in value. A back-of-the-napkin calculation puts the value cost per square foot to bring the basement from rough and unfinished to mostly finished at only $20/sf.
Fine Homebuilding Recommended Products
Fine Homebuilding receives a commission for items purchased through links on this site, including Amazon Associates and other affiliate advertising programs.

100-ft. Tape Measure

Smart String Line

Original Speed Square


View Comments
I have reservations about fully finishing a basement space with a drywall ceiling. Access to electrical, plumbing & heating components will be restricted and other future modifications to the living quarters above will result in having to partially (or extensively) demo the finished ceiling below.
I would almost always advocate for a suspended ceiling that is easily removed for future access.