Podcast 561: Bungalow Basements, Unfamiliar Subflooring, and Making Your Own Windows
Saving money in new builds, induction vs. gas, HVAC systems, seismic upgrades, subfloor panels, and making windows.

Follow the Fine Homebuilding Podcast on your favorite app. Subscribe now and don’t miss an episode:
 |
Help us make better episodes and enter for a chance to win an FHB Podcast T-shirt:
www.finehomebuilding.com/podcastsurvey
Doug says to stick to basics in bath fixtures. Kyle prefers induction cooking. Jim makes the case for central heating and cooling equipment. Kurt wants to improve his bungalow crawlspace. Andrew found weird subflooring in his house. Justin is considering making his own windows.
Editor Updates:
- Kiley’s water management
- Mike’s water management
- Jeff’s attic work
- Patrick’s concrete floor sanding and waxing
Listener Feedback 1:
Doug writes: Hi all,
On the 555 aftershow Patrick made a statement that I think should be repeated often. When nearing the end of a build and money is getting tight, spend more on the areas that are hard to change later. It’s an easy job to change a $20 light fixture later. It is much more difficult and costly to replace a bath tub. Even laminate counters can be replaced with quartz or stone without much additional cost for the removal. With plumbing fixtures also think long and hard before going with the latest decorator colors. If you go into a bathroom and see Harvest Gold or Avocado fixtures you know when the house was built. White may be boring but it never goes out of style.
Related Links:
Listener Feedback 2:
Kyle writes: I was just writing in regards to the discussion about induction vs. gas cooking. I just listened to the newest E3: Energy and Efficiency with Emily Mottram podcast, Season 5 Episode 3 where she interviewed a professional chef that is also a kitchen technology educator. They had a great discussion about this topic. What I found interesting is that the expert pointed out that the professional vs. residential gas ranges are completely different ballparks in Btu output. An induction cooktop puts out more energy to your pan than a residential gas range/cooktop. It is also 90% efficient vs. 40% for gas.
Going from an induction range at our old home to our new home with a beautiful 36-in. gas range has me missing induction cooking so much. The ease of cleaning isn’t even comparable, and neither is the ease of boiling water and adjusting the temp while cooking. The downside to induction could be the need for proper cookware, but most high-quality cookware I have found works well with induction. I also felt much more safe cooking with my 3-year-old son on the induction vs. our gas range now. My feelings about the gas range has me searching for a 36-in. freestanding induction range to replace it, but they seem very costly, especially since our current range is less than 1 year old.
Just thought people may enjoy the listen.
Related Links:
Listener Feedback 3:
Jim in Cleveland, OH, writes: FHB Podcasters,
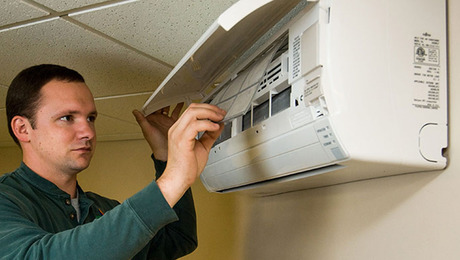
The topic of minisplits came up on ProTalk episode 544 with Maria Lauber from Mitsubishi Trane HVAC, which is a great listen. I thought I would weigh in regarding a complete 180 we did on the HVAC system selection on our new build. You were kind enough to include my letter about the forever house my wife and I are finishing up and have trademarked the term “bestguessery” on the behalf of the FHB Podcast team.
We originally were going to use minisplits but ended up going with very small furnaces with 1.5-ton condensers. While the VFR technology behind the minisplit design is indeed magic, there are a few points that should be considered in balance with the design decision to use this system type in your build.
- Fresh air exchange. The wall and ceiling cassette design obviously eliminates the ability to incorporate the home’s ERV fresh air return into the airflow of a ducted furnace. So that means that the ERV will typically be supplying fresh air to only a single point or two, rather than the many registers that your furnace is supplying, so pick your location wisely.
- Humidification. Similar to the ERV challenge, if you think your system design will need the support of an evaporative or steam humidifier, then you again don’t have the advantage of a network of ductwork to distribute the conditioned air.
- Thermostats. Minisplits come with proprietary thermostats that, while very nice, preclude you from swapping them out with your favorite after-market, smart-phone-enabled thermostats like Nest. Mitsubishi does make an interface box that accepts common 24-volt HVAC thermostat controls on one side and then translates that to their proprietary controls on the other. But you’ll lose some more fine control doing this, like more granular fan speeds.
- Service life and costs. Minisplits are incredibly sophisticated pieces of engineering. When they work, they are great, but when they break the component costs can be huge. At my company I’ve had some control boards in minisplits that have cost well over $1200 to replace. Then there is the matter of how long any manufacturer will continue to produce those parts. The mechanical engineer who helped me on the design of our home’s HVAC pointed out that a Goodman furnace has a control board in it that is readily available for $250, is the same board that is produced for several manufacturers, and any low-level, mirror-fogging technician can replace the part. Minisplits require a higher-level service technician in my experience.
Disclaimer: All my opinion and your mileage may vary. Thanks for the continued great content.
Related Links:
- Right-Size Mechanical Systems for Energy Efficiency and Comfort
- Making Sense of Minisplits
- The Diagnostic Benefits of Smart Thermostats
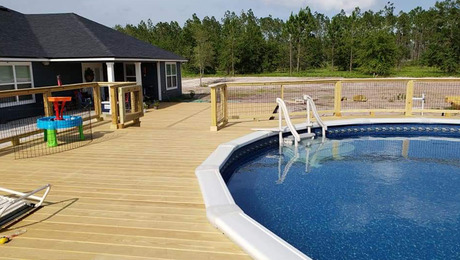
Question 1: What’s the best approach to do a seismic retrofit and air-seal my crawlspace?
Kurt in Seattle writes: Hi podcast crew!
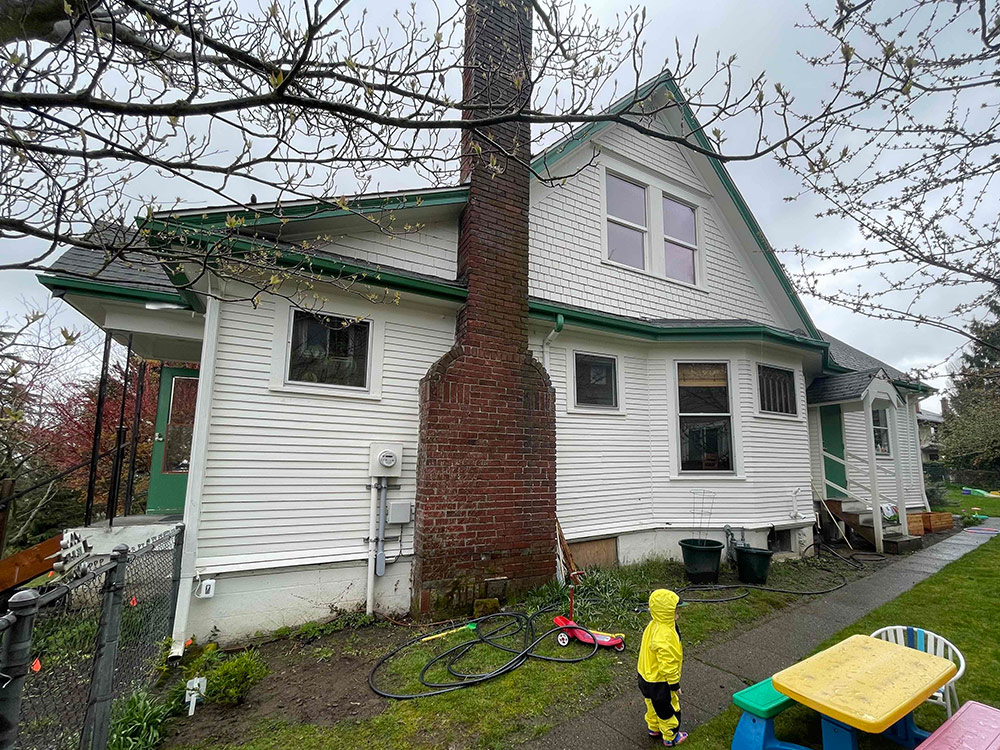
I’ve been an avid listener for years and really appreciate the expertise and information in the podcast. I’ve learned a ton! I haven’t heard this one discussed before, so I thought I’d ask for some advice. I have questions about the best way to do seismic retrofits alongside encapsulating the vented crawlspace (common in the region). The October 2011 issue of FHB has a good overview of the seismic portion, but there isn’t much out there about the air barrier/thermal envelope/crawlspace encapsulation part of the project.
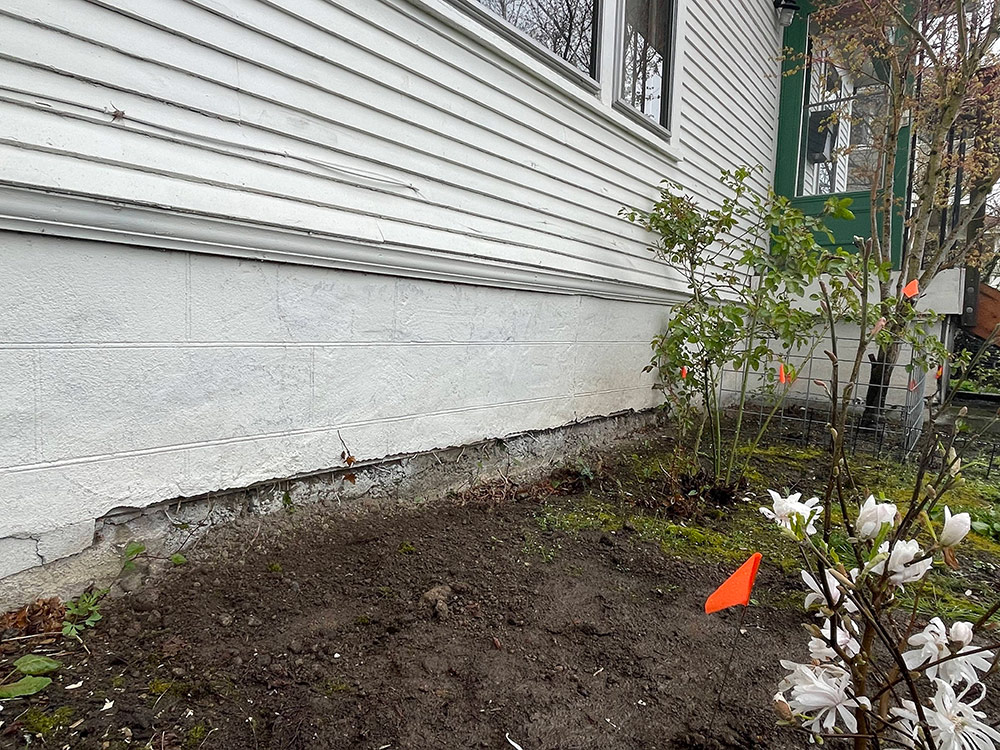
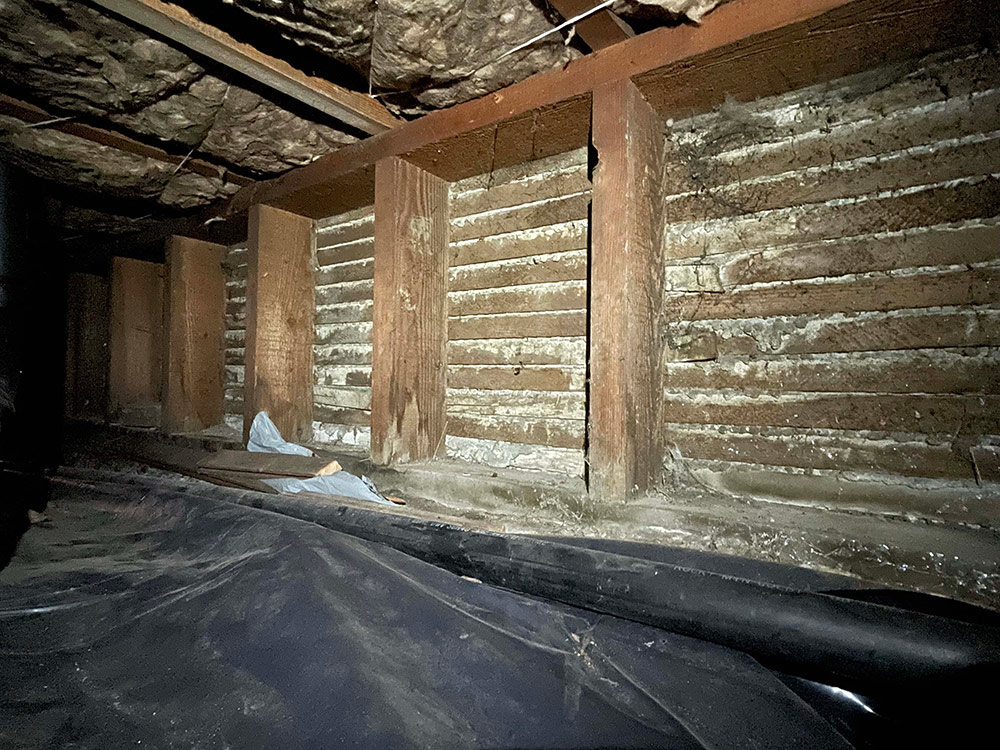
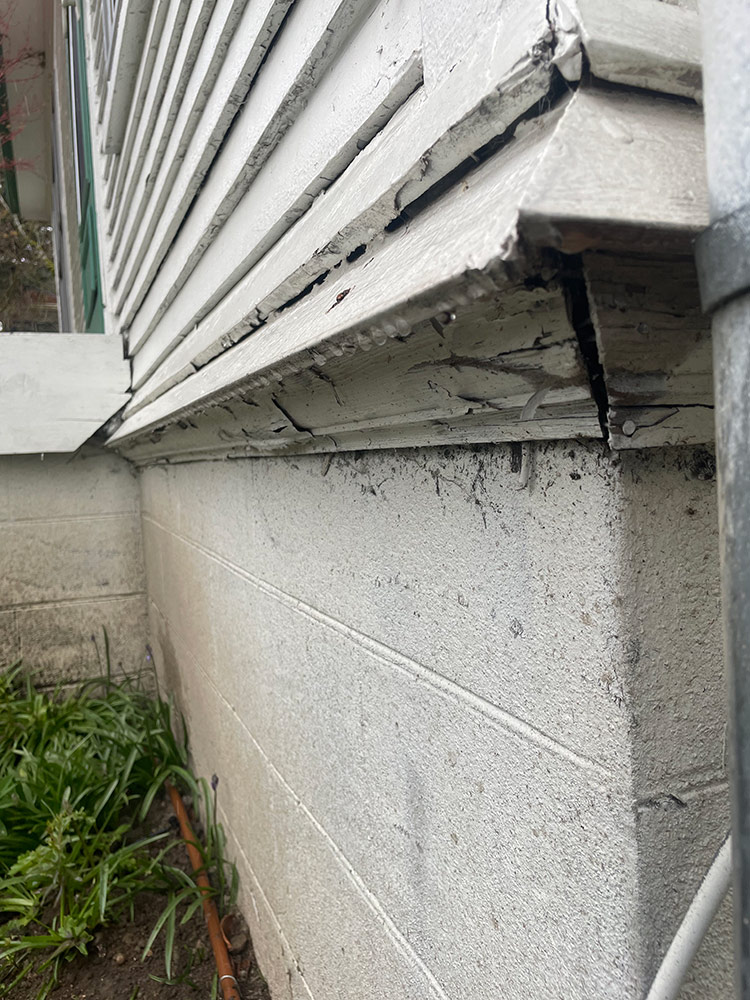
We live in a 1905, two-story, 1900-sq.-ft. house in Seattle, Washington (climate zone 4C). It hasn’t seen any major improvements in its life, apart from new electrical, plumbing, some air-sealing, and attic insulation (blown-in cellulose to R49) that I’ve done in the last few years. Most of the house sits on a 24- to 28-in. cripple wall with no bracing; the mechanicals (95% gas furnace, electric water heater) are in a Michigan basement that is open to the rest of the crawlspace. The exterior finish is stucco over lathe, some of which is failing due to weather exposure, lack of maintenance, and probably some settling. The remainder of the floor joists sit directly on the foundation.
 |
 |
 |
 |
 |
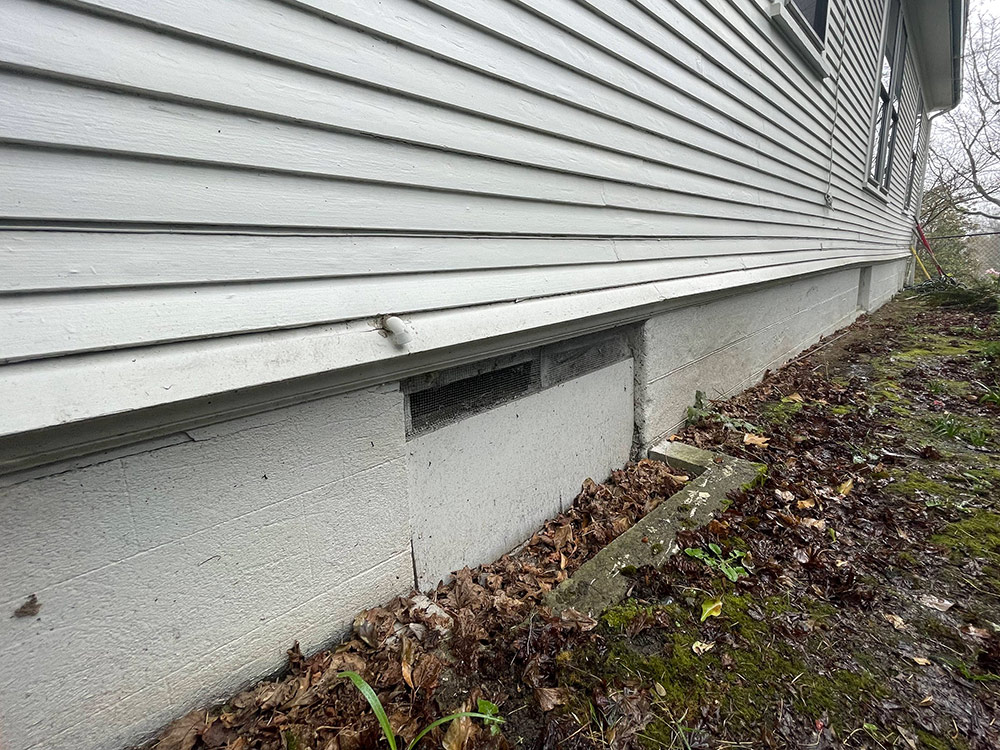 |
Given the as-built conditions, does it make sense to do the seismic work from the exterior? Demo the stucco and lathe, add the required blocking/tie-downs, bolt the sill to the foundation, and then add ply or ZIP sheathing? It seems like this would meet the seismic-retrofit requirements and start to improve the building envelope. The benefit is a relatively easy working area, but I’m not quite sure how to detail where the ZIP would meet the bottom of the lap siding (and what finish material to put over the ZIP to match the existing foundation pattern). Finally, I’d insulate the cripple-wall stud bays with mineral wool from the inside, before encapsulating the basement. Moving materials is infinitely easier and the pace of work would be a lot faster. My back thinks this is a good approach.
Alternately, I could work from inside the crawlspace; the access isn’t great, but it is tolerable. The strategy is basically the same, except that the air barrier changes significantly. The standard advice is to bolt, block, and sheathe with 1/2-in. plywood with vent holes. How can I effectively encapsulate the crawlspace with this system? The crawlspace floor poly can’t run up the plywood and cover the vents, right? I can’t put foam board under the floor joists since there is plumbing and HVAC in the way. I guess the only upside I see is that I could work down there in the rainy season and stay dry.
With either method, I’d plan to add a vapor barrier on the crawlspace floor and tape it appropriately to the sill and around a few posts, even though there is a very poorly done barrier already (no tape, torn, etc). While I’m down there, should I level the crawlspace and add a couple inches of foam below the vapor barrier? Pour a rat slab? Radiant slab? Something else? The main-level flooring is about due for a replacement, so I could probably add a membrane air barrier to the subfloor when I remove the existing flooring, but that doesn’t seem ideal either and might cause condensation on the floor joists below.
I’m not a builder by trade (rather, I’m a mountain guide). I’m not afraid of hard work in difficult spots, but would love to make this as easy as possible on myself! We plan to live in this house for a very long time, and I’m willing to put in the effort to do it correctly.
Related Links:
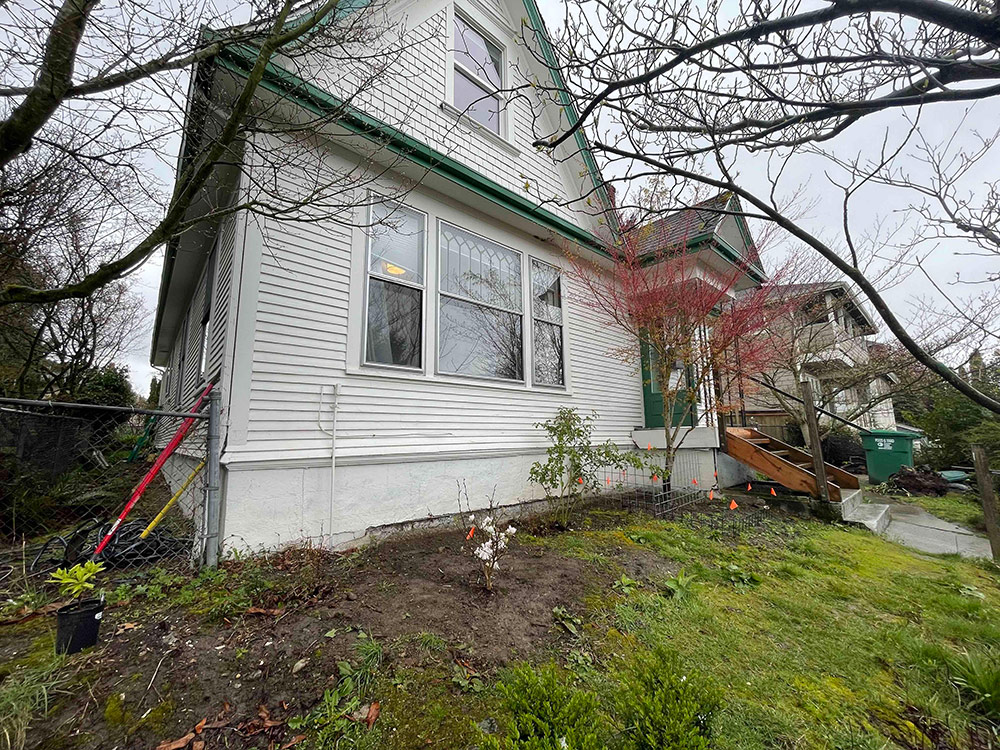
Question 2: How do I best protect against moisture on a floor over a crawlspace?
Andrew writes: Hello FHB team,
I’m a carpenter in the Pacific Northwest, and I’m redoing the floors of our 1980s tract home before our 3-month-old baby begins to crawl around. After demolishing the old 3/4-in. oak floor and carpet, I was puzzled to find subfloor that appears to be chipboard with a fir outer ply. I’ve asked around and searched Google, but I’ve got very little to go on. One fella said maybe it’s a product called Redex, but that’s all I have to go on.
Now the problem: the old floor had no vapor barrier and the house is built on a vented crawlspace. There is 6-mil poly covering the dirt in the crawlspace, but it’s not in the best shape.
I would like to run some underlayment as well as a sound vapor barrier prior to installing the 3/8-in. engineered birch flooring. I’m concerned about moisture migrating up through the old floor system, condensing on the barrier, then soaking into the chipboard. The joints are very gappy and swollen as it is. I’m also concerned about sanding the high spots for fear of burning through the outer ply and leaving exposed chipboard.
I hope you all can point me in the right direction!
Thanks for all that you do. I’ve listened to every single episode at least once.
Related Links:
Question 3: Should I make my own windows?
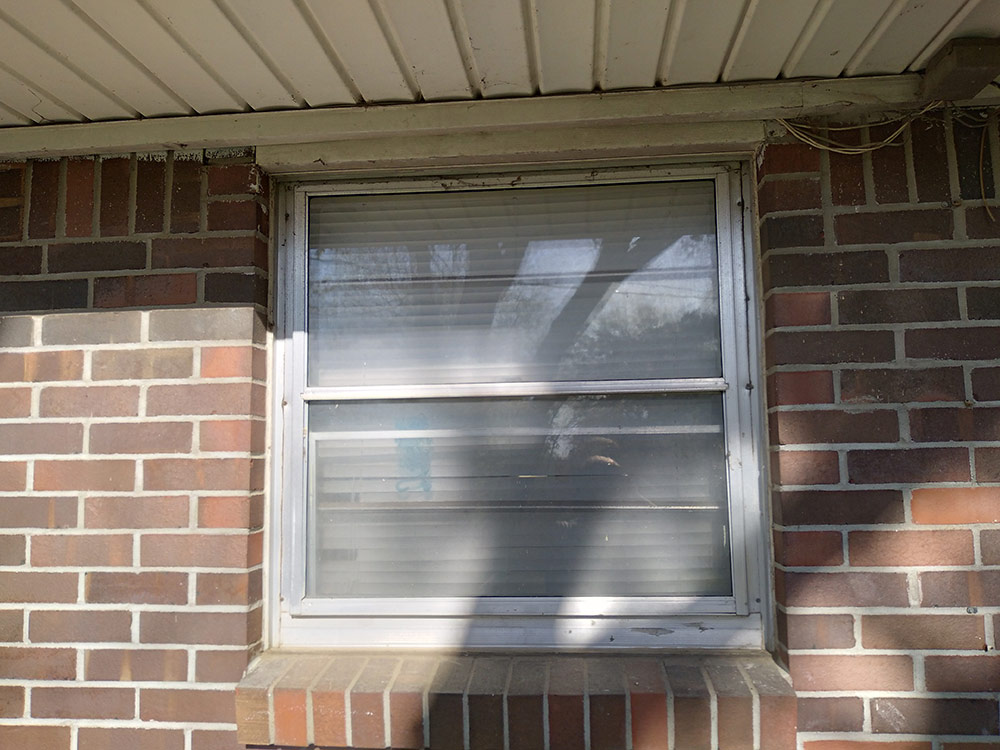 Justin (who wrote in podcast #559 about brick veneer) writes: Also, the windows are basically non-functioning, but I do not want to replace them with just a cheap replacement from the big box store. I am a woodworker and furniture maker on the side, and am seriously contemplating making my own windows. Am I crazy, or is this something doable for someone able to work to very tight tolerances? I am thinking I want to do wood casement windows. Any tips or suggestions? Would it be crazy to simply buy the double- or triple-pane glass panels and install them in custom-built casements and frames? I have sourced out all the glass (I have a glass manufacturer about 2 miles away from my house) and hardware. I think this would be a really fun project to tackle and save me tons of money by not having to pay for labor. Again, am I crazy, or do you think it’s doable? (I think we’ve established by now that I am probably crazy.)
Related Links:
END NOTE:
Podcast 561: Members-only Aftershow — All About Windows
The crew talks about the importance of windows, making your own windows, and reasons for window replacement.

Check out one of our latest Project Guides: Energy Retrofit!
Check out our FHB Houses:

Visit the Taunton Store • Magazine Index • Online Archive • Our First Issues • All Access

Help us make better episodes and enter for a chance to win an FHB Podcast T-shirt: www.finehomebuilding.com/podcastsurvey

If you have any questions you would like us to dig into for a future show, shoot an email our way: [email protected].
If we use your question we’ll send you a FHB Podcast sticker!

FHB Podcast T-shirts!
Represent your favorite podcast! Available in several styles and colors. Made from 100% cotton. Find the Podcast t-shirt and more cool products in the Fine Homebuilding Store.

| Fine Homebuilding podcast listeners can now get 20% off anything in the Taunton store, including Pretty Good House.
Use the discount code FHBPODCAST to take advantage of this special offer. |
 |
“Finally, knowledgeable people talking about building reasonably-sized, high-performance houses for normal people with real budgets!” — DanD, VA, 8/19/22, Amazon.com review |
We hope you will take advantage of a great offer for our podcast listeners: A special 20% off the discounted rate to subscribe to the Fine Homebuilding print magazine. That link goes to finehomebuilding.com/podoffer.
The show is driven by our listeners, so please subscribe and rate us on iTunes or Google Play, and if you have any questions you would like us to dig into for a future show, shoot an email our way: [email protected]. Also, be sure to follow Fine Homebuilding on Instagram, and “like” us on Facebook. Note that you can watch the show above, or on YouTube at the Fine Homebuilding YouTube Channel.
The Fine Homebuilding Podcast embodies Fine Homebuilding magazine’s commitment to the preservation of craftsmanship and the advancement of home performance in residential construction. The show is an informal but vigorous conversation about the techniques and principles that allow listeners to master their design and building challenges.
Other related links
-
- All FHB podcast show notes: FineHomebuilding.com/podcast.
- #KeepCraftAlive T-shirts and hats support scholarships for building trades students. So order some gear at KeepCraftAlive.org.
- The direct link to the online store is here.