previous
  • Top 10 Videos of 2011
    Top 10 Videos of 2011
  • 7 Small Bathroom Layouts
    7 Small Bathroom Layouts
  • Your Guide to Energy Smart Homes
    Your Guide to Energy Smart Homes
  • Tool Test Preview: Compact Compressors
    Tool Test Preview: Compact Compressors
  • Fine Homebuilding: The Current Issue
    Fine Homebuilding: The Current Issue
  • Fine Homebuilding: The Digital Issues
    Fine Homebuilding: The Digital Issues
  • VIDEO: Stop Paint from Bleeding
    VIDEO: Stop Paint from Bleeding
  • The Inspector Game: Goofs on a Roof
    The Inspector Game: Goofs on a Roof
  • Patrick's Barn: A Perfect Place for a Party
    Patrick's Barn: A Perfect Place for a Party
  • How to Fill Nail Holes and Paint PVC Trim
    How to Fill Nail Holes and Paint PVC Trim
  • The Self-Taught MBA: Inspired Reading
    The Self-Taught MBA: Inspired Reading
  • 10 Basement-Remodeling Tips and Techniques
    10 Basement-Remodeling Tips and Techniques
  • Seven Steps to Choosing the Perfect Circular Saw
    Seven Steps to Choosing the Perfect Circular Saw
  • Replacing a Roof : Installing a Ridge Vent
    Replacing a Roof : Installing a Ridge Vent
  • How to Avoid Complicated Fractions
    How to Avoid Complicated Fractions
next
continued 12next>VIEW ALL

Wraparound Lavatory Drawer

Make use of that lost space around the sink-bowl by transforming an old vanity into a bathroom base cabinet for your sink

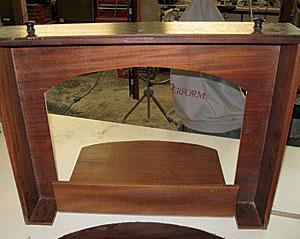
I was converting an antique vanity into a base cabinet for a lavatory when my client said she wanted to preserve as much of the antique drawer as possible, maximizing its usable space. Here’s how I did it.

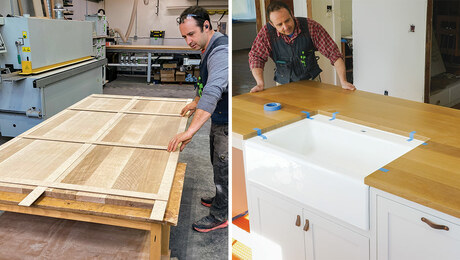
First, I transferred the curve of the sink-bowl cutout to the bottom of the drawer, then cut away the portion of the drawer that had to go to accommodate the sink.

Cut away the bottom and back of the drawer to accommodate the oval sink. Cut away the bottom and back of the drawer to accommodate the oval sink. Photo by: Brian Campbell

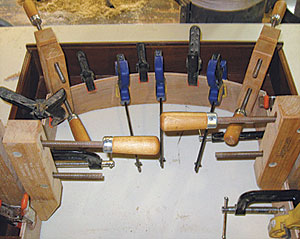
The new drawer back and sides are composed of two layers of 1/4-in.-thick lauan plywood. One layer is 3/8 in. wider than the other, which accounts for the thickness of the drawer bottom. The outer layer is stapled from the side to the drawer’s bottom. The inner layer sits on top of the drawer bottom and is stapled from below so that the fasteners are perpendicular to one another.

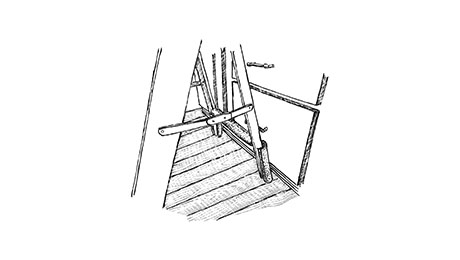
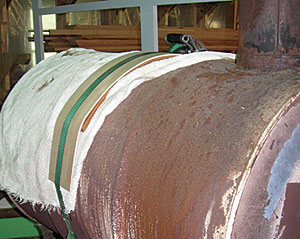
Before affixing the curved layers to the drawer bottom, I used my homemade bending form to put some arc in them. I dunked the plywood in a rain barrel, then strapped the two layers to my 55-gal. oil-drum woodstove. The stove had a little tighter radius, so the spring-back was about perfect. I spread polyurethane glue between the plywood layers and held them together with a variety of clamps while the glue set up. I stained the new sides and drawer back to match the original, and we were good to go.

Staple outer layer of plywood to drawer bottom, spread glue, and clamp the two layers together. Staple outer layer of plywood to drawer bottom, spread glue, and clamp the two layers together. Photo by: Brian Campbell
Stain and finish to match the original. Stain and finish to match the original. Photo by: Brian Campbell
When my client and I originally discussed the project, we talked about using a hinged drawer front that would conceal a narrow band of storage space. I think this works better, and it provides about three times more storage space than a tilt-out.
Photos: Brian Campbell
From Fine Homebuilding207 , pp. 20 October 15, 2009
continued 12next>VIEW ALL