Timber-Frame Joinery
Learn a traditional timber-frame technique for cutting a double-bladed scarf joint.
The scarf joint was born of necessity when carpenters needed longer timbers than their forests could provide. The first documented example comes from the remains of a 7th-century Anglo-Saxon burial ship that was discovered in an English riverbank. A scarf was used to join stem and stern timbers to a center keel. Dozens of scarf joints have been documented over time. Some have failed miserably, while others have survived centuries. The double-bladed scarf, first introduced in the 16th century, is the strongest joint for joining two timbers. Commonly used in a horizontal application (over a post, for instance), it also can be used vertically.
This particular timber-frame joint has long been a favorite of mine because of its decorative as well as its structural power. To make it stand out more, I increase the length of the blades from the usual 1-1/2 in. to 5 in.
Accurate layout is critical if you don’t want to spend all day fitting the four face cuts on each half of the joint. It is a time-consuming process, but my speed picks up on the second and third joints. In a completed frame, the scarf is an eloquent representation of the time spent and the level of my craft.
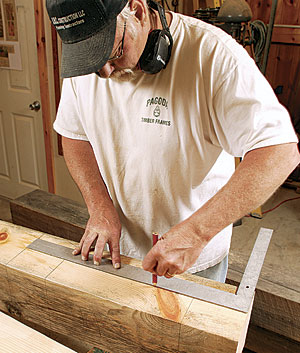
Layout is based on a centerline
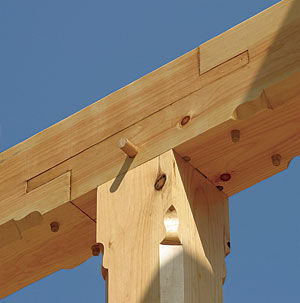
Typically 20 in. to 30 in. long, the completed scarf consists of two identical halves. Each has a 5-in. by 1-1/2 -in. blade, a 14-in. space, and a corresponding 5-in. by 1-1/2 -in. housing. Once assembled, the joint can be pegged through the blades.
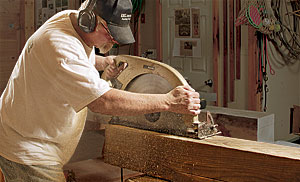
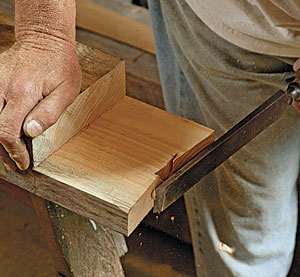
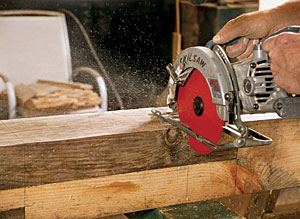
Mark the end of the cut to reduce tearout
The joinery is as decorative as it is structural, so it’s important to have clean cuts. With that in mind, use a chisel to score the end grain at the end of the housing cut. Next, rip the centerline from both sides; the mortise will clean out anything left by the stopped cuts.

Back-cutting makes an easier fit
After the shoulder is cut, the blade end is relieved across its center.
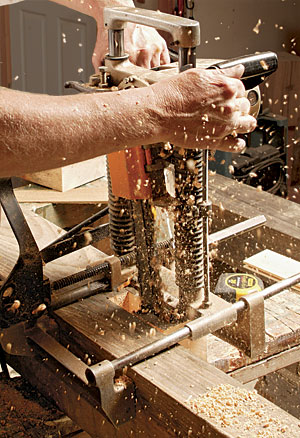
The housing can be excavated with a drill and chisel, or it can be cut with a chain mortiser. The end result should be a clean, tight housing for the blade. The back end of the housing is relieved with a chisel, so any adjustments have to be made only to the exposed edges of the blade.
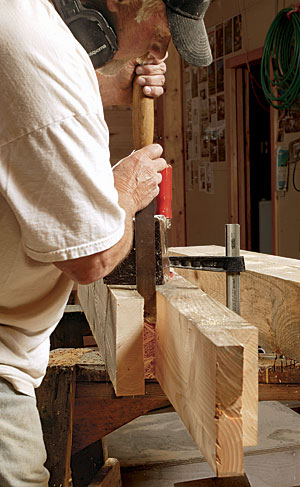
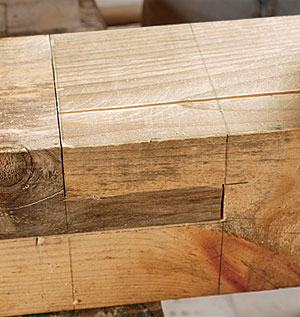
Test and tune the fit
With the two halves assembled, check all mating edges to see that there aren’t any gaps caused by an improper fit. In this case, a gap at the blade was reduced by a saw-kerf on the shoulder.
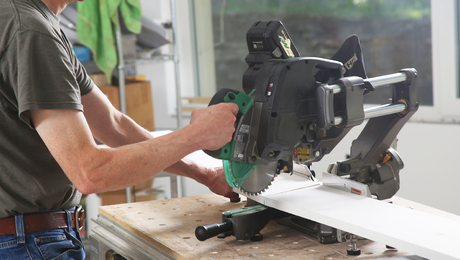
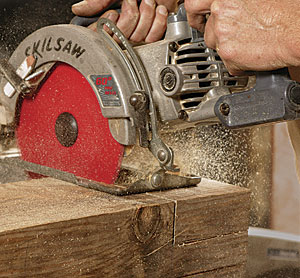
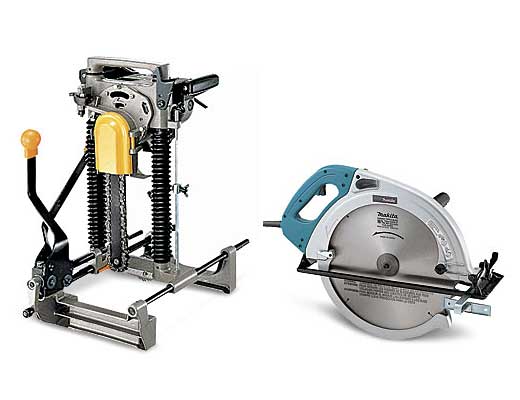
Tools of the trade: Big timbers require big tools
A device made specifically for timber framers is the chain mortiser, a small electric chainsaw mounted on an indexing frame. It cuts a mortise in the time it used to take a carpenter to chuck a bit into his brace. Another tool, a big circular saw, has a 16-5/16-in.-dia. blade and can cut 6-1/4 in. at 90°. The electric brake improves safety, and there’s an extra handle mounted on the body for more control. The tools shown here are made by Makita (www.makitausa.com). The mortiser sells for about $1300, and the saw for about $650.
Photos by Charles Bickford, except where noted.