
Flawless Two-Piece Baseboard
If you dial in your measurements and fine-tune your baseboard cuts, you won’t need the painter to make your work look good.
Synopsis: Although often passed up in favor of speedbase-style single-piece baseboard, which is faster to install and less expensive, two-piece baseboard has several advantages: It’s better at hiding waves in walls, and it keeps joints tighter in corners. Carpenter Nick Schiffer explains his typical installation process, which includes measuring, cutting, scribing, fastening, making splices, and cutting copes.
In the world of building, finish carpentry is the second-to-last step before the homeowners move in—or in the case of a remodel like this one, before they reoccupy the room. My job is to make sure that the framers, drywall installers, and flooring guys who came before me look good, and that the painter who comes after me isn’t left with the task of hiding sloppy joints, excessive nail holes, and oversize gaps.
Although many houses are trimmed with a one-piece, shaped base-board that mimics the look of a traditional two-piece installation—a product known as speedbase—I still prefer the real deal: flat stock topped with a separate cap molding. This two-piece installation takes a bit longer, but it provides more leeway for finesse when it comes to hiding waves in walls and keeping joints tight at corners, even if they aren’t square.
Clear the room and prep the area
My process for installing baseboard on remodel jobs is essentially the same as it is in new construction. The only notable exceptions are that remodels typically include a bit more job-site protection, may require that I set up my saw outside or in a garage if the house is occupied, and likely involve removing the existing baseboard before installing the new.
Ideally, I remove all furniture and set up my miter saw and other tools right in the room that I’m working in. at the least, I move all the furniture to the center of the room and cover it with a drop cloth, then I find a nearby spot to set up shop for cutting.
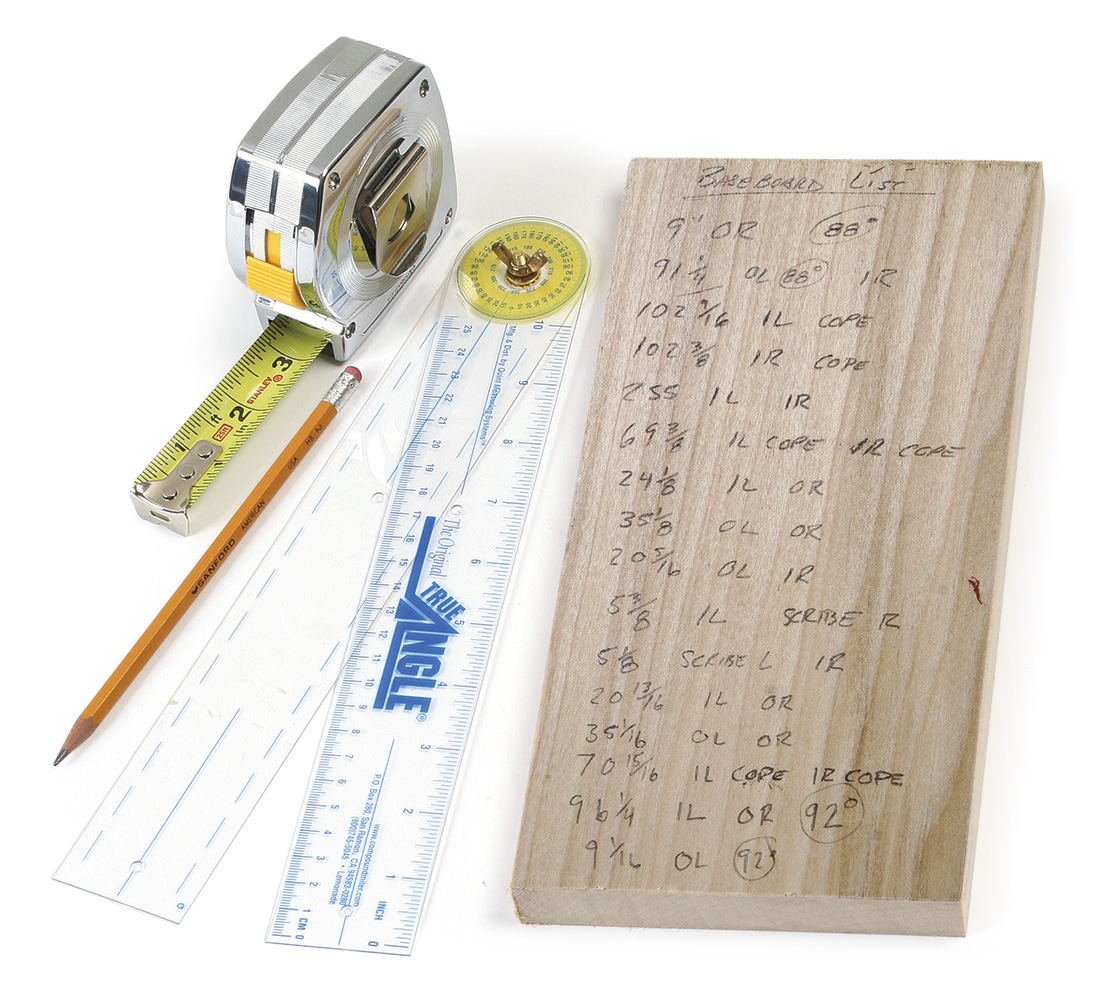
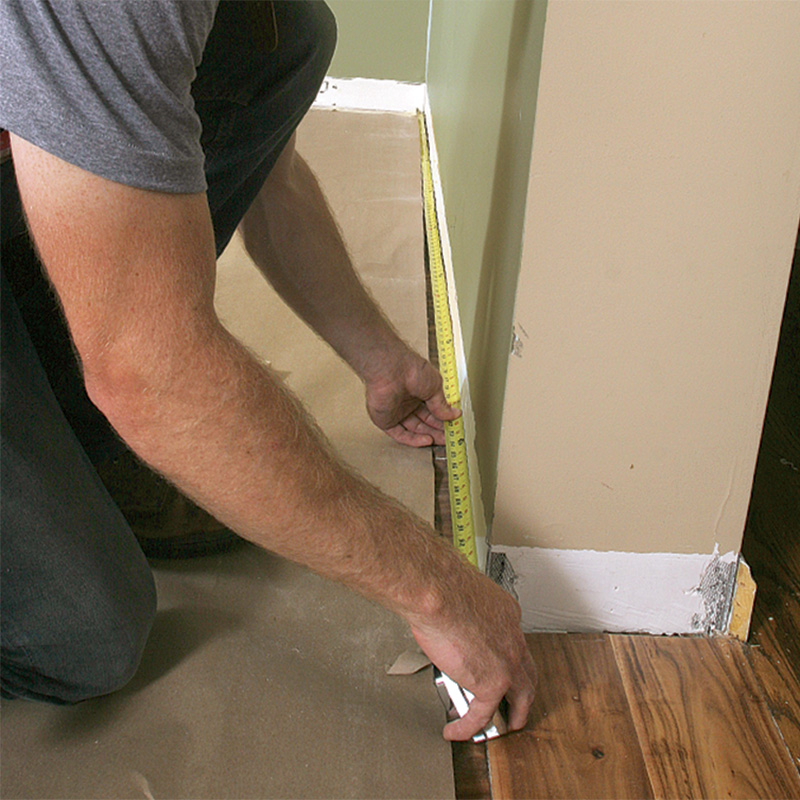
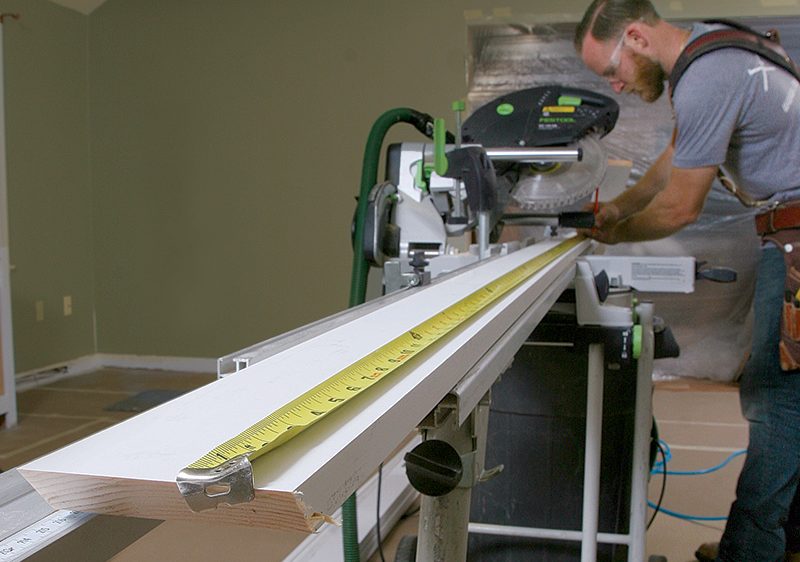
Measure and make a cutlist
The installation starts with careful measurements and a detailed cutlist, which improves accuracy and reduces trips back and forth to the saw. For consistency, I always start at a doorway and work clockwise. I make my cutlists with three columns. The first column is for length measurements, which I take along each wall at floor level. The next two columns are to indicate the type of cut needed on each end of every piece of stock. I check all inside and outside corners with an angle-finder—an indispensable $10 finish-carpentry tool—to determine if off-angle joints are necessary. I mark conventional inside and outside miters (90° angle) with the length and type of miter necessary on each end. OR indicates an outside miter on the right end of the piece of stock, OL indicates an outside miter on the left end, and IR and IL are for inside-right and inside-left miters. If I encounter an out-of-square corner (greater or less than 90°), then I write the adjusted angle that will be needed.
|
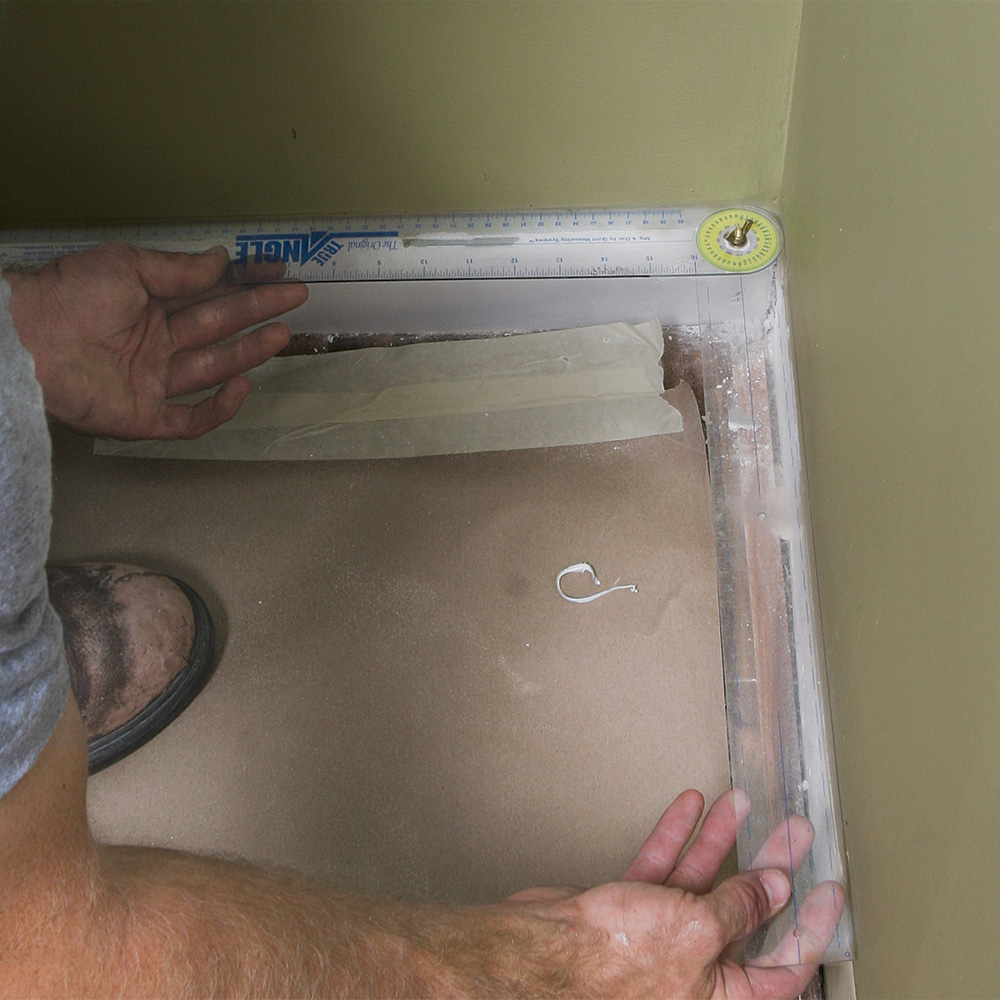
I protect the floor of the room with kraft paper—holding it off the wall by a few inches so that it won’t interfere with the baseboard—and seal doorways with plastic sheeting. With the room prepped, I remove any existing baseboard with a thin flat bar and a hammer.
Unless the baseboard is being saved, my priority is to keep the drywall intact. If the baseboard splits or breaks in half, I’m not concerned, but holes made in the wall that won’t be covered by the new trim mean extra work. If the baseboard comes off in long lengths, I cut it into shorter sections on the miter saw so it can be loaded into a barrel alongside broken pieces and shorter remnants for carrying to the Dumpster.
To eliminate the chance of the new baseboard being hung up by old nails and debris, I pull any nails left behind in the wall, scrape away caulk, and vacuum the whole area. If walls are already painted, I mark stud locations with pieces of painter’s tape or with pencil marks on the paper that covers the flooring. If the walls will be painted after my installation, I mark the studs just above where the new baseboard will go.
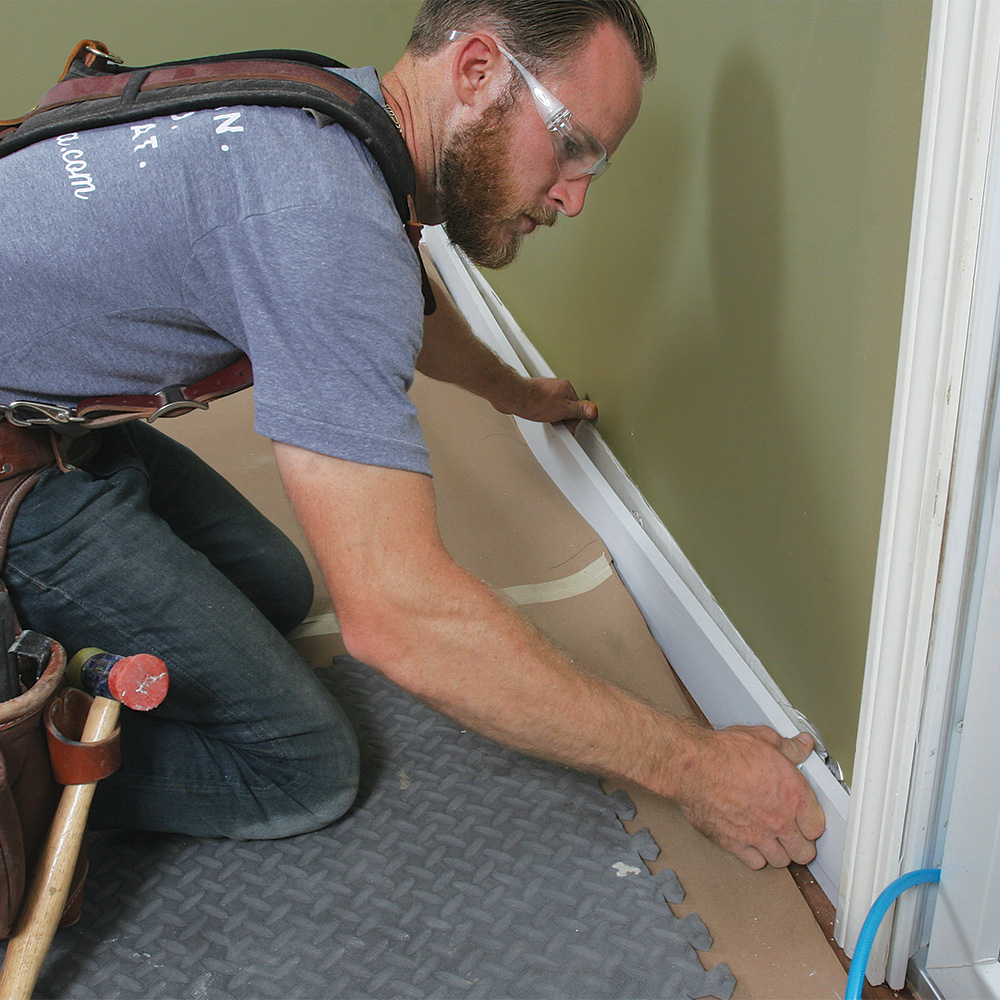
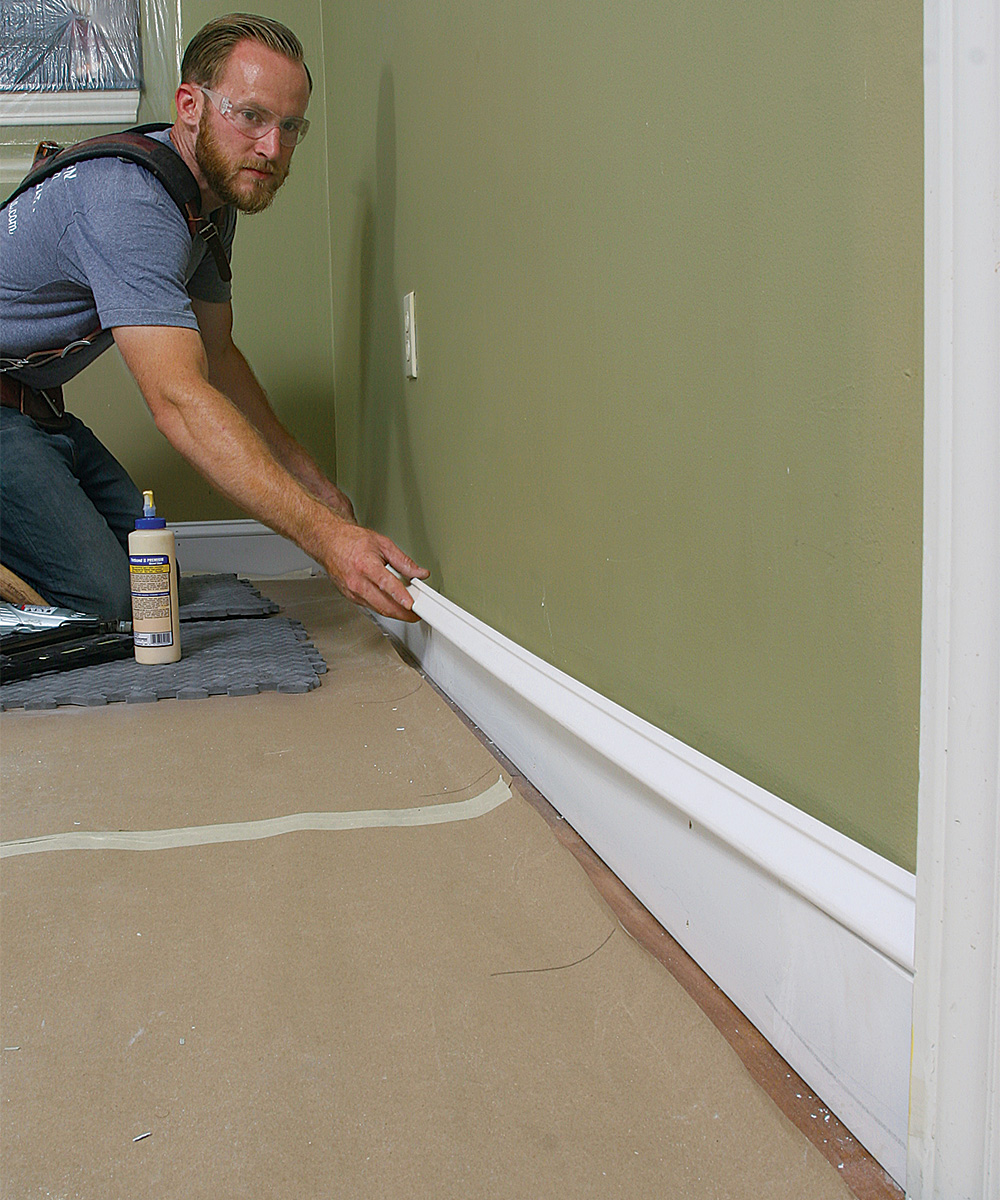
First comes the flat stock
For paint-grade jobs, I use primed finger-jointed pine for the flat stock. Once I’ve cut pieces and positioned them on the floor where they will be installed, I look for places that will require excessive scribing along the bottom edge of the baseboard where it meets the floor. If the installation will be finished off with shoe molding, then scribing isn’t usually necessary, but shoe molding isn’t used much in my region.
All the flat stock is fastened with a pair of 2-1/2-in.-long 15-ga. finish nails into each stud, and the mating mitered pieces of both inside and outside corners are coated with wood glue before being fitted together. I assemble most corners right in place, and I like to leave the first piece loose at least one stud back from the corner until the second piece has been fitted and clamped and the glue has dried. Small jogs and runs of trim with outside corners are often easier to fasten together on the workbench with glue and miter clamps and then to drop into place as one piece.
For long walls, it’s necessary to splice together two pieces of stock with either a traditional scarf joint or a reinforced butt joint.
Two-piece baseboard flat stock
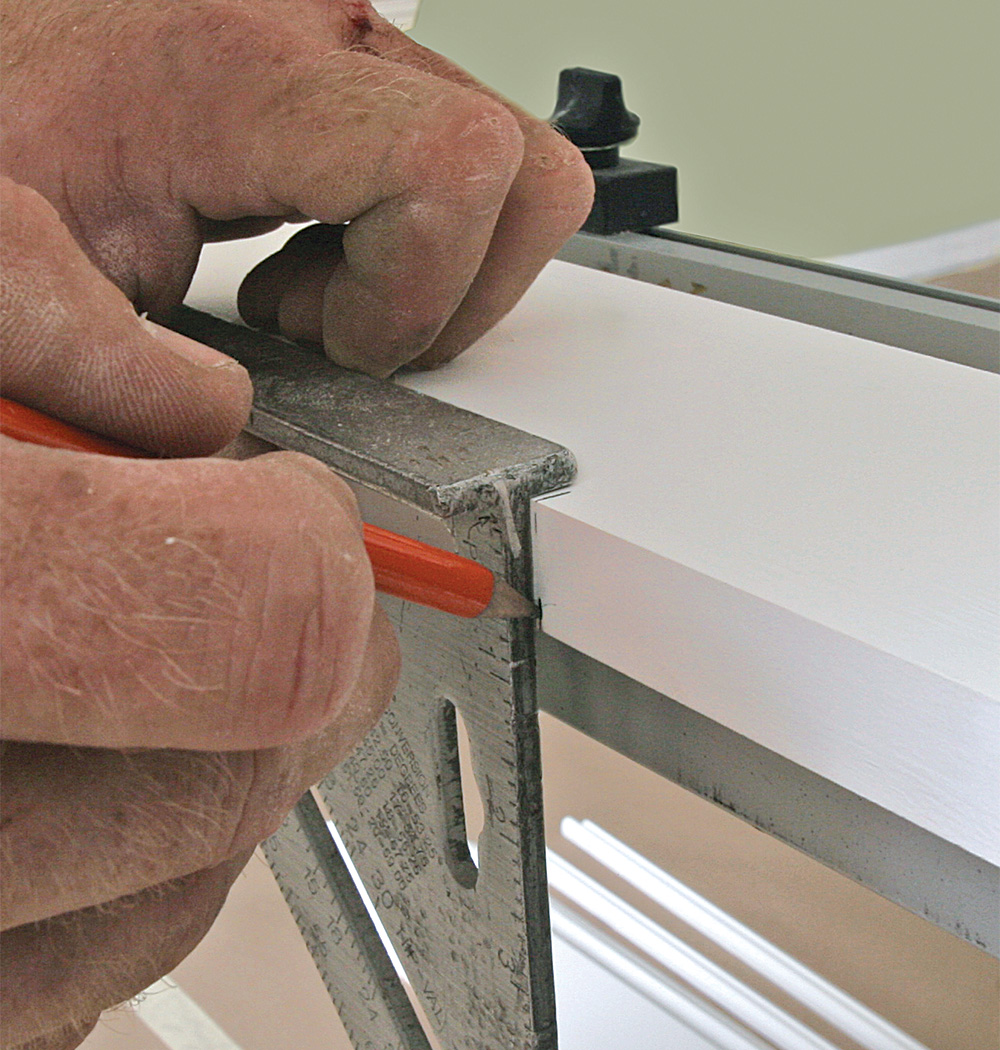
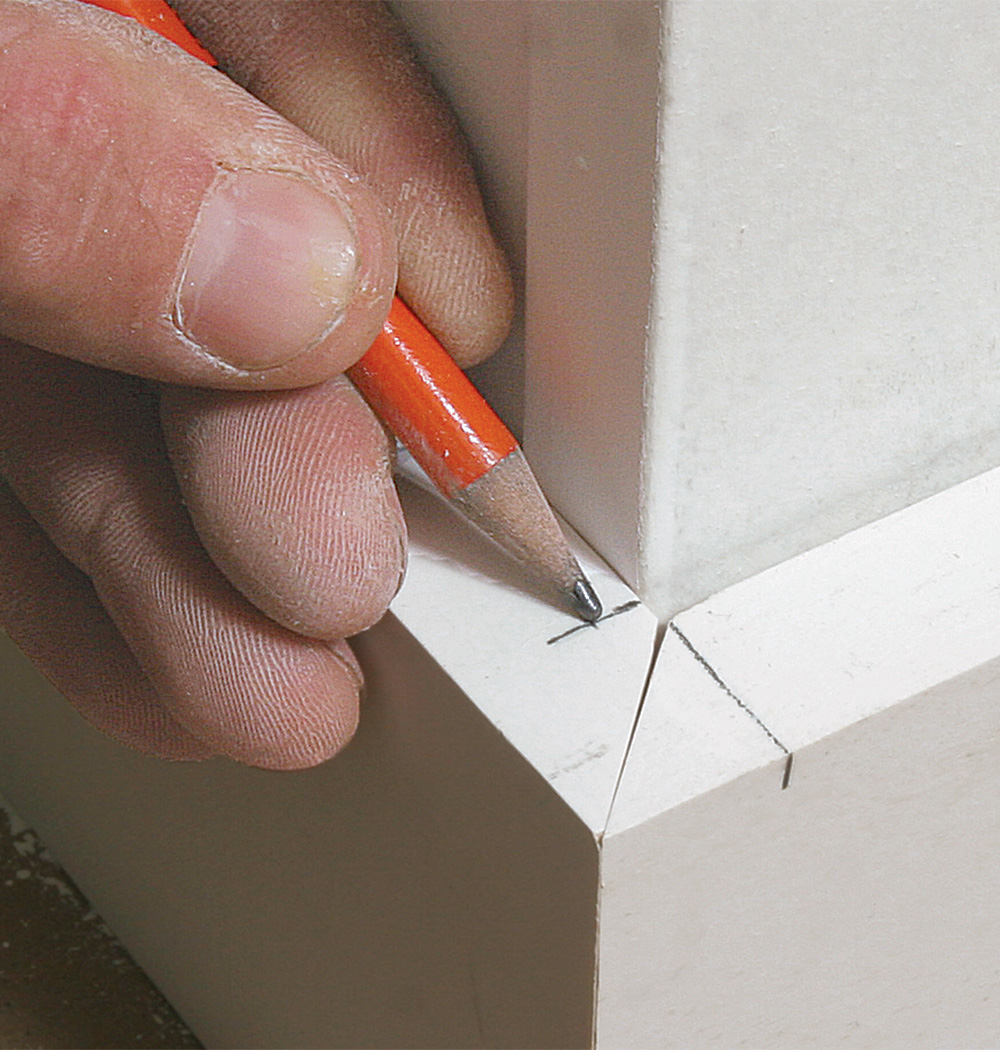
Cuts must be accurate
If you want to make efficient use of your accurate measurements, then your cuts have to be accurate, too. My measurements are of the actual walls, which means the lengths on my cutlist are from the long points of inside miters to the short points of outside miters. To remain accurate, I mark my stock the same way. On this piece, I cut the outside miter and measured along the face of the stock to mark the inside of the miter’s short point. For inside corners, I typically miter the two pieces of flat stock together, setting the saw to make a 44.5° miter to ensure that the visible seam is tight.
 |
 |
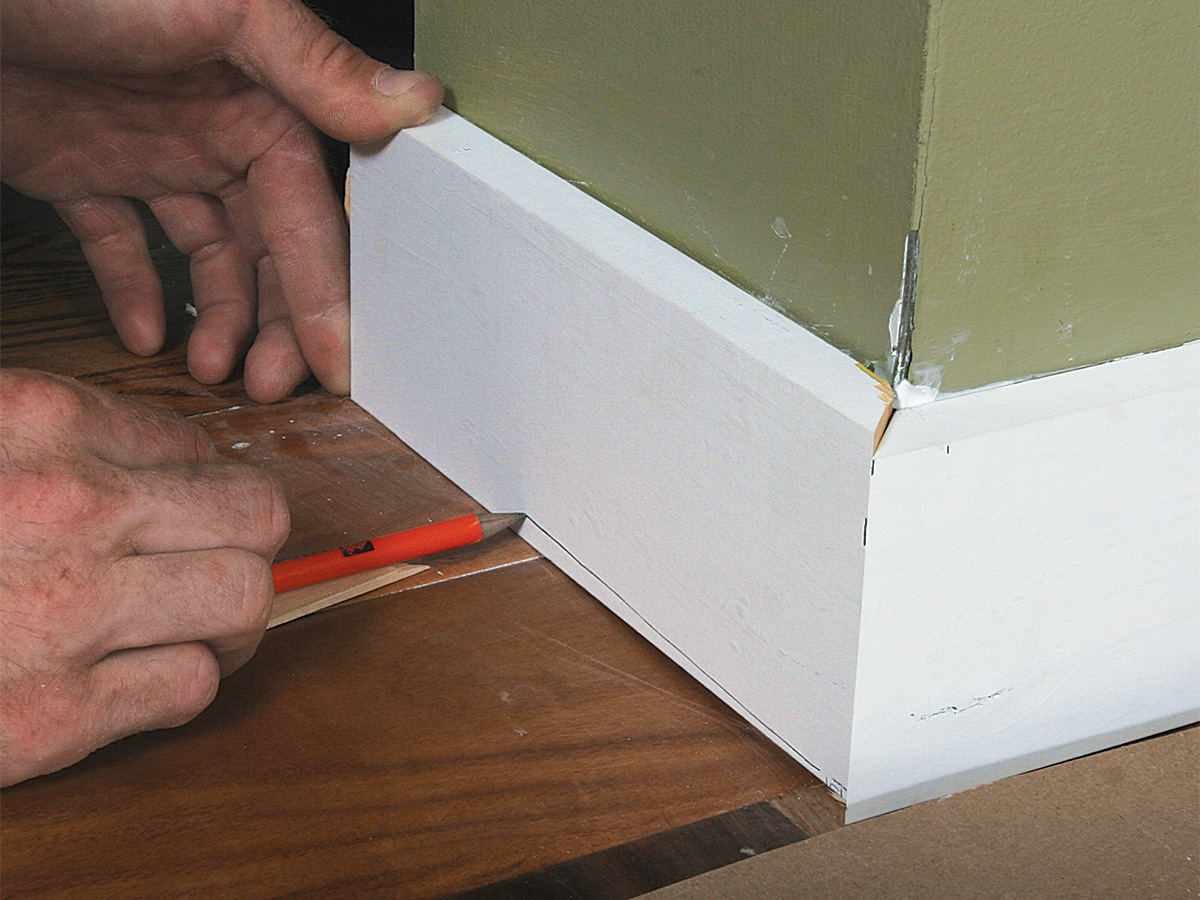
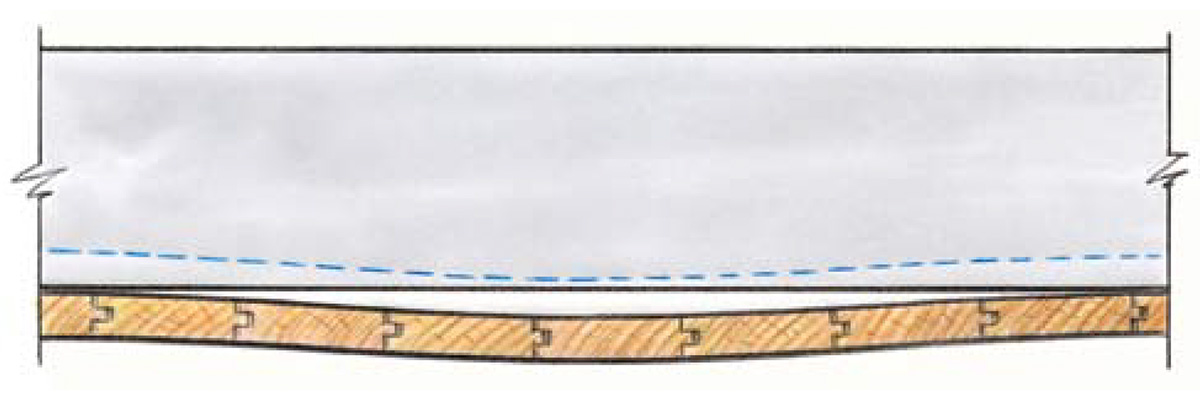
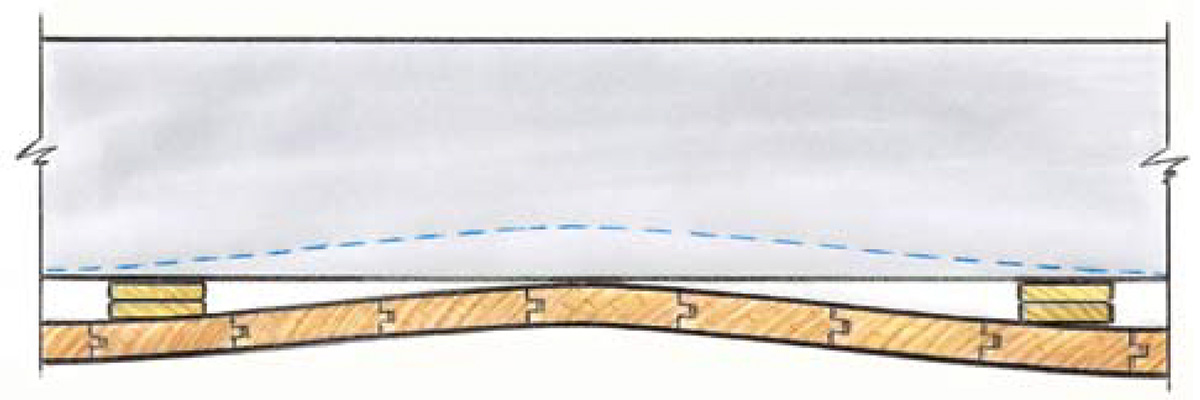
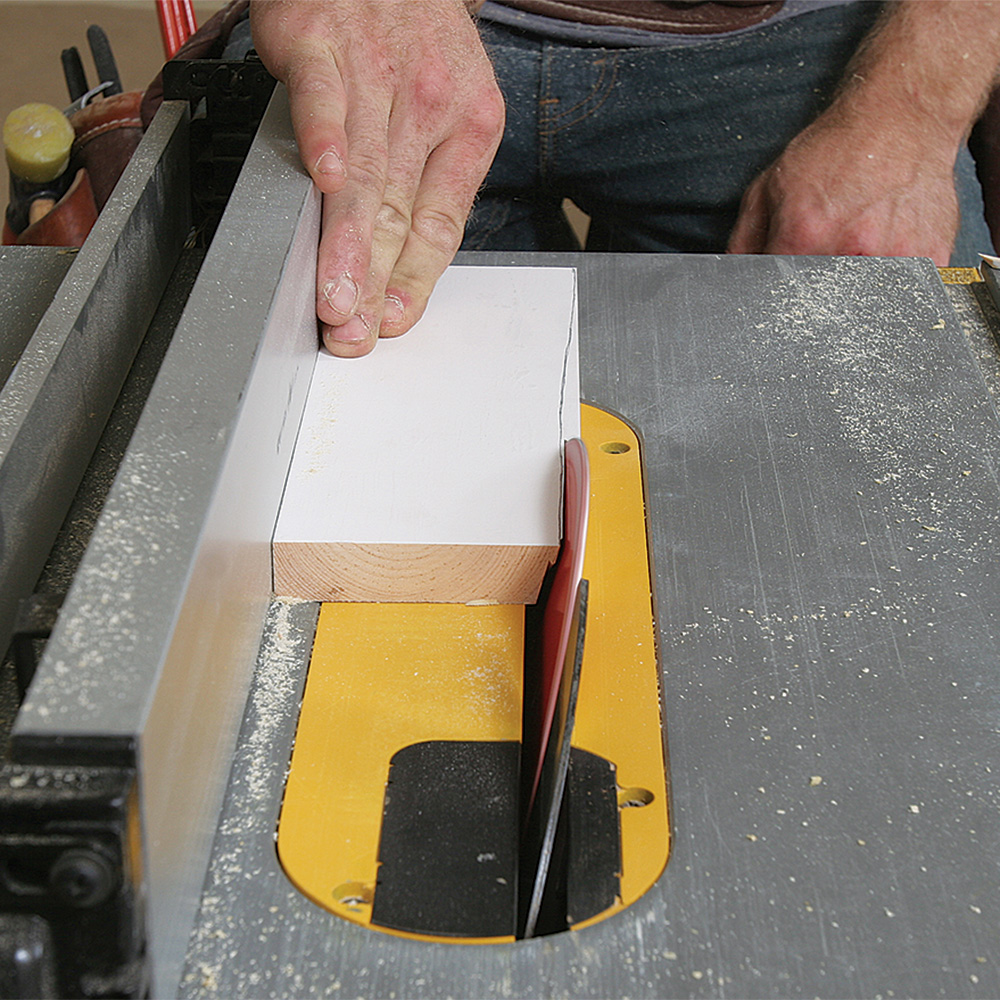
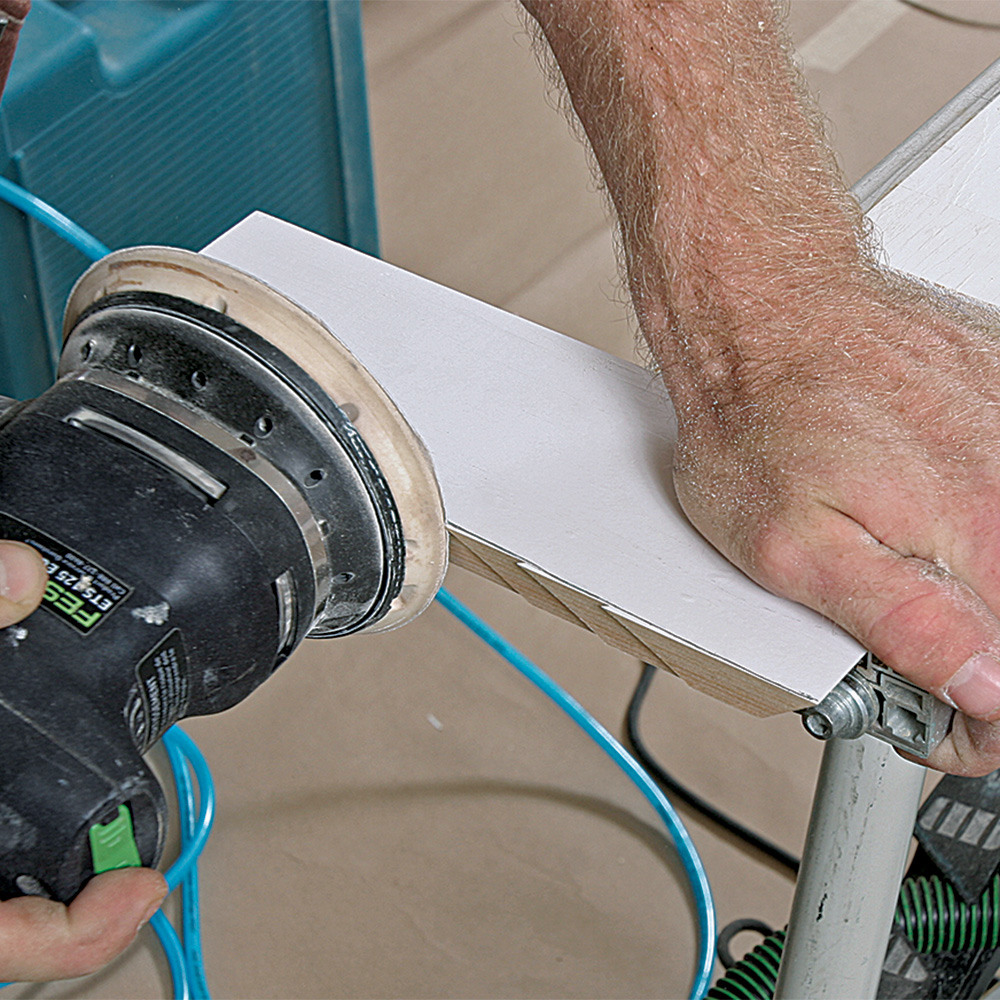
Scribing for a tailored fit
In minor cases, a pencil and a shim are all you need to trace the contours of the floor onto the piece of stock. From there, you can follow the scribed line, removing most of the waste on a tablesaw and fine-tuning the scribe with a jigsaw, a block plane, and/or a sander. Severe waves in the floor may require using wider flat stock so that the top edge of the baseboard remains at a constant height while the bottom edge follows the humps and dips in the floor.
|
|
|
 |
 |
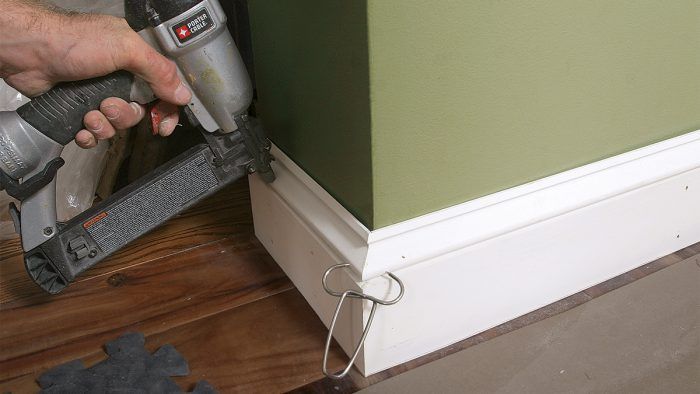
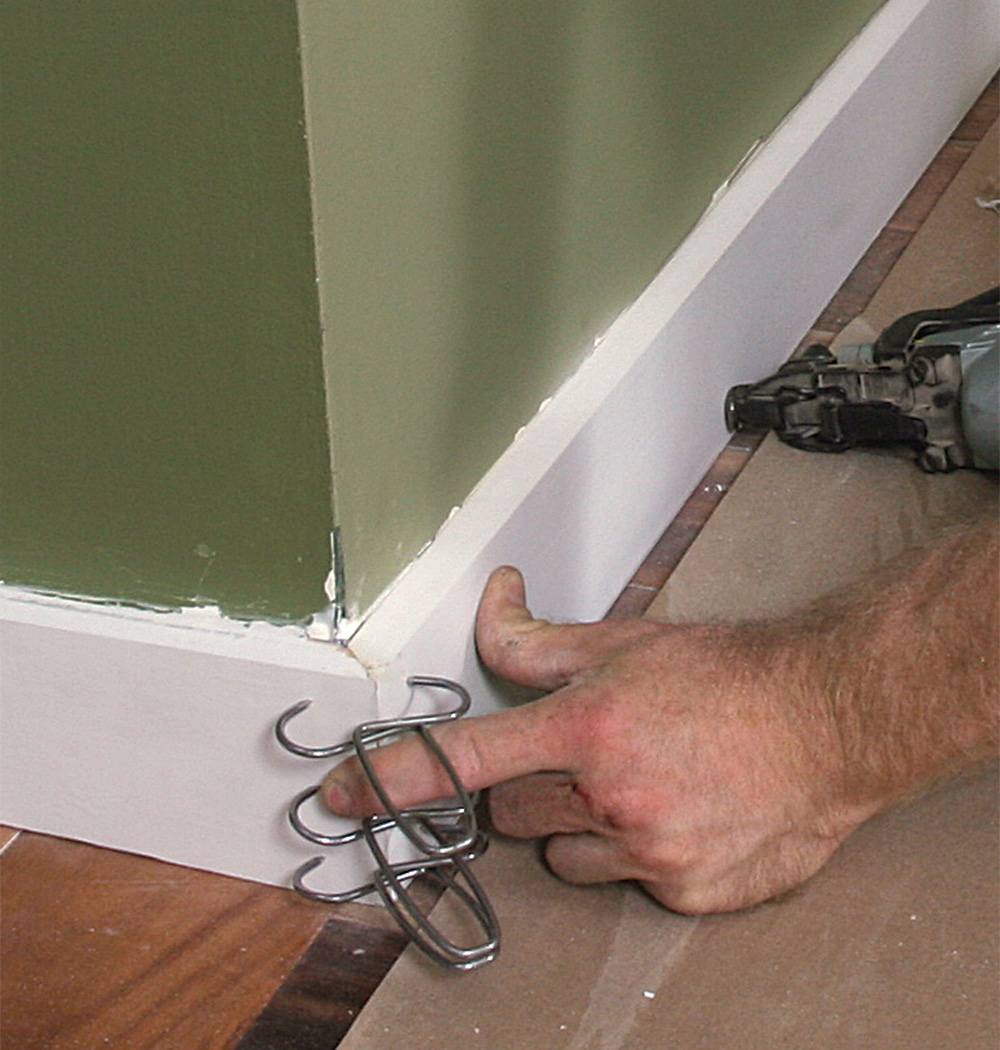
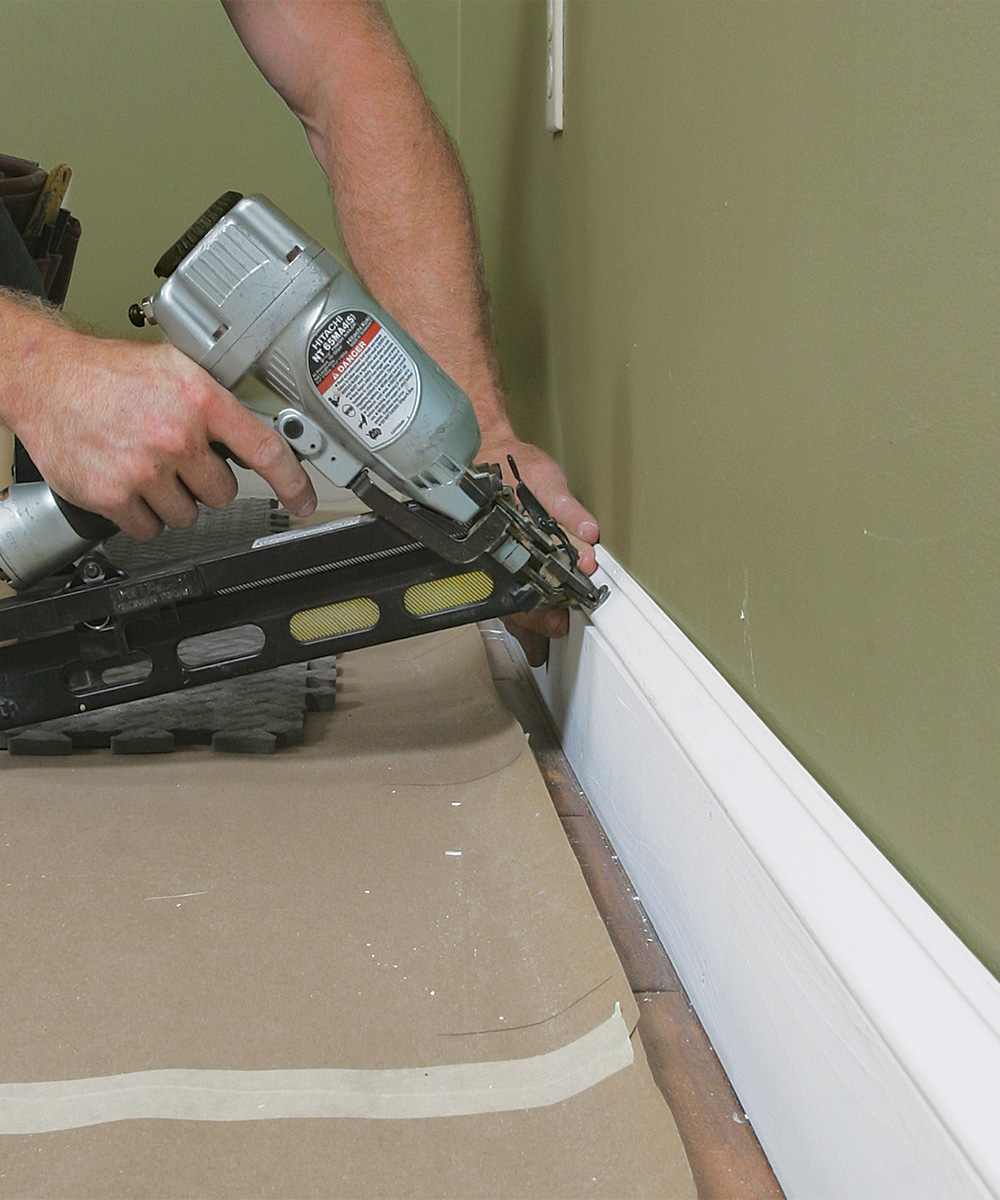
Keep flat-stock joints tight, flush, and tidy
My priorities when installing flat stock are making tight joints and getting a good fit between trim and flooring. This means scribing where necessary and sometimes adjusting the angle of a miter or marking a piece in place for a recut. Doing so yields tight joints that come together with no space or need for filler. I cut long pieces just a hair beyond the mark and then spring them into place. For outside corners, I focus first on the miter, holding nails back from the nearest studs until the miter has been glued and clamped. (I use Collins miter clamps.) Once the glue sets, I tack the corner to the studs and remove the clamps.
 |
 |
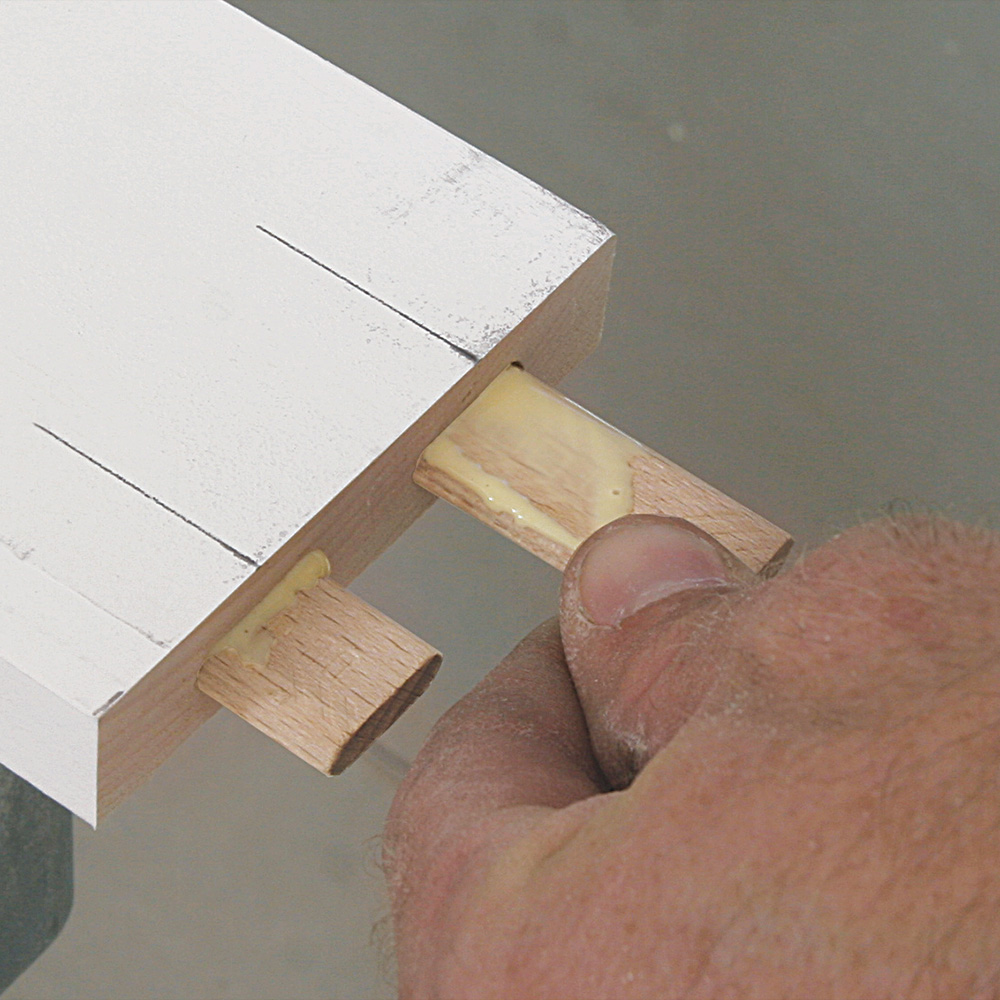
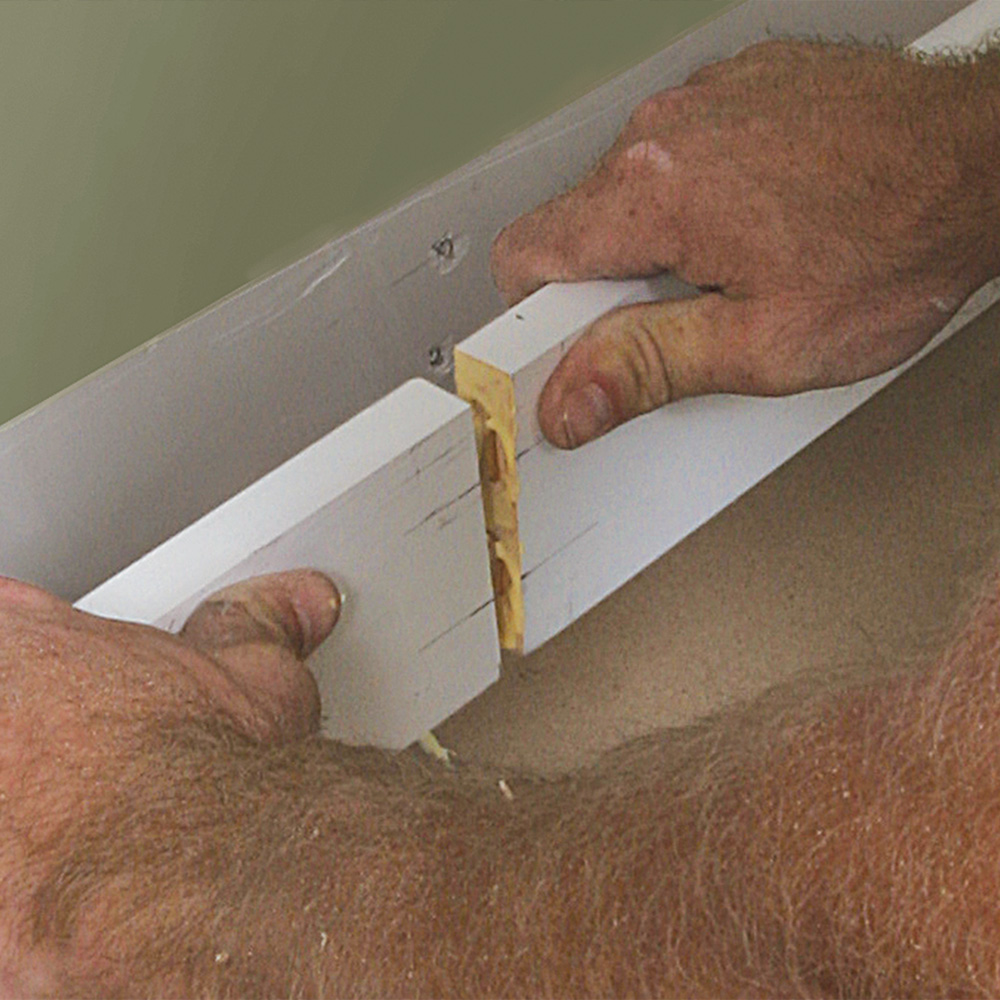
Reinforced splices
The traditional approach to making splices is to create a scarf joint (cutting the end of each piece on an angle), which ensures the largest glue surface possible. I prefer to handle splices with butt joints, though, which allows me to cut the trim pieces slightly long and spring them into place without worrying about one piece slipping past the other and creating an open joint. Normally a butt joint wouldn’t be as strong as a scarf joint, because the end grain of wood doesn’t glue together as strongly as the face grain, but I reinforce butt joints with a pair of tenons set into slots cut with a Festool Domino tool.
 |
 |
 |
Cap molding follows suit
The key to a quick cap-molding installation is to keep updating the cutlist as the flat stock is installed. If a piece of flat stock is cut to the measured length and ends up being a bit too long or an angle needs to be adjusted, I erase the original measurement on the cutlist and write in the updated measurement so that the cap molding can be cut right on the first try.
Unlike the miter joints on the inside corners of the flat stock, I prefer coped joints at inside corners of the cap stock, which ensures that the joints will fit tight through seasons of expansion and contraction. At this point, I map out which pieces will require a cope and on which end, adding that information to the cutlist as well.
Clean returnsMiter returns are a clean way to terminate the cap molding in situations where the end of the run of trim will be visible. These tiny returns are prone to splitting when nailed, so I assemble the pieces with fast-setting CA glue, such as 2P-10 (fastcap.com), and then install them as one unit.
|

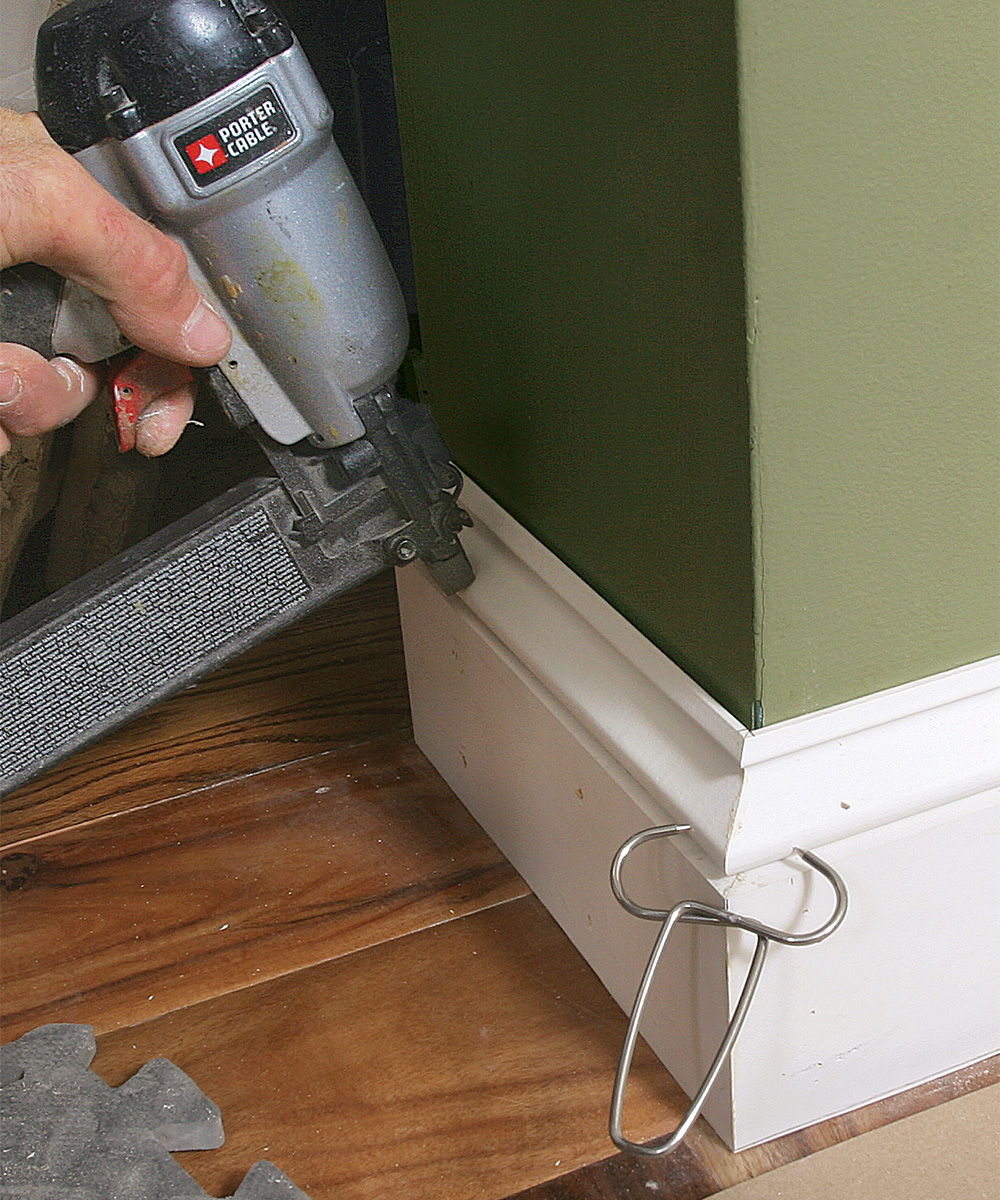
In most cases, I fasten the cap tight to the wall using 2-1/2-in. 15-ga. trim nails, always placing the nails in an area of the cap profile that will minimize hassle when the painter fills and sands the holes. The cap molding can follow the contours of the wall to a certain extent, concealing slight waves and gaps that the thicker, flat stock can’t conform to, but I don’t blindly follow contours of badly waved walls. If inside or outside corners are clearly out of whack or a long run has a big dip, floating the cap away from the wall is often less noticeable than trying to follow it snugly. In these cases, I switch to an 18-ga. brad nailer to fasten the cap molding to the flat stock below rather than into the wall studs, and then I fill the gap between cap and wall with caulk.
Most cap moldings are too small to be bored out easily with a Festool Domino tool, so rather than relying on butt joints and tenons for splices, I go with the traditional scarf joint. I cut the joint as steep as my miter saw allows to provide as much face grain as possible for the glue joint, but I avoid cutting these pieces overly long, as springing them into place often leads to a misaligned joint.
Two-piece baseboard cap stock
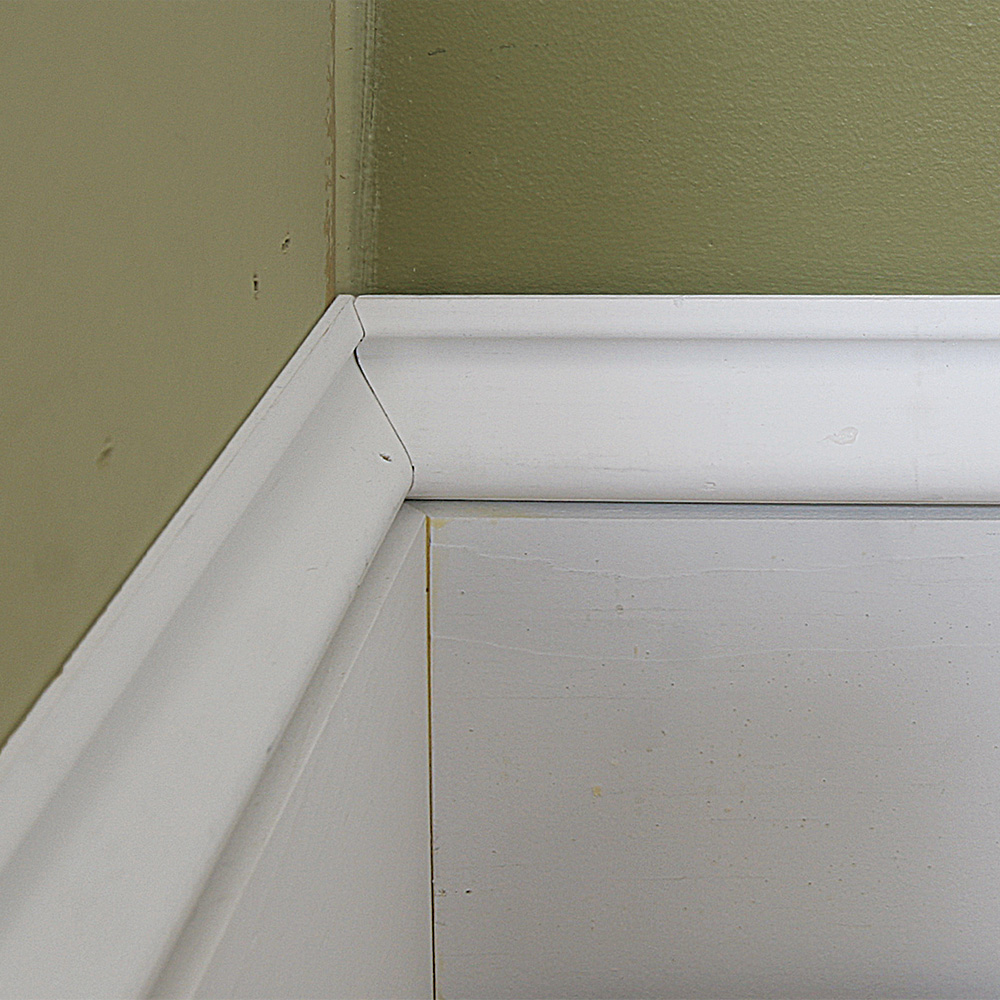
The cap hides the flaws
The more flexible cap molding can conform to wavy walls and hide gaps behind the less flexible flat stock. But if the walls are severely wavy or have out-of-square corners, I switch to an 18-ga. brad nailer to fasten the cap molding to the flat stock below rather than into the wall. In these cases, caulk hides the gap between cap and wall.
 |
 |
 |
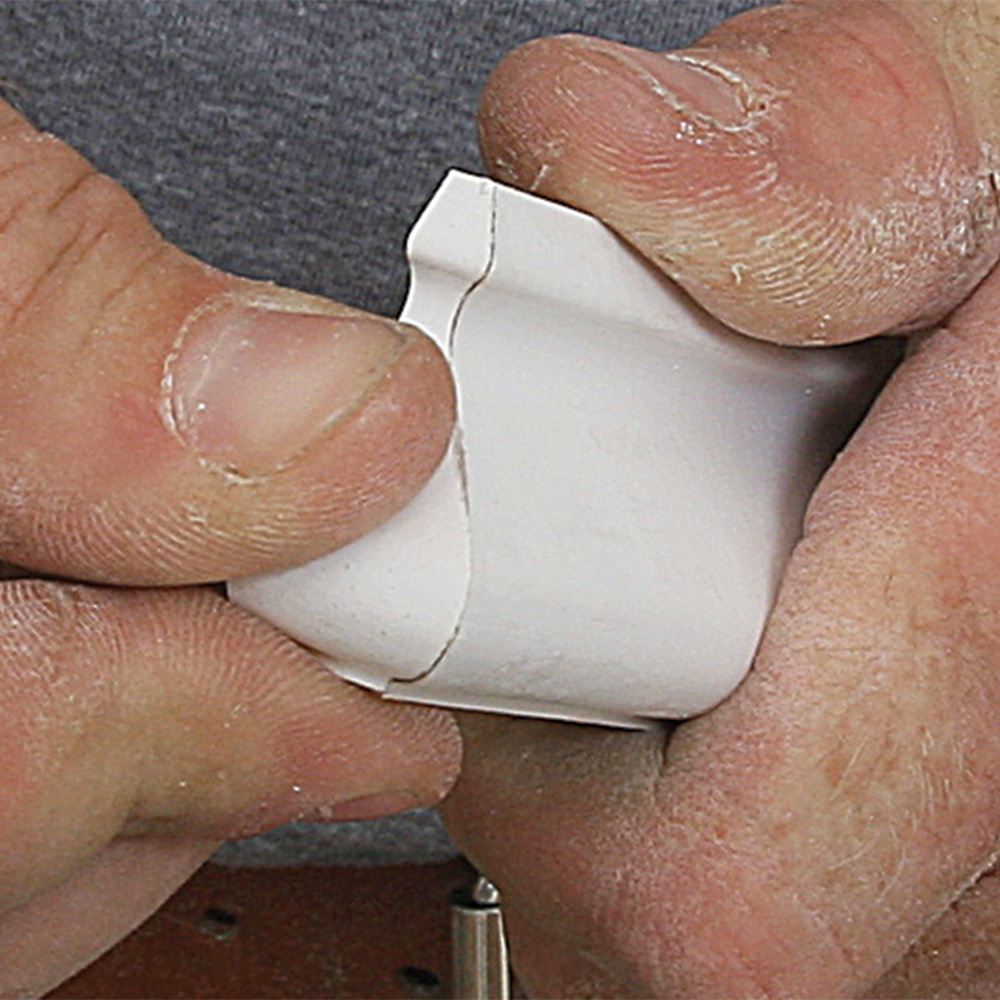
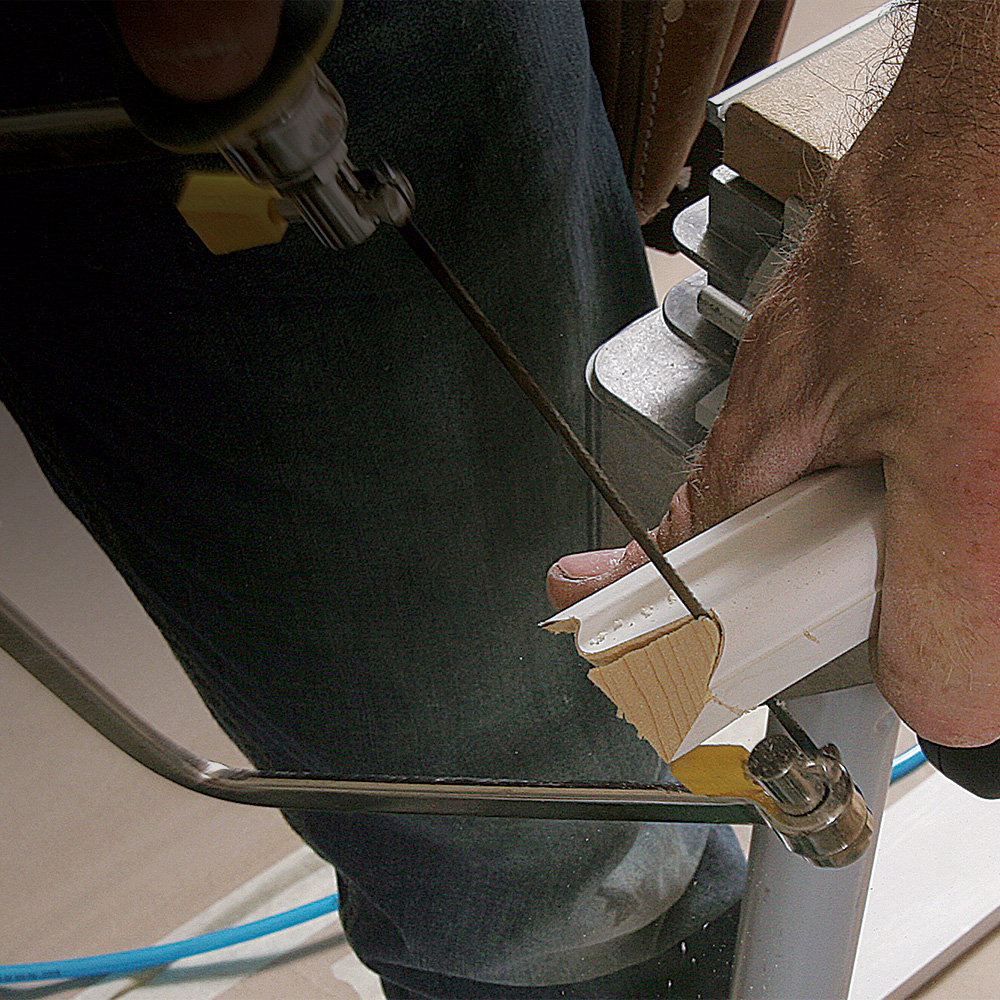
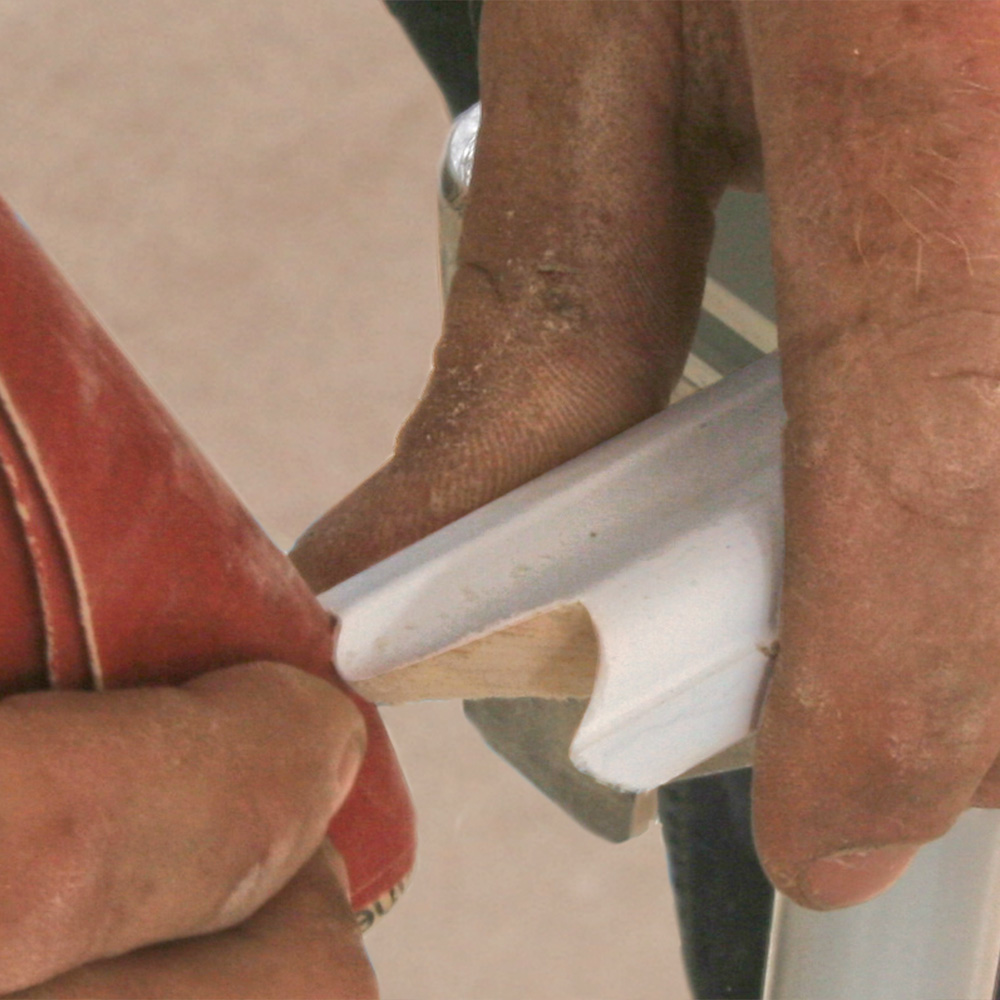
Clean copes by hand
Because the cap is more visible than the flat stock it covers, inside corners are best handled by coping one piece of cap molding to fit against the other. This technique allows for slight deviations from square without tweaking the angle of the miter, and the seam will stay tight throughout the year, even if the cap expands or contracts with changes in seasonal humidity. There are many ways to cope a joint, but I learned to do it by hand. After cutting the piece to a 45° angle, I remove the waste with a coping saw held at a slight negative angle. I work my way from both sides of the end grain toward the center, then do a final cleanup with 180-grit sandpaper to leave a cleanly contoured profile.
 |
 |
 |
Nick Schiffer is owner of NS Builders near Boston. Photos by Justin Fink.
From Fine Homebuilding #256
To see this article as a PDF, click the View PDF button below.

View Comments
I wonder if it would be possible to use a filler in a dip, let it harden, paint one part white, the other part wood stain? I am a superintendent and I always save sawdust to use in a mixture for those small little defects. But, your way probably is "perfection". Thanks for sharing