FHB Logo Facebook LinkedIn Email Pinterest Twitter Instagram Tiktok YouTube Plus Icon Close Icon Navigation Search Icon Navigation Search Icon Arrow Down Icon Video Guide Icon Article Guide Icon Modal Close Icon Guide Search Icon Skip to content
Subscribe
Log In
  • How-To
  • Design
  • Tools & Materials
  • Videos
  • Blogs
  • Forum
  • Magazine
  • Members
  • FHB House
  • Podcast
Log In
How-To

2 Methods for Patching a Hardwood Floor

Learn professional techniques for evaluating damaged flooring, removing individual boards, and installing seamless repair patches.

By Brent Kelosky Issue 286 - Oct/Nov 2019

Synopsis: Brent Kelosky, a wood flooring specialist, describes two ways to replace a damaged section of hardwood floor. If the damage is through the entire board, the fix requires removing the damaged piece down to the subfloor with a router; if the board is not damaged all the way through, it’s possible to use a template to remove the top layer and install a replacement cap. In either case, Kelosky explains how to remove the damaged section and install the replacement piece to hide the repair as completely as possible.


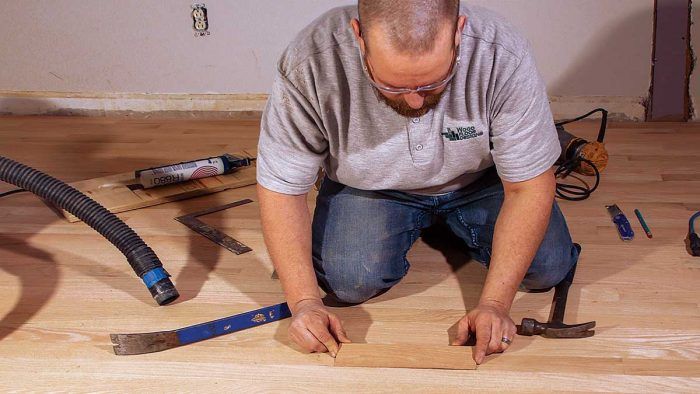
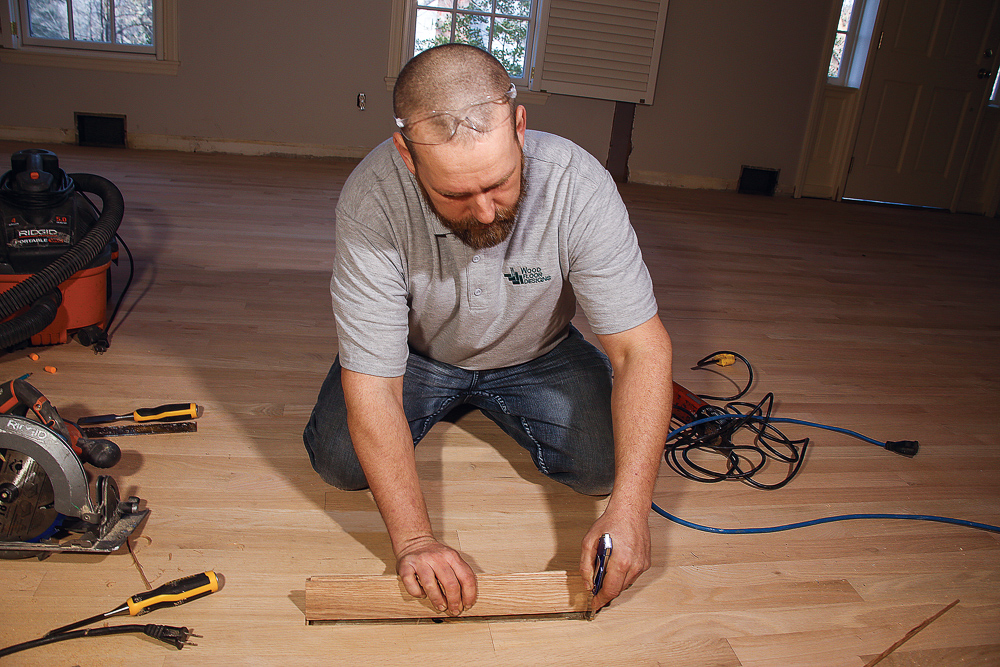
My father started our family business, Wood Floor Designs, more than three decades ago. I’ve helped him manage it for the past 26 years. In that time, we’ve completed hundreds of floor patches. The hardest part of any patch job is finding a replacement board to match the floor—it needs to be the same species and equal in size, thickness, and grain. There are times when you can hide a repair completely, and other times when it might be more visible, but it need not stand out like a sore thumb. No matter the wood (here we’re working with plain-sawn red oak), we use one of two repair – one requires a circular saw, and the other a router. The choice depends on how deep the damage goes.

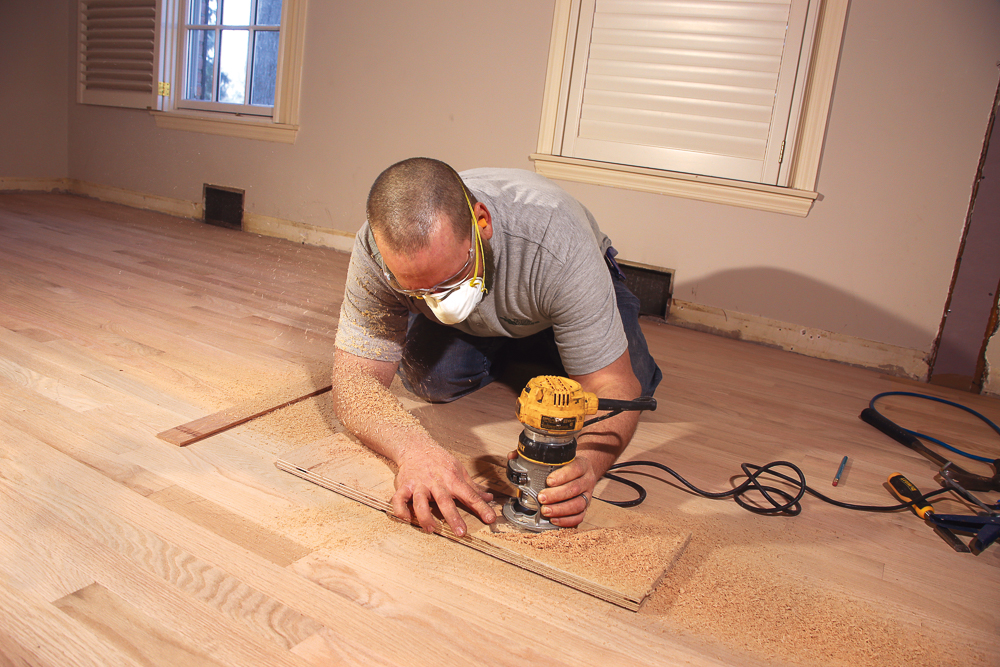
Remove the board down the subfloor

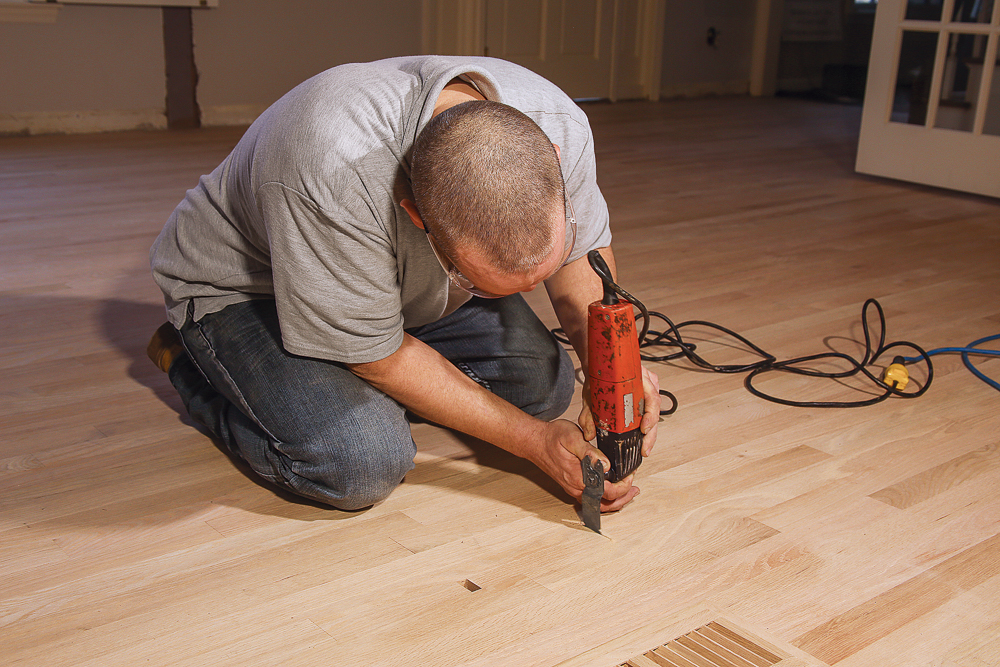
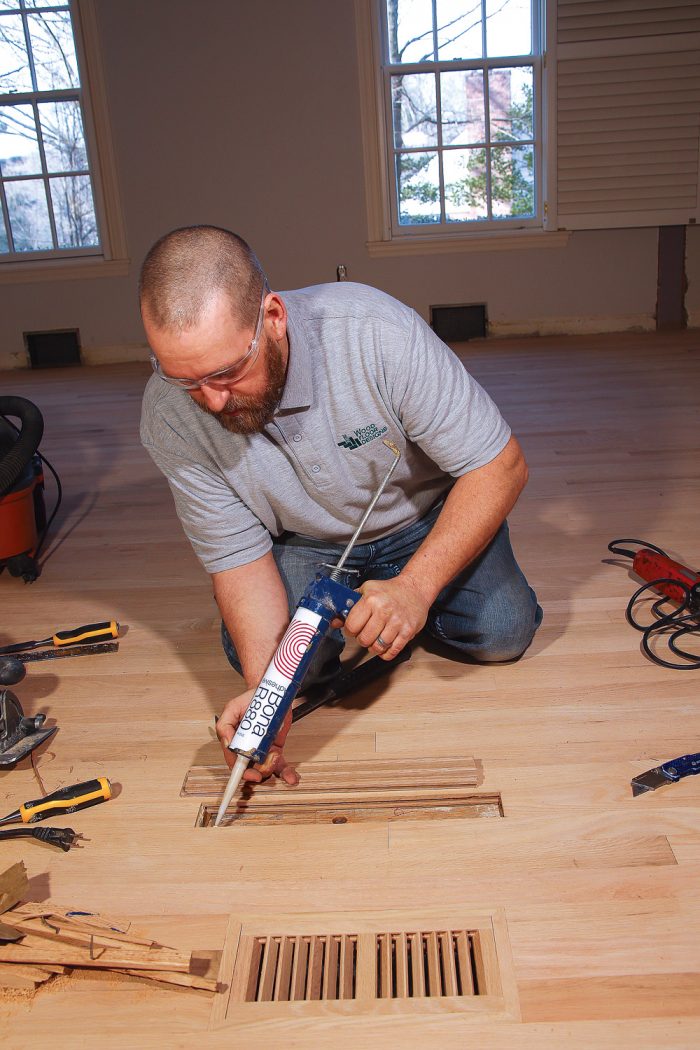
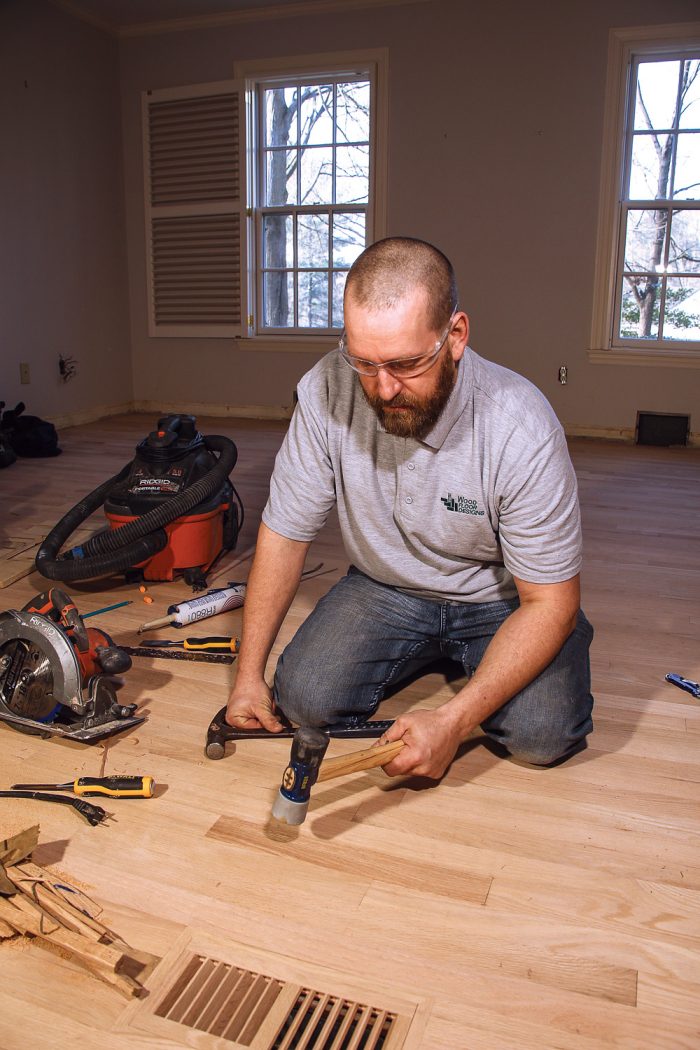
If you know there’s rot, it’s best to cut out the section of board in its entirety down to the substrate. Termite damage and holes are also good reasons to remove the entire piece. You want to install boards as flush as possible, even if you are going to sand, but it’s better if the new board is a little proud than if it sinks below the surrounding boards. If the floor has been finished already, you will need to spend extra time ensuring the thickness of the new board is an exact match, and set it with precision.

oscillating multitool making cuts
Mark the repair. If it’s a long board, mark the section being replaced with a square. Use an oscillating multitool to make the first two cuts at both ends of the damaged area.
circular saw making two cuts down the length of a board
Make three cuts. With a circular saw set to 3⁄4 in., make two cuts down the length of the board and one at an angle across (an “N” shape). This releases pressure and makes removing the pieces easier. Be sure to make the first cut to the inside of any nails, then move over an inch and make the second lengthwise cut.
a chisel extending lengthwise cuts
Remove the damage. Use a chisel or oscillating multitool to extend the lengthwise cuts to the ends to free the center strips, and remove them; the groove side should come out easily. Use a hammer and chisel to chip away the tongue side, and use a cat’s paw to remove any nails.
removing the tongue of the cut board
Pry the tongue. Remove the tongue of the cut board from the groove on the adjacent board.

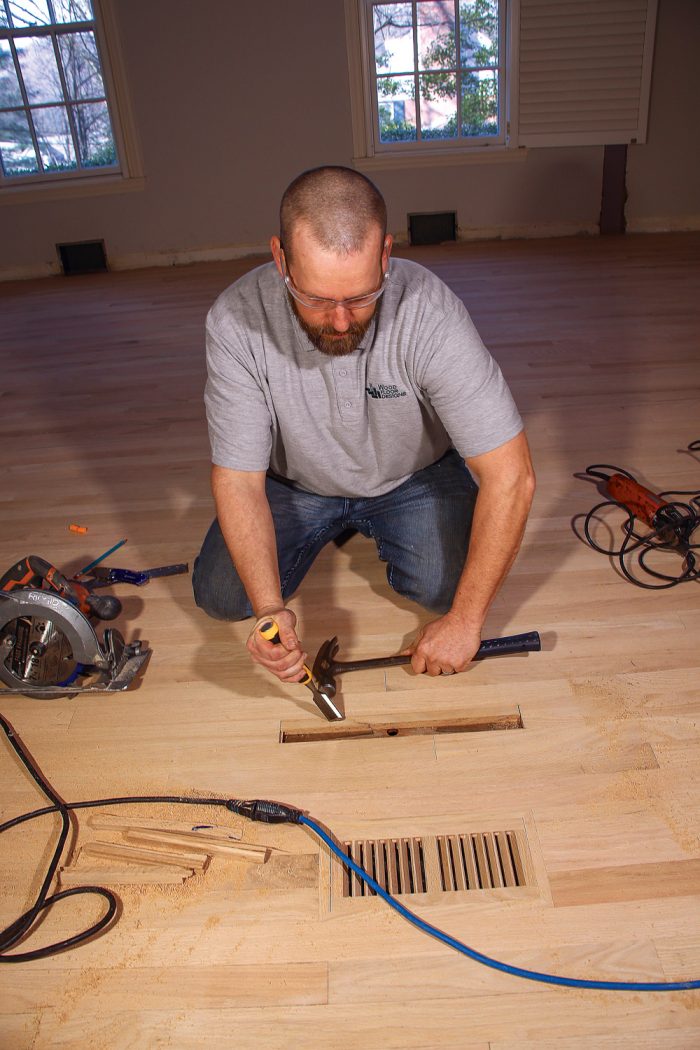
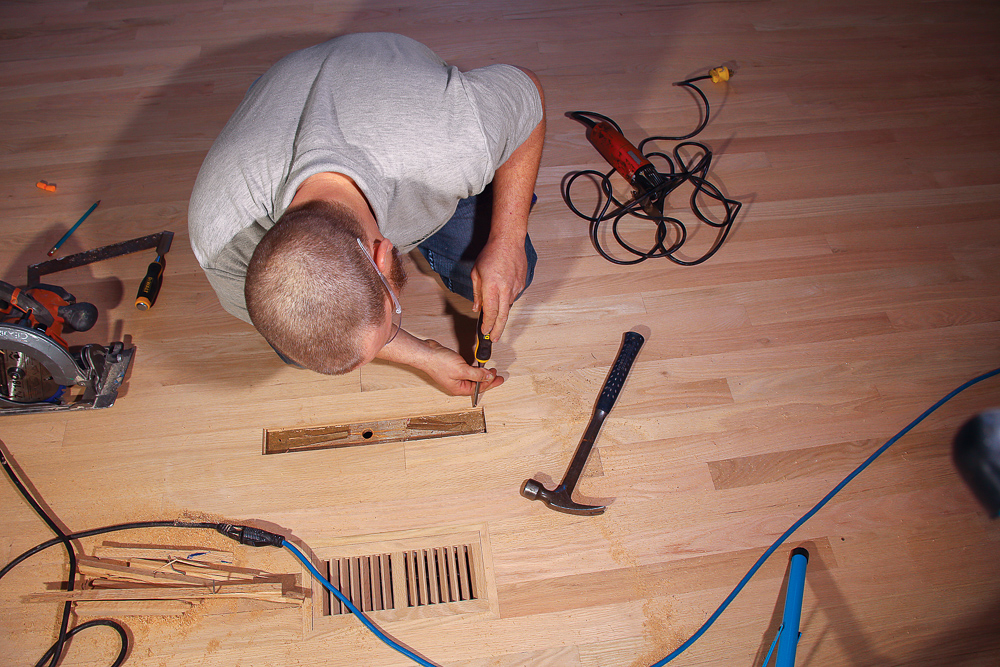
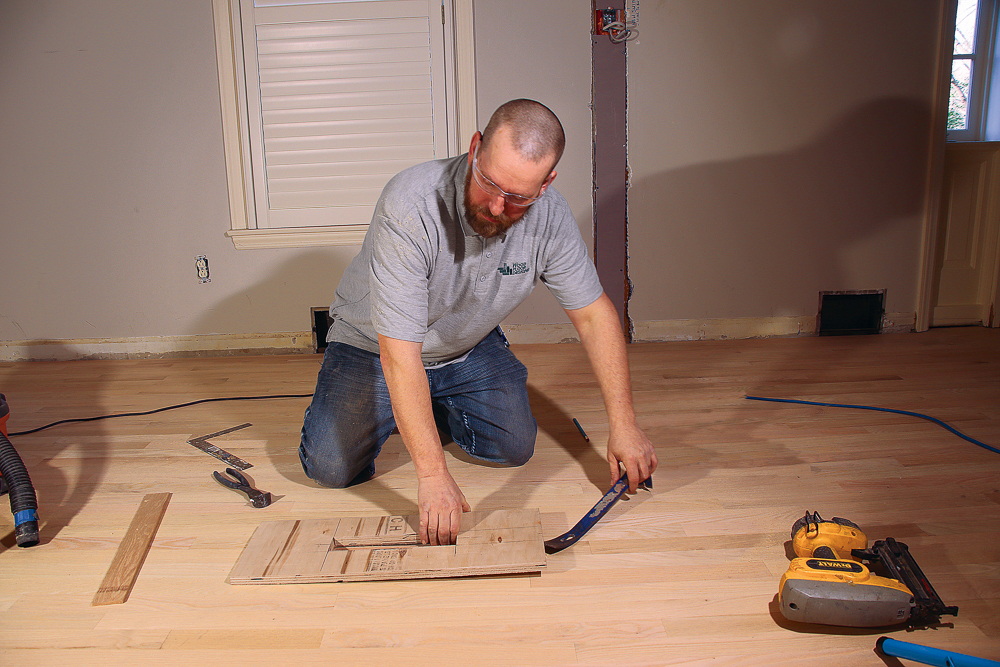
Install the new board

ripping the back of a groove with the claw of a hammer
Modify the groove. In order to tip the tongue-and-groove replacement board into place—tongue-side first—rip the back of the groove with the claw of a hammer to make a rabbeted joint.
using a utility knife to mark the cut
Mark, cut, check. Use a utility knife to mark the cut on the replacement board. Cut it to size and dry-fit, laying dental floss or a piece of paper down first to make it easy to remove.
applying adhesive
Anchor the board. Apply adhesive (we use Bona, but Liquid Nails or yellow glue work too) to the tongue and groove of the adjacent boards, and slide the replacement piece into place. Do not glue directly to the subfloor.
tamping with a rubber mallet
Tamp it in. With a rubber mallet, gently tamp the new board in place. Weight the new board until the adhesive sets up.
sanding patch into plane
Finish it off. If the patch stands slightly proud, sand it into plane. We use an edger, which is more aggressive than an orbital sander.

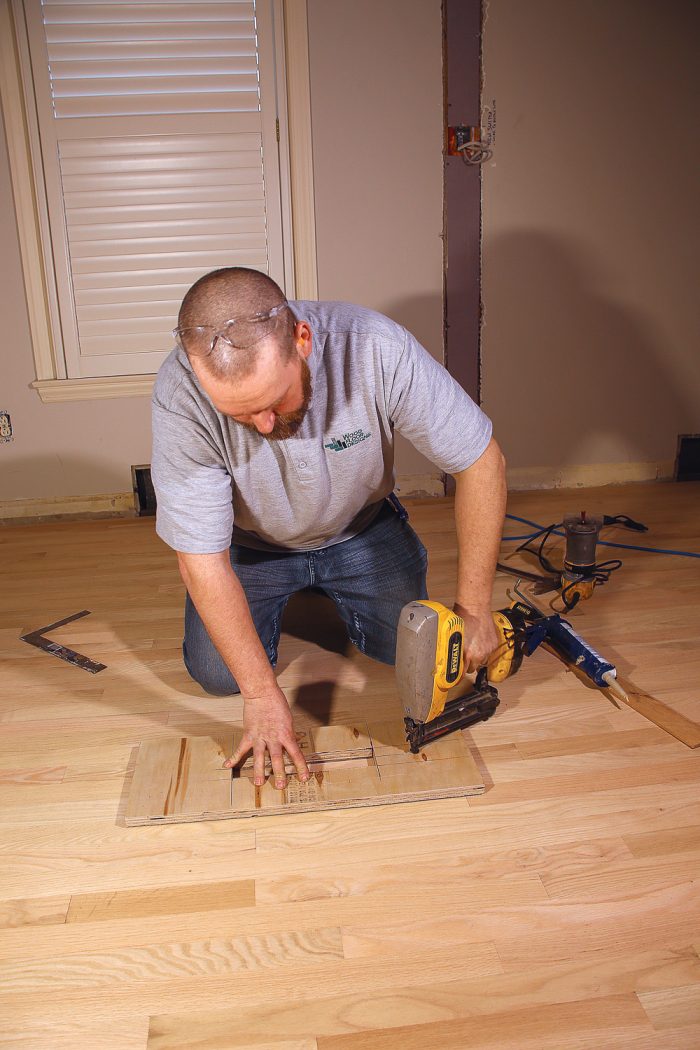
Another approach: Take the top off

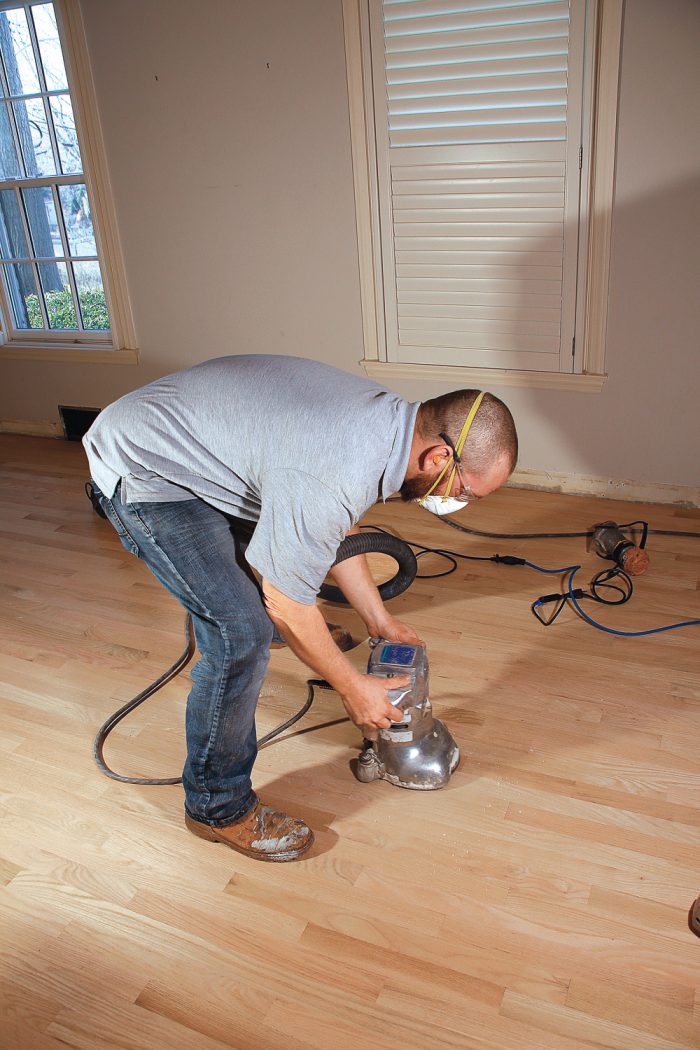
If the board is not damaged all the way through, another repair option is to use a router to remove the top wear layer. With this method, the original plank stays anchored to the floor and substrate, and gets a shallow mortise to receive a replacement cap. This approach calls for a 1⁄4-in.-thick piece—resawn or planed down from a full-thickness board. If you use this method with prefinished flooring, you won’t be able to sand, so the depth of the mortise and thickness of the patch have to match precisely.

nail plywood template over area
Set a guide. Nail a 3⁄4-in. plywood template over the area so the router bit and bearing ride on the template without hitting adjacent boards. If the floor is already finished, either tack the template between board seams or use double-sided tape to hold it down. Do a test to make sure the tape won’t mar the floor.
use a router to remove top of board surface
Go slow. Use a router to remove the top one-third of the board surface in 1⁄16-in. increments. Rout down to just above where the tongue and nails sit.
remove template and clean corners with a chisel
Check the match. Remove the template, clean up the corners with a chisel, and do a dry fit, gently tapping the replacement piece into place to ensure it is reasonably flush. For final installation, lay in the adhesive, tap the board into place with a rubber mallet, weight it until the glue sets, and then sand if needed.

Photos by Patrick McCombe.

From Fine Homebuilding #286

To view the entire article, please click the View PDF button below.

More about hardwood flooring:

How to Replace a Floorboard

Refinish Your Wood Floors – Uncover the beauty in old hardwood flooring with a little patience and some great professional advice.

Mesquite Hardwood Floor Install – Tips & tricks from a wood geek.

Sign up for eletters today and get the latest how-to from Fine Homebuilding, plus special offers.

Signing you up...

This site is protected by reCAPTCHA and the Google Privacy Policy and Terms of Service apply.
See all newsletters
See all newsletters
×

Get home building tips, offers, and expert advice in your inbox

Signing you up...

This site is protected by reCAPTCHA and the Google Privacy Policy and Terms of Service apply.
See all newsletters
See all newsletters
View PDF

New Feature

Fine Homebuilding Forums

Ask questions, offer advice, and share your work

Log in or create an account to post a comment.

Sign up Log in

Become a member and get full access to FineHomebuilding.com

Up Next

Video Shorts

Featured Story

Practical and Sustainable Prefab Home

Two boxes make up the plan for this modular house: One has the kitchen and common area, while the other includes two bedrooms and two baths.

Featured Video

How to Install Cable Rail Around Wood-Post Corners

Use these tips to keep cables tight and straight for a professional-looking deck-railing job.

Related Stories

  • Podcast 587: Members-only Aftershow—Basement Flooring
  • Set Trusses Solo
  • Tool Test: Compact Cordless Routers
  • Lantern-Style-Tile Jig

Discussion Forum

Recent Posts and Replies

  • |
  • |
  • |
  • |
  • |
  • |
View More Create Post

Highlights

Fine Homebuilding All Access
Fine Homebuilding Podcast
Tool Tech
Plus, get an extra 20% off with code GIFT20

"I have learned so much thanks to the searchable articles on the FHB website. I can confidently say that I expect to be a life-long subscriber." - M.K.

Get home building tips, offers, and expert advice in your inbox

Signing you up...

This site is protected by reCAPTCHA and the Google Privacy Policy and Terms of Service apply.
See all newsletters
See all newsletters

Video

View All Videos
  • Podcast 587: Members-only Aftershow—Basement Flooring
  • Podcast 543: Affordable Flooring, Replacing Replacement Windows, and Low-Flow Fans
  • Podcast 539: Seasonal Gaps in Flooring, AeroBarrier for Existing Homes, and Wood Foundations
  • Podcast 517: Sizing Stringers for Wet Wood, Odd Foundations, and Concrete Domes
View All

Routers

View All Routers Articles
  • Scribing Rails to a Round Column
  • 2 Methods for Patching a Hardwood Floor
  • Get More From Your Router
  • Cutting-Edge Router
View All Routers Articles

BOOKS, DVDs, & MERCH

Shop the Store
  • 2022 Fine Homebuilding Archive
    Buy Now
  • 2023 Tool Guide
    Buy Now
  • Pretty Good House
    Buy Now
Shop the Store

Fine Homebuilding Magazine

  • Issue 318 - October 2023
    • Make Mudsills Square and Level
    • Turn Up the Heat With Induction Cooktops
    • The Fine Homebuilding Interview: Lloyd Alter
  • Issue 317 - Aug/Sept 2023
    • Finishing Drywall With Seamless Results
    • A Flat Roof in a Cold Climate
    • Compact Cordless Shop Vacs
  • Issue 316 - July 2023
    • Timber-Framed Solar Canopies
    • Build a Transom Above a Stock Door
    • Understanding Toilet Design and Efficiency
  • Issue 315 - June 2023
    • How to Craft a Copper Roof
    • 5 Lessons from Building in a Cold Climate
    • The Advantages of Cellular PVC Siding
  • Issue 314 - April/May 2023
    • 7 Options for Countertops
    • Tool Test: Wood-Boring Bits
    • Critical Details for Ductless Heat Pumps

Fine Homebuilding

Follow

  • YouTube
  • instagram
  • facebook
  • pinterest
  • Tiktok
  • twitter

Newsletter

Get home building tips, offers, and expert advice in your inbox

Signing you up...

This site is protected by reCAPTCHA and the Google Privacy Policy and Terms of Service apply.
See all newsletters
See all newsletters

Membership & Magazine

  • Online Archive
  • Start Free Trial
  • Magazine Subscription
  • Magazine Renewal
  • Gift a Subscription
  • Customer Support
  • Privacy Preferences

Taunton Network

  • Green Building Advisor
  • Fine Woodworking
  • Fine Gardening
  • Threads
  • About
  • Contact
  • Advertise
  • Careers
  • Copyright
  • Terms of Use
  • Site Map
  • Do not sell or share my information
  • Privacy Policy
  • Accessibility
  • California Privacy Rights

© 2023 The Taunton Press, Inc. All rights reserved.

X
X
This is a dialog window which overlays the main content of the page. The modal window is a 'site map' of the most critical areas of the site. Pressing the Escape (ESC) button will close the modal and bring you back to where you were on the page.

Main Menu

  • How-To
  • Design
  • Tools & Materials
  • Video
  • Blogs
  • Forum
  • Reader Projects
  • Magazine
  • Members
  • FHB House

Podcasts

  • FHB Podcast
  • ProTalk

Webinars

  • Upcoming and On-Demand

Podcasts

  • FHB Podcast
  • ProTalk

Webinars

  • Upcoming and On-Demand

Popular Topics

  • Kitchens
  • Business
  • Bedrooms
  • Roofs
  • Architecture and Design
  • Green Building
  • Decks
  • Framing
  • Safety
  • Remodeling
  • Bathrooms
  • Windows
  • Tilework
  • Ceilings
  • HVAC

Magazine

  • Current Issue
  • Past Issues
  • Magazine Index
  • Subscribe
  • Online Archive
  • Author Guidelines

All Access

  • Member Home
  • Start Free Trial
  • Gift Membership

Shop the Store

  • Books
  • DVDs
  • Taunton Workshops

More

  • FHB Ambassadors
  • Reader Projects
  • Podcast
  • FHB House
  • Customer Support

Account

  • Log In
  • Join

Newsletter

Get home building tips, offers, and expert advice in your inbox

Signing you up...

This site is protected by reCAPTCHA and the Google Privacy Policy and Terms of Service apply.
See all newsletters
See all newsletters

Follow

  • YouTube
  • instagram
  • facebook
  • pinterest
  • Tiktok
  • twitter

Join All Access

Become a member and get instant access to thousands of videos, how-tos, tool reviews, and design features.

Start Your Free Trial

Subscribe

FHB Magazine

Start your subscription today and save up to 70%

Subscribe

We hope you’ve enjoyed your free articles. To keep reading, become a member today.

Get complete site access to expert advice, how-to videos, Code Check, and more, plus the print magazine.

Start your FREE trial

Already a member? Log in