Placing and Finishing a Heated Concrete Floor
Learn how to pour a concrete floor for a post-frame building, including radiant tubing for warmth and steel reinforcement for strength.
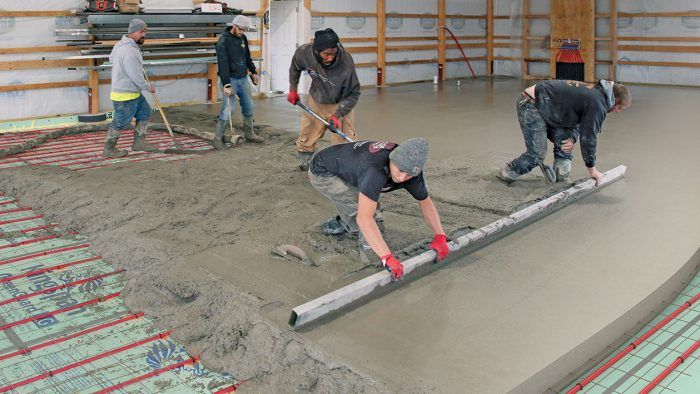
In the genesis of a post-frame building, placing the concrete floor is always a milestone. My new building, which was on its way to becoming our roofing and remodeling company’s headquarters, had been under construction in my “free time” for 10 months when we placed and finished its concrete slab.
I was anxious to get the slab placed and finished because I had several uses planned for this building. It would act as material and equipment storage; as a woodworking and metal shop; and, most importantly, as a place to separate my professional and private life. For two decades my business has shared a small house with my wife and family. With the floor placed, I suddenly felt like my dream of having a dedicated building for work had become real, and I was approaching the finish line.
Start with a level base
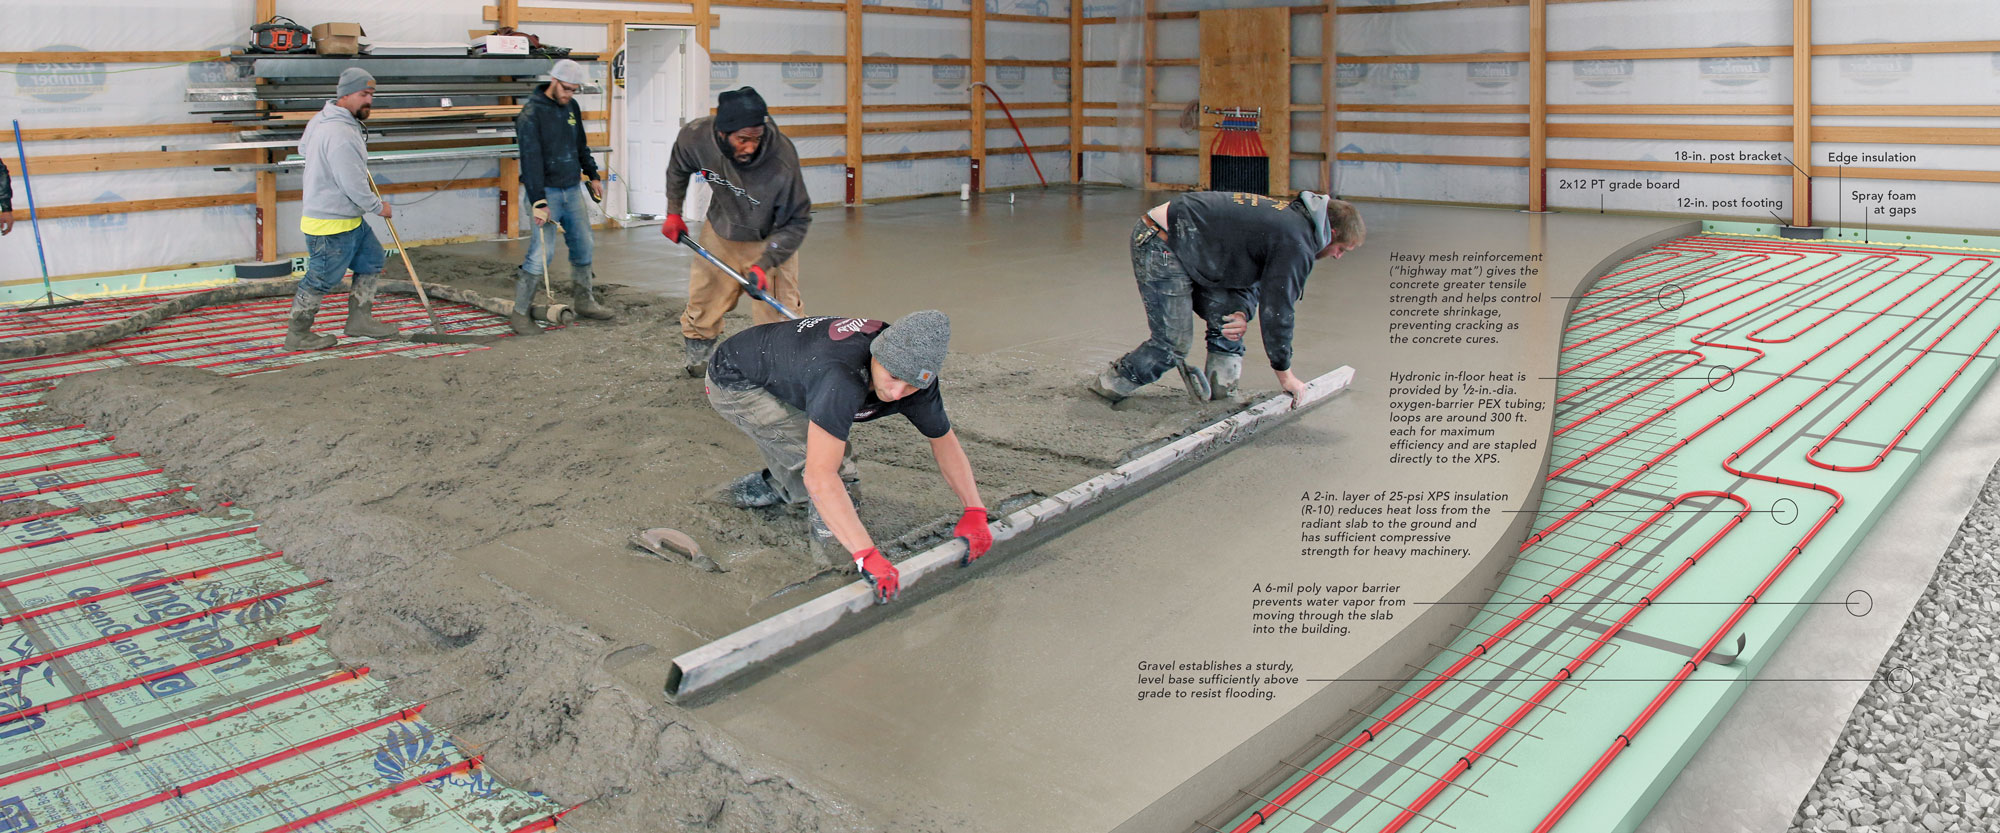
To prepare the site ahead of raising the frame (See “Raising a Post Frame,” FHB #307), we stripped the topsoil from the building’s footprint and created a gravel pad with 2B crushed limestone. Post-frame buildings can flood if they aren’t sufficiently raised above the surrounding grade. This gently sloping lot wasn’t prone to flooding, so we placed 6 in. on the uphill side and 18 in. on the low side, high enough above the surrounding grade even in the case of a flash flood. Had we been in a low-lying area and wanted to keep the building’s contents dry, we might have raised it higher. We didn’t compact the gravel with a tamper or roller because the gravel is mostly self-compacting; plus, we ran a tracked skid loader and telehandler over the gravel for six months as we constructed the building, further compacting the gravel layer.
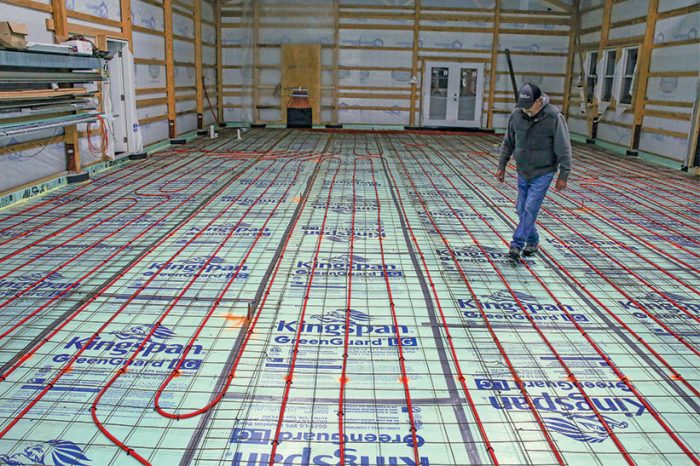
Under the concrete is an XPS insulation layer with the pieces fit tightly together and the seams taped. The insulation slows heat flow toward the soil and directs it upward into the slab. Before laying the insulation, we leveled the gravel base with rakes and a laser level to prevent any voids under the foam. A 6-mil plastic vapor barrier prevents water vapor moving into and through the slab from the soil. This is the residential requirement in the International Residential Code (IRC) for my climate (zone 5), which I chose to use so that the heating system would be more effective and efficient.
Radiant tubing for a warm floor
I worked in cold commercial buildings early in my career, and I’m done with that. I want warm floors in my wood and metal shops, and I want to be comfortable working on my equipment and vehicles. I chose in-floor radiant heat instead of a forced-air system because it’s quiet and the heat is comfortable and even, creating a place that’s nice to work in.
The radiant loops are 1⁄2-in. oxygen barrier PEX; common PEX used for potable water cannot be used for hydronics, and vice versa. My plumbing supply house, which has a hydronic designer on staff, will plan a loop layout based on the building plan and its heat loss for free if you purchase the piping and equipment from them.
The general guidance is to keep hydronic loops around 300 ft. each for maximum efficiency. I fastened the PEX directly to the foam using Malco’s PEX Foam Board Stapler, which uses proprietary plastic staples. The staples come in two different sizes depending on the foam thickness used, and the stapler has an autofeed magazine that holds 25 staples and is operated while the user is standing upright. It was a huge time- and back-saver. Three of us installed 1800 ft. of tubing in a few hours. I pressurized the system with 50 lb. of air and monitored a gauge on the manifold to make sure we didn’t create any leaks during the pour.
The right reinforcement and mix
Concrete can withstand much higher loads with steel reinforcement, and since I planned to store heavy machines on the slab, strength was of great importance. I chose welded wire mesh for reinforcing the concrete. I have family members involved in heavy highway construction, and their recommendation was the strong and reliable heavier-gauge “highway mat” wire mesh. Some folks might suggest fiber reinforcement, but it wouldn’t work with the smooth-troweled finish I wanted. Others might suggest #4 steel bars on a 2-ft. grid, but I think that’s overkill and needlessly costly.
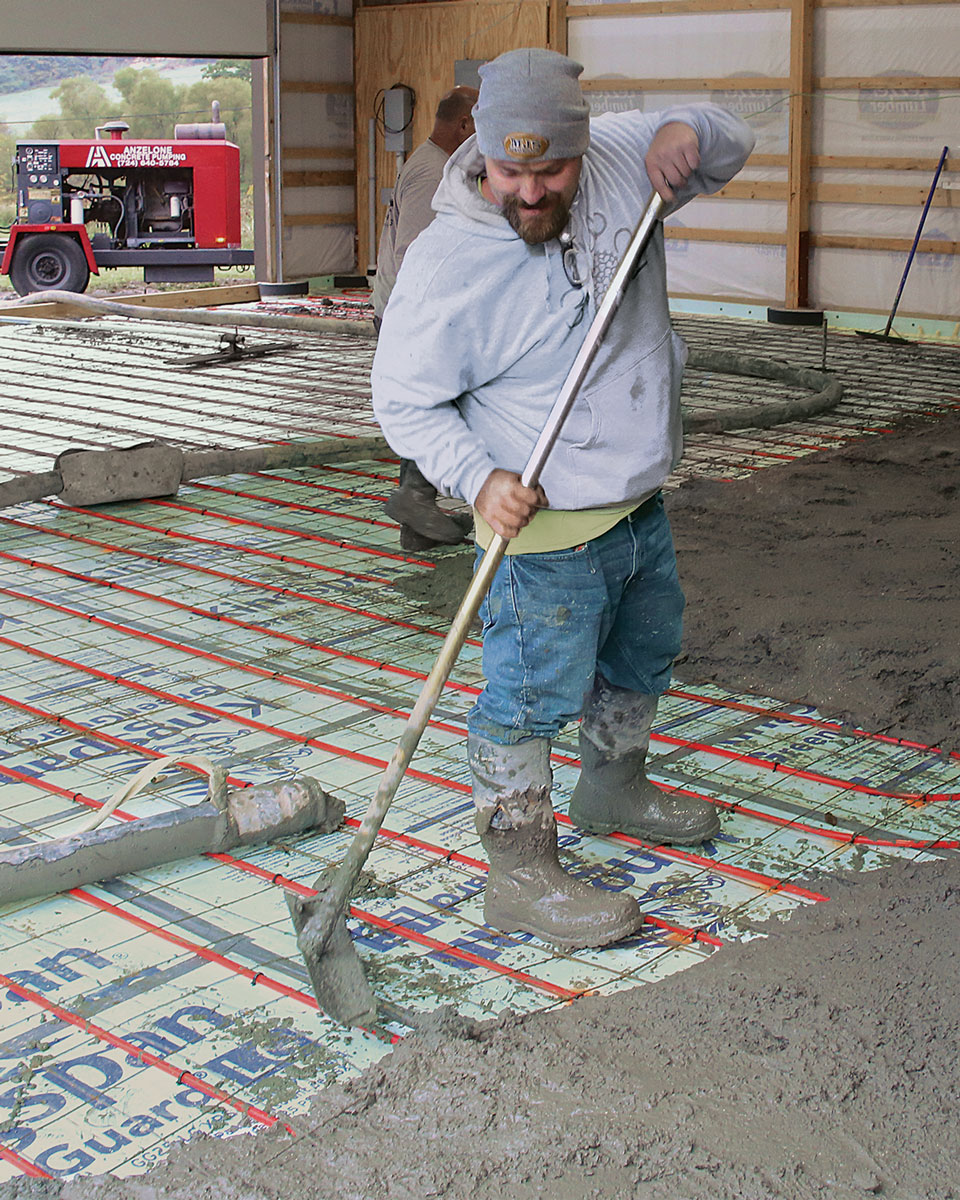
We used 5-ft. by 10-ft. mats of the heavy steel mesh. We shook out the sheets, overlapped them all by one square, and tied them together with tie wire. Premade loops and Mister Twister tools made short work of the connections. I laid the wire loose on top of the PEX so it could be pulled up into the middle of the slab during the pour.
I chose 4000-lb. concrete mix, which was recommended by my concrete contractor for a building storing heavy equipment. At 5 in. thick, it took 38 cu. yd. total for the floor. A concrete truck can only haul 10 cu. yd. at a time, so we had to coordinate the delivery with several trucks. Because we were pumping the concrete, we could unload the trucks quickly, so we staggered them 15 minutes apart. I added 1% calcium chloride to speed the setting time so the steel-trowel finish wouldn’t take all day. With the recent boom in construction and lack of qualified concrete truck drivers, I had to schedule this pour three weeks in advance. And because the first run for concrete trucks is before dawn, I installed lighting so we wouldn’t have to work in the dark.
Big job, higher stakes
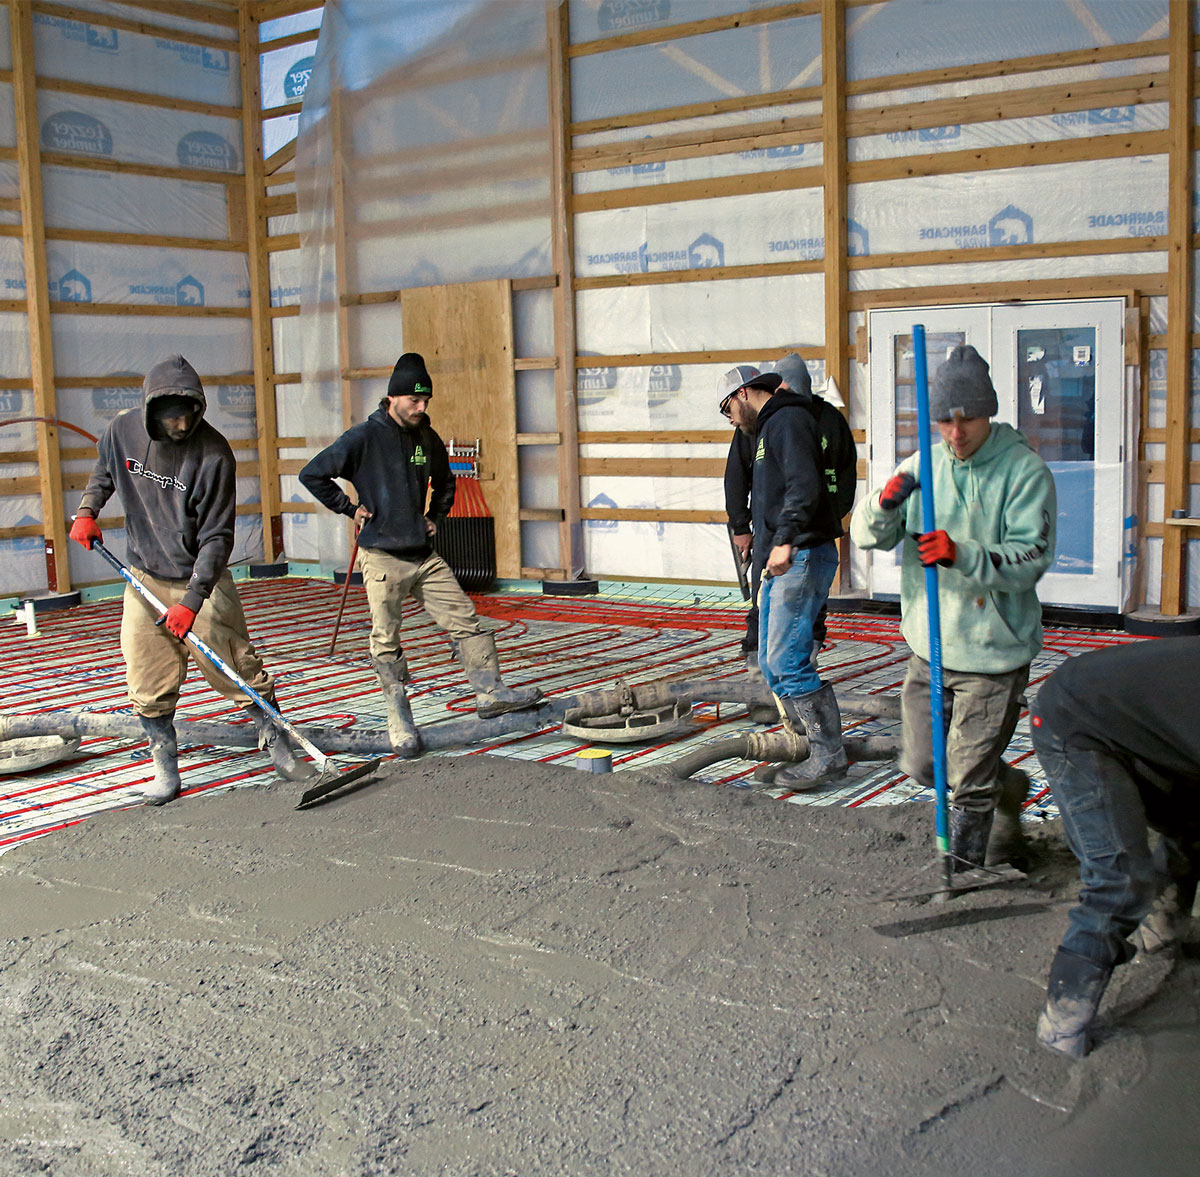
With the size of this pour, pumping was the only option. Besides that, it’s a bad idea to wheel concrete over PEX heating loops because wheelbarrows and power buggies can damage the tubing. In my area, the concrete pumping crew is a separate contractor. They brought a pumper trailer powered by a diesel motor. The concrete truck dumps directly into the pumper’s hopper, and the pumper distributes the concrete through 4-in. rubber hoses. The pumping company provides the equipment and two guys to move the hose during the pour. Pricing is based on the yards pumped and the amount of hose used. In my market, concrete costs almost $200 per cu. yd. You really need to take accurate measurements and make sure you have a consistent grade to order the right amount. In the days of $75-per-yd. concrete, dumping a couple of yards on the ground was no big deal; today the stakes are higher. There’s also an environmental cost to concrete, so you don’t want to waste it. You also don’t want to run short. Most companies have a 4-yd. to 6-yd. minimum per truck, so if you do run short, that extra yard is going to cost $800 to $1200. I cut this job a little closer than I intended; we had about one wheelbarrow load left over.
Find a skilled finisher
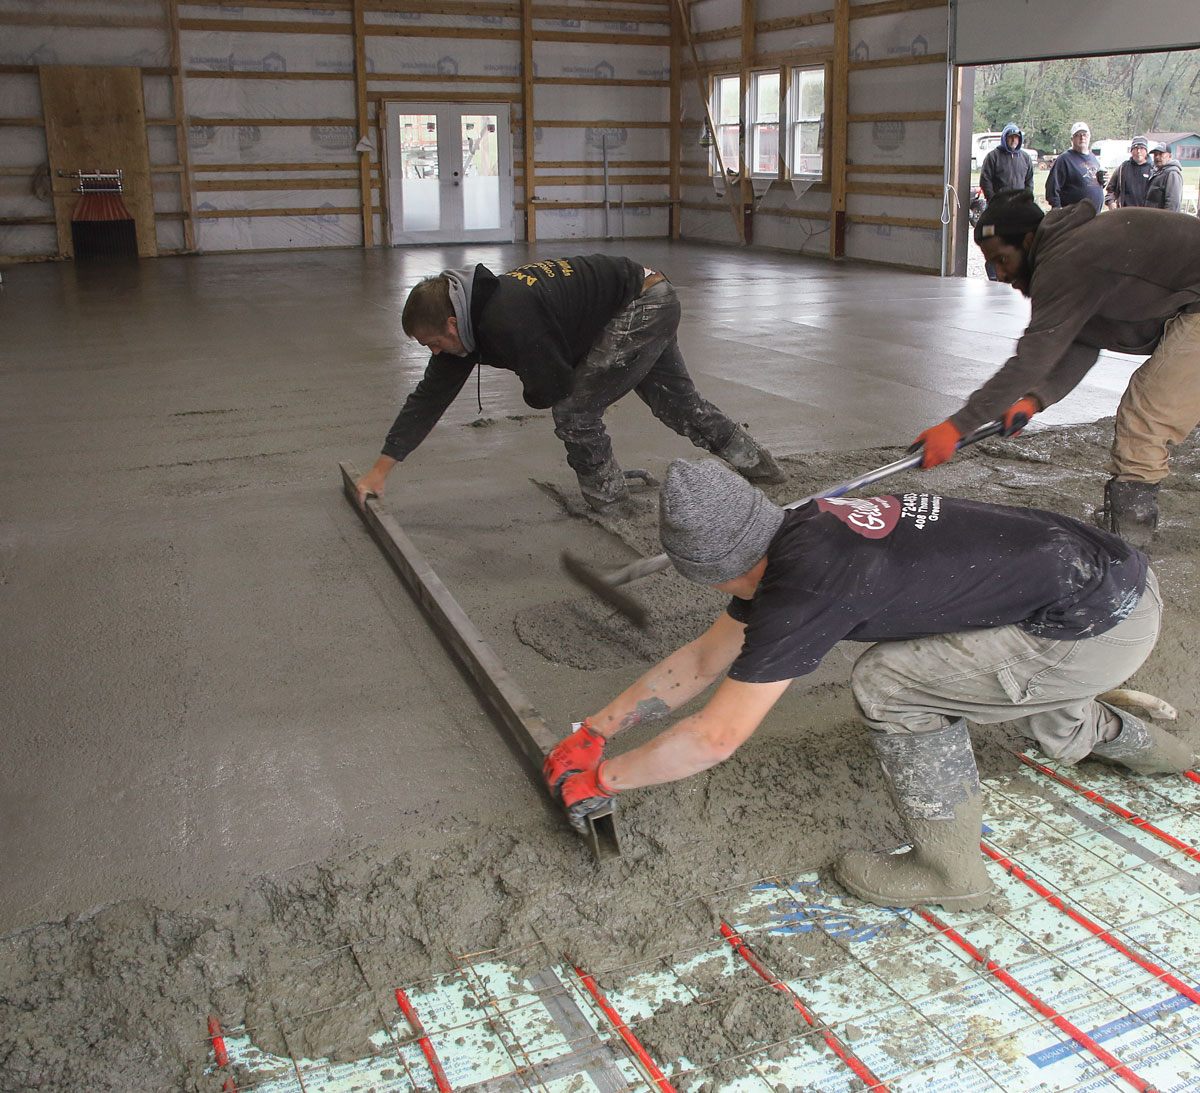
My finisher, George Leone, and his crew have been doing flatwork for me for 15 years. I met George through a batch-plant referral. Pouring a 2400-sq.-ft. floor is a big job, and not all concrete contractors are equipped or staffed for a job of that size. Before you hire one, visit past projects to look at the quality of the finish, because a cell phone picture doesn’t show you what you need to see, especially with steel-troweled floors. My crew and I have a lot of concrete experience and pour our own sidewalks and patios, and even some driveways, but we wouldn’t attempt a job of this scale.
From roughest to smoothest, the most common finishes are broom, sponge, mag or float, and steel trowel. Steel-trowel floors are burnished to an almost glasslike sheen. After the concrete is placed, screeded, and bull-floated, the concrete is polished with a walk-behind or ride-on finishing machine called a power trowel. I wanted a steel-trowel finish on my floor because it’s the smoothest finish available and is easy to sweep and mop. It’s also the most common finish for interior concrete floors. (And it’s the perfect finish when my building doubles as a roller disco for my kids and their friends.) People have asked me if the floor is slippery when it’s wet. It’s not. But because of the added labor, steel-trowel finishes are the most expensive, adding to between $0.50 to $1 per sq ft.
As you might imagine, placing and finishing a slab of this size is not a cheap undertaking. From the gravel under the concrete to the sealer on top, I spent about $24,000, or $10 per sq ft. Although it was a huge expense, this was not a time to cut corners. I could have skimmed an inch out of the gravel base or an inch off the floor depth and saved 10 tons of gravel and 9 cu. yd. of concrete, but the floor might have cracked under my heavy equipment.
I also could have used use bubble-pack insulation under the slab instead of sheet foam as I’ve seen locally, or I could have eliminated the in-floor heat, but my shop wouldn’t have been as comfortable. A strong, properly finished concrete floor isn’t cheap, but nothing is more expensive than failure when it comes to big concrete slabs.
Andrew Grace is a roofer, builder, and remodeler in Ligonier, Pa.
Photos by Patrick McCombe.
From Fine Homebuilding #317
RELATED STORIES


