Beams add a traditional touch and transform a ceiling from a blank sheet to a point of interest. Faux beams, or box beams, are for decoration and do not actually support a ceiling. The most common design is a simple box made of an inner support plus three pieces that show. The long joints between the sides and bottom of the beam can be made in a number of ways, including miters, flush butt joints, and butt joints with a visible reveal, as we did for the beams shown here. For these beams, the bottom beam piece is a 1×4, and the sides are 1×6s. That makes for a squarish beam that is 5 in. wide and 5-1⁄2 in. tall. You may prefer to vary the dimensions to match the proportions of the space you are installing them in.
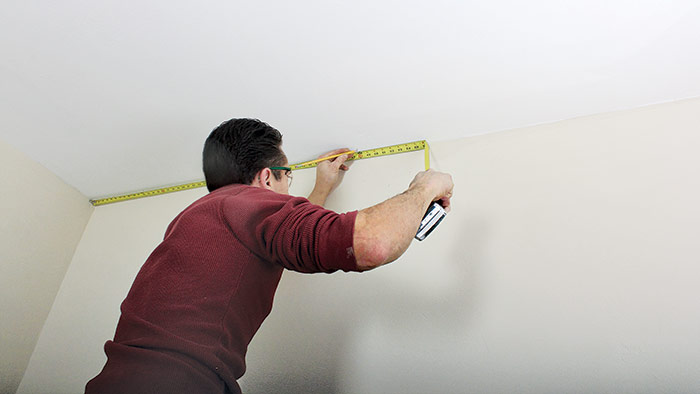
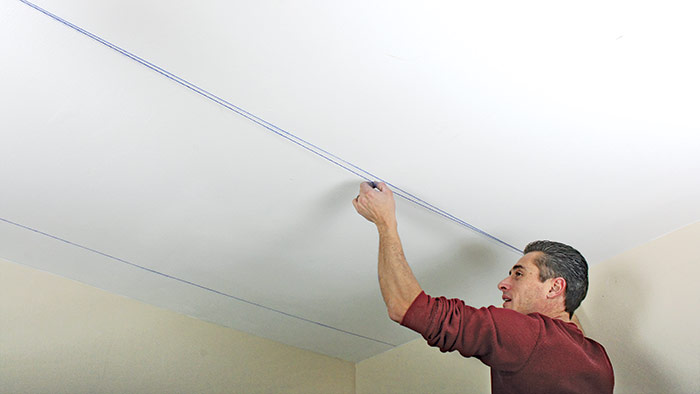
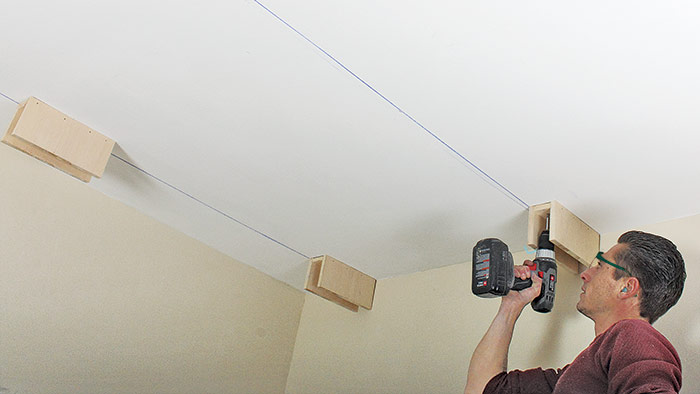
1. LAY OUT THE BEAMS. Plan for a series of evenly spaced beams. For each beam, measure and mark for both sides of the inside nailing block on each side of the room (top). Working with a helper, snap chalklines between the marks (above).
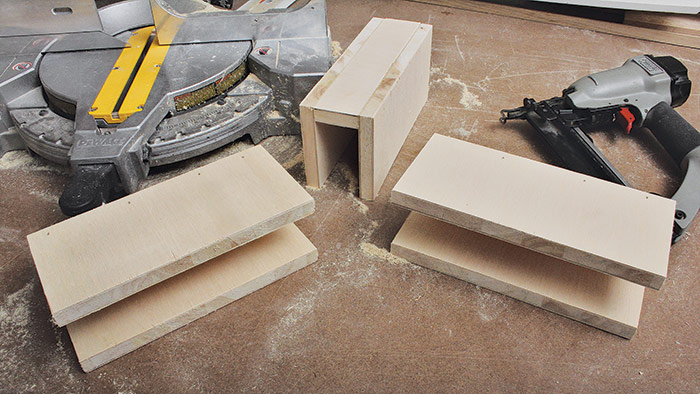
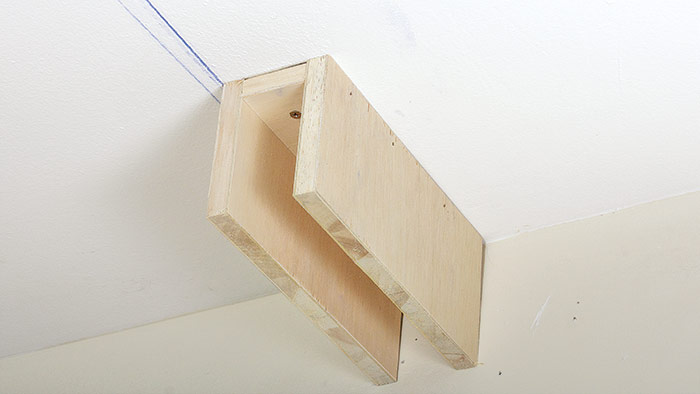
2. MAKE A NUMBER OF PLYWOOD NAILING BLOCKS. The blocks are as wide as the bottom beam piece, and at the right height so they will hold the bottom piece at the desired height. In this case, 3⁄4-in. plywood is cut to 2 in. wide for the top, and the sides are 4 1⁄2 in. wide, so that the bottom beam piece will be raised 1⁄4 in. above the bottom of the sides.
3. ATTACH THE NAILING BLOCKS. If the beam will run across ceiling joists, use a stud finder to locate the joists and drive 3-in. screws to attach the nailer to the joists. Install a nailing block every 2 ft. or so.
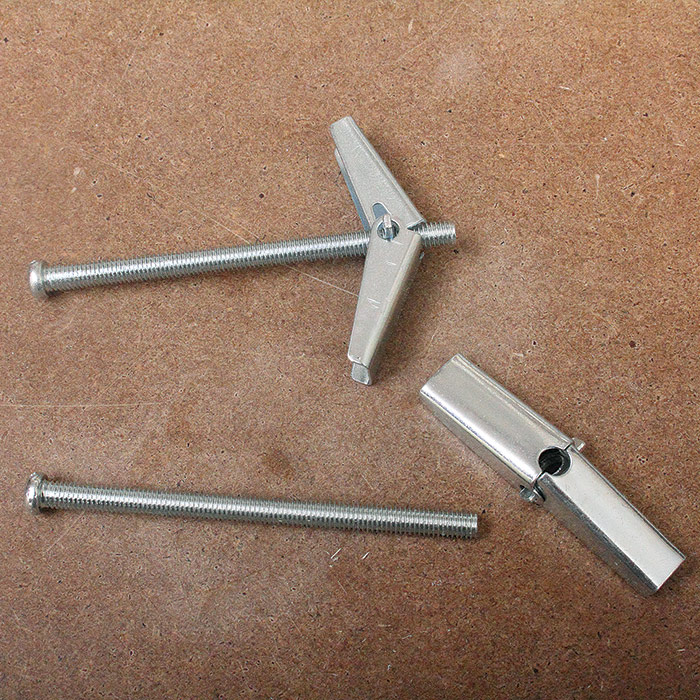
Attaching a Beam with Toggle Bolts
If the beam runs parallel to the ceiling joists there might not be any framing to attach it to. Plastic drywall anchors will not be strong enough, so use 3-in. toggle bolts instead.
Toggle bolts
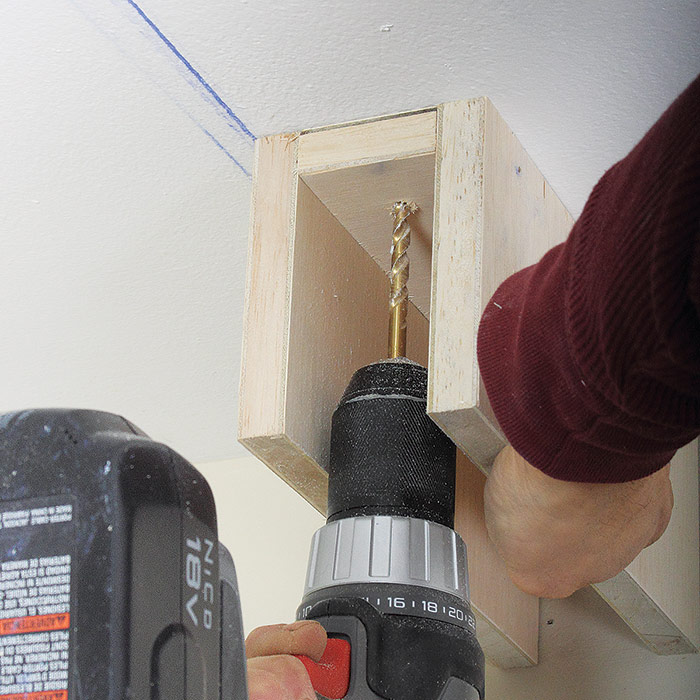
1. DRILL THE HOLE.
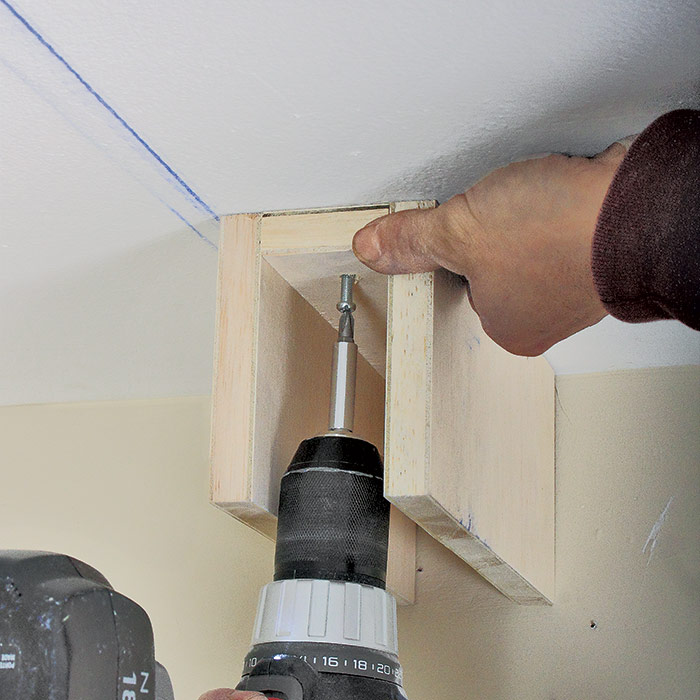
Hold the nailing block in place and drill a hole of the recommended size through it and through the drywall.
Thread the toggle nut onto the end of the bolt and tap it through the hole until you can feel the wings of the nut open.
Screw the bolt tight; you may need to pull down on it as you drive the bolt.
2. INSERT THE TOGGLE.
3. TIGHTEN THE TOGGLE.
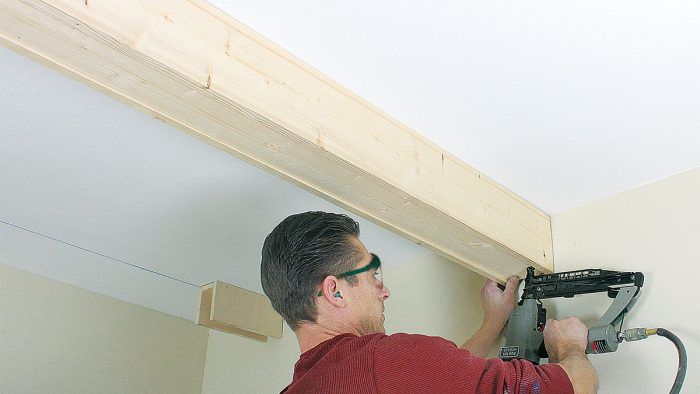
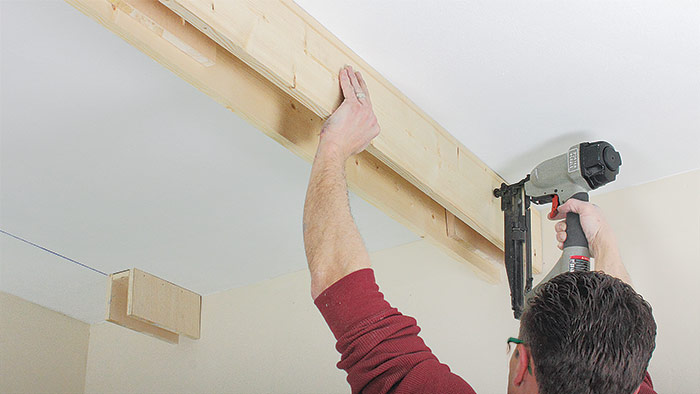
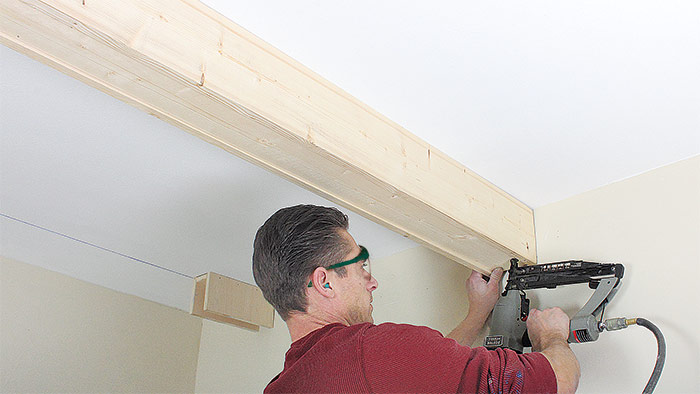
4. ATTACH THE SIDES. Cut the side pieces, hold them up against the ceiling, and attach them to the nailing blocks with nails or finish screws.
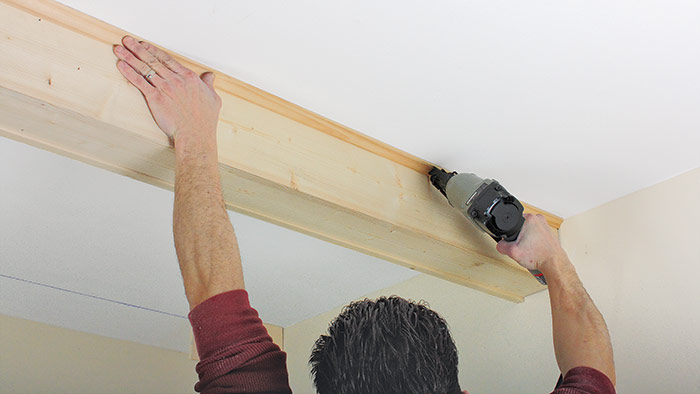
5. ATTACH THE BOTTOM PIECE. Shoehorn the bottom piece into place and tap it up until it hits the nailing blocks. Drive screws or nails up into the box and through the sides.
6. TRIM OUT THE BEAM. If desired, add trim where the beam meets the ceiling. Trim options include cove, quarter round, bead molding, simple square strips, or small crown.
Excerpted from Trim (The Taunton Press, 2015) by Steve Cory.
This is a dialog window which overlays the main content of the page. The modal window is a 'site map' of the most critical areas of the site. Pressing the Escape (ESC) button will close the modal and bring you back to where you were on the page.
We use cookies, pixels, script and other tracking technologies to analyze and improve our service, to improve and personalize content, and for advertising to you.
We also share information about your use of our site with third-party social media, advertising and analytics partners.
You can view our Privacy Policy
here and our Terms of Use here.