FHB Logo Facebook LinkedIn Email Pinterest Twitter Instagram Plus Icon Close Icon Navigation Search Icon Navigation Search Icon Arrow Down Icon Video Guide Icon Article Guide Icon Modal Close Icon Guide Search Icon Skip to content
Subscribe
Log In
  • How-To
  • Design
  • Tools & Materials
  • Videos
  • Blogs
  • Forum
  • Magazine
  • Members
  • FHB House
  • Podcast
Log In

Fine Homebuilding Project Guides

Finish & Trim Carpentry

Guide Home
  • Trim Design
  • Tools and Materials
  • Interior Trim Basics
  • Window and Door Casings
  • Baseboard and Crown Molding
  • Wainscot and Paneling
  • Mantels and Fireplace Surrounds
  • Coffered Ceilings
Job Site Diaries

Wainscoting That Will stand the Test of Time

Preassembling wall panels before installation strengthens rail and stile connections to avoid potential problems with the joints opening up.

By Nick Schiffer

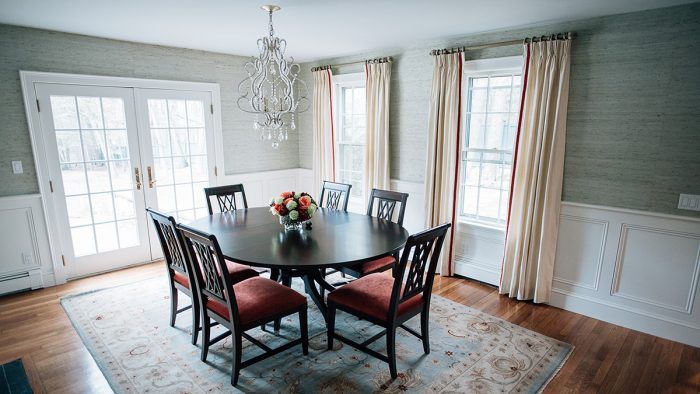
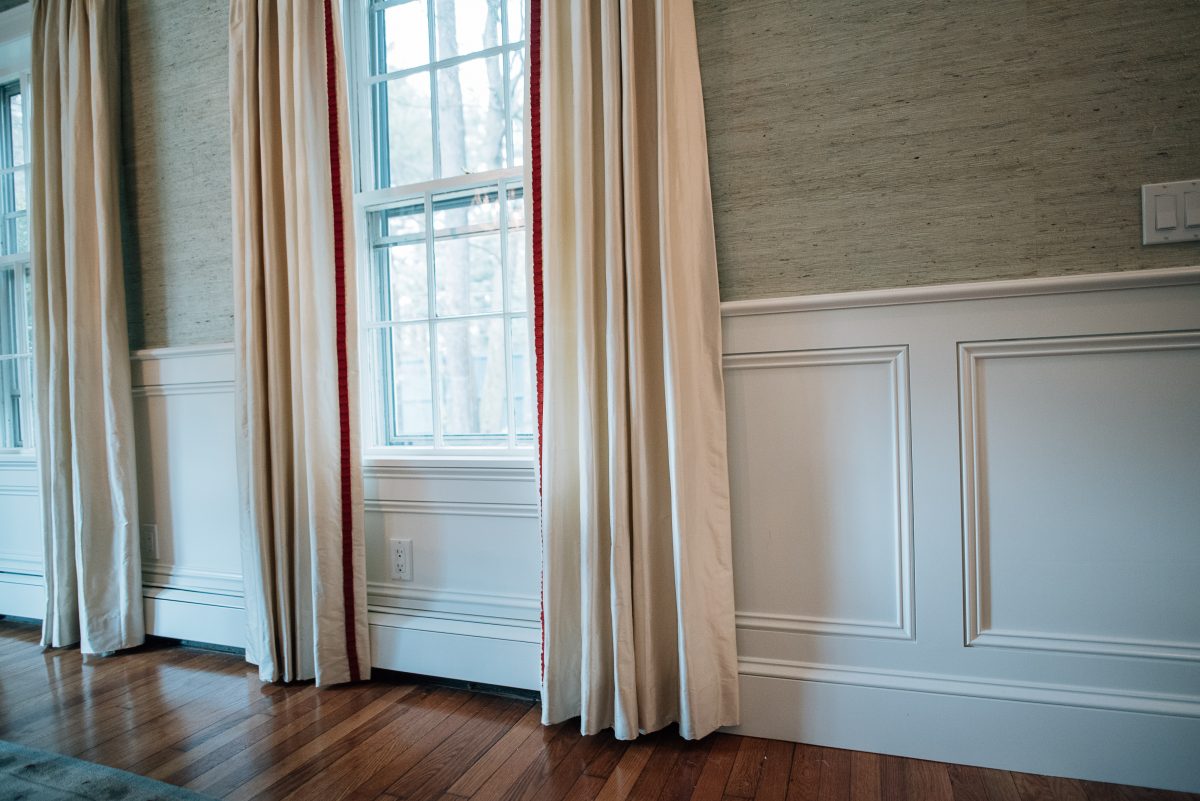
Wainscoting can dress up any room and add a layer of elegance to the otherwise plain walls. In the past our crew has commonly joined all of the panels and frames on site, but in our recent dining-room project, we decided to take a different approach with the install and preassemble the wall panels before installation.

Why build panels and frames ahead of time?

In the past, we’ve had the rail and stile connections open up, causing cracking in the finish. This alternative method would allow us the opportunity to strengthen these joints, which would rectify the previously encountered issues.

Like any job, we begin with the layout, marking everything on the wall and being conscious of windows, doorways, and electrical locations. (If we’re able to relocate electrical boxes to the center of the panels or stiles we do. You want to make it look like you planned those details.) We also mocked up our rail and stiles on the walls to make sure everything would fit the way we hoped.

What we did differently

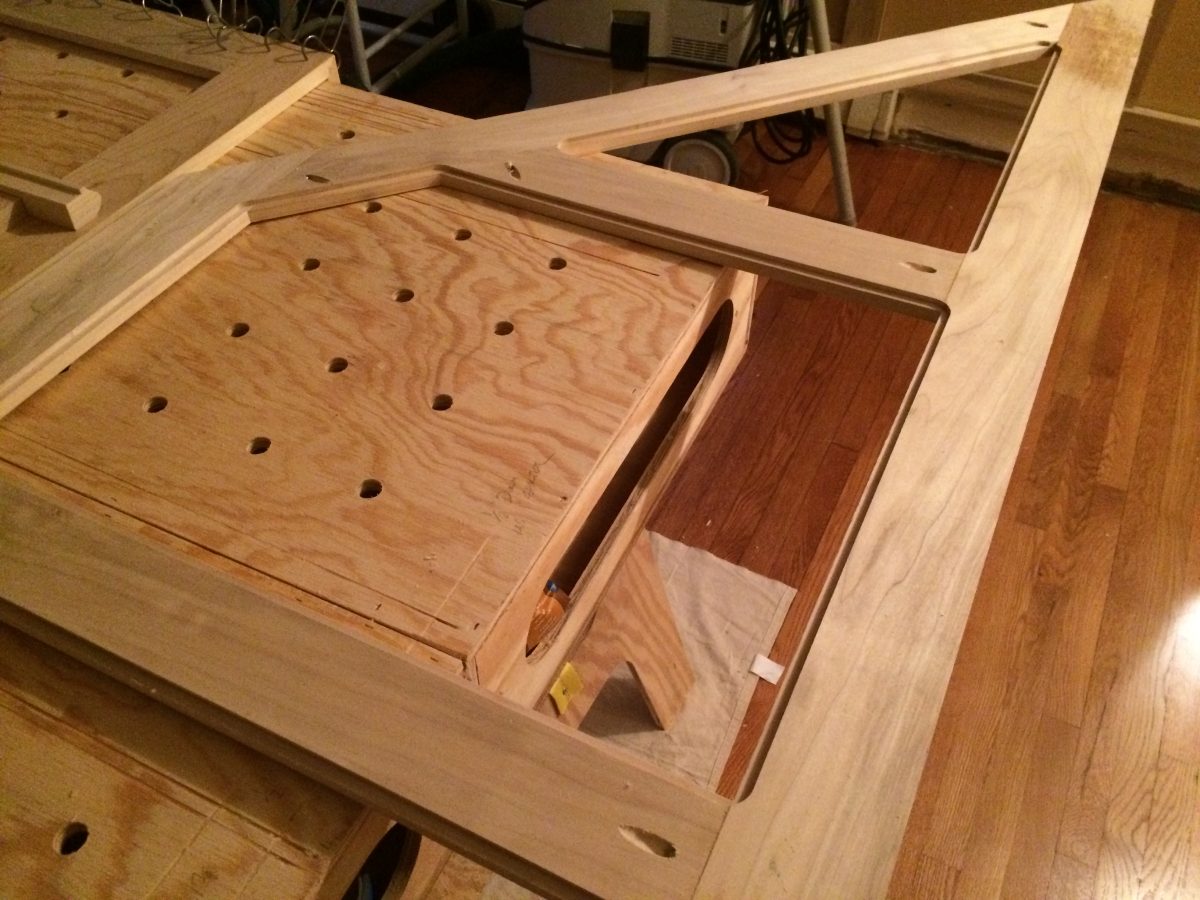
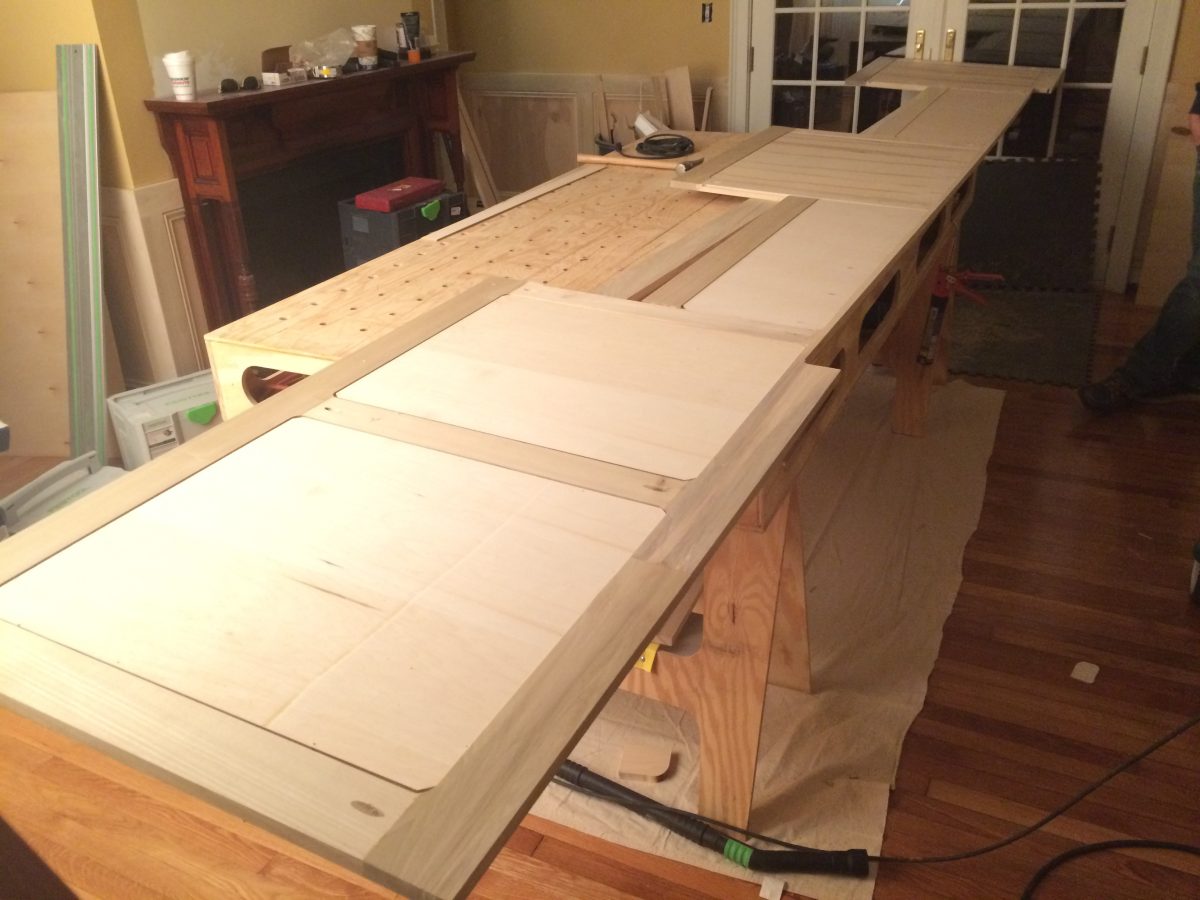
Using (2) 6mm x 40mm dominos, (1) 1-1/4-in. pocket screw, and wood glue, we assembled the rails and stiles face down on the table. Completing one task at a time rather than one wall at a time allowed us to work efficiently with only the tools required. When we moved on to the next step those tools would be put away and new tools would be setup for the next task. In this case, the router with a rabbeting bit. Laying face down we rabbeted out each panel section so we could install 1/4-in. plywood, often times we use MDF but in this case we used paint-grade plywood due to the availability. Gluing and stapling the plywood in from the back is where we gain a ton of extra strength with the preassembly method.

wainscot panel frame

preassembled wainscot panel

Final details

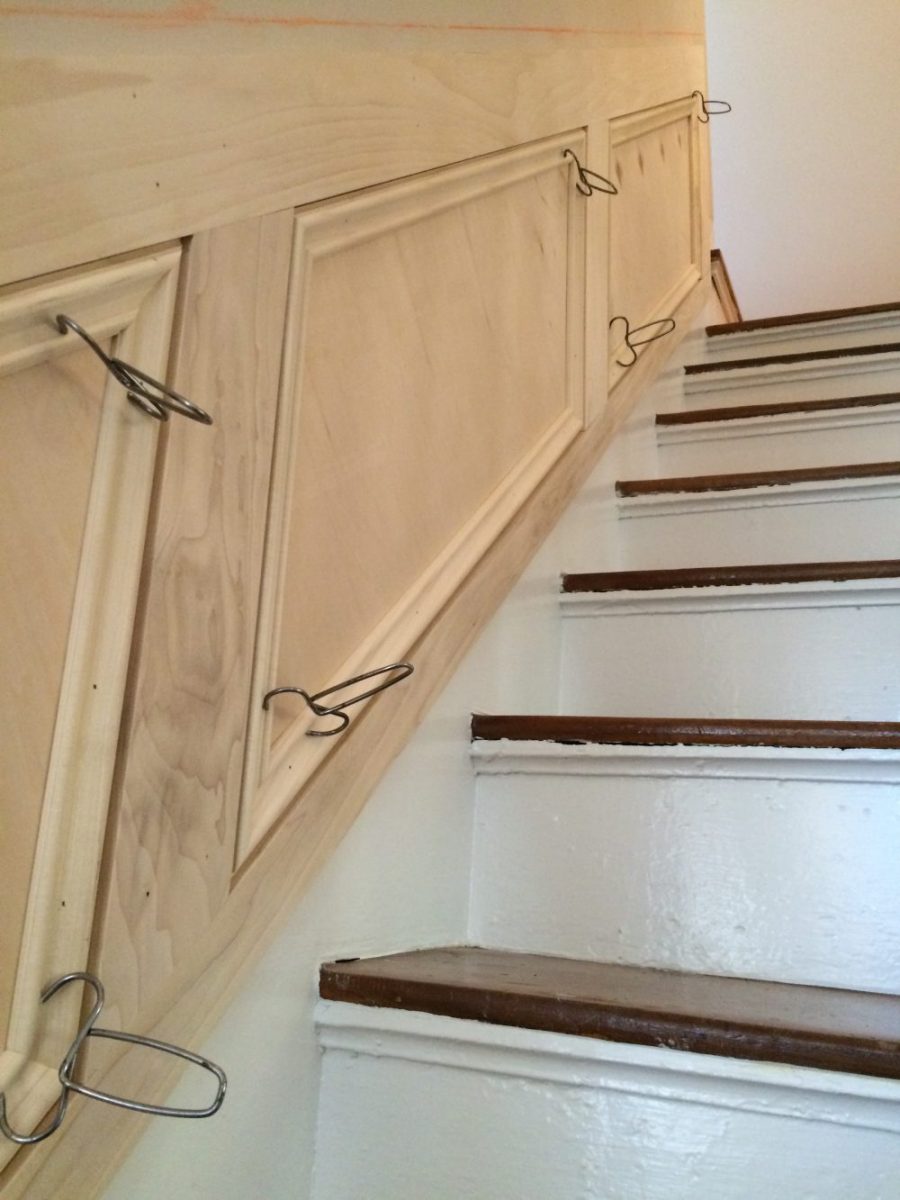
We then install the panels on the wall with construction adhesive and 18 ga. x 2-1/2-in.  brads at the stud locations. It’s important to use construction adhesive on the plywood to prevent the panel from sounding hollow, should there be any low spots on the wall.

We follow up with our panel and chair rail moldings to complete the look. Traditional installation, glue, and brads secure the molding to the panels. We finished this job with a Water Alkyd in Dove White.

wainscot molding clamped together
finished wainscot

Sign up for eletters today and get the latest how-to from Fine Homebuilding, plus special offers.

Signing you up...

This site is protected by reCAPTCHA and the Google Privacy Policy and Terms of Service apply.
See all newsletters
See all newsletters
Previous: Wainscot for a Window Next: Taking Wainscot Up Stairs

Guide

Finish & Trim Carpentry

Chapter

Wainscot and Paneling

View Comments

  1. user-2754989 | Jan 01, 2017 04:19pm | #1

    Great article Nick. Solid technique and execution. -Spencer aka @hoosier_carpenter

  2. ChrisPaulk | Jan 09, 2017 01:44pm | #2

    Nice article Nick! Noticed you are using the Paulk Workbench! ;)

  3. user-6554618 | May 29, 2017 01:52pm | #3

    Nice job. Only gripe would be there's no shoe mould. We build with dominos also but in the shop and minus the pocket screw - pipe clamp across the joints. I keep going back and forth on using the pocket screws. Time and material but with speed vs. reusable clamps but slower. Anyway good to see another carpenter building things to last.

  4. user-6554618 | Jan 07, 2018 07:45pm | #4

    Nice work. Give you an A, A+ if you used shoe mould that matched the hardwood floor. I've been building this way since day one. Definitely the way to go. But why install your mouldings in the field vs. the shop? Having just built panels for a stair recently, it's way faster to fab as much in shop as possible. To each his own. If you do a lot of panel work look into getting a miter trimmer. Best $200 I've ever spent.
    Brian

  5. carl10 | Jun 08, 2018 04:57pm | #5

    Nick,

    I am about to start the same project and was wondering how the stairs were finished as your assembly (and mine) are proud of the skirt board? TY Carl

Log in or create an account to post a comment.

Sign up Log in

Become a member and get full access to FineHomebuilding.com

Finish & Trim Carpentry

Finish & Trim Carpentry

Trusted, comprehensive guidance from the pros for creating perfect trim details in any room of the house

View Project Guide

View All Project Guides »

Become a member and get unlimited site access, including the Finish & Trim Carpentry Project Guide.

Start Free Trial

Trim Design
  • Trim Style and Design
Tools and Materials
  • Tools
  • Materials
Interior Trim Basics
  • Tips and Tricks
  • Techniques
  • Using Jigs
Window and Door Casings
  • Windows
  • Doors
Baseboard and Crown Molding
  • Baseboard
  • Crown Molding
  • Specialty Crown Situations
Wainscot and Paneling
  • Beadboard Wainscot
  • Paneled Wainscot
  • Chair Rails
  • Wall Treatments
Mantels and Fireplace Surrounds
  • Design
  • Installing Mantels and Surrounds
Coffered Ceilings

Fine Homebuilding

Follow

  • twitter
  • facebook
  • instagram
  • pinterest

Newsletter

Get home building tips, offers, and expert advice in your inbox

Signing you up...

This site is protected by reCAPTCHA and the Google Privacy Policy and Terms of Service apply.
See all newsletters
See all newsletters

Membership & Magazine

  • Online Archive
  • Start Free Trial
  • Magazine Subscription
  • Magazine Renewal
  • Gift a Subscription
  • Customer Support
  • Privacy Preferences

Taunton Network

  • Green Building Advisor
  • Fine Woodworking
  • Fine Gardening
  • Threads
  • About
  • Contact
  • Advertise
  • Careers
  • Copyright
  • Terms of Use
  • Site Map
  • Do not sell or share my information
  • Privacy Policy
  • Accessibility
  • California Privacy Rights

© 2023 The Taunton Press, Inc. All rights reserved.

X
X
This is a dialog window which overlays the main content of the page. The modal window is a 'site map' of the most critical areas of the site. Pressing the Escape (ESC) button will close the modal and bring you back to where you were on the page.

Main Menu

  • How-To
  • Design
  • Tools & Materials
  • Video
  • Blogs
  • Forum
  • Reader Projects
  • Magazine
  • Members
  • FHB House

Podcasts

  • FHB Podcast
  • ProTalk

Webinars

  • Upcoming and On-Demand

Podcasts

  • FHB Podcast
  • ProTalk

Webinars

  • Upcoming and On-Demand

Popular Topics

  • Kitchens
  • Business
  • Bedrooms
  • Roofs
  • Architecture and Design
  • Green Building
  • Decks
  • Framing
  • Safety
  • Remodeling
  • Bathrooms
  • Windows
  • Tilework
  • Ceilings
  • HVAC

Magazine

  • Current Issue
  • Past Issues
  • Magazine Index
  • Subscribe
  • Online Archive
  • Author Guidelines

All Access

  • Member Home
  • Start Free Trial
  • Gift Membership

Shop the Store

  • Books
  • DVDs
  • Taunton Workshops

More

  • FHB Ambassadors
  • Reader Projects
  • Podcast
  • FHB House
  • Customer Support

Account

  • Log In
  • Join

Newsletter

Get home building tips, offers, and expert advice in your inbox

Signing you up...

This site is protected by reCAPTCHA and the Google Privacy Policy and Terms of Service apply.
See all newsletters
See all newsletters

Follow

  • twitter
  • facebook
  • instagram
  • pinterest

Join All Access

Become a member and get instant access to thousands of videos, how-tos, tool reviews, and design features.

Start Your Free Trial

Subscribe

FHB Magazine

Start your subscription today and save up to 70%

Subscribe

We hope you’ve enjoyed your free articles. To keep reading, become a member today.

Get complete site access to expert advice, how-to videos, Code Check, and more, plus the print magazine.

Start your FREE trial

Already a member? Log in