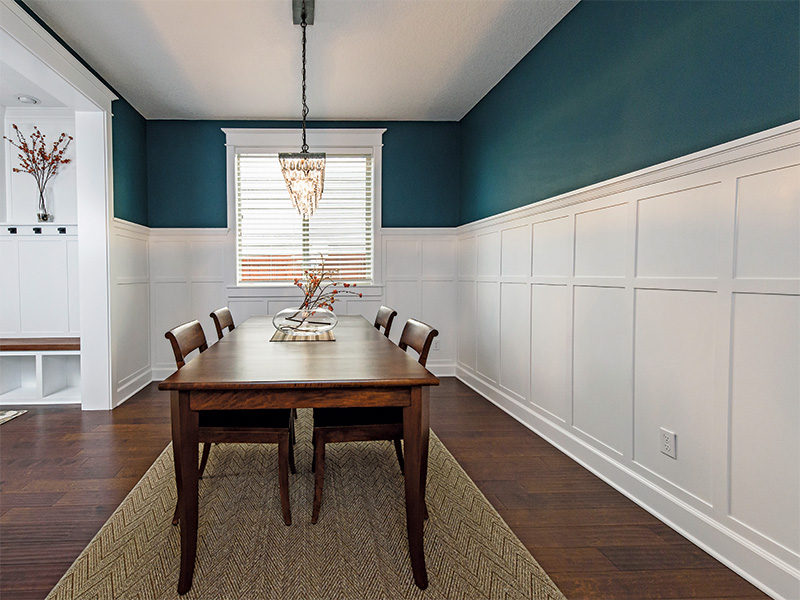
Wainscot adds a striking level of sophistication, depth, and visual interest to a space. While wainscot is a catch-all term for a variety of wall treatments, the job shown here centers around the timeless painted frame and flat panel reminiscent of the Shaker style. It’s a classic look that makes a room come to life.
However, this style of wainscot is both labor and material intensive and its price is a bit surprising to most homeowners. My system of on-site measurement and off-site production balances traditional methods, quality workmanship, speed, and efficiency, allowing me to be as competitive as possible while still offering a superior product.
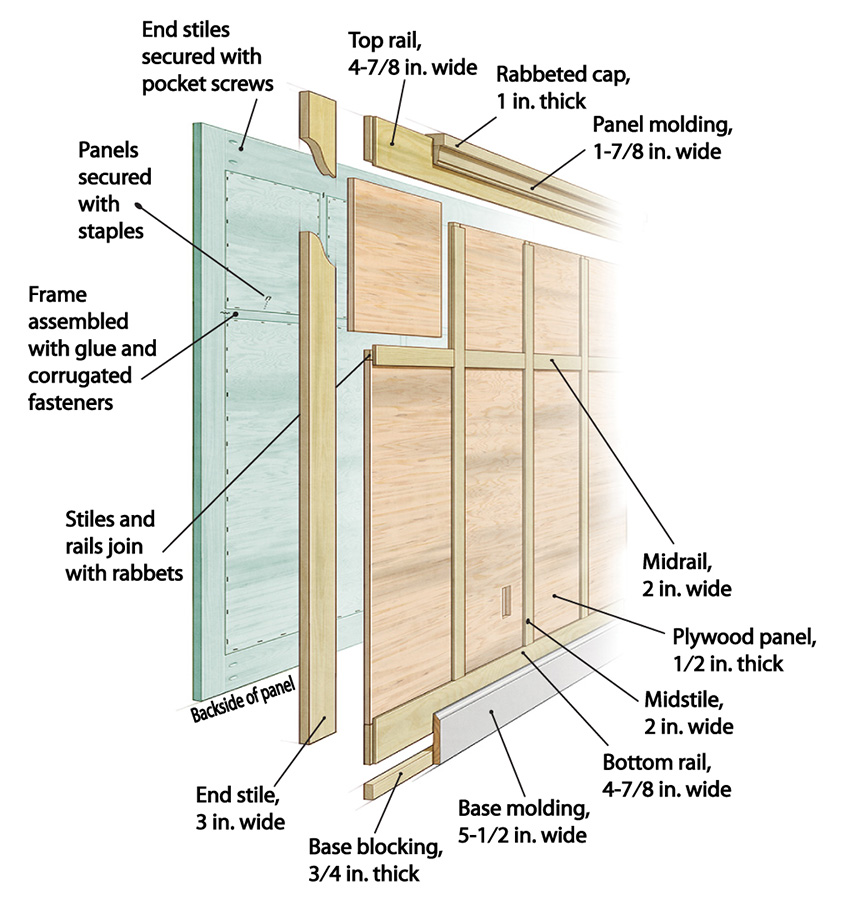
Anatomy and proportions
Panel size depends on the moldings you’ll use. The bottom rail is sized to show about 2 in. of wood above the base molding, enough to hide discrepancies between wainscot and base molding that follows a floor that may not be flat or level. The top rail receives a 5/4 cap supported by a panel molding, and the top rail is wide enough to leave a 3-in. exposure, matching the width of the stiles. The panel height is what’s left after subtracting the base height, bottom rail, top rail, and cap assembly. The panel width varies from 15 in. to 20 in.
I remove the existing drywall or plaster and install the wainscot directly onto the studs. This puts the assembly behind the existing door and window casing. This detail is key to the overall look, replicating the style of an older house that was originally built with wainscot. My crew makes the frames from 3/4-in. poplar and uses 1/2-in. shop-grade maple or birch plywood for the panels. The simplicity of the design means all the components can be made on a tablesaw.
In most spaces, wainscot looks best at about one-third of the height of the wall. However, two-thirds of the wall height is often chosen for large rooms, or for dining rooms and other spaces where intimacy is desired. In either case, I use those proportions as a starting point and fine-tune the wainscot height based on the customer’s preference and existing obstacles (I will stay below light switches, for example).
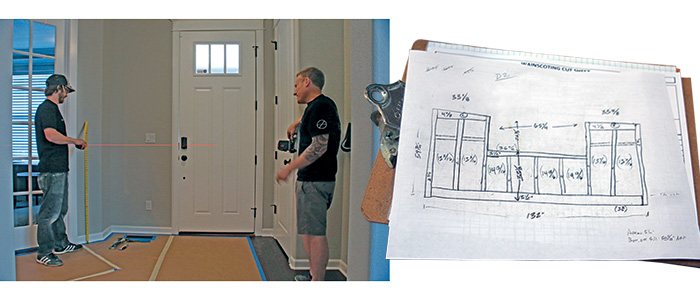
Measure on site, build in the shop
Make plans. All relevant dimensions should be included in site drawings, from wall lengths to window and door widths to switch locations.
Measure the room (a laser measure works great) from an intuitive starting point. Number each wall and make a plan drawing. Sketch elevations of walls interrupted by windows. Plan to install the larger assemblies first, making their corner stiles 1 in. wider to accommodate the lap of the intersecting panels. after the measurements are taken on site and drawings for each wall are made, it’s back to the shop, where the wainscot is planned out, the stock sized and machined, and the frames and panels assembled.
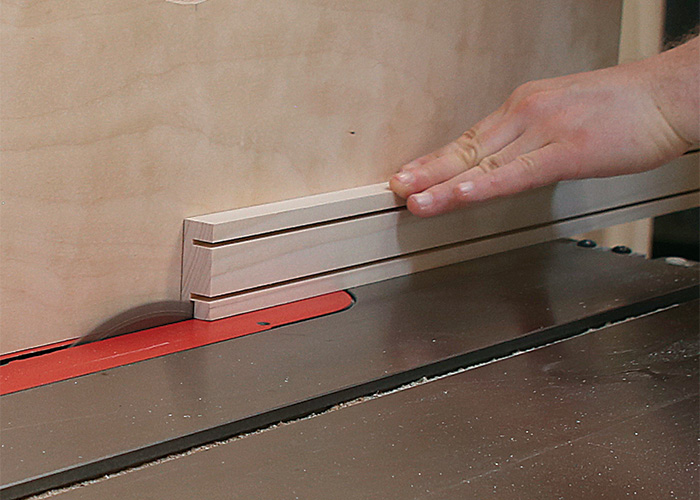
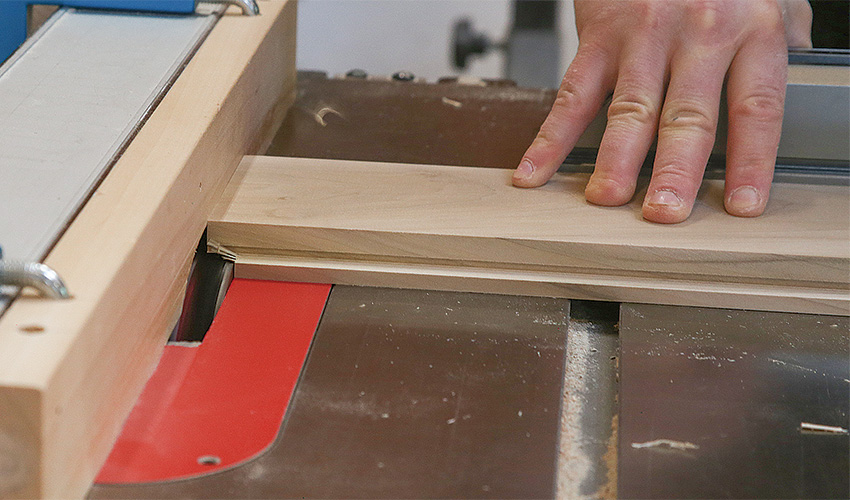
Rabbet rips. Rip the long edges of the rail and stile stock to width, then rabbet them the depth of the panel stock on a tablesaw.
Dado for the ends. Rabbet the front of the rail ends to meet up with the stiles using a dado blade on a tablesaw and a miter gauge.
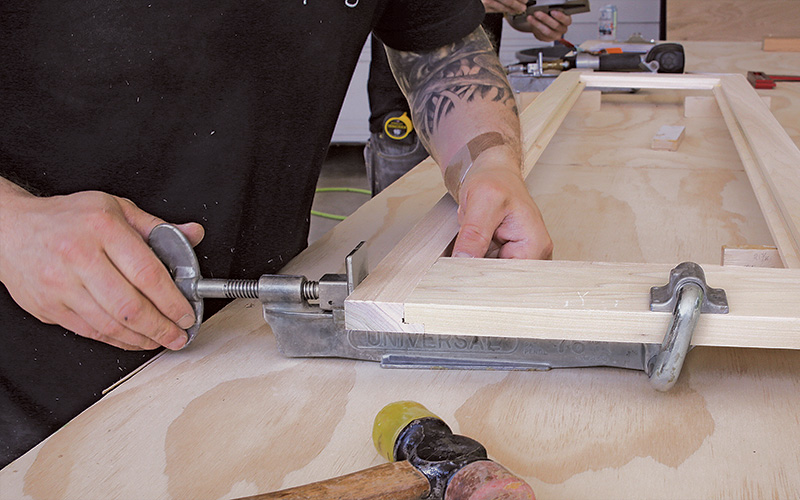
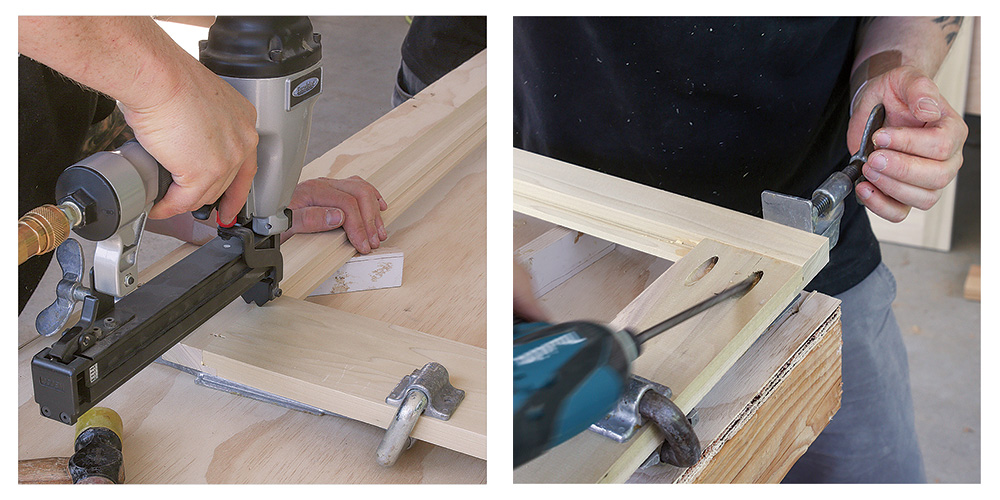
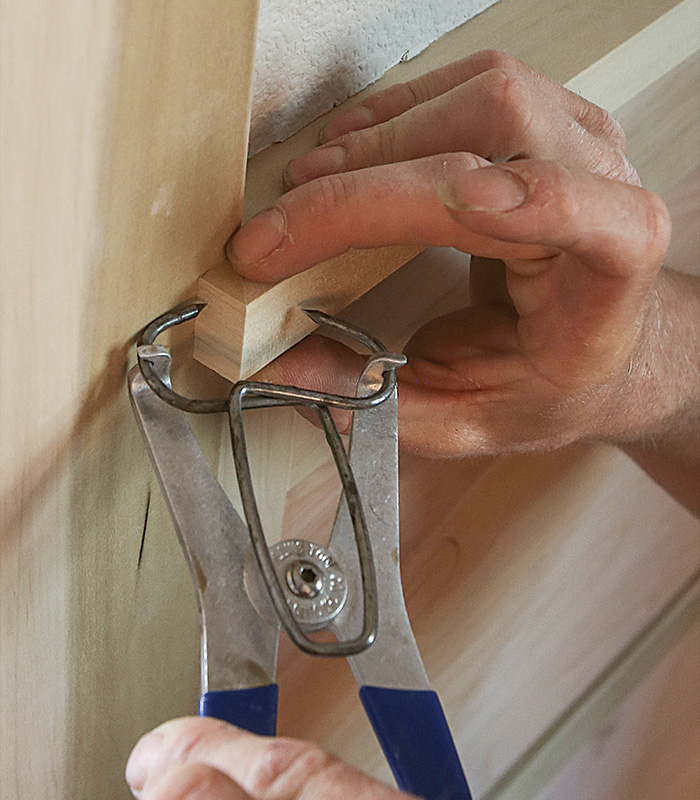
Get a grip. For assembly, use a UC-76 wedgegrip clamp (Dubuque Clamp Works) to pull the rails and stiles together.Fast frame fastening. Join all but the end rails and stiles with 1⁄2-in.-wide by 3⁄8-in.- long pneumatically driven corrugated fasteners and glue. For a stronger joint to help panels longer than 4 ft. survive handling, pocket-screw the end stiles to the rails.
Start ripping. Rip panel stock to width on a tablesaw before cutting it to length. Plan your cuts to use the stock efficiently, and rip like size panels all at once to save setup time.
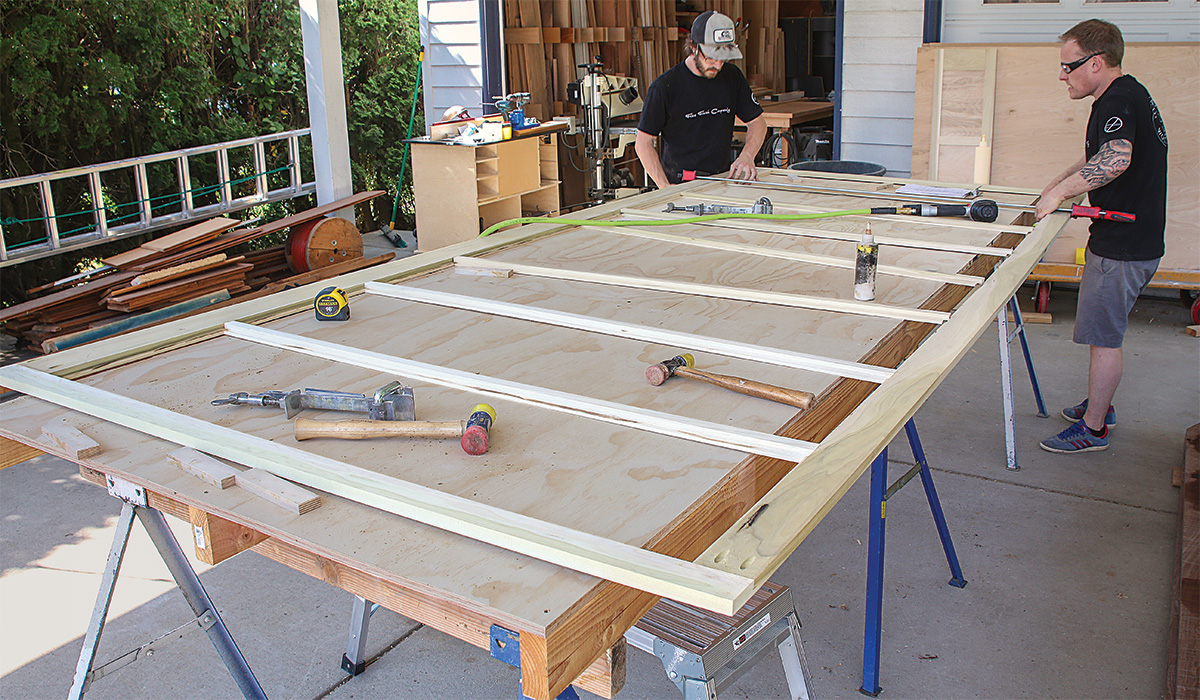
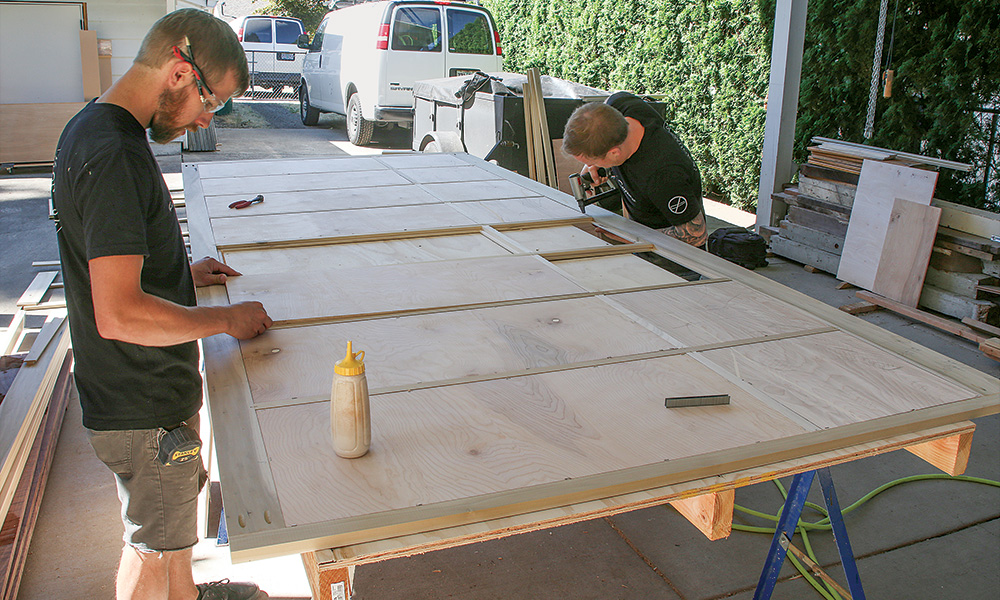
Build it backside up. Cut intermediate rails to length and fit them between the stiles. Attach them with glue and corrugated fasteners. Glue and staple the plywood panels into the rabbets.
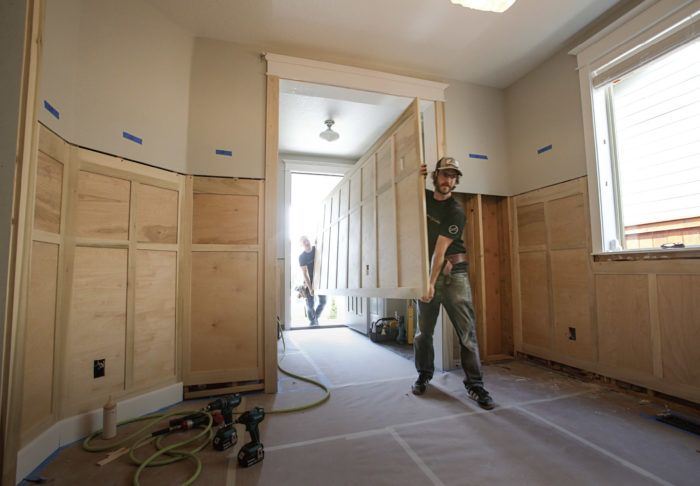
Open the walls, install the panels
In this phase, tear out the existing drywall, being careful to make clean edges at the top and at the casings. With the drywall out, fit the wainscot panels into place. Doing this puts the face of the wainscot behind the faces of the casings.
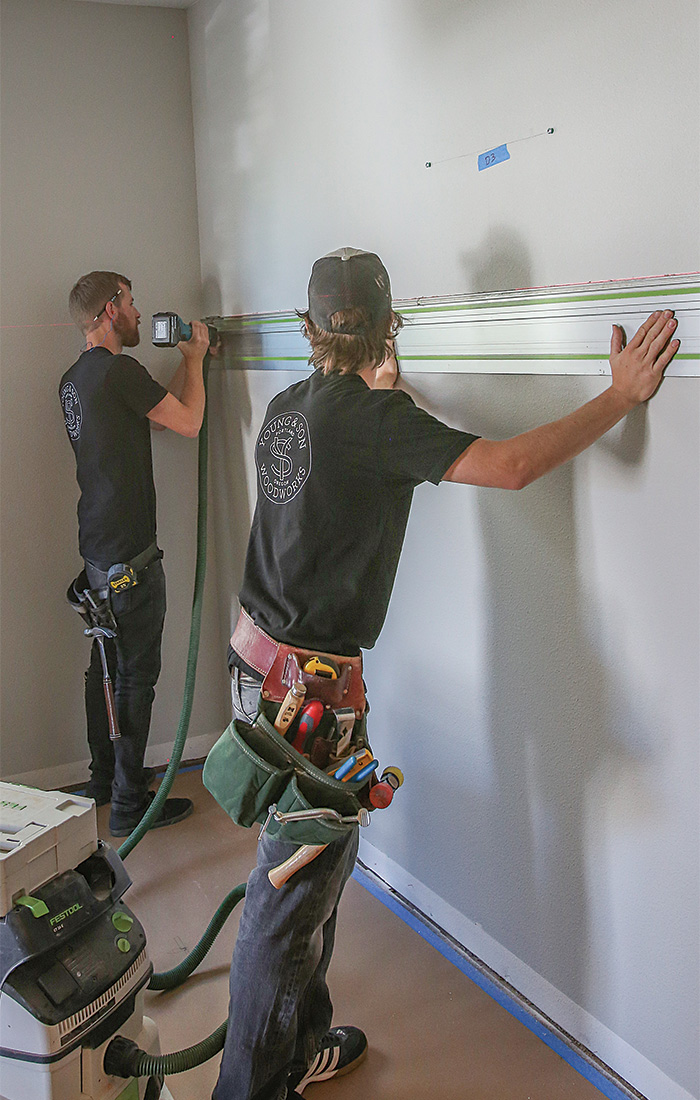
Clean, straight cut. Use a helper to hold a straightedge to a laser-level line, and cut the drywall using an oscillating multitool. Hold a vacuum below the multitool to catch dust.
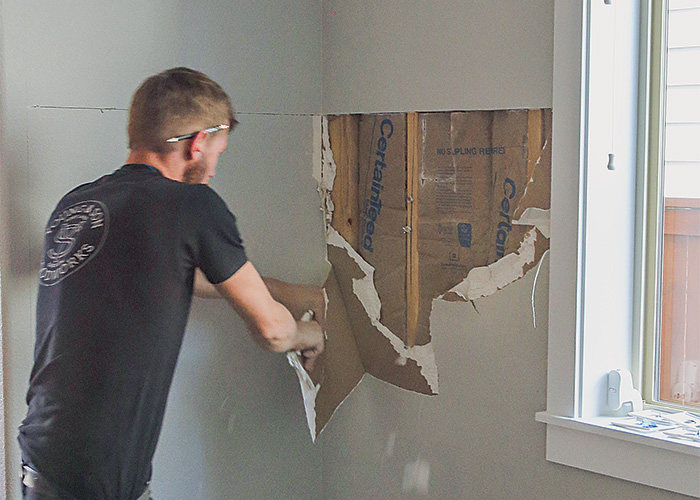
Clear the way. Remove all the drywall in the area to be wainscoted. Once the studs are fully exposed, take out the drywall screws.
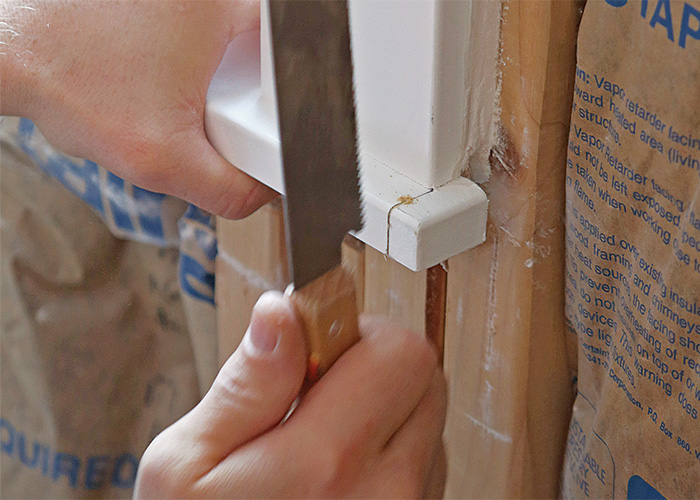
Remove hang-ups. Cut window stools flush with the casing to allow the panels to be placed. These offcuts can be glued back in place after installing the wainscot panels.
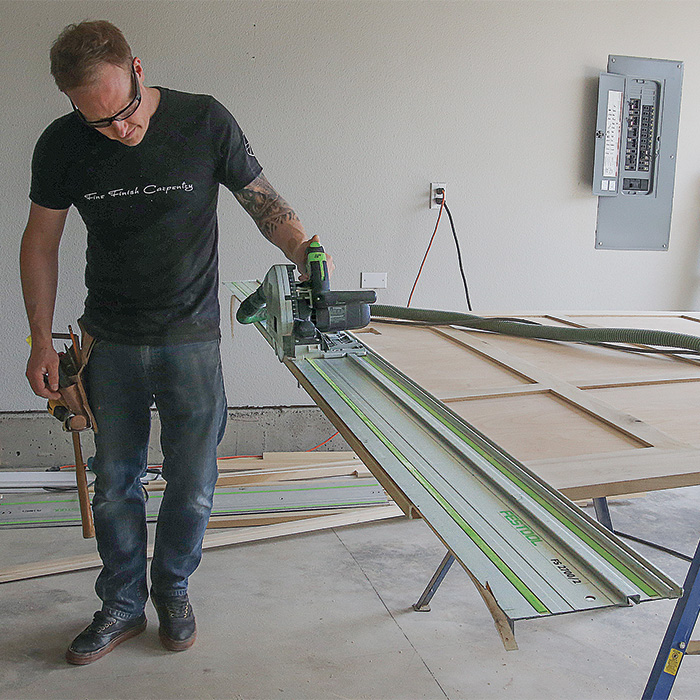
Trim to fit. Make the panels a little oversize in the shop, then cut them to size on site. A track saw is a great way to make the finishgrade cuts required for final fitting.
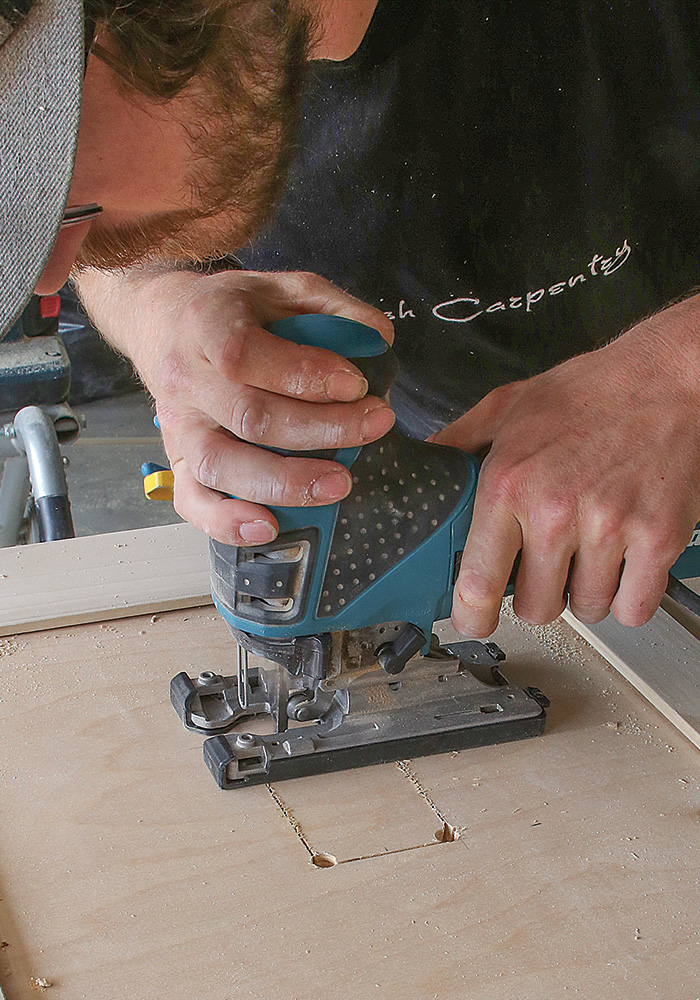
Connect the dots. Cutouts for electrical boxes are done on site by drilling holes at each corner and cutting between them with a jigsaw.
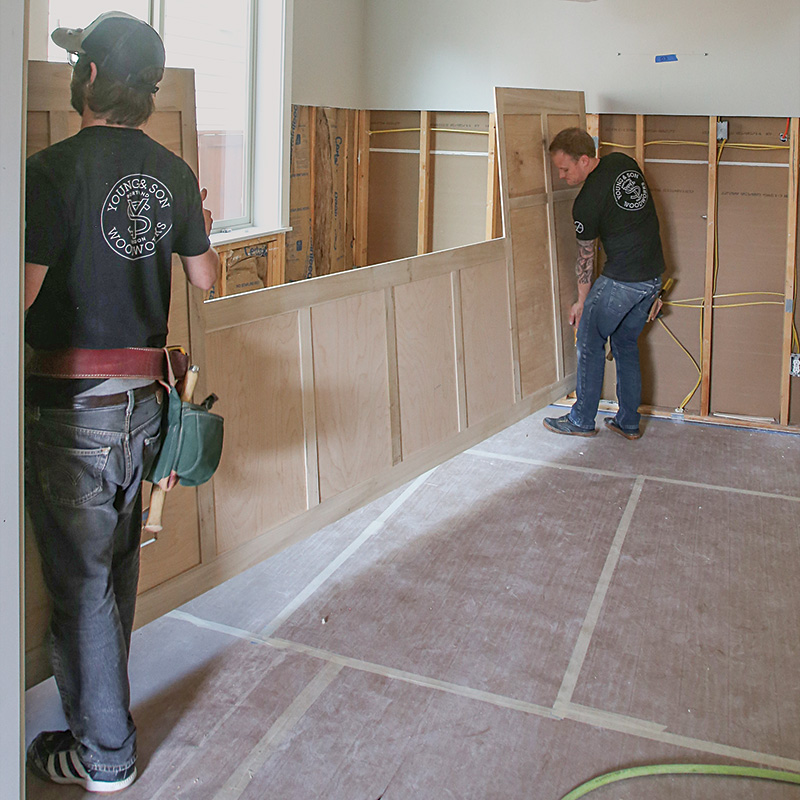
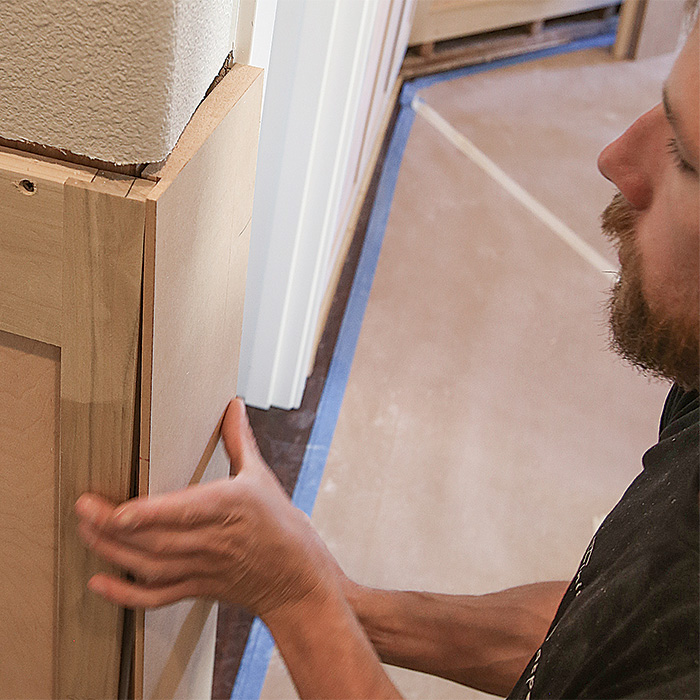
Moment of truth. With the fitting done, walk the panels into place, where they will be positioned for fastening.
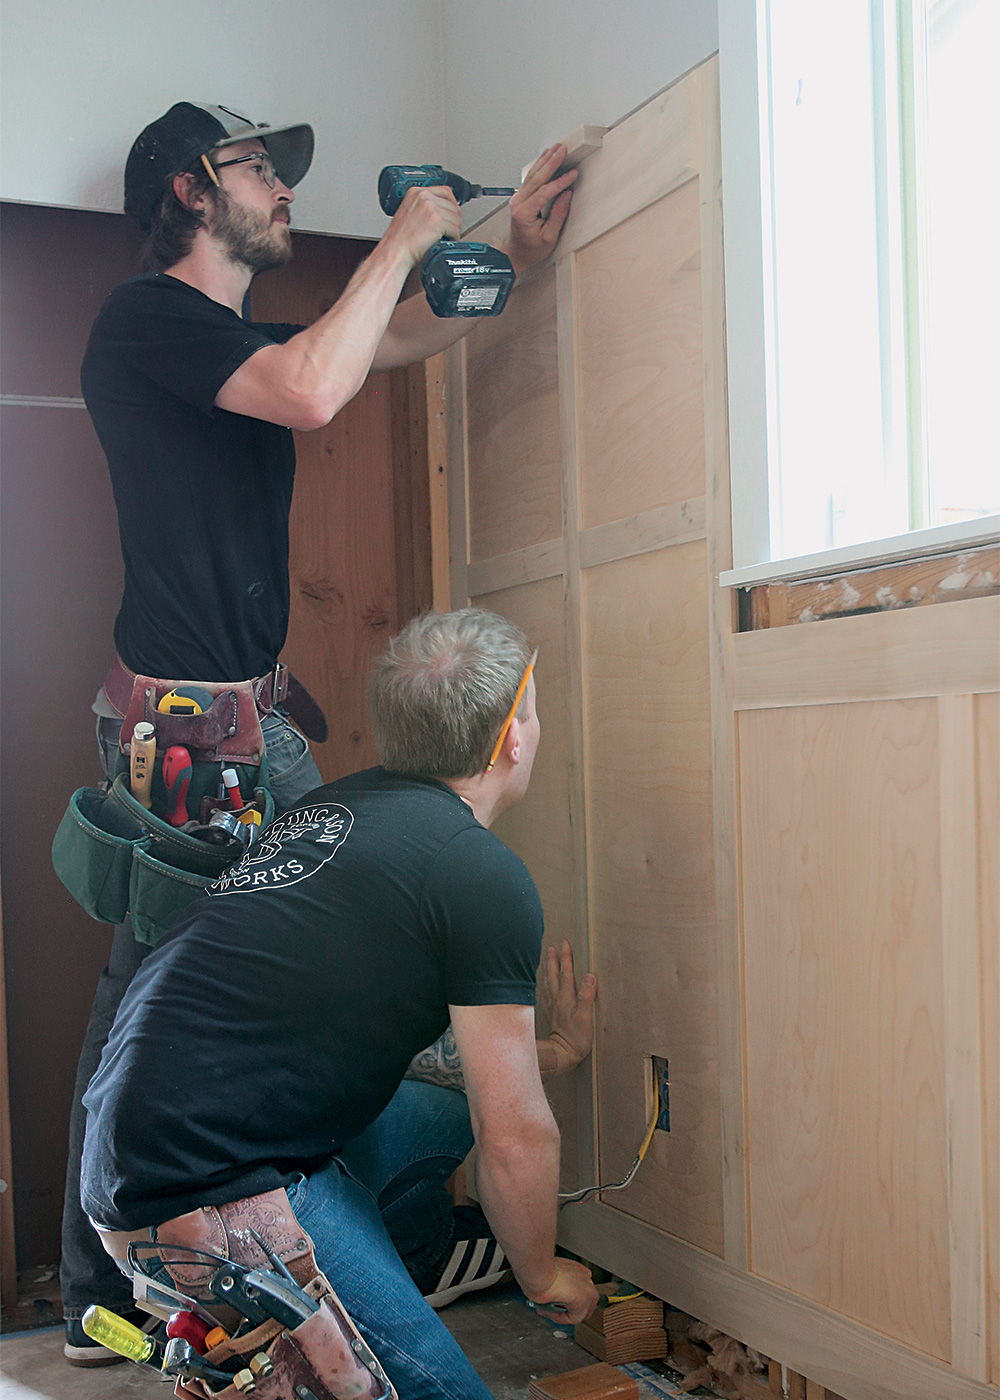
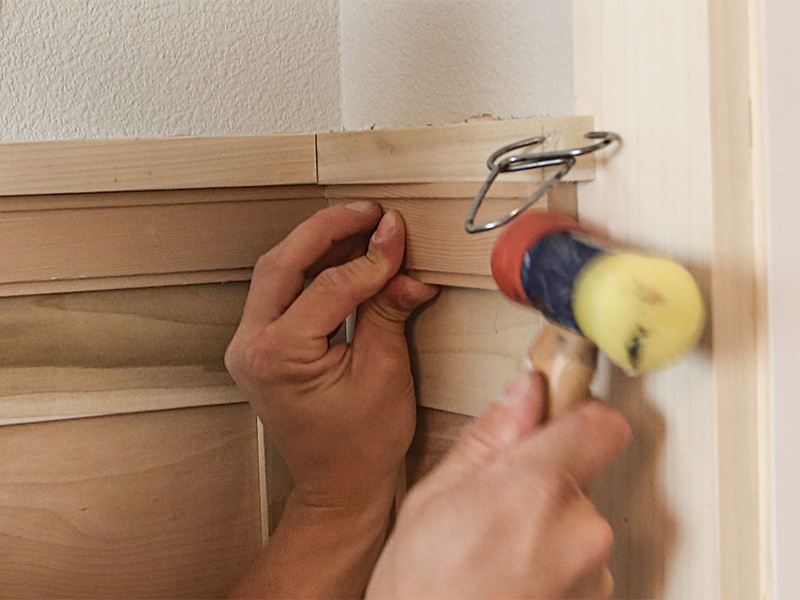
Lift and fasten. Work in a team to install the panels, with one carpenter prying the panel up while the other sets the gap up top with a cutoff from the cap molding. Screw the panels to the studs where the base and panel molding will hide the screwheads.
Details tie the wainscot to the room
With the panels installed, treat the rest of the job like everyday trimwork of fitting caps, panel molding, and base. All the normal techniques apply—you want tight, gluereinforced joints, and careful work that leaves the wood looking pristine.
Small walls get solid panels. Rabbet the panels’ backs to keep each panel’s edge flush with the face of the abutting panel.
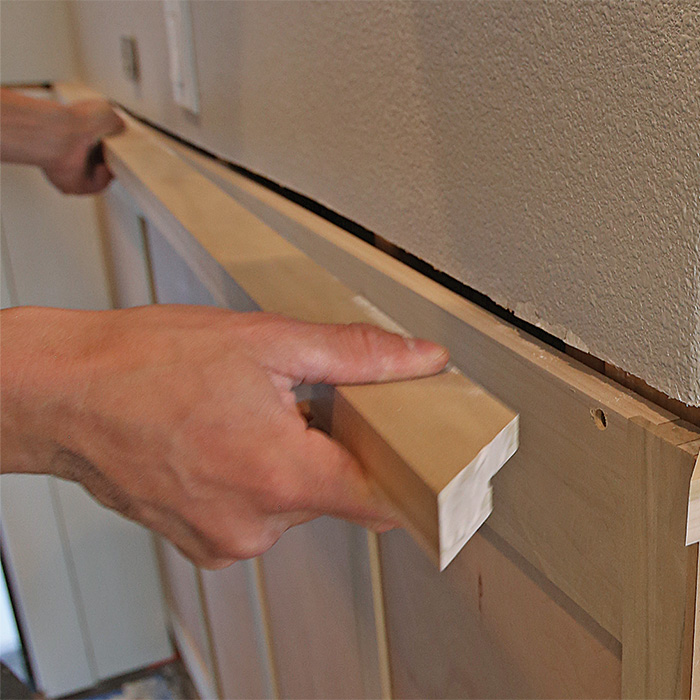
Clean cap. The cap’s rabbet ensures it sits at a consistent depth. Miter the ends and nail the cap to the top rail.
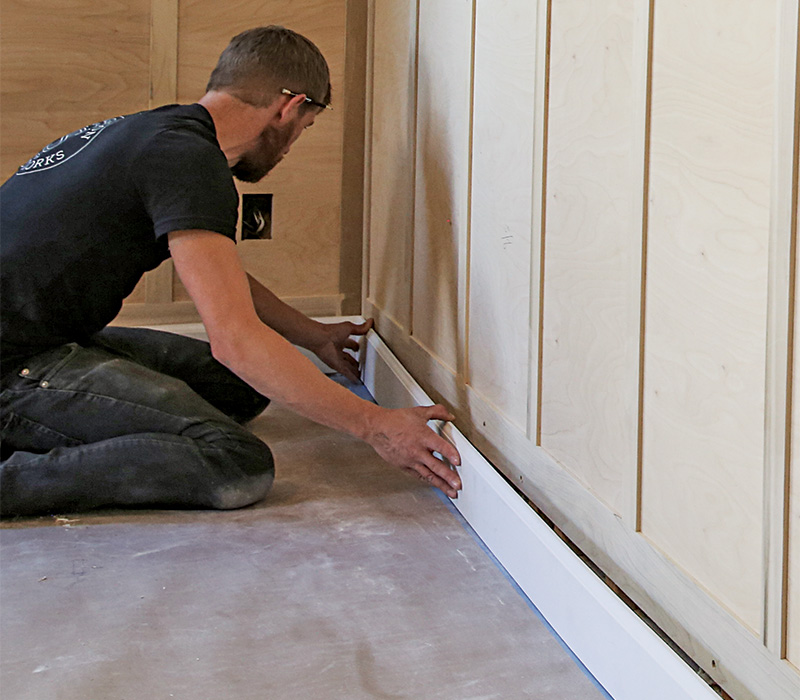
Pad the base. Nail scraps of frame material in place to pad out the bottom of the wall behind the base molding.
Flex fit. Cut base molding a little long so that it meets the perpendicular piece in a cope and snaps into place.
Reinstall the old trim. Retaining the existing molding profiles around common details such as windows and doors visually ties the new wainscot to the rest of the house.
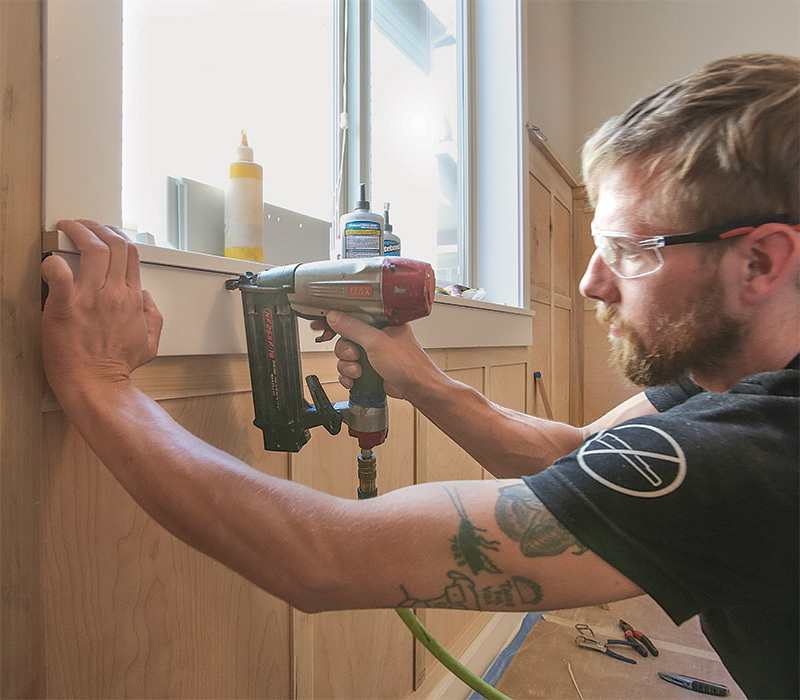
Glued returns. Extend the cap over the casing edges, mitering the very ends. Cut small returns and glue and clamp them into place.
Finishing touches. Wrap up the installation with a panel molding under the cap. Return its ends, tap it into place, and fasten. The rest of the job is left for the painters.
Andrew Young owns Young & Son Woodworks in Portland, Ore.
Photos by Andy Engel, except where noted.
From FineHomebuilding #272
To view the entire article, please click the View PDF button below.
This is a dialog window which overlays the main content of the page. The modal window is a 'site map' of the most critical areas of the site. Pressing the Escape (ESC) button will close the modal and bring you back to where you were on the page.
We use cookies, pixels, script and other tracking technologies to analyze and improve our service, to improve and personalize content, and for advertising to you.
We also share information about your use of our site with third-party social media, advertising and analytics partners.
You can view our Privacy Policy
here and our Terms of Use here.