previous
  • How To Make a Reciprocating-Saw Blade Guide Block
    How To Make a Reciprocating-Saw Blade Guide Block
  • VIDEO: Stop Paint from Bleeding
    VIDEO: Stop Paint from Bleeding
  • How to Avoid Complicated Fractions
    How to Avoid Complicated Fractions
  • The Inspector Game: Goofs on a Roof
    The Inspector Game: Goofs on a Roof
  • 10 Basement-Remodeling Tips and Techniques
    10 Basement-Remodeling Tips and Techniques
  • Seven Steps to Choosing the Perfect Circular Saw
    Seven Steps to Choosing the Perfect Circular Saw
  • Top 10 Videos of 2011
    Top 10 Videos of 2011
  • Patrick's Barn: A Perfect Place for a Party
    Patrick's Barn: A Perfect Place for a Party
  • 7 Small Bathroom Layouts
    7 Small Bathroom Layouts
  • The Self-Taught MBA: Inspired Reading
    The Self-Taught MBA: Inspired Reading
  • Wanted: Plumber for a Bathroom Remodel
    Wanted: Plumber for a Bathroom Remodel
  • Your Guide to Energy Smart Homes
    Your Guide to Energy Smart Homes
  • How to Figure Out Concrete Volume with Sketchup
    How to Figure Out Concrete Volume with Sketchup
  • Replacing a Roof : Installing a Ridge Vent
    Replacing a Roof : Installing a Ridge Vent
  • Fine Homebuilding: The Digital Issues
    Fine Homebuilding: The Digital Issues
next
Theres a Better Way


Pipe Clamp Hold Down for the Job Site

comments (6) October 8th, 2009 in Blogs        
cmiller Chuck Miller, special-issues editor
61 users recommend

Video Length: 0:51
Produced by: John Ross; edited by Michael Dobsevage


This tip was sent to us by Joseph Kaye, of Uniondale, N.Y.:

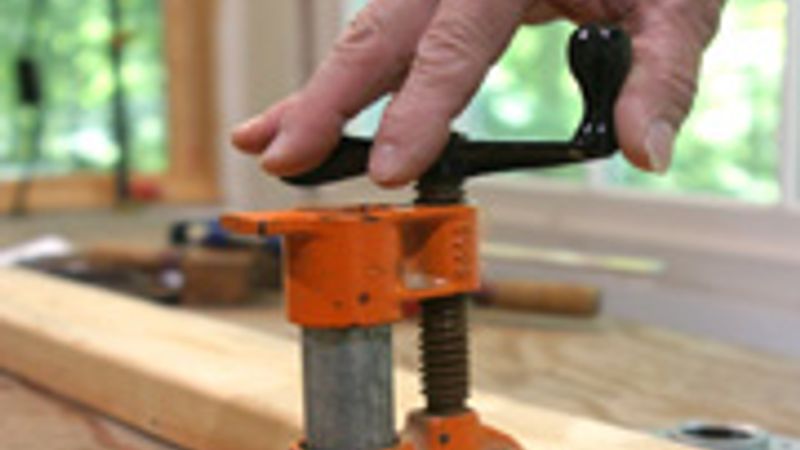
Whenever I need a hold-down clamp on my bench, I reach for one of my pipe clamps. As shown in the (video), I insert a short length of pipe through a hole in the bench top. It is threaded into a pipe flange secured upside-down to the underside of the bench, giving me the versatility of a hold-down without having to buy one.

To see a drawing of how this works, study the illustration for Joseph's tip in the Fine Homebuilding archive, availble to FineHomebuilding.com online members.


posted in: Blogs, job site, bench, pipe clamp

Comments (6)

Fumbletrumpet Fumbletrumpet writes: Pipe clamps are an excellent system that I have see in the USA, but we don't really have them here in the UK (our pipe is metric and all too often plastic or copper - threaded imperial steel/iron pipe is hard to source).

We do however have a sort-of 'system' of clampy type things which fit into the standard holes within a 'Workmate' (do you guys have these sort of folding benches ?) or its cheaper clones. These hold-downs (we sometimes call them 'dogs') may not be available in the USA, but if they are, why go to all the trouble of making something that already exists as an off the shelf product ?

Anyways, how often do you need a clamp in the middle of a board or bench ? Easiest of all must be clamp near an edge with a ratchet clamp or lever a hold down timber batten off a slightly thicker than workpiece shim with the clamp in between (sorry, needs a pic to explain really).

Like the pipe clamp system, just seems a lot of work to me.
Posted: 3:59 am on November 28th

bill117 bill117 writes: I don't have a pipe threader. Why not just drill a hole the size of the pipe and remove the sliding end of the pipe clamp, thread the pipe through the hole, and replace the sliding end?
Posted: 11:51 pm on October 13th

notretired notretired writes: I was watching how you did multiple doors. I use a variation of that method. I set up sawhorses about 4 inches further apart than the doors are long. Then I drill 3 holes, 1 in the center of bottom and 2 in the top about 6 inches from each edge of the door with a 3/8 inch bit. I put a 3/8 x 5 inch bolt in each hole. The single bolt acts as the pivot and the other two hold the door steady. Using the two bolts you can easily flip to the other side. The best part is there are no runs.

I refinished 96 doors total for a customer using this trick
Posted: 12:42 am on October 13th

woodwrangler woodwrangler writes: I glued up elliptical header moldings using a similar arrangement. After determining the shape of the final piece and laying it out with straight board sections, I drilled somewhat oversized holes for the clamp pipes, locating them where they would do the most good. I used the clutch-plate tail-pieces on the underside and added stiffening 2x4s on edge going the length of the jig and in between, next to the holes. The bottom of the clamps hooked onto these stiffeners and held the boards to the table, with scraps protecting the boards, to produce flat finished moldings. I used biscuits in the ends of the board pieces where they would not show in final form and let it set overnight, ready for final shaping. I still have that fixture 19 yrs later.
Posted: 4:50 pm on October 12th

wapitiscat wapitiscat writes: I might try this using the clutch plate tail piece of the clamp and see if it works similar to a traditional holdfast. That way, you're only limited by the length of pipe and not the range of the treads on the clamp end.
Posted: 12:00 pm on October 12th

renosteinke renosteinke writes: Please note that these flanges will NOT accept pipe from either direction. If you look closely, you will see that the flange was installed into an over-sized hole, to allow the 'stub' portion to recess into the board.

In a sense, you have to attach the flange to the board in a 'backwards' fashion.

I believe FWW shoed a similar arrangement, only using MDF. In that example, the hole was small enough that the pipe nipple itself was able to cut it's own threads into the MDF.
Posted: 1:05 pm on October 9th

You must be logged in to post comments. Click here to login.