Synopsis: Installing square cabinets to out-of-square walls and bumpy floors is the subject of this article. Tom Law shows how shims and judicial scribing camouflage common house problems. A sidebar deals with installing frameless European cabinets.
Well, there you are, just walking into a new kitchen with freshly painted drywall. Or maybe you’re remodeling, and you’ve spent the last few days gutting the kitchen. But now you’ve got a clean slate to work with. The kitchen cabinets are in cardboard boxes, and all you have to do is unpack them and fasten them to the wall, right? Easy, tiger.
Kitchen cabinets are like carry-out food: A lot can go wrong with the order, and you don’t want to be five miles down the road when you discover that something’s missing. Before you begin installing cabinets, check all the boxes. Make sure you have everything you need and that the cabinets are what the customer ordered.
Take a close look at the walls and the floor— they’re probably not as flat as they appear. You’ll have to compensate for any imperfections because the cabinets take precedence. You don’t distort a straight cabinet to fit a crooked wall.
Here, I’ll discuss the methods I use to install cabinets when conditions are less than perfect, and believe me, they usually are.
Know the room conditions
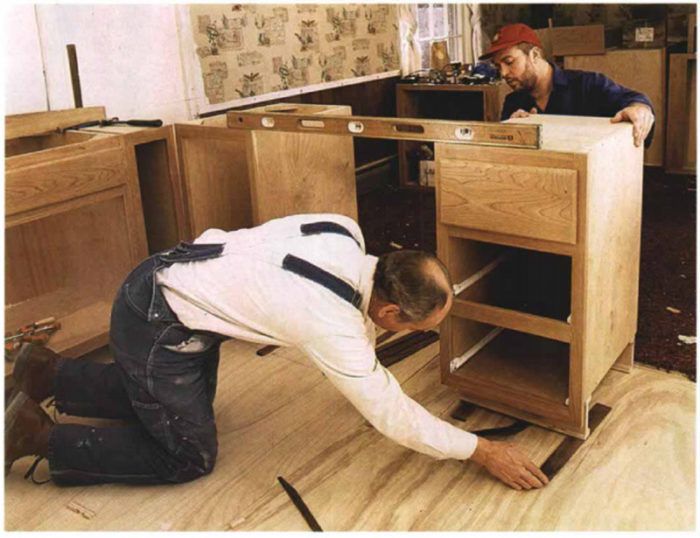
Every installation begins with a check of the floor and the walls for the carpenter’s guiding principles: plumb and level, straight and square. I use a straightedge and a level to see how the floor goes. The goal is to locate high and low spots because one of these spots will be the starting point for the cabinet layout, ultimately determining the height of the countertop.
I also use the straightedge to check the walls for straight and plumb. If there is a corner, I check it for square. Although serious flaws are uncommon, minor problems like crooked studs or spackle buildup often appear.
Marking the wall and the floor
To get over the fidgets of starting the job, I mark the cabinet layout on the wall. Marking the layout helps me visualize the finished job.
To begin with, I decide whether to use the high or low spot on the floor for my starting point. Choosing the high spot probably means that only one base cabinet will sit directly on the floor; all the others will be shimmed up. Using the low spot means that most of the cabinets will have to be scribed to fit the irregularities of the floor. It’s easier to use the high spot because it’s easier to shim up than to cut off, but the determining factor is countertop height. Usually a countertop is 3 ft. from the floor.
For photos and more on marking the wall and scribing, click the View PDF button below.
Fine Homebuilding Recommended Products

All New Kitchen Ideas that Work


