
One of the most important steps in how to frame a shed is being precise with your measurements. Take the extra time to properly square up the floor and walls of your building. An out-of-square start will cause problems through each step of your framing and building process.
Previously on The Digital Jobsite:
If you’ve just stumbled across this tutorial, you can use these links to previous episodes to get up to speed before watching the wall layout explanation in this segment:
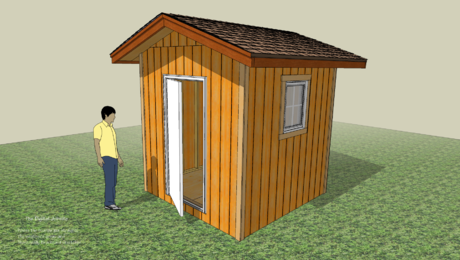
This is an overview of the shed project:
This blog post explains overall layout priorities and shows assembly and square-up of floor framing:
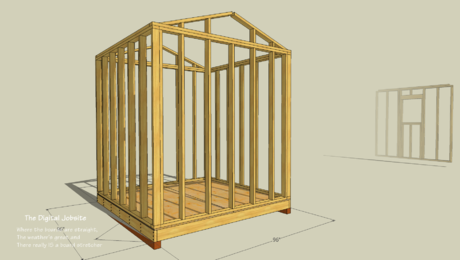
Stud Layout Simplified:
There are several factors to consider in the wall framing process of building a shed. Members such as plates, studs, cripples, headers, sill plates and backing each have a specific place and purpose in wall construction. The final assembly can be confusing with so many different elements included. To simplify this tutorial I use the Layers feature of SketchUp to hide everything but the studs while showing preliminary stud layout principals:
Its important to emphasize that the example shown here is intended only as an introductory layout tutorial meant to convey basic but functional standards and concepts of how to frame a shed. Its a little bit “old school” in theory by not necessarily incorporating material conservation, thermal transmission or minimal required strength layout factors which are important but advanced building considerations. The great thing about first building a SketchUp model is that anyone with a desire to implement more advanced building practices can optimize their model to optimize these concepts and more to truly realize their design goals.
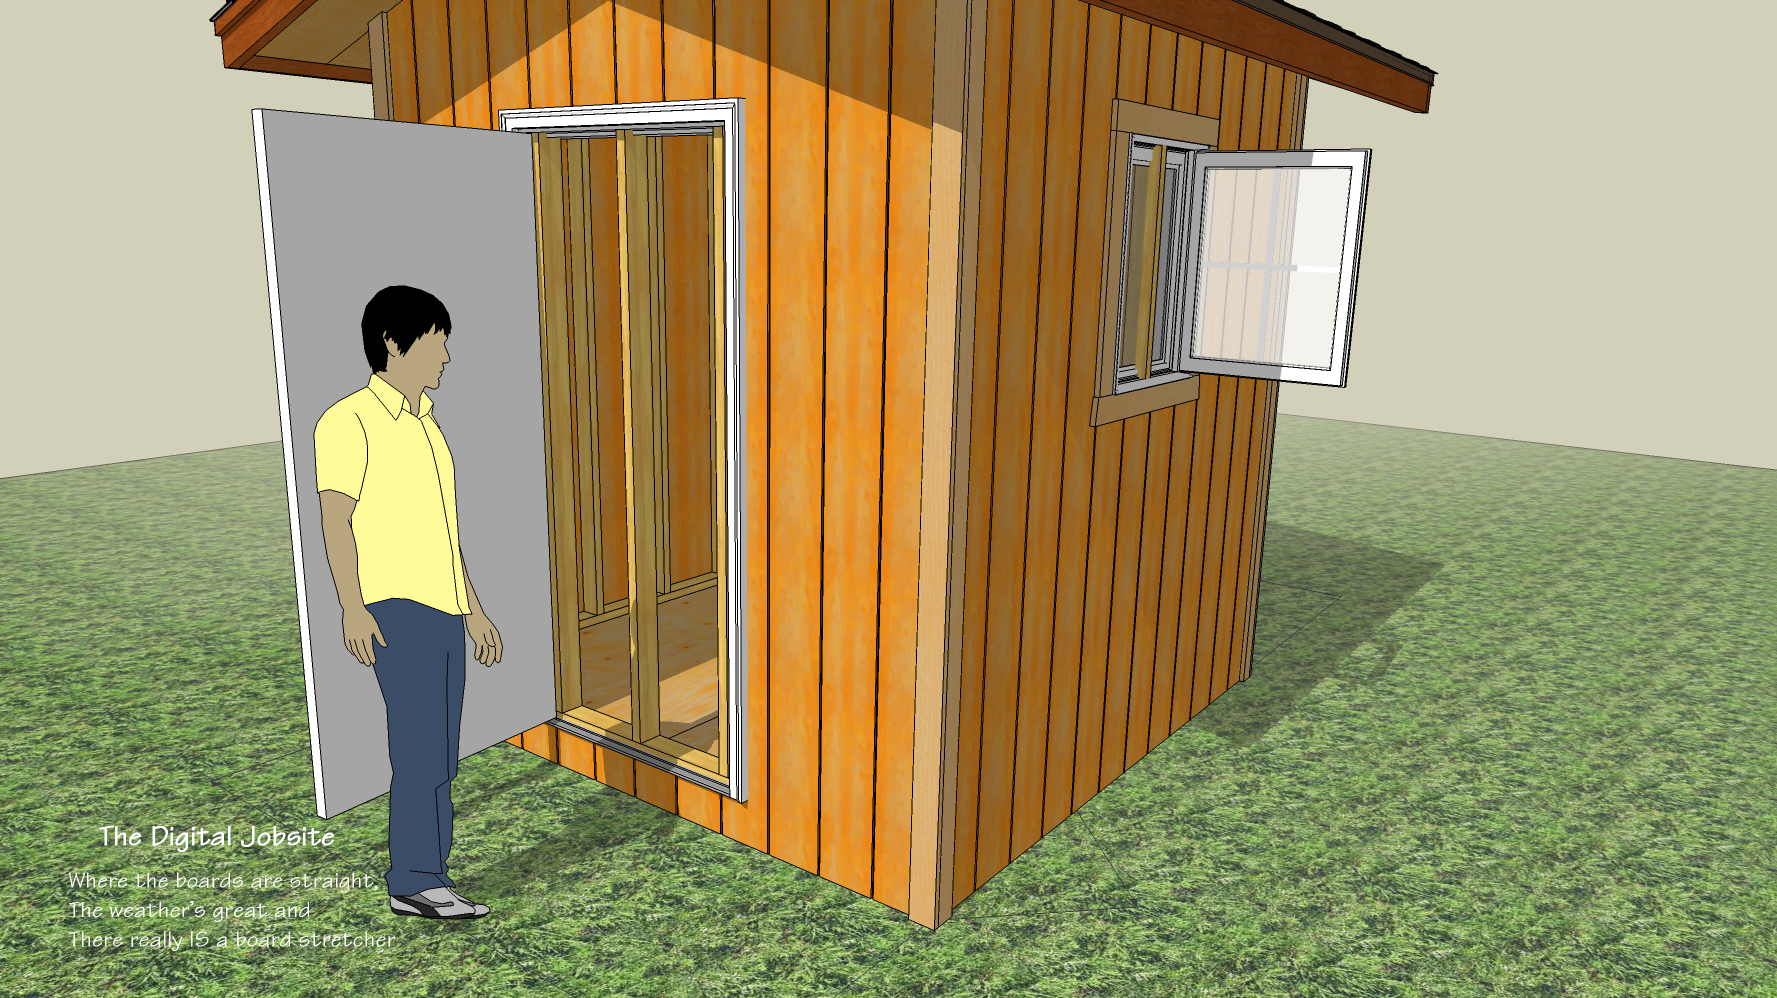
Every Room Gets a Door:
One of the first lessons I learned as a young ambitious carpenter being taught layout methods was “every room gets a door”. Those words, spoken by my Irish mentor, echo through my mind to this day any time I’m penciling layout on plates. It’s an important lesson as is learning how to incorporate openings into wall framing layout for doors and windows. A “rough opening” is required to provide space for installing doors, windows, vents and the like. This video expands the basic stud layout principles explained above by using SketchUp model capabilities to manipulate framing members to add rough openings for a window and door to the shed.
Brace Yourself:
The trick for learning how to frame a shed is planning ahead. Use SketchUp, draw by hand, or use a model. Ensure you have the tools and materials you need readily available to avoid stopping the project at an inopportune moment. Review our overview of beginning your shed project before you get started.
The next segment of building this shed will cover “balloon framing” options for the gable end walls as an alternate framing method. It will also go through some carpentry procedures for building, standing and bracing the walls which are necessary steps prior to roof framing.
Check out comments here at finehomebuilding.com and on my YouTube Channel where you can subscribe and be kept current with more insight into the design and building process of this simple, sturdy shed as future tutorial videos become available. Feel free to add to the discussion here or there if you have questions or comments. Thanks for watching…
Fine Homebuilding Recommended Products
Fine Homebuilding receives a commission for items purchased through links on this site, including Amazon Associates and other affiliate advertising programs.

Affordable IR Camera

Handy Heat Gun
8067 All-Weather Flashing Tape
-
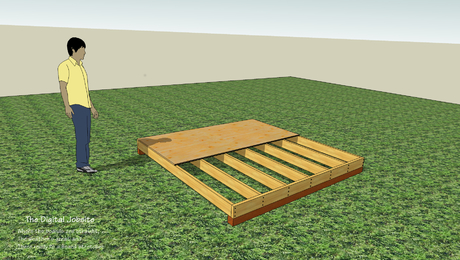
Shed wall layout simplified in this SketchUp model view
-
Why are this door and window installed without rough openings?
-
Every room gets a door... with a rough opening framed in...


View Comments
In the series on making sawhorses you illustrated using components as a method for customizing the fit of parts of an assembly. This allowed you to modify all of the copies of the component simultaneously without having to work right in the middle of the sawhorse sketch.
Would this be a useful technique for modifying the framing for the door and window receiving walls?
The reason I ask is that I seem to end up with a lot of extraneous lines of unknown origin in my sketches. I think I inadvertently create them when trying to modify details in magnified views of my sketch.
I really enjoy your multi-part series on sketchup. The excessive mouse movement i commented on earlier is much better. The repetition is good and the consistency of technique is also good.
carver,
For your question about using components:
My approach to using components has evolved over time. Early on I spent (wasted?) a lot of time creating components of just about everything. More recently I've found that using Groups allows all of the benefits of Components with less effort. Either one will help minimize the "extraneous lines" you're finding as long as you pay close attention to whether you're in or or out of Group/Component Edit mode.
I suggest making each separate piece of a model a Group which you can Move/Copy to replicate. Create Components only when you anticipate the potential need for future batch-editing. Remember you can always Explode either a Group or Component and then switch its attributes to the other one if you find you wished you'd made it the other one.
I think in the first SU Blog shed I made a lot more components of studs, cripples, etc. In this new shed most of that stuff is just grouped so I guess I'm saying Components would work for for modifying the wall framing for the door and window but I don't think its worth the extra trouble.
Thanks for giving me a pass on the cursor movement. I hope I'm actually getting better but there is the danger that you're just becoming hypnotized by it and just THINK it's better :-)
Matt
Groups and Components are your friends. Think of groups as you would think of any actual building material; a 2x4 is a group, a sheet of plywood is a group, a slab of concrete is a group. These are groups because there is a general need to modify them individually just as you do in real life. Now think of components as you would think of building supplies like doors, windows, faucets, cabinets, etc. These items are production made elsewhere and will all be the same albeit some stretched or mirrored for functionality.
Everything starts out as a group. I even setup a hotkey (easy to do in preferences) to make groups in a single click. I say again.... everything starts out as a group. Make a 2x12 rafter then turn it into a group. Make a door then make it a group. Want to add a door handle? Make the handle then turn it into a group. Stick that handle group on the door and turn the door group and handle group into a group (this is called a 'nested' group).
Sometimes a group works better as a component. Remember that 2x12 rafter group? I assume your project will need more than one rafter and the majority of those will be cut the same. Make that rafter group into a component. Don't explode it first just select it then right click to bring up the menu and "make component". This method is actually FASTER than making a component first as it sidesteps the dialog for name and description and allows SketchUp to name it (actually number it). Rarely do I care what a component is named. I can see it and I know what it is.
Now all your rafters are components and will edit simultaneously. But what about those oddball rafters that need to stop at the chimney? Easy; just select those two or three rafter components and right click to bring up the menu and "make unique". This will retain their status as components but allow them to be individually modified components; aka if you copy & paste them they will edit simultaneously with the "unique" components.
More useful yet these days are "Dynamic Components" which self edit to predetermined sizes, scales, colors, shapes, and arrangements depending on how they are programmed. Making a dynamic component is sorta difficult and sometimes frustrating. But using them is a joy. I recommend heading over to the 3D Warehouse and download pre-configured dynamic components. In my opinion the best ones are the ones offered by manufacturers. I recently downloaded all of the Marvin Windows premier window and door dynamic components for a house I was designing. I tell you, it was about 1000 times faster to place the windows and modify them; not to mention I didn't need to worry whether they were 'realistic' sizes because all the dynamic attributes changed them into actual Marvin Window sizes. Kraftmaid Cabinetry also offers a decent set of components. I would be curious to know who else.
DC
Dreamcatcher,
Thanks! Great instruction to any and all who want to learn efficient and effective SketchUp Modeling.
Carver; the thought processes explained in Dreamcatcher's comment are well worth studying to overcome the modeling challenges you asked about. You won't go wrong applying his insight and methods to take your modeling up a notch. I've learned a thing or two from DC's comments as I'm sure others have.
I don't remember if it's pointed out in the videos but the shed window is one of the Marvin "Dynamic Components" DC mentions. They're a great asset to the SketchUp modeling community and just plain old cool to work with.
Matt,
Thank You so much for this series. I love watching and learning from your videos. Awesome!!!
Paul
Paul,
Glad to hear you're finding this series helpful. A busy summer has stalled my blog post schedule but I have full intentions of continuing the series to complete the shed.
Thanks for your patience!
Being efficient with your building materials not only limits waste, but it can save you money. Take time to plan your project and draw out your wall layout to maximize efficiency. Excellent post!
Inspectpro,
While my intent was to show efficient use of materials I sometimes wonder if I achieved it. From your post it sounds like I did.
Thanks!
Excellent tutorials you have here, I had no clue that so much math and planning went into framing. Good work, keep it up!