
Use and Care for a Professional Foam Gun
Remodeler Kiefer Limeback shares tips on how to select the right spray-foam gun, how to fill gaps of all shapes and sizes, and how to clean and store a foam gun.
When making the jump from canned straw-dispensed foam to a professional foam-application gun, there are a few things that you need to know in terms of care and how to use it. When it comes to using foam, I’m always going to go for a foam gun for a number of reasons.
The first is bead control. I can go from a 1/4-in. bead to a 3-in. bead and anywhere in between with just the turn of a knob. The second reason is I have the ability to stop instantaneously by releasing the trigger. You’re going to have more yield because you’re using the exact amount of foam that you need and you’re going to keep a cleaner job site. The last and most important reason is that you have the ability to use a gun-dispensed can throughout a month’s time. So, if you only use a quarter of it or the full can, you’re going to have the same performance on day one that you are on day 30.
Choosing and using a foam gun
So, the main thing I look for when choosing a gun is a solid build. Here I’m using the Pro 14 model by Great Stuff. Largely constructed of metal, it has a long smooth barrel, so it’s easy to clean. This one has a dual finger trigger so it’s also going to be easy to actuate. One of the most important things is the top of the gun—the cage where the can screws on is metal. When a gun is placed down on the job site, if somebody were to step on it by accident, a metal barrel is going to be a lot stronger and withstand bending.
This gun has a two-finger trigger, which I prefer for two reasons. The first is that it allows you to wear gloves without worrying about being choked up on the trigger. Secondly, you can use two fingers, which, if you’re going to be applying foam back and forth back and forth for a long time, two fingers will definitely less fatiguing than just using one finger.
On the back of the gun there’s a dial that adjusts the trigger throw. So, by turning that dial clockwise, what you do is lock out the trigger, and then you can adjust by turning it counterclockwise the amount you want that trigger to throw. When you pull the trigger, it’s actually moving the needle in the valve at the tip, and that allows the flow of foam.
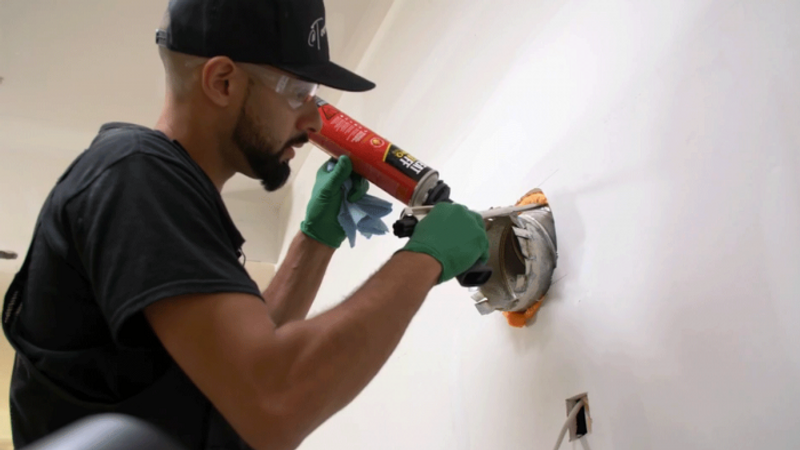
Step one should always be safety glasses, and we’re going to wear some gloves because foam is very sticky and you don’t want this on your skin. If you had the can outside in the winter—say you’re applying some foam in the winter and the can is cold—bring the can indoors and allow it to sit to warm up to room temperature. This is really important because foam from a cold can will not expand completely and the foam will not dispense properly.
An important thing to note when attaching the can to the gun is that you really want to commit and screw it on in one shot. If you go slowly, there’s a chance that foam could be sprayed out of the cage.
Make sure that you’re shaking the foam right before application, which will actually help it dispense. I like to hold underneath the cage with my pinky finger so that I’m supporting the gun and the can at the same time. To use the gun, take it out of the storage position by unlocking the trigger—there’s a knob on the rear that loosens frees up the pin that travels down the barrel. One turn counterclockwise, and you’ll lay a small bead. Two turns counterclockwise, and the bead starts growing. The more that you loosen the knob on the rear, the larger your bead gets. Just make sure that you clean the tip after each use.
Foam types and application tips
This foam by Great Stuff is designed for larger gaps, so anywhere from 1 in. to 3 in. This is a high-expansion high-yield foam. Great Stuff also has a low-expansion polyurethane foam with low pressure for around windows and doors. Use the door and window foam around jambs to block air and moisture. Use the high-yield foam around wires, pipes, ductwork, the bottom of baseboards—your general gap zones.
When applying foam, a lot of people have a tendency to drag the tip along the surface, which is fine, but you really have to make sure that you’re not dragging the tip against rough surfaces such as concrete or steel. If you drag the valve at the end of the tip against a rough surface and damage it, not only will the gun leak, the foam inside the barrel will cure and you won’t be able to clean it out.
During application, always try to keep the can as vertical as possible. That may not always be ideal, especially when working up in tight areas around ceilings, so to combat that problem use the included gun tips. The gun tips slide over the end of the nozzle and allow you to attach a piece of tubing or a straw that you can bend up to get into those tight spots while still keeping the can vertical.
End of the day: Replacing and storing
So how do you know when it’s time to change a can? There are two tell-tale signs. First, the can gets a lot lighter as you dispense the foam. The second sign is that your beads aren’t going to be as large as they once were. Changing the can is really simple. First, unscrew the can—a little bit of foam will escape around the nozzle, but that’s not a problem. Take your gun cleaner, and spray that. It will dissolve the foam. Then take a new can, spin it on, and the can is swapped.
You can’t unscrew a partially used can and then reliably restart it. You can spray it with the foam cleaner, but the problem is that the valve is going to get jammed up. If you find yourself needing to switch between a number of products, it’s better to dedicate a product to a gun and have multiple guns.
You can leave the can attach the gun for up to 30 days if you have a partially used can. If the can is fully expelled and you’re ready to flush the gun, step one would be to unscrew the partially used can or the empty can. A little bit of foam will escape the top of the gun. Spray that to clean it up, give it a wipe, and then screw on the gun cleaner. With the gun cleaner attached, you can dispense a bit of that gun cleaner into a bucket or a garbage can. When you see the stream start, flush it again. Leave a little bit in the nozzle to dissolve the remaining foam for about five to ten minutes, then give it one more blast. Once you see that stream is clear, you can close the valve at the rear and then flip the gun over. You also want to make sure that the tip is clean. Take your gun cleaner, spray a little bit on a rag, and then wipe the tip. While you’re doing that, make sure that the end of the tip has no debris caught in it—you want that tip to be absolutely clean.
That’s pretty much all you need to know, but you’ll need some experience using and caring for a foam gun to completely understand all of the tips I’ve demonstrated here.
Keifer Limeback is a remodeling contractor in Ontario, Canada. Find him on Instagram @toolaholic
The tools and materials featured in this video are all part of the Great Stuff line by DuPont.

View Comments
If you have to remove a partial can (perhaps to store a gun or clean one that was stored too long)) be prepared for foam to ooze out of the can. As mentioned in the article, debris (partially cured foam) may hold the valve in the can partially open.
To help in reproducing bead size, mark a line at 12 o'clock on the knob- makes it easier to know how much you've opened it.