FHB Logo Facebook LinkedIn Email Pinterest Twitter X Instagram Tiktok YouTube Plus Icon Close Icon Navigation Search Icon Navigation Search Icon Arrow Down Icon Video Guide Icon Article Guide Icon Modal Close Icon Guide Search Icon Skip to content
Subscribe
Log In
  • How-To
  • Design
  • Tools & Materials
  • Restoration
  • Videos
  • Blogs
  • Forum
  • Magazine
  • Members
  • FHB House
  • Podcast
Log In

Fine Homebuilding Project Guides

Finish & Trim Carpentry

Guide Home
  • Trim Design
  • Tools and Materials
  • Interior Trim Basics
  • Window and Door Casings
  • Baseboard and Crown Molding
  • Wainscot and Paneling
  • Mantels and Fireplace Surrounds
  • Coffered Ceilings
Tools & Materials

Window Casing with a Fillet

Adding a protruding bead under the top piece of casing adds a distinctive touch to traditional window trim.

By Steve Cory
  • X
  • facebook
  • linkedin
  • pinterest
  • email
  • add to favorites Log in or Sign up to save your favorite articles

This traditional-looking style features a thin protruding horizontal piece just under the top casing and on top of the side casing pieces. Variously called a “fillet,” “parting bead,” or even “popsicle stick” because of its thinness, this piece adds a distinctive touch for a small outlay of money and labor. A fillet may be a simple piece of lath; in the example shown here, we added some detail by using a piece of upside-down Colonial stop.

filleted casing
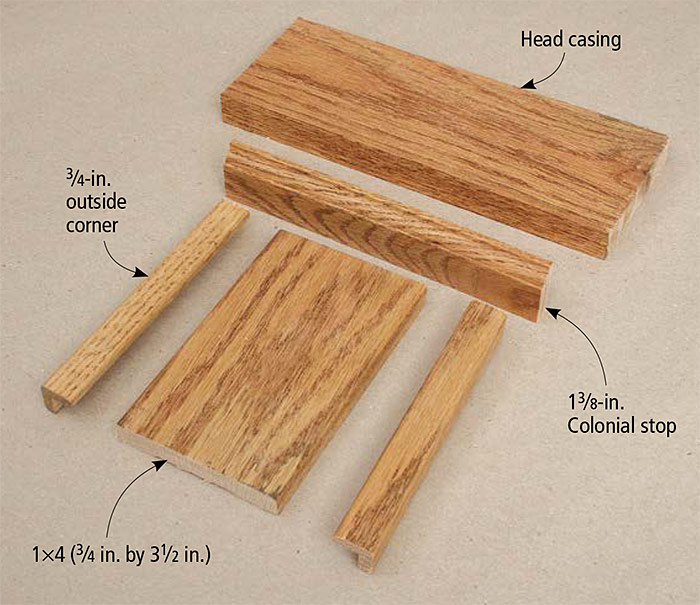
FILLETED CASING. This trim arrangement is made with plain (or sanitary) side casing that is trimmed on the sides with outside corner moldings, a ripped 1×6 for the head casing, Colonial stop, and plinth blocks.

Fillets are usually used along with side casings that are not tapered along their widths, as most mitered casings are. The side casings could be plain, without a profile (sometimes called “sanitary casing”). In our example, we add a decorative touch to the side casings by attaching outside corner molding to each side; we left the head casing piece plain.

ASSEMBLE THE SIDE CASING
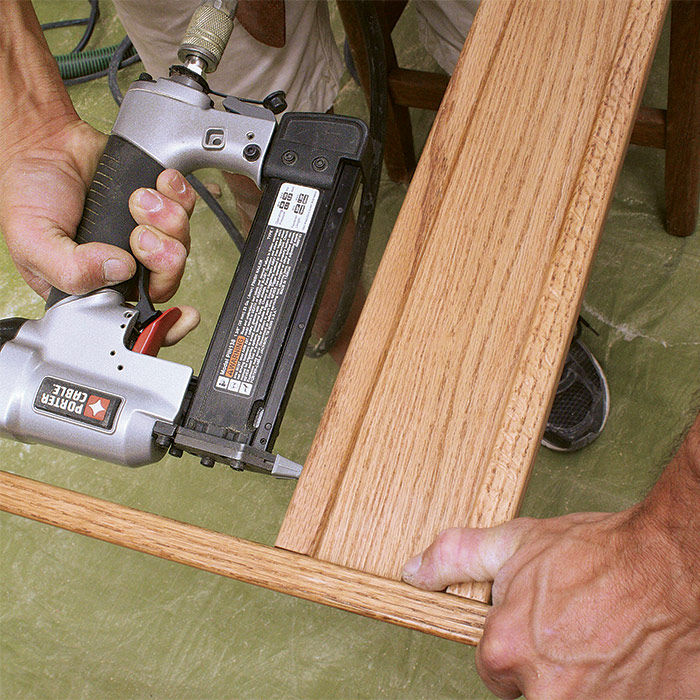
1. ASSEMBLE THE SIDE CASING. To make this style of casing, nail pieces of 3⁄4-in. outside corner trim to each side of 3 1⁄2-in. sanitary casing. Hold a straightedge at one end as shown.


TIP: It’s important that both the side casing pieces be precisely tall enough to create the desired reveal on the top jamb. Before fastening the side pieces, set a scrap piece of wood on top, spanning both pieces, to be sure the reveal will be consistent.


Making Plinth Blocks

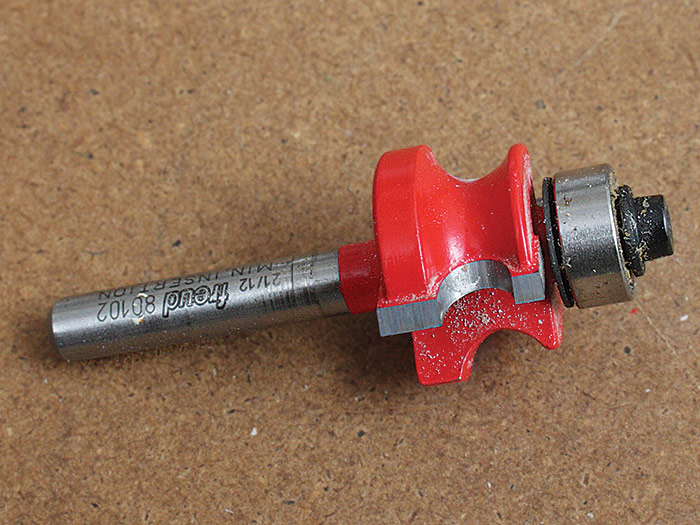
If you cannot buy plinth blocks that suit you, it’s not difficult to make your own. In our example, none of the available blocks came close to matching plinth blocks elsewhere in the house. You may have to go to a hardwood supplier to buy some 1-in.-thick or 11⁄8-in.-thick stock. Find a router bit (1) that creates a similar profile; you probably won’t get an exact match, but the difference will not be noticeable if the blocks are in different rooms. Cut the blocks to length and width (2). Use a power sander to smooth any rough edges, then rout the top and side front edges (3).

ROUTER BIT WITH A SIMILAR PROFILE
1. FIND A ROUTER BIT WITH A SIMILAR PROFILE.


CUT THE PLINTH BLOCK TO LENGTH
2. CUT THE PLINTH BLOCK TO LENGTH


ROUT THE PROFILE
3. ROUT THE PROFILE


MEASURE THE SIDE CASING
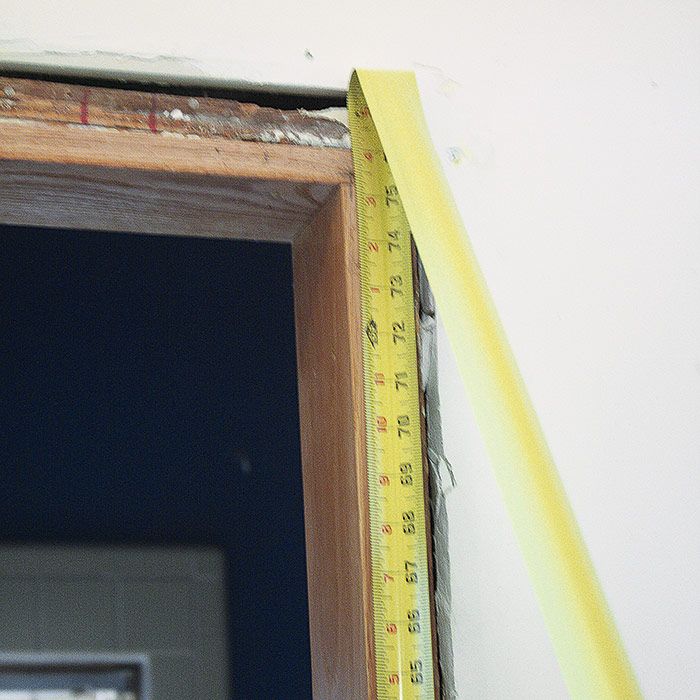
2. MEASURE FOR AND CUT THE SIDE CASING. Install the plinth block at the bottom, if it will be used. (Of course, for window trim the casing will rest on the stool.) Mark the reveal. Measure for side casing pieces that reach the top reveal mark.

CUT THE SIDE CASING
Then cut the side casing.


mark for cutting the baseboard
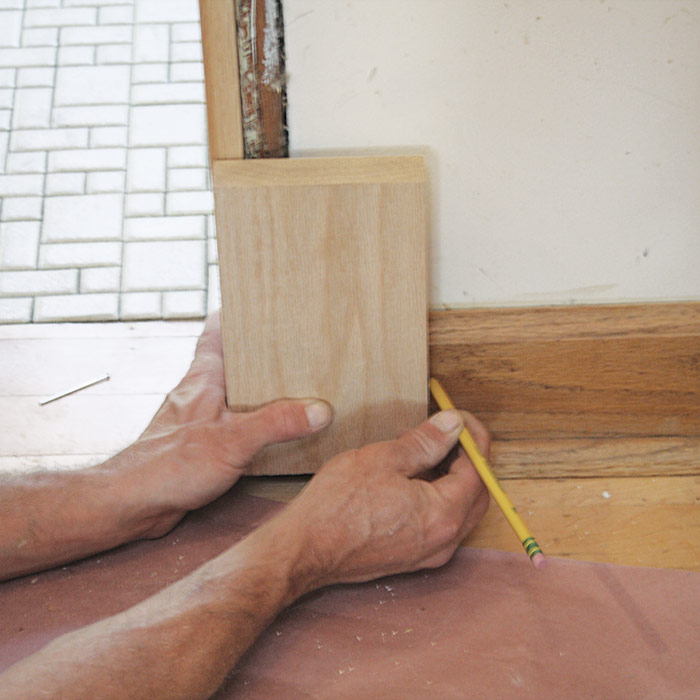
TIP:
If the baseboard is in place, hold a plinth block (this one is scheduled for edge routing) in place to mark for cutting the baseboard. Note that the block is wider than the casing, and so nearly covers the entire thickness of the jamb.


ATTACH THE SIDE CASING
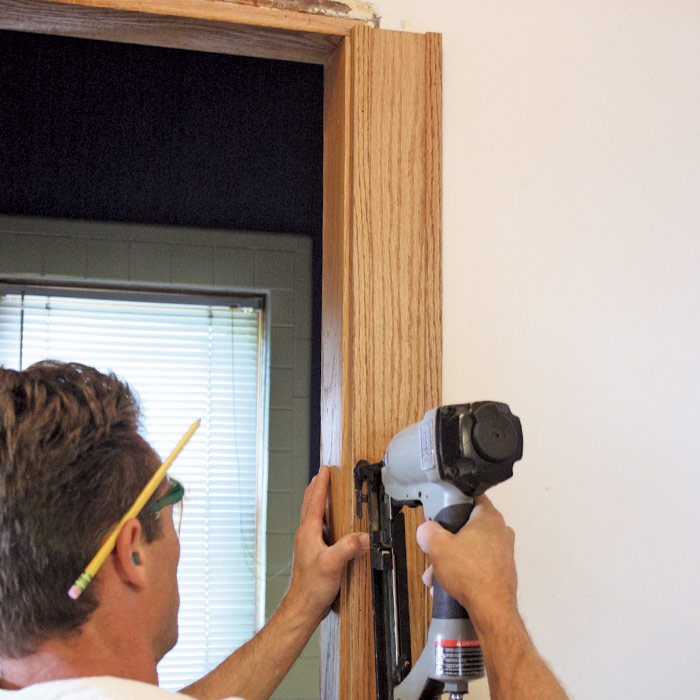
3. ATTACH THE SIDE CASING. Be sure to maintain a consistent reveal along the side and top jamb edges. Drive pairs of nails, one into the jamb and one into the wall framing, every 16 in. or so.

MEASURE FOR THE FILLET
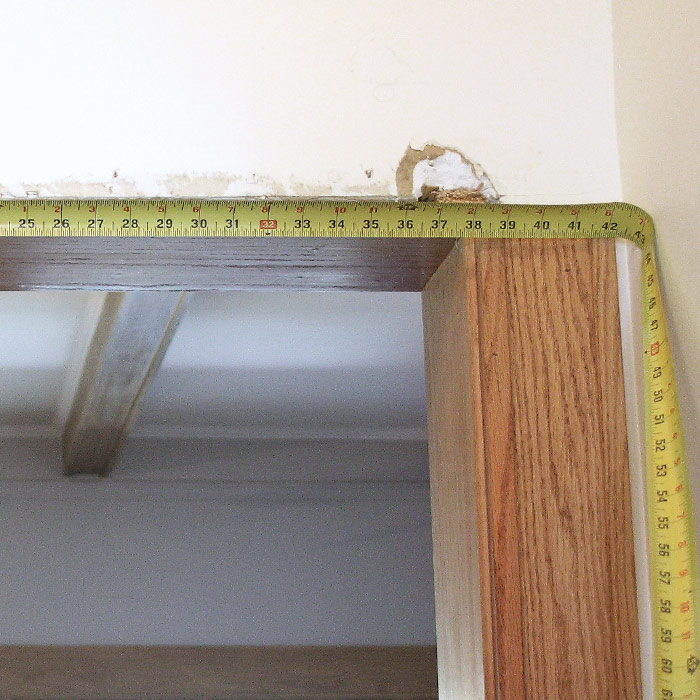
4. MEASURE FOR THE FILLET. Measure across the outside edges of the casing boards and add 1 in., so it will overhang 1⁄2 in. on each side.


CUT RETURNS FOR THE FILLET
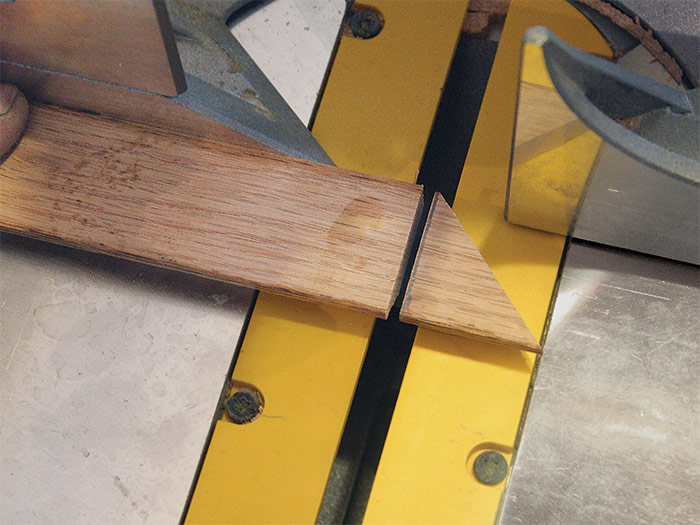
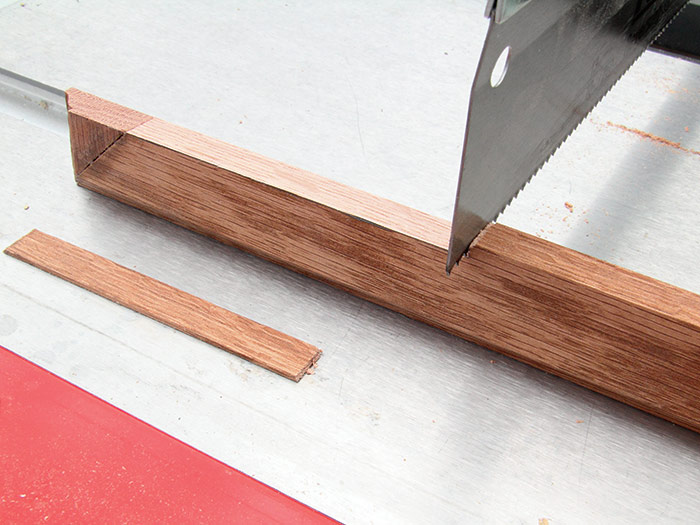
5. CUT RETURNS FOR THE FILLET. Cut a piece of 13⁄8-in. Colonial stop to length with 45-degree miters at each end. (Measure from tip to tip of the miter cuts.) Place the stop upside down on the saw’s base to make the cuts. To make returns, cut 45-degree miters on both sides of a scrap piece of stop, then cut across at 90 degrees as shown to make a triangle.


GLUE THE RETURN
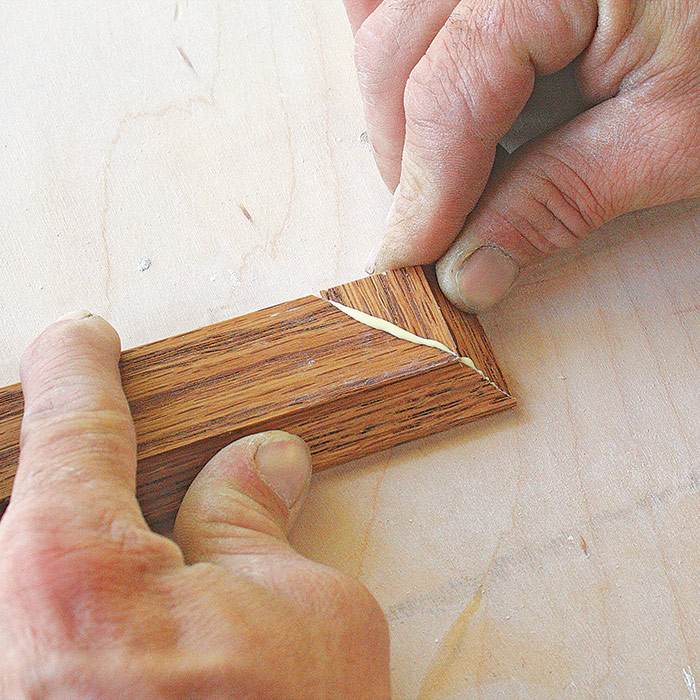
6. GLUE AND NAIL THE RETURN. Test that the triangular return piece fits neatly. Apply glue to the return piece, press it into place.

NAIL THE RETURN
Then drive a pin nail or two to hold it until the glue dries.

NAIL THE FILLET
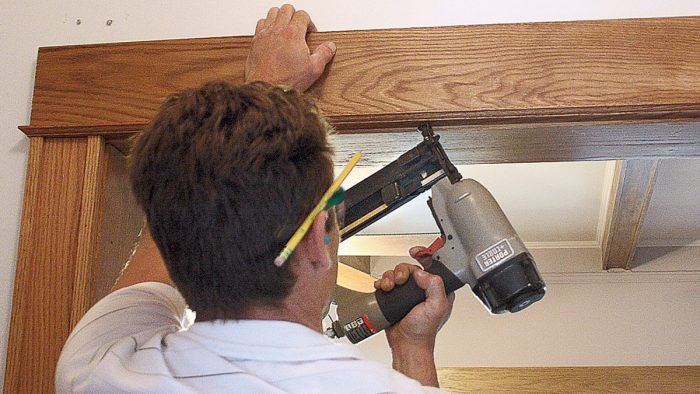
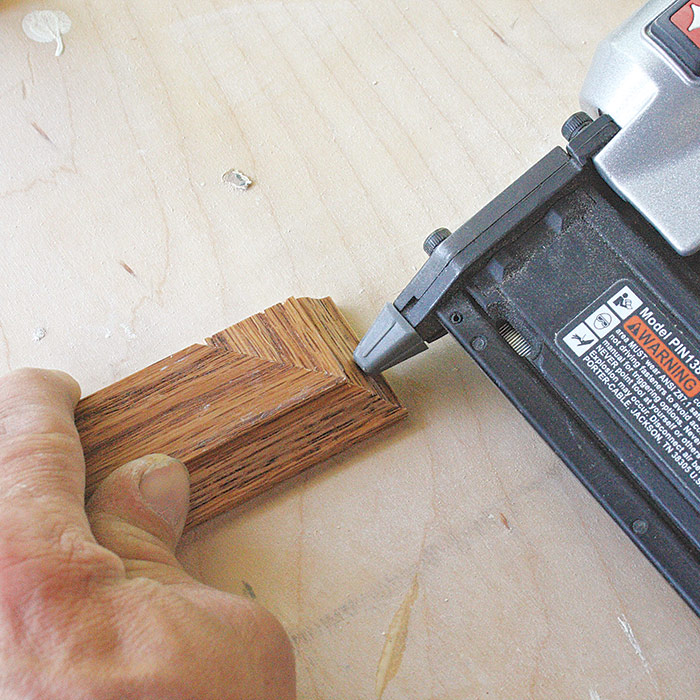
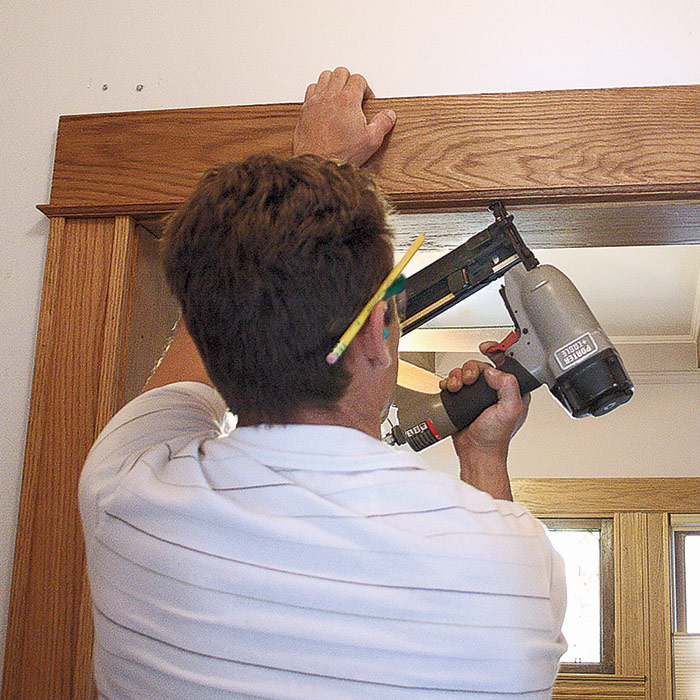
7. NAIL THE FILLET. Place the fillet atop the side casing pieces. Check that it comes tight to the edge of the top jamb; if there is a gap, see the sidebar to solve the problem. Position the fillet so it overhangs the casing on each side by 1⁄2 in., and drive small nails down into the top of the casing.

ATTACH THE HEAD CASING
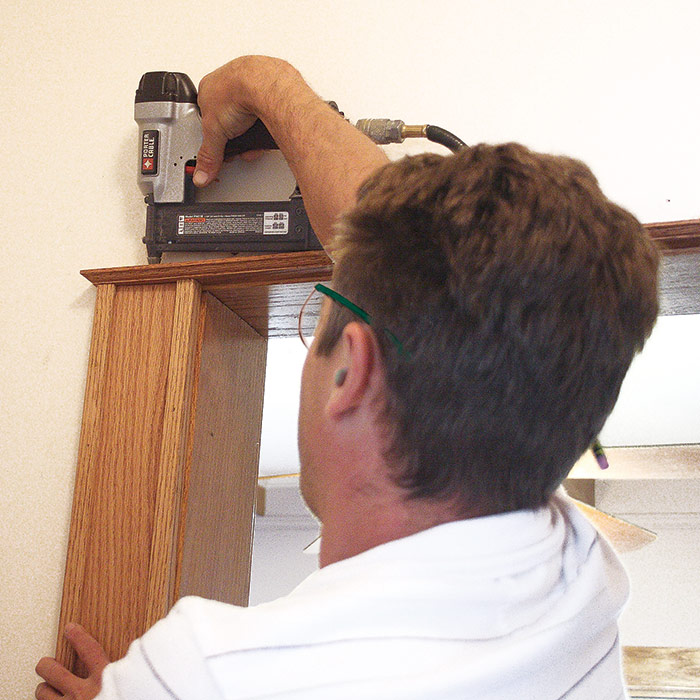
8. ATTACH THE HEAD CASING. Rip-cut a piece of 1×6 to the same width as the side casings (including the attached outside corners)—about 4 1⁄4 in. Cut it to the same length as the distance from outside to outside of the side casings. Set it centered on top of the fillet. Drive nails up through the fillet and into the head casing; nail the head casing to the wall framing as well.


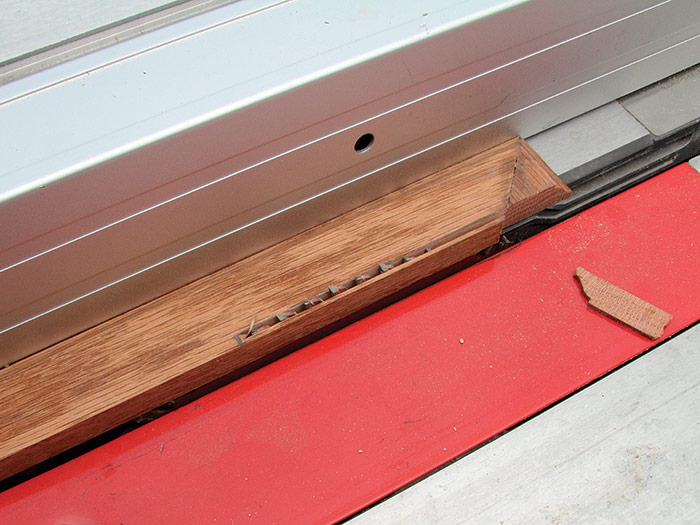
Modifying a Fillet for an Imperfect Wall

If your wall is wavy or otherwise imperfect (a not unusual situation, especially in an older home), you may need to shave one end of a fillet so it can come tight against the top jamb. Use a plane for a small discrepancy, or make a cutout with a tablesaw and handsaw to close a gap of more than 1⁄8 in.

make a cutout with a tablesaw
make a cutout with a handsaw


Excerpted from Trim (The Taunton Press, 2015) by Steve Cory.

Previous: Trimming a Window on a Paneled Wainscot Wall Next: Craftsman-Style Casing

Guide

Finish & Trim Carpentry

Chapter

Window and Door Casings

Sign up for eletters today and get the latest how-to from Fine Homebuilding, plus special offers.

Signing you up...

This site is protected by reCAPTCHA and the Google Privacy Policy and Terms of Service apply.
See all newsletters
See all newsletters

Log in or create an account to post a comment.

Sign up Log in

Become a member and get full access to FineHomebuilding.com

Finish & Trim Carpentry

Finish & Trim Carpentry

Trusted, comprehensive guidance from the pros for creating perfect trim details in any room of the house

View Project Guide

View All Project Guides »

Become a member and get unlimited site access, including the Finish & Trim Carpentry Project Guide.

Start Free Trial

Trim Design
  • Trim Style and Design
Tools and Materials
  • Tools
  • Materials
Interior Trim Basics
  • Tips and Tricks
  • Techniques
  • Using Jigs
Window and Door Casings
  • Windows
  • Doors
Baseboard and Crown Molding
  • Baseboard
  • Crown Molding
  • Specialty Crown Situations
Wainscot and Paneling
  • Beadboard Wainscot
  • Paneled Wainscot
  • Chair Rails
  • Wall Treatments
Mantels and Fireplace Surrounds
  • Design
  • Installing Mantels and Surrounds
Coffered Ceilings

Fine Home Building

Newsletter Sign-up

  • Fine Homebuilding

    Home building tips, offers, and expert advice in your inbox.

  • Green Building Advisor

    Building science and energy efficiency advice, plus special offers, in your inbox.

  • Old House Journal

    Repair, renovation, and restoration tips, plus special offers, in your inbox.

Signing you up...

This site is protected by reCAPTCHA and the Google Privacy Policy and Terms of Service apply.
See all newsletters

Follow

  • Fine Homebuilding

    Dig into cutting-edge approaches and decades of proven solutions with total access to our experts and tradespeople.

    Start Free Trial Now
    • Facebook
    • Instagram
    • X
    • LinkedIn
  • GBA Prime

    Get instant access to the latest developments in green building, research, and reports from the field.

    Start Free Trial Now
    • Facebook
    • YouTube
  • Old House Journal

    Learn how to restore, repair, update, and decorate your home.

    Subscribe Now
    • Facebook
    • Instagram
    • X

Membership & Magazine

  • Online Archive
  • Start Free Trial
  • Magazine Subscription
  • Magazine Renewal
  • Gift a Subscription
  • Customer Support
  • Privacy Preferences
  • About
  • Contact
  • Advertise
  • Careers
  • Terms of Use
  • Site Map
  • Do not sell or share my information
  • Privacy Policy
  • Accessibility
  • California Privacy Rights

© 2025 Active Interest Media. All rights reserved.

Fine Homebuilding receives a commission for items purchased through links on this site, including Amazon Associates and other affiliate advertising programs.

  • Home Group
  • Antique Trader
  • Arts & Crafts Homes
  • Bank Note Reporter
  • Cabin Life
  • Cuisine at Home
  • Fine Gardening
  • Fine Woodworking
  • Green Building Advisor
  • Garden Gate
  • Horticulture
  • Keep Craft Alive
  • Log Home Living
  • Military Trader/Vehicles
  • Numismatic News
  • Numismaster
  • Old Cars Weekly
  • Old House Journal
  • Period Homes
  • Popular Woodworking
  • Script
  • ShopNotes
  • Sports Collectors Digest
  • Threads
  • Timber Home Living
  • Traditional Building
  • Woodsmith
  • World Coin News
  • Writer's Digest
Active Interest Media logo
X
X
This is a dialog window which overlays the main content of the page. The modal window is a 'site map' of the most critical areas of the site. Pressing the Escape (ESC) button will close the modal and bring you back to where you were on the page.

Main Menu

  • How-To
  • Design
  • Tools & Materials
  • Video
  • Blogs
  • Forum
  • Project Guides
  • Reader Projects
  • Magazine
  • Members
  • FHB House

Podcasts

  • FHB Podcast
  • ProTalk

Webinars

  • Upcoming and On-Demand

Podcasts

  • FHB Podcast
  • ProTalk

Webinars

  • Upcoming and On-Demand

Popular Topics

  • Kitchens
  • Business
  • Bedrooms
  • Roofs
  • Architecture and Design
  • Green Building
  • Decks
  • Framing
  • Safety
  • Remodeling
  • Bathrooms
  • Windows
  • Tilework
  • Ceilings
  • HVAC

Magazine

  • Current Issue
  • Past Issues
  • Magazine Index
  • Subscribe
  • Online Archive
  • Author Guidelines

All Access

  • Member Home
  • Start Free Trial
  • Gift Membership

Online Learning

  • Courses
  • Project Guides
  • Reader Projects
  • Podcast

More

  • FHB Ambassadors
  • FHB House
  • Customer Support

Account

  • Log In
  • Join

Newsletter

Get home building tips, offers, and expert advice in your inbox

Signing you up...

This site is protected by reCAPTCHA and the Google Privacy Policy and Terms of Service apply.
See all newsletters
See all newsletters

Follow

  • X
  • YouTube
  • instagram
  • facebook
  • pinterest
  • Tiktok

Join All Access

Become a member and get instant access to thousands of videos, how-tos, tool reviews, and design features.

Start Your Free Trial

Subscribe

FHB Magazine

Start your subscription today and save up to 70%

Subscribe

You have 1 free article remaining.

Get complete site access, including thousands of videos, how-to tips, tool reviews, and design features.

Start your FREE trial

Already a member? Log in

We hope you’ve enjoyed your free articles. To keep reading, become a member today.

Get complete site access to expert advice, how-to videos, Code Check, and more, plus the print magazine.

Start your FREE trial

Already a member? Log in

Privacy Policy Update

We use cookies, pixels, script and other tracking technologies to analyze and improve our service, to improve and personalize content, and for advertising to you. We also share information about your use of our site with third-party social media, advertising and analytics partners. You can view our Privacy Policy here and our Terms of Use here.

Cookies

Analytics

These cookies help us track site metrics to improve our sites and provide a better user experience.

Advertising/Social Media

These cookies are used to serve advertisements aligned with your interests.

Essential

These cookies are required to provide basic functions like page navigation and access to secure areas of the website.

Delete My Data

Delete all cookies and associated data