How to Insulate an Attic Floor
If you’re building a new home, remember to seal the air leaks before you insulate.

Maybe you are building a new home with an unconditioned vented attic. The house is framed, sheathed, and roofed. The drywall contractors have finished their work, so now you’re ready to insulate the attic floor.
If you are an owner-builder, this may be the first time you’ve done this. So what do you need to know?
Air sealing comes first
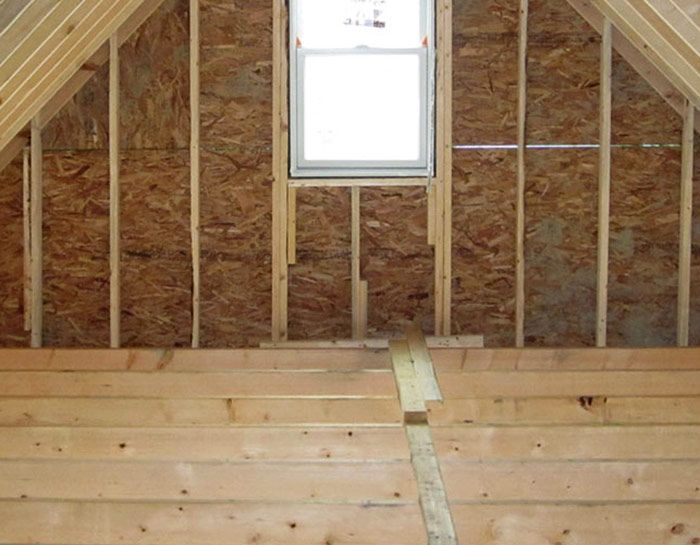
Although it’s common to talk about installing insulation on “the attic floor,” most attics don’t really have a floor. They have floor joists (or the bottom chords of roof trusses) with drywall below. When you are in the attic, you’re usually stepping carefully on top of the floor joists, looking down at the back side of the drywall ceiling.
You’ll be installing insulation on top of this drywall ceiling. (In some high-performance homes, builders install OSB rather than drywall in this location, and then install a service chase below the OSB. If you’re insulating the attic, however, it doesn’t matter very much whether there is a drywall ceiling below or an OSB ceiling below.)
If you care about energy performance, now is probably a good time for a blower-door test. You certainly can’t insulate your attic until you’ve finished your air sealing work — once the insulation is installed, tracking down air leaks is a real pain.
Inspect the attic
So you are up in the attic, before the blower-door test. You have good lighting, so you can see what’s going on.
First, because this is a newly built home, there are no big holes — right? From the attic, you can verify that there aren’t any goofy dropped ceilings or unsealed soffits where huge volumes of air can escape from the home. If there are any problems like that, now’s the time to seal them.
Next, verify that the attic hatch is well insulated with rigid foam, and equipped with weatherstripping. (For more information on this issue, see Insulating Attic Stairs.)
Next, verify that the bottoms of the rafters are elevated at the eaves, or that raised-heel trusses were specified. You want plenty of room above the top plates of the perimeter walls — enough room for R-38 to R-60 insulation, depending on your climate zone — plus a few extra inches for the ventilation baffles and the air space under the roof sheathing. If there isn’t enough room near the eaves, there’s not much you can do about it now… but at least you assessed the situation.
While you’re inspecting the eaves, see if there is some light coming in through the soffit vents. If so, it’s a good sign. Now look up at the ridge — you want to make sure that the roofers remembered to install a ridge vent.
Seal the air leaks
Next, focus on sealing all the usual penetrations and leaks:
- Air leaks around chimneys;
- Air leaks near bath exhaust fans;
- Air leaks near plumbing vent pipes;
- Air leaks at ceiling electrical boxes;
- Air leaks at electrical cable penetrations.
Hopefully, there aren’t any recessed can lights in your ceiling, nor are there any heating or cooling ducts in the attic (because you are a GBA reader). If for some reasons you have recessed can lights, you had better come up with a plan to address them. For more information on this issue, see Recessed Can Lights.
![[Photo credit: Rook Energy Solutions, Yarmouth, ME]](https://images.finehomebuilding.com/app/uploads/2021/03/19162958/Partition_top_plates_3_-_air_sealing_-_rookenergy_dot_com.preview.jpg)
For more information on air sealing, see Air Sealing an Attic.
Install the ventilation baffles
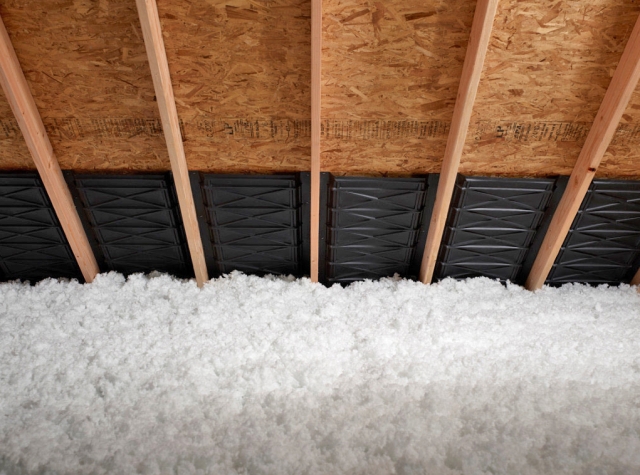
The next job is to install ventilation baffles under the roof sheathing near the eaves of your roof. These baffles ensure that you’ll have a clear ventilation channel so that air can flow from the soffit vents into the attic. If you want to use commercially available baffles, choose high-quality one like the SmartBaffle or the AccuVent.
If you want to make your own baffles, follow the instructions in this article: Better Vented-Roof Baffles.
The baffles should begin above the ventilated soffit — just to the exterior side of the plane of the wall sheathing — and should extend far enough into the attic that they terminate above the top of the insulation on the attic floor. The deeper the insulation, the longer the baffles have to be.
![The blue rectangle in this photo is a wind-washing dam; the air leaks at the perimeter of the dam have not yet been sealed. [Photo credit: Christopher King]](https://images.finehomebuilding.com/app/uploads/2021/03/19163115/Wind-washing_dam_-_cropped_-_Christopher_King.preview.jpg)
Install a dam around the attic access hatch
Don’t forget to build an insulation dam around the perimeter of your attic hatch, using plywood, OSB, or 2x12s (see photo below).
![[Photo credit: www.homeenergyauditco.com]](https://images.finehomebuilding.com/app/uploads/2021/03/19163046/Insulation-dam-at-hatch-2-homeenergyauditco-dot-com-700x388-1.jpeg)
Install the insulation
In a new house, you’ll probably be installing either R-38 insulation (appropriate for a code-minimum house in Climate Zones 2 or 3), R-49 insulation (appropriate for a code-minimum house in Climate Zones 4 through 8), or R-60 insulation (the depth recommended for a “pretty good house” in a cold climate).
There are three common types of insulation used to insulate attic floors: fiberglass batts, blown-in fiberglass, and cellulose.
Cellulose is the best choice. The second-best choice is blown-in fiberglass. The worst choice is fiberglass batts.

Once you have determined the depth of the insulation you’ll be installing, make several marks (using a wide marker that leaves a bold, easy-to-read line) on the framing members in the attic — the rafters or chord webs — indicating the desired depth of the insulation.
When it’s time to blow in the insulation, remember to wear a dust mask. If you’re an owner-builder, you may want to read this article: Borrowing a Cellulose Blower From a Big Box Store.

If you’re the person up in the attic holding the blower hose, don’t skimp on insulation depth. Aim the hose at the corners and edges of your attic; look for crannies that may need special attention; and be generous. A little too much does no harm at all. Once all of the needed insulation has been installed, rake the high spots and fill the valleys.
If you are a builder or an insulation contractor, remember that you’re required to provide the homeowner with documentation detailing the R-value of the insulation you have just installed. R-value claims must meet the requirements of the Federal R-Value Rule (16 CFR Part 460, “Trade Regulation Rule Concerning the Labeling and Advertising of Home Insulation”), so don’t exaggerate.
This article originally appeared in Green Building Advisor.
Fine Homebuilding Recommended Products
Fine Homebuilding receives a commission for items purchased through links on this site, including Amazon Associates and other affiliate advertising programs.

Foam Gun

Insulation Knife

Nitrile Work Gloves


View Comments
Sheeps wool, period! Cellulose, then blown in mineral wool if you find it? Now I’m looking at hemp…