FHB Logo Facebook LinkedIn Email Pinterest Twitter X Instagram Tiktok YouTube Plus Icon Close Icon Navigation Search Icon Navigation Search Icon Arrow Down Icon Video Guide Icon Article Guide Icon Modal Close Icon Guide Search Icon Skip to content
Subscribe
Log In
  • How-To
  • Design
  • Tools & Materials
  • Restoration
  • Videos
  • Blogs
  • Forum
  • Magazine
  • Members
  • FHB House
  • Podcast
Log In

Fine Homebuilding Project Guides

Windows & Doors

Guide Home
  • Choosing Windows
  • Installing Windows In New Walls
  • Retrofitting Windows
  • Window Repairs
  • Door Basics
  • Interior Doors
  • Exterior Doors
How-To

Video Series: How to Install Interior Extension Jambs and Window Trim

Remodeler Mike Sloggatt finishes off this replacement-window project with a new casing, stool, and apron.

  • X
  • facebook
  • linkedin
  • pinterest
  • email
  • add to favorites Log in or Sign up to save your favorite articles
Video Player is loading.
Current Time 0:00
/
Duration 0:00
Loaded: 0%
Stream Type LIVE
Remaining Time -0:00
 
1x
    • Chapters
    • descriptions off, selected
    • captions settings, opens captions settings dialog
    • captions off, selected

      This is a modal window.

      Beginning of dialog window. Escape will cancel and close the window.

      Text
      Background
      Window
      Font Size
      Text Edge Style
      Font Family

      End of dialog window.

      This is a modal window. This modal can be closed by pressing the Escape key or activating the close button.

      This is a modal window. This modal can be closed by pressing the Escape key or activating the close button.

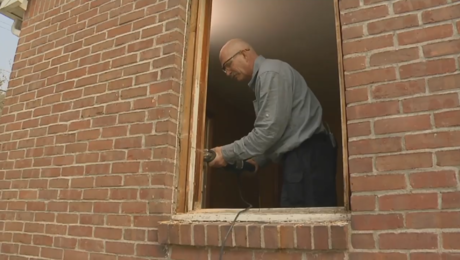
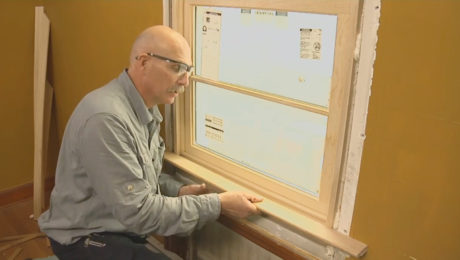
      Remodeler Mike Sloggatt: I’m here to trim out this window, so the first thing I need to do to get started is remove this foam.

      I have to add extension jambs to the window to trim it out. I need the jambs because this window was built for a 2×4 wall with drywall. This wall is plaster with ¾-inch sheathing on the outside. I need to figure out what the distance is between the window and the edge of the plaster, and will check it in a number of places since the thickness of the plaster may differ. It looks like ¾ inch is the right size for the extension jambs.

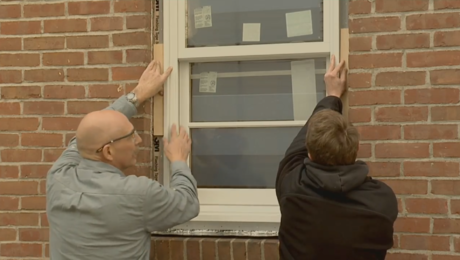
      I made a little mockup so that I can see exactly how this stool is going to sit in relation to the window. That will give me a good idea of where to start the extension jambs. I’ll cut them first before I start trimming out the window.

      Measure from the top of the stool to just about the top of the window. This is a long measurement and doesn’t have to be that precise. The width of the window at the top is a really important measurement. Hook the tape in the groove on one side and bring it over to the other side. That’s going to be 28 and 7/8.

      Extension jambs and measurements

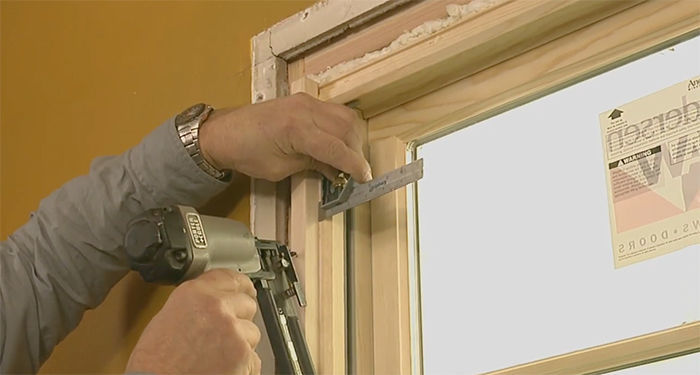
      I’m going to start with the vertical jamb extensions. I personally like to use an interior glue for that. I set the adhesive first for the left side. The jamb should be just slightly higher than the stool. I pin the jamb in place. Next, I use a combination square to set the offset. This way, I get a consistent reveal around the entire window. Do the same procedure on the other side of the window. Then do the head jamb using the same method.

      Vertical jamb extensions install

      Then I start cutting and laying out the sill. I mocked up the trim for this bottom corner for the ¼-inch offset for the jamb. I tack it in place with a brad, then set a mockup of the stool. I like the miter to break at the outside edge of the casing; it looks really sharp. If I mark the mockup of the stool here on the wall and on the other side, then I know exactly how long the stool needs to be. I can cut the casings, cut the stool, and everything will fit and come together.

      I like to mark off the reveal first, so I can get very accurate measurements and only have to cut the casings once. I mark the reveal on each side of the window, at the top.

      I need to measure for the casing now. I hook the tape on the bottom of the extension jamb I just installed and bring it right up to the line at the top. I’ve got 50 inches here. Now check the other side—I’ve got the same measurement, 50 inches. Measuring from side to side is critical. I’ve got 29 and 5/16. A lot of guys like to burn an inch to get a real accurate measurement, but I think that’s dangerous. I’d probably cut the wrong mark. If anything, I’ll burn 10 inches. So, the measurement is 39 and 5/16—and I can tell it’s 10 inches too long. One inch I can’t see.

      Before I put on the casings, I take my foam gun and touch up the areas where the shims were, creating a good seal.

      Cutting the stool and apron

      Mark up the stool now

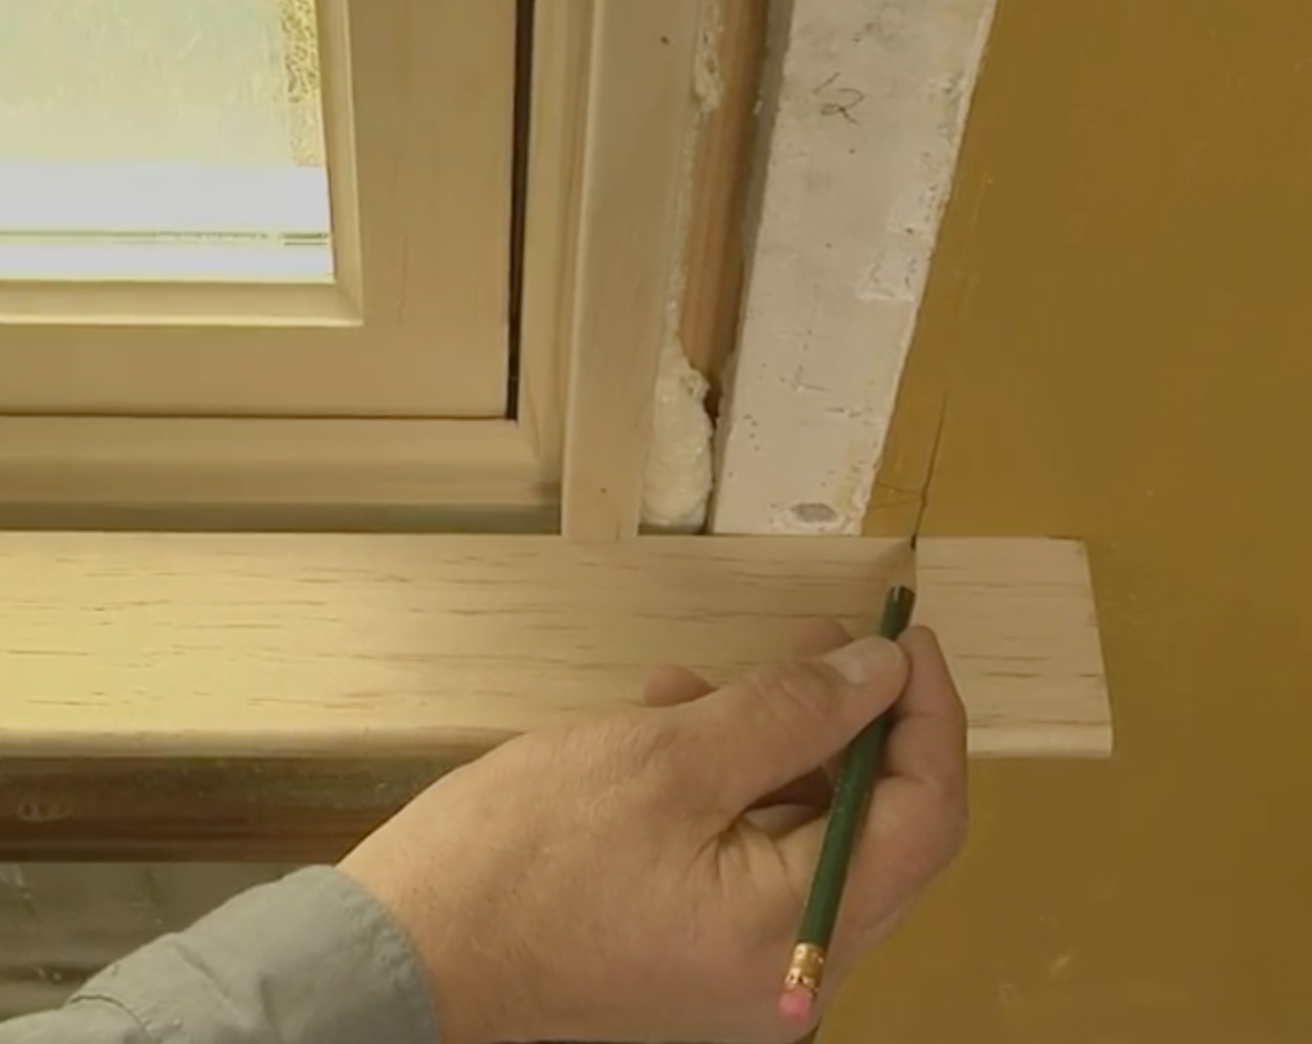
      I’m going to mark up the stool now. To do that, I take the marks I made on the wall and register them to the window. Mark the outside of the miter and also mark where you’ll have to make a relief cut to fit over the plaster. I mark the other end of the stool the same way. Next I have to figure out how much to take out—it should be ¾ inch, the size of the extension jamb. An easy way to do this is to slide the stool back and make a scribe line at the edge of the plaster. That’s how much you have to take off so that the stool clears the plaster.

      I remove the stool from the window and, using the combination square, extend the lines across the stool. Then, when I take it outside, I will cut the correct lines. I’ll do a self-return on the miter. I also measure ¾ inch in from the back edge of the stool and mark it. I’m going to remove all the material behind that mark.

      Once the stool is cut, I dry-fit it. It looks good. I use some adhesive and tack it into place. Then I can make the apron underneath and finish it up. I cut a couple of self-returns for the window stool. Just put a little glue on them and clamp them into position. I want a good solid surface to nail to, so I put a filler in below the stool.

      To mark out the apron, I like to have an even overhang or reveal. I put up a sample piece and measure 7/8 inch to the nosing cove and make a mark on the wall. Do the same on the other side. Measure between the two lines; it’s not an accurate measurement, but I’ve got 34 and ¼. I go outside to cut the apron with self-returns on it. I need to mark on the base of the apron where to cut the full self-return. I lay the piece flat on the circular saw. When I bring the blade down to cut it, I let the blade stop first. If I pick it back up before it stops, one of the teeth will catch the piece and throw it. You’ll lose the piece.

      I like to put the self-returns on before I install the apron. You could clamp it, but I’ll use a 23-gauge pinner instead.

      I put a little glue along the bottom of the stool to make the connection really good. The lines I used to measure from are the lines I use to register the apron. Push it up nice and tight against the stool, and keep it level.

      Finishing the casing

      The last thing I need to do is finish the casing. I’ve got the two side casings that were precut and the top casing. Just tack the two side casings into position. Use the combination square to check the offset. I have to final fit that top miter; I’m not sure if it’s going to be real good or not. Make sure the casing is tight to the stool. Finally, I place the top piece. The miters look good. I’m just going to apply glue to the miters of the top piece and set it in place. Clamp it at each end and pin it in place.

      Finishing the casing

      There’s a little dip in the plaster at the left top corner, so I want to make sure the molding will remain in plane. I put a little shim under there temporarily until I get the casing set. Pin along the length of the top casing, and pin the corners, too.

      Before I call it a day, I take the stops out and operate the window to make sure it functions properly.

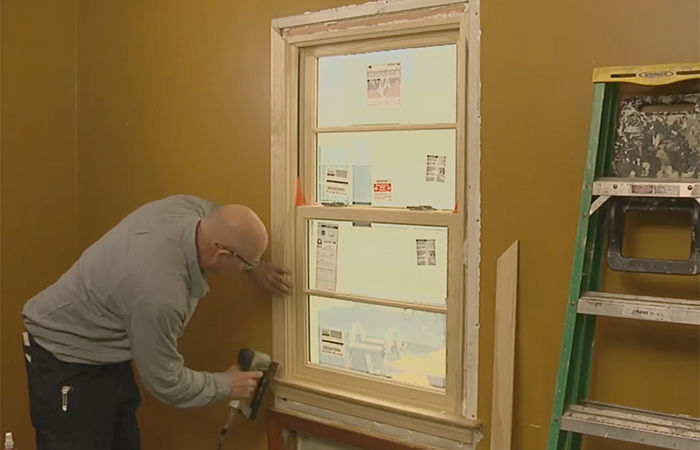
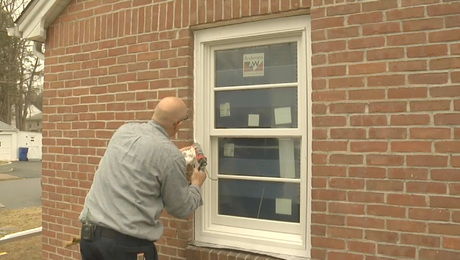
      Narrator: After he confirms the window operates correctly, he nails off the casing with a 15-gauge finish nailer. The larger nails will hold better long-term.

      Mike: We downsized this window deliberately so we’d have room for all the flashing on the exterior, and also for the exterior trim to blend in with the house. We’re done. We’ll leave it to the painter to patch the holes and finish it up.


      More on door and window trim:

      Paint-Grade Interior Trim – The sheer number of available products can make shopping for interior trim an overwhelming prospect, even for experienced builders. Here’s a rundown on what’s out there.

      Master Class in Moldings – An illustrated guide to the profiles and proper proportions of casing, crown and baseboard.

      Well-Proportioned Trim – Interior trim is such an important element of a room’s design that it deserves more than the little bit of thought it often gets. Proportion is a key consideration — here’s how to get started.

      Craftsman-Style Casing – The simple elegance of the Craftsman style has fueled its popularity for more than 100 years. Finish carpenter Tucker Windover outlines his method for installing Craftsman-style window casing.

      Perfect Minter Joints Every Time – Veteran trim carpenter Jim Chestnut shares his time-tested process for installing miter joints. The trick is to assemble the trim with biscuits first, then nail the assembly in place.

      Videos in the Series

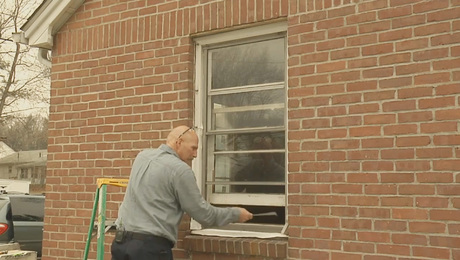
      • Install a Full-Frame Replacement Window: Removing Old Trim and Measuring for a New Window in a Brick Wall

        Remodeler Mike Sloggatt starts this tricky remodeling project by carefully removing old trim and measuring for a new window.

      • Install a Full-Frame Replacement Window: How to Remove Old Window Sashes and Jambs From a Brick Wall

        The next step in this full-frame window installation is for remodeler Mike Sloggatt to remove old window sashes and jambs.

      • Install a Full-Frame Replacement Window: How To Flash a Window Rough Opening in an Existing Brick Wall

        Remodeler Mike Sloggatt demonstrates a reliable method for managing water when installing a replacement window in a masonry wall.

      • Install a Full-Frame Replacement Window: How to Install and Air-Seal a New Window in an Old Brick Wall

        Remodeler Mike Sloggatt shows how to flash and air-seal the new window.

      • Install a Full-Frame Replacement Window: How to Install a PVC Exterior Casing on a Window in a Brick Wall

        Remodeler Mike Sloggatt shows how to integrate exterior trim with flashing to make your replacement window weatherproof.

      • Video Series: How to Install Interior Extension Jambs and Window Trim

        Remodeler Mike Sloggatt finishes off this replacement-window project with a new casing, stool, and apron.

      Previous: Install a Full-Frame Replacement Window: How to Install a PVC Exterior Casing on a Window in a Brick Wall Next: How to Measure and Prepare an Opening For A Replacement Window

      Guide

      Windows & Doors

      Chapter

      Retrofitting Windows

      Sign up for eletters today and get the latest how-to from Fine Homebuilding, plus special offers.

      Signing you up...

      This site is protected by reCAPTCHA and the Google Privacy Policy and Terms of Service apply.
      See all newsletters
      See all newsletters

      View Comments

      1. ptbarnumma1 | Jun 07, 2016 08:54am | #1

        Appreciated the detail on this project. I have always had old homes and new windows never come flush to inside wall so seeing the right way to do extension jams was great. of course my extension jams needed to be 1.5" so I used a 5/4 board and cut to size. My finish carpentry skills are lacking to say the least but this one came out quite respectable thanks to this step by step process.

      2. user-6810206 | Apr 05, 2017 01:52pm | #2

        From which company did you buy those spring clamps that you used on the trim on the corners?

        1. ilovebatz | May 30, 2019 06:23pm | #3

          Collins Miter Spring Pliers and 4 Miter Clamp Kit is the tool and spring clamps. You can find them on Amazon.

      Log in or create an account to post a comment.

      Sign up Log in

      Become a member and get full access to FineHomebuilding.com

      Windows & Doors

      Windows & Doors

      Trusted, comprehensive guidance from the pros for choosing, installing, replacing, and repairing windows and doors on any house

      View Project Guide

      View All Project Guides »

      Become a member and get unlimited site access, including the Windows & Doors Project Guide.

      Start Free Trial

      Choosing Windows
      • Window Types
      • Design and Materials
      • Energy-Efficient Windows
      Installing Windows In New Walls
      • Installation, Start to Finish
      • Head Flashing for Windows
      • Video Series: Nail-Fin Window over Zip System Sheathing
      • Video Series: Nail-Fin Window over Exterior Rigid-Foam Insulation
      • Video Series: Nail-Fin Window over Housewrap
      • Video Series: Nail-Fin Window over Peel-and-Stick Housewrap
      • Video Series: Nail-Fin Window over a Fluid-Applied WRB
      • Video Series: Weatherproof Window Installation
      Retrofitting Windows
      • Removing the Old, Installing the New
      • Video Series: How to Replace a Window
      • Video Series: Install a Full-Frame Replacement Window in a Brick Wall
      • Video Series: Install an Insert Replacement Window in a Brick Wall
      • Video Series: Retrofit a Flanged Window
      Window Repairs
      • Restoring Old Windows
      • Repairs and Upgrades
      Door Basics
      • Tools & Jigs for Door Hanging
      • How to Install Doors
      • Hinges
      • Handles, Knobs, and Locksets
      • Fixing Door Problems
      Interior Doors
      • Prehung Doors
      • Pocket Doors
      • Other Types of Doors
      • Custom-Built Doors
      Exterior Doors
      • Door Choices and Design
      • Installing Entry Doors
      • Building Exterior Doors
      • Installing French Doors
      • Replacing a Door
      • Adding Weatherstripping and Sweeps

      Fine Home Building

      Newsletter Sign-up

      • Fine Homebuilding

        Home building tips, offers, and expert advice in your inbox.

      • Green Building Advisor

        Building science and energy efficiency advice, plus special offers, in your inbox.

      • Old House Journal

        Repair, renovation, and restoration tips, plus special offers, in your inbox.

      Signing you up...

      This site is protected by reCAPTCHA and the Google Privacy Policy and Terms of Service apply.
      See all newsletters

      Follow

      • Fine Homebuilding

        Dig into cutting-edge approaches and decades of proven solutions with total access to our experts and tradespeople.

        Start Free Trial Now
        • Facebook
        • Instagram
        • X
        • LinkedIn
      • GBA Prime

        Get instant access to the latest developments in green building, research, and reports from the field.

        Start Free Trial Now
        • Facebook
        • YouTube
      • Old House Journal

        Learn how to restore, repair, update, and decorate your home.

        Subscribe Now
        • Facebook
        • Instagram
        • X

      Membership & Magazine

      • Online Archive
      • Start Free Trial
      • Magazine Subscription
      • Magazine Renewal
      • Gift a Subscription
      • Customer Support
      • Privacy Preferences
      • About
      • Contact
      • Advertise
      • Careers
      • Terms of Use
      • Site Map
      • Do not sell or share my information
      • Privacy Policy
      • Accessibility
      • California Privacy Rights

      © 2025 Active Interest Media. All rights reserved.

      Fine Homebuilding receives a commission for items purchased through links on this site, including Amazon Associates and other affiliate advertising programs.

      • Home Group
      • Antique Trader
      • Arts & Crafts Homes
      • Bank Note Reporter
      • Cabin Life
      • Cuisine at Home
      • Fine Gardening
      • Fine Woodworking
      • Green Building Advisor
      • Garden Gate
      • Horticulture
      • Keep Craft Alive
      • Log Home Living
      • Military Trader/Vehicles
      • Numismatic News
      • Numismaster
      • Old Cars Weekly
      • Old House Journal
      • Period Homes
      • Popular Woodworking
      • Script
      • ShopNotes
      • Sports Collectors Digest
      • Threads
      • Timber Home Living
      • Traditional Building
      • Woodsmith
      • World Coin News
      • Writer's Digest
      Active Interest Media logo
      X
      X
      This is a dialog window which overlays the main content of the page. The modal window is a 'site map' of the most critical areas of the site. Pressing the Escape (ESC) button will close the modal and bring you back to where you were on the page.

      Main Menu

      • How-To
      • Design
      • Tools & Materials
      • Video
      • Blogs
      • Forum
      • Project Guides
      • Reader Projects
      • Magazine
      • Members
      • FHB House

      Podcasts

      • FHB Podcast
      • ProTalk

      Webinars

      • Upcoming and On-Demand

      Podcasts

      • FHB Podcast
      • ProTalk

      Webinars

      • Upcoming and On-Demand

      Popular Topics

      • Kitchens
      • Business
      • Bedrooms
      • Roofs
      • Architecture and Design
      • Green Building
      • Decks
      • Framing
      • Safety
      • Remodeling
      • Bathrooms
      • Windows
      • Tilework
      • Ceilings
      • HVAC

      Magazine

      • Current Issue
      • Past Issues
      • Magazine Index
      • Subscribe
      • Online Archive
      • Author Guidelines

      All Access

      • Member Home
      • Start Free Trial
      • Gift Membership

      Online Learning

      • Courses
      • Project Guides
      • Reader Projects
      • Podcast

      More

      • FHB Ambassadors
      • FHB House
      • Customer Support

      Account

      • Log In
      • Join

      Newsletter

      Get home building tips, offers, and expert advice in your inbox

      Signing you up...

      This site is protected by reCAPTCHA and the Google Privacy Policy and Terms of Service apply.
      See all newsletters
      See all newsletters

      Follow

      • X
      • YouTube
      • instagram
      • facebook
      • pinterest
      • Tiktok

      Join All Access

      Become a member and get instant access to thousands of videos, how-tos, tool reviews, and design features.

      Start Your Free Trial

      Subscribe

      FHB Magazine

      Start your subscription today and save up to 70%

      Subscribe

      This is your last free article.

      Don't miss another expert tip or technique from building pros. Start your free trial today.

      Start your FREE trial

      Already a member? Log in

      We hope you’ve enjoyed your free articles. To keep reading, become a member today.

      Get complete site access to expert advice, how-to videos, Code Check, and more, plus the print magazine.

      Start your FREE trial

      Already a member? Log in

      Privacy Policy Update

      We use cookies, pixels, script and other tracking technologies to analyze and improve our service, to improve and personalize content, and for advertising to you. We also share information about your use of our site with third-party social media, advertising and analytics partners. You can view our Privacy Policy here and our Terms of Use here.

      Cookies

      Analytics

      These cookies help us track site metrics to improve our sites and provide a better user experience.

      Advertising/Social Media

      These cookies are used to serve advertisements aligned with your interests.

      Essential

      These cookies are required to provide basic functions like page navigation and access to secure areas of the website.

      Delete My Data

      Delete all cookies and associated data