
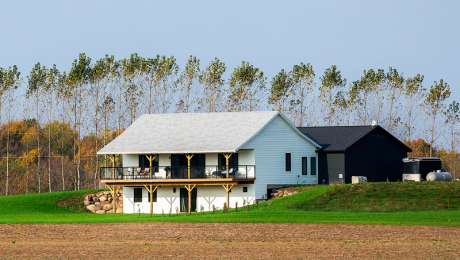
Ok, So How Much Does Building Your Own Home Cost?
Detailed budgets and learning to adapt when needed is crucial, especially if you're a self-designer/builder like Ian Schwandt. Follow the cost-by-cost break down of FHB House WI and how $124.34 per sq. ft. was achieved.

“It is 100% about the money 100% of the time” – My dad, Morry
Though I believe that my dad unleashed this observation partially in jest, it often rings true in residential construction. A client’s budget (or lack of a budget) directly influences every material selection and decision made during the design and construction phases of a home build, and therefore the final cost of building a home.
I kept a fairly detailed spreadsheet throughout my design process that had my estimated costs for a phase of the build, and I tracked the actual costs against that estimate. For the scope of work that I needed to hire out, I got subcontractors involved early in the process, reaching out to some key subcontractors like my excavation company, JF Trucking & Trenching, while I still lived in New York. These subcontractors were able to provide me with cost ranges that I plugged into my spreadsheet along with the material takeoffs for my self-performed scope of work.
With our design finalized and my budget spreadsheet complete in August of 2020, we secured financing via a construction loan for $250,000 for our 2750-sq.-ft. house. This $250,000 figure was based on 80% of our bank’s expected appraised value of our design at $312,500. The 80/20 loan-to-value matrix is very common in residential mortgage lending. I budgeted an additional $25,000 out of pocket, resulting in my self-design/build budget of $100 per sq. ft. As material costs steadily rose throughout the second half of 2020 and the first half of 2021, we faced a realization that to meet our budget we would either need to drastically value-engineer our interior finishes or possibly not build a portion of the project. The other option was to increase our budget; after looking at the new construction appraisal our bank provided and comparing it to what new homes and newly remodeled homes were selling for in our area, we felt that increasing our budget was worth the risk.
Below is a full breakdown—not including cost of land and permitting which can vary wildly—of what we spent to build FHB House WI.
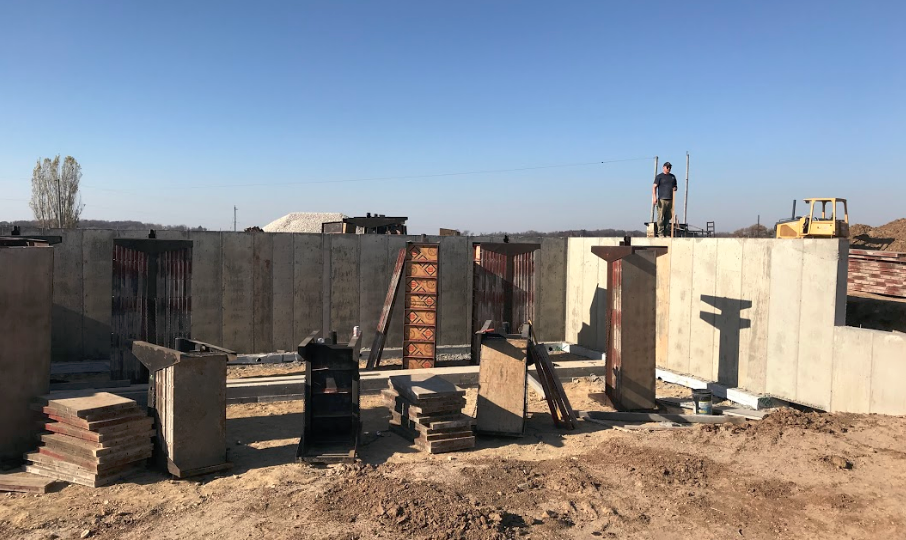
Sitework and Site Improvements
$1,886 – Electrical Service (Brought by the utility company from the adjacent road)
$14,092 – Well (250 ft. in deep, clay soils)
$15,000 – Three-Bedroom Mound Septic System
$15,776 – Excavation, Final Grade, Stone Retaining Walls, Driveway
Sitework Total – $46,754
Foundation and Concrete
$12,763 – Footings and Pour Foundation Walls (Self-performed labor for forming and setting footings; I worked on my concrete contractor’s crew setting and stripping wall forms)
$3,000 – Waterproofing Materials (Self-performed labor, Mel-Rol Waterproofing)
$3,517 – Basement Concrete Floor (Self-performed labor for grading and radiant tubing; I manned a wheelbarrow on the day of the pour.)
$5,200 – Garage Floor
Foundation and Concrete Total – $24,480
Framing Lumber
$6,758 – First-Floor Framing (TJI, LP Legacy Subfloor)
$15,071 – Wall Framing (LSL Studs, Zip Sheathing)
$20,860 – Roof Framing ($6500 For Roof Truss Package, Zip Sheathing, 2×12 Rafters)
$6,767 – Deck Framing ($1650 for Triple PWT LVL, 2×8 Joists, 6×6 Posts, Helical Piles)
Framing Total – $49,456
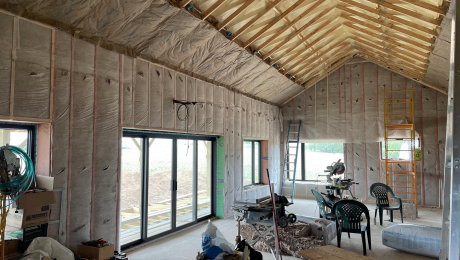
Insulation
$7,176 – SprayFoam Roof System (4 in. closed-cell spray foam)
$2,500 – Foam Board (Basement walls, underslab)
$3,500 – Cellulose
$3,500 – Fiberglass Batts
Insulation Total – $16,676
Exterior Finish Material
$5,297 – Roofing Material (CertainTeed Landmark Shingles)
$5,782 – Exterior Doors (ThermaTru)
$14,690 – Marvin Window and Patio Door Package (Essential Windows, Ultimate Doors)
$15,100 – LP SmartSide, Aluminum Soffit, Windsor One Porch Ceiling
$3,000 – Exterior Paint
$16,000 – Decking Finish Material (Ipe decking, Peak glass railing)
Exterior Finish Materials – $59,869
Drywall
$20,692 – 8000 sq. ft. of Drywall Hung With a Level 4 Finish
Electrical
$25,382 – Including Light Fixtures and Generator
Plumbing
$17,200 – Includes $4000 for Iron Filtration System
$7,500 – Plumbing Fixtures (Kohler faucets, Grohe Shower Systems)
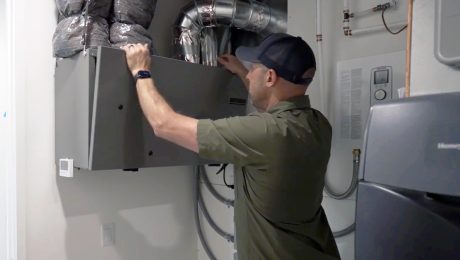
HVAC
$9,000 – Minisplit System
$5,000 – In-Floor Heat System and Boiler (Self-performed install)
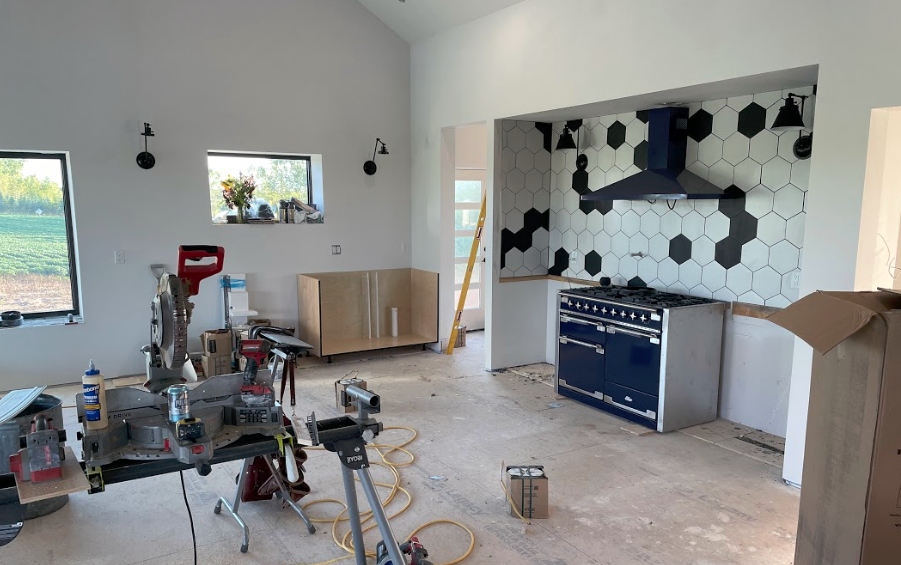
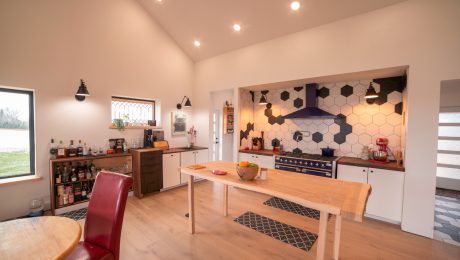
Interior Finishes (all self-performed)
$11,000 – Tile
$6,000 – Wood Flooring
$5,000 – Doors and Trim
$7,000 – Site built cabinet and counter material
$16,912 – Appliances (AGA kitchen, Electrolux laundry)
$3,000 – Interior Paint
Interior Finishes Total – $48,912
Debt Service
$11,000 – Interest Payments on Construction Loan and Credit Cards
= Project Total – $341,921
$124.34 per sq. ft.
In addition to the monetary cost, a large self-built project like FHB House Wisconsin comes with a cost measured in time. During the build I worked 20 hours a week at my job as an estimator and Project Developer for TDS Custom Construction and Sara worked full time. Between Sara and I, both of our fathers, and a few friends, we worked about 3000 hours on the build project. It would be easy for an observer to say that these hours need to be converted into dollars to give a true cost for the project, but I feel that this line of thinking misses the point and the spirit of self-building. We, like most of the self-builders you can find on social media, have chosen this path as it represents the only way to achieve the desired result. In that spirit, below is a rough breakdown of the hours that we put into each of the phases above.
Sitework and Site Improvements – 50 hours
Foundation and Concrete – 120 hours
Rough Framing – 800 hours
Insulation – 120 hours
Exterior Finish – 700 hours
Interior Finishes – 700 hours
HVAC – 170 hours
Project Management – 250 hours
Total Hours – About 3,000 hours
Even though on paper this looks like a daunting outlay for one year of life for Sara and me, the decision to self-build as opposed to buy was an easy one. Having previously remodeled one house to the best of our abilities, and having been exposed to many interesting architectural styles through my interior carpentry work, we had a clear vision for what we wanted our home to be. Add in my desire for an energy- efficient high-performance home and our access to buildable land, and the choice to build new was clear. In the end, the added cost in dollars and time of building our house as a double-wall construction, high-performance home was negligible. The extra air-sealing, framing, insulating, and mechanicals added about a month’s worth of work, 160 hours, and $10,000 in extra material—the bulk of dollars spent on framing for the double wall and extra insulation.
At many points along this journey, I have been asked, “Would you do it again?” There were certainly times when the stress levels were through the roof, the money was tight, and the patience had run dry, and I thought, “no way, not a chance.” Having come out of the journey with a house of my own design, built with my own hands and the hands of my family, at a cost that I was able to shoulder, I can now answer that question with an emphatic “yes.”


View Comments
One of the most rewarding parts about this project has been sharing the process on this blog. And sharing this raw cost data has been something that was important to me from the start. If anyone has questions or is interested in additional background to this cost data please reach out via the comments.
Thanks
Ian
Enjoyed hearing and reading about the process so far. I don't recall if you mentioned this on the podcast at all - but did you do smart framing for your walls/doors/windows?
Also, on the framing did you do any type of drywall gasket like the DOW drywall gasket, or did you only rely on the zip + foam for penetrations for exterior air sealing?
I did double wall framing 16 o.c. 2x6 bearing wall for the exterior and non bearing 2x4 wall interior. For the window and door air sealing I installed the windows in the drainplane by installing the 1x drainplane strapping on the outside of the window opening which is lined with Zip sheathing buck on all sides. I uses Zip Tape to flash/seal the strapping to the Zip face of the wall and the buck the top and side flanges of the window is taped with Zip Tape, insulated with Rockwool and then taped on the inside to the window buck on all four sides with ProClima Profect tape from Passive House Building. I can't say enough about how well this tape air seals the windows. No interior trim all drywall returns. No drywall gaskets anywhere but I did seal plates with acoustical sealant and the disc lights have gaskets.
Thanks for following the project!
Ian
Good job, sounds like a good plan and great price. We did a similar thing, built a double-stud 2150 sq ft house full basement, did a lot of work ourselves but also hired quite a bit. I also kept a spreadsheet but it hasn't been updated for a while. But I think we are in the same ballpark as you. Looks like you got away with not doing any stormwater management, which in our case cost $15K-$20K, but you were required to do a sand mound at similar expense while we lucked out and have a conventional system.
Hard to compare without some more details.
Curious about your window package. How many windows did you have? Any large expensive windows? What U-value and air leakage ratings did you have? We did U 0.16 windows from ProVia in Ohio.
What were your insulation values? 10/20/40/60? (underslab/basement walls/main walls/ceiling)?
Our house had some timber framing (which I did), only a couple posts, mostly horizontal members that rested on the double-stud wall. We also decided to get a custom-built kitchen from an Amish outfit down the road. That was well over $15K.
Would I do it again? No, once was enough. I like doing weekend size projects, but I didn't like doing weekend size projects every day for 2 years (I'm retired so probably not as limber or fast as you). As well as retired, I'm just plain tired too. And no, I won't do it again as I don't plan to move again in this life.
Dennis,
Thanks for the comments!
12 windows total. 2 patio doors. 3 of the windows in the great room are 60"x84" They were not that expensive. Under $1500 each if memory serves. Our large OXXO patio door was about $5K that was the big expense.
U-Value on the Marvin Essentials is .29 and our overall air leakage based on a pre-insulation blower door test beat passive house standard. Still hoping to do another test now that everything is done.
Insulation values 20/30/45/64
Thanks again,
Ian
While Ian's family self build is a commendable job, the article 's title, like many articles featured in F.H. is misleading and delusional. To claim that this project was tracked to the penny per square foot while providing only rounded numbers on labor is disingenuous at best. Beyond that fact, if you factor the 3000 undocumented hours into a real life labor rate of, say, $60 hr. then the home cost roughly $200/sq. ft. to build. A nice, quality built home no doubt. But nothing to write home about...certainly when expressed to the penny. This proves to me that the title is meant to capture the imagination of the DIY that this magazine has moved toward catering to over the past 10 years. Its all about selling product by the magazine's advertisers rather than how to professional build and/or remodel a real fine home.
Shorter deadnuts: Shut FHB all down and have a contractor build your house.
thanks for all the information. as a non builder there is a lot of jargon and detail I would like to drill into. Are you thinking of doing sub podcasts or articles breaking down this info. Example is the window installation with the double walls. I know this can be particularly challenging. And we see 6 different ways from 5 different authors.
Hello
We did a window install video earlier in the series that details the flashing and window install steps. Was there anything in particular that you were looking for more information on?
Thanks
Ian
Does your final price figure include any of the garage?
I've been through all of your articles and videos. Not much information about the garage.
I am also a contractor and will begin building my own self designed home this spring.
Thanks
It does include the garage which is 32' wide and 30' deep. 2x6 walls insulated with fiberglass, typical trusses with blown in cellulose and a heated slab. We built the extra depth to as space for a commercial kitchen and walk in cooler for my wife. Currently the extra depth is acting as my shop until we build a pole barn this summer. Good luck with your build and please reach out with any questions.
Thanks,
Ian