Build a Mobile Tool-Storage System
Maximize productivity with custom work carts that roll right off the truck and onto the job site.
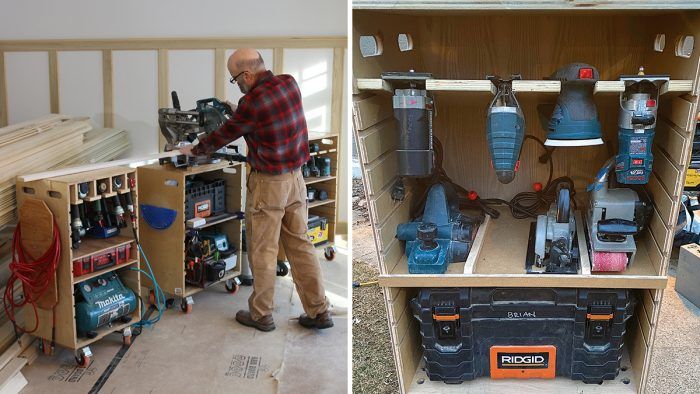
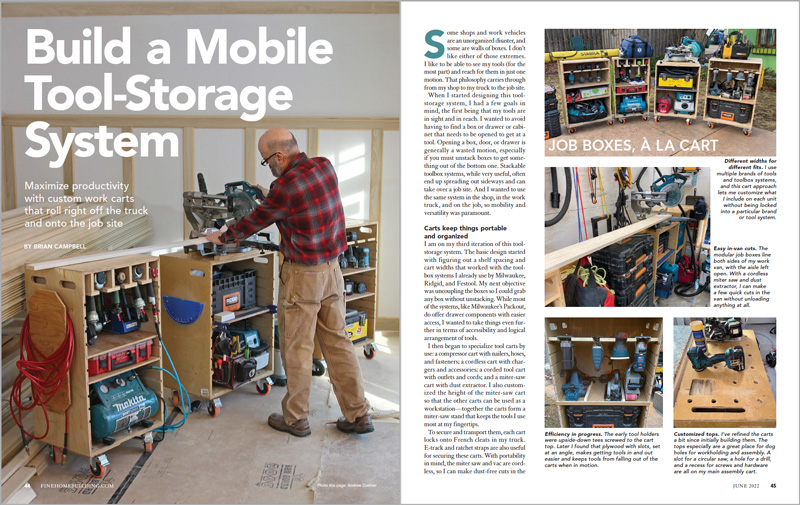
Some shops and work vehicles are an unorganized disaster, and some are walls of boxes. I don’t like either of those extremes. I like to be able to see my tools (for the most part) and reach for them in just one motion. That philosophy carries through from my shop to my truck to the job site.
When I started designing this tool-storage system, I had a few goals in mind, the first being that my tools are in sight and in reach. I wanted to avoid having to find a box or drawer or cabinet that needs to be opened to get at a tool. Opening a box, door, or drawer is generally a wasted motion, especially if you must unstack boxes to get something out of the bottom one. Stackable toolbox systems, while very useful, often end up spreading out sideways and can take over a job site. And I wanted to use the same system in the shop, in the work truck, and on the job, so mobility and versatility was paramount.
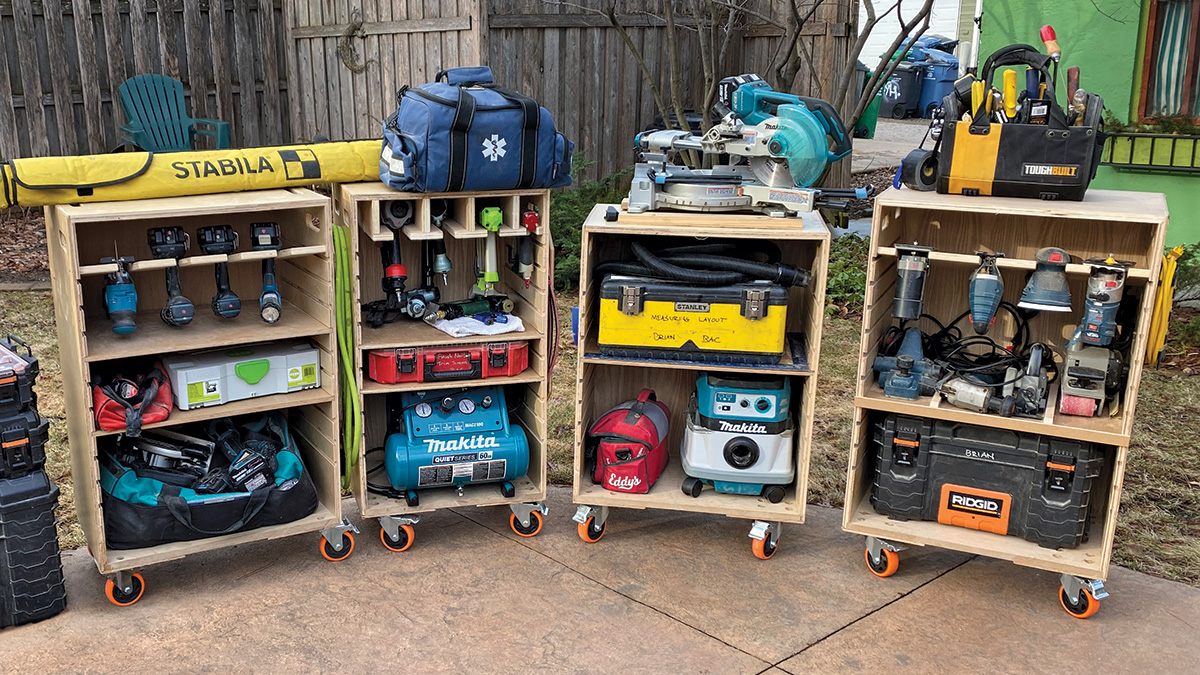
Carts keep things portable and organized
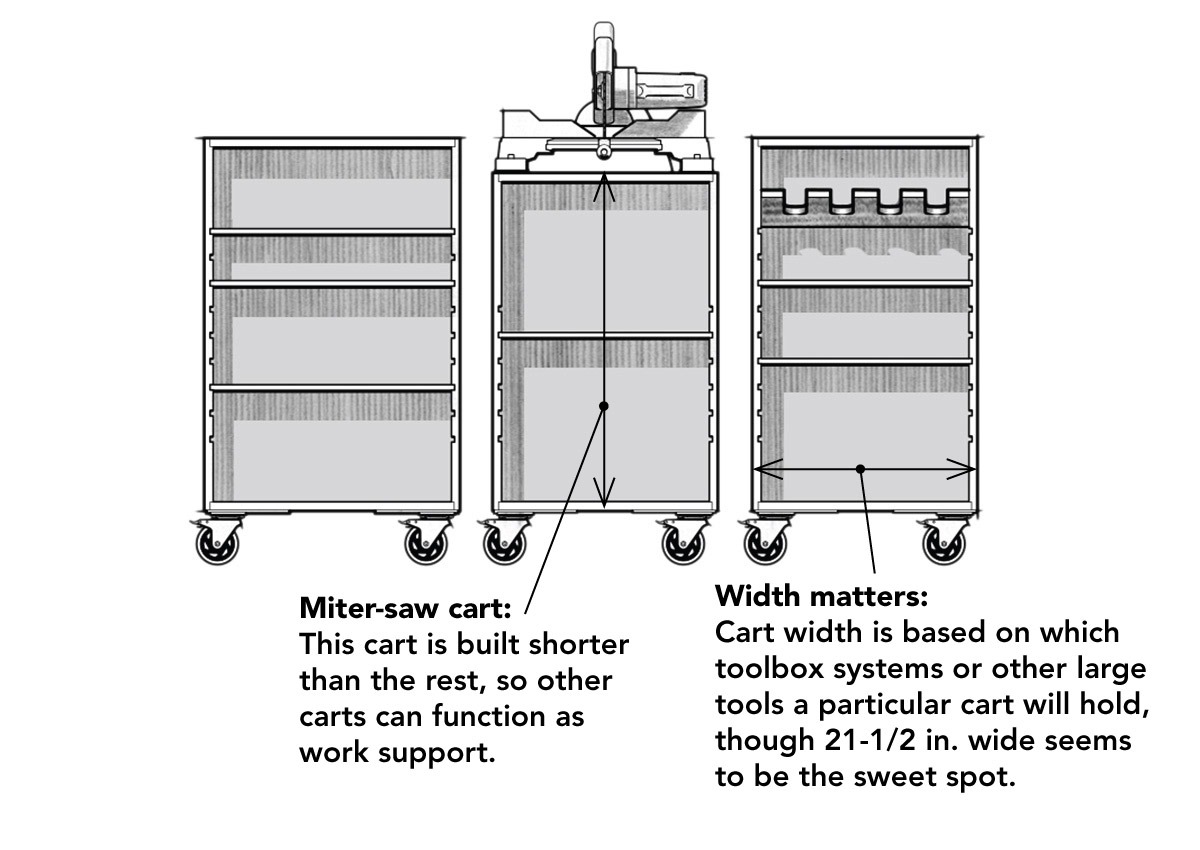
I am on my third iteration of this tool-storage system. The basic design started with figuring out shelf spacing and cart widths that worked with the toolbox systems I already use by Milwaukee, Ridgid, and Festool. My next objective was uncoupling the boxes so I could grab any box without unstacking. While most of the systems, like Milwaukee’s Packout, do offer drawer components with easier access, I wanted to take things even further in terms of accessibility and logical arrangement of tools.
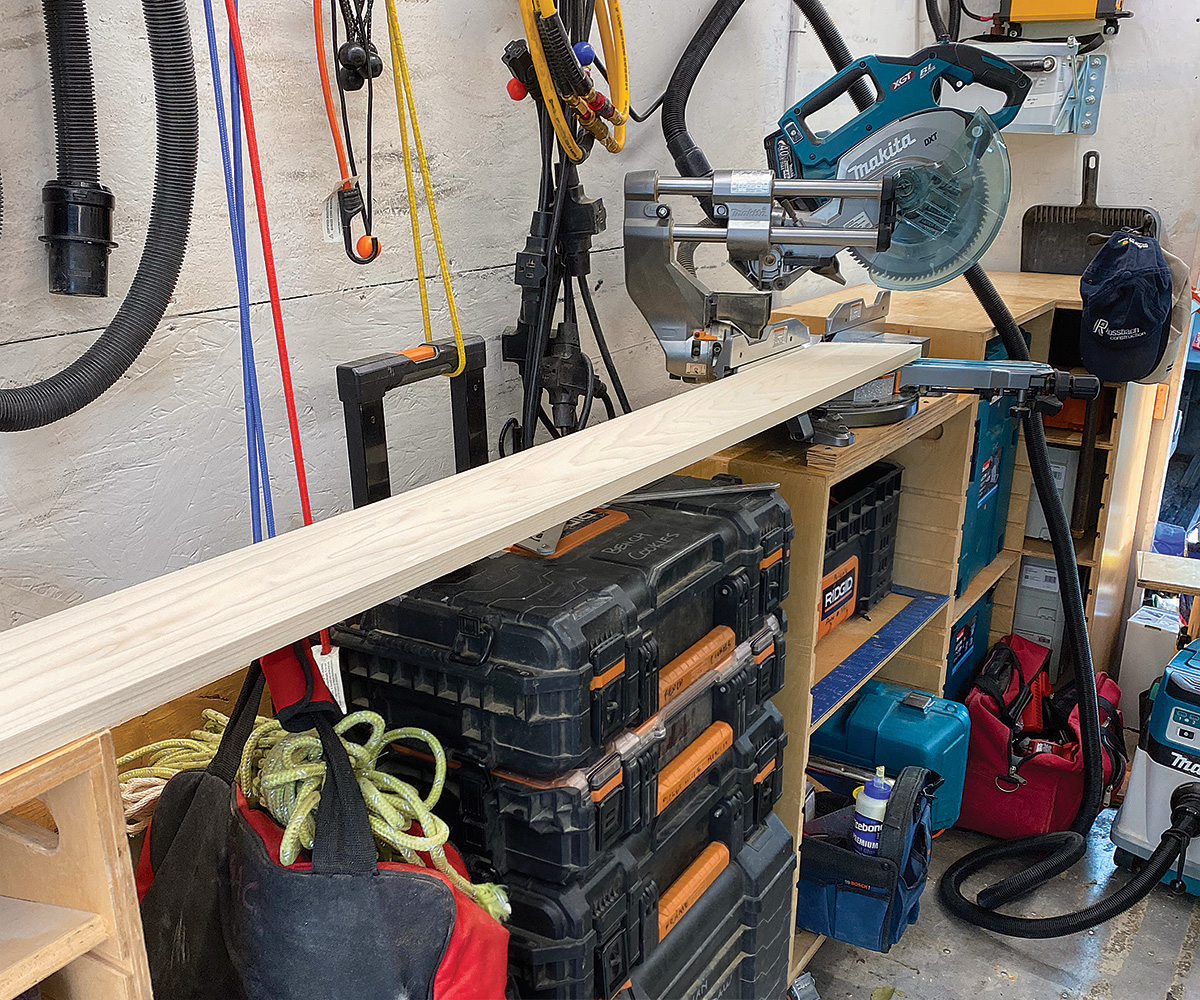
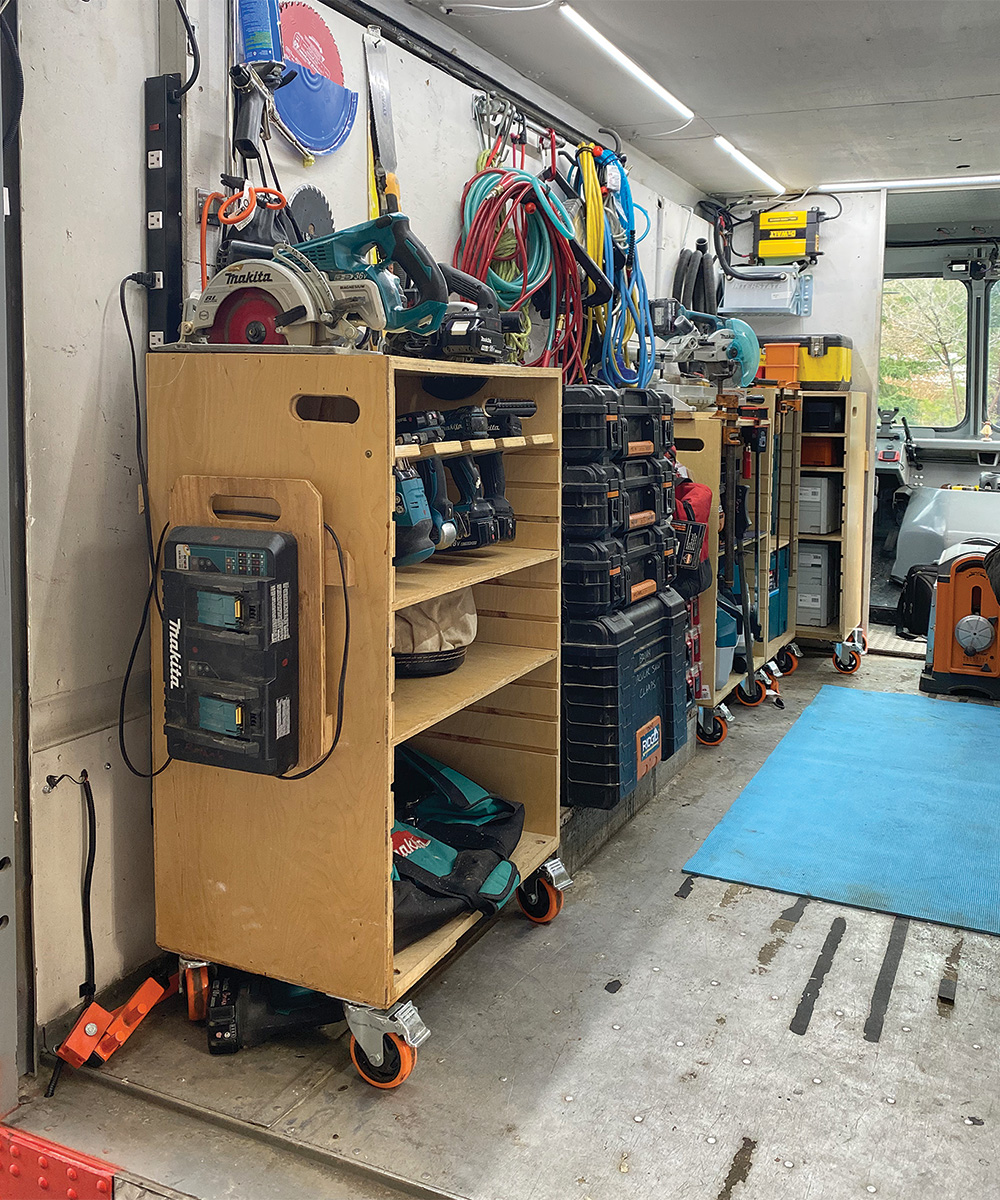
I then began to specialize tool carts by use: a compressor cart with nailers, hoses, and fasteners; a cordless cart with chargers and accessories; a corded tool cart with outlets and cords; and a miter-saw cart with dust extractor. I also customized the height of the miter-saw cart so that the other carts can be used as a workstation— together the carts form a miter-saw stand that keeps the tools I use most at my fingertips.
To secure and transport them, each cart locks onto French cleats in my truck. E-track and ratchet straps are also useful for securing these carts. With portability in mind, the miter saw and vac are cordless, so I can make dust-free cuts in the truck without unloading. And because everything in the cargo bay is on wheels, it can be completely unloaded in a few minutes if I need to haul a bunch of material or a full load of cabinets.
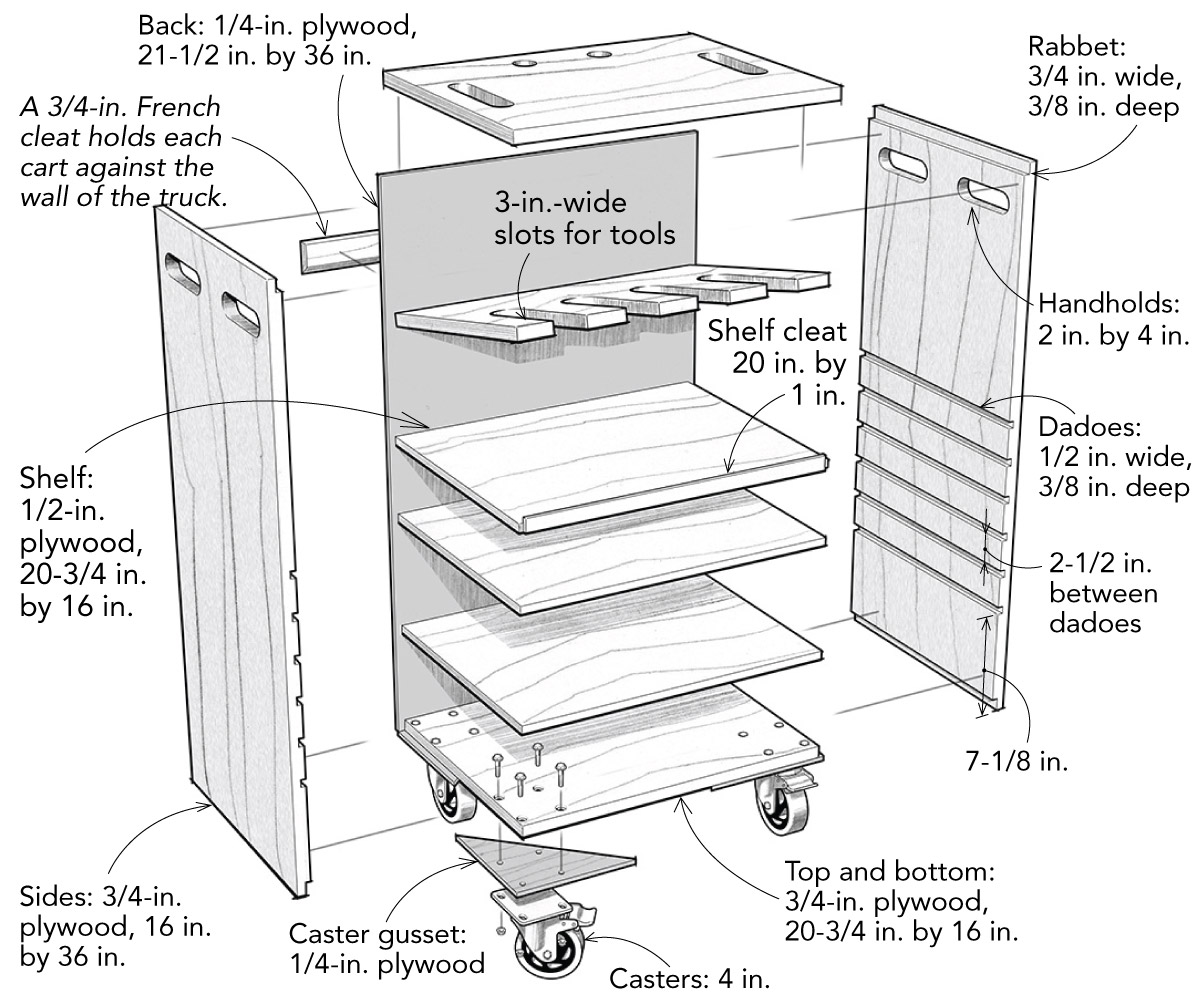
Modular Job Box Anatomy
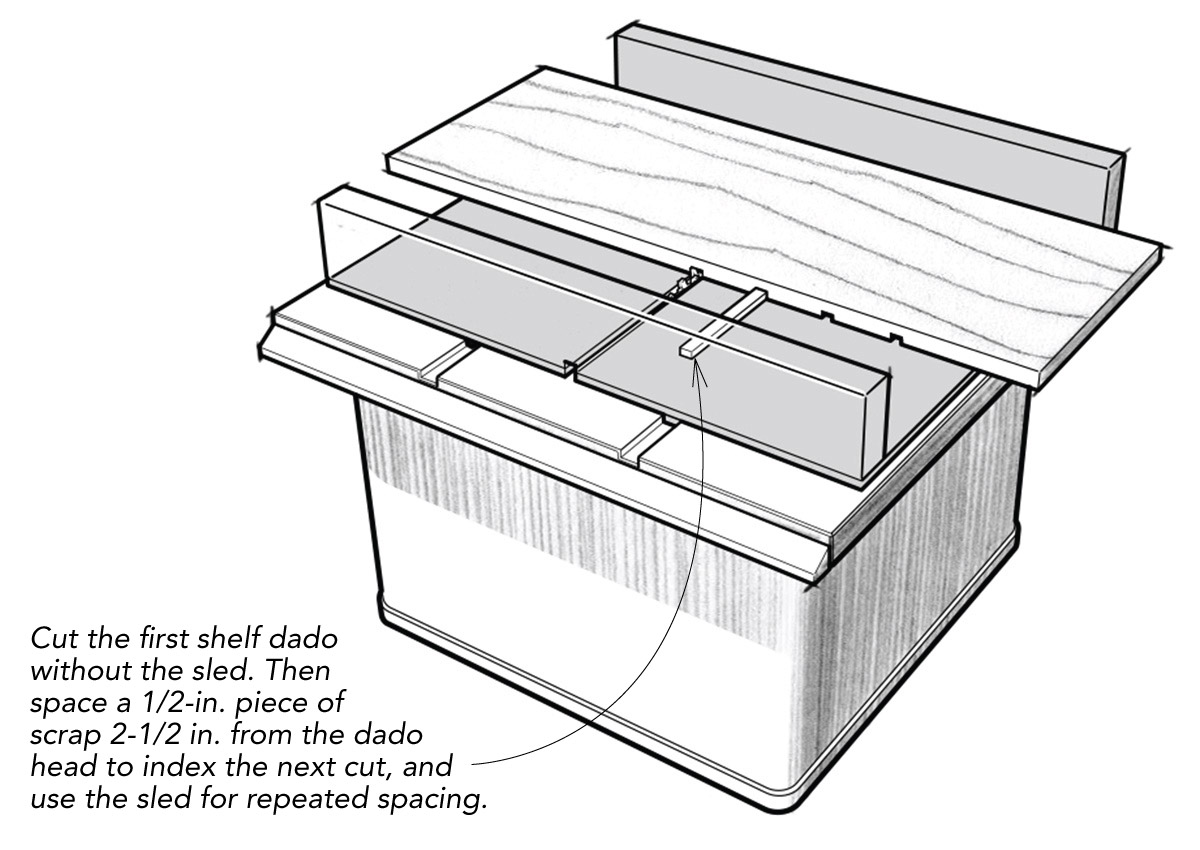
The construction of the box is straightforward—the sides are rabbeted to accept the top and bottom, with slots in the sides for shelves. The case is glued and screwed together with #8 by 1-1/4-in. construction screws. The back is stapled on and one middle shelf fixed in place with screws to keep the cart sides rigid. I reinforced the bottom corners of the cart where the casters are mounted with 1/4-in. plywood and recessed the mounting bolts so that there’s nothing to interfere with sliding a toolbox into the bottom shelf.
Customization is ongoing
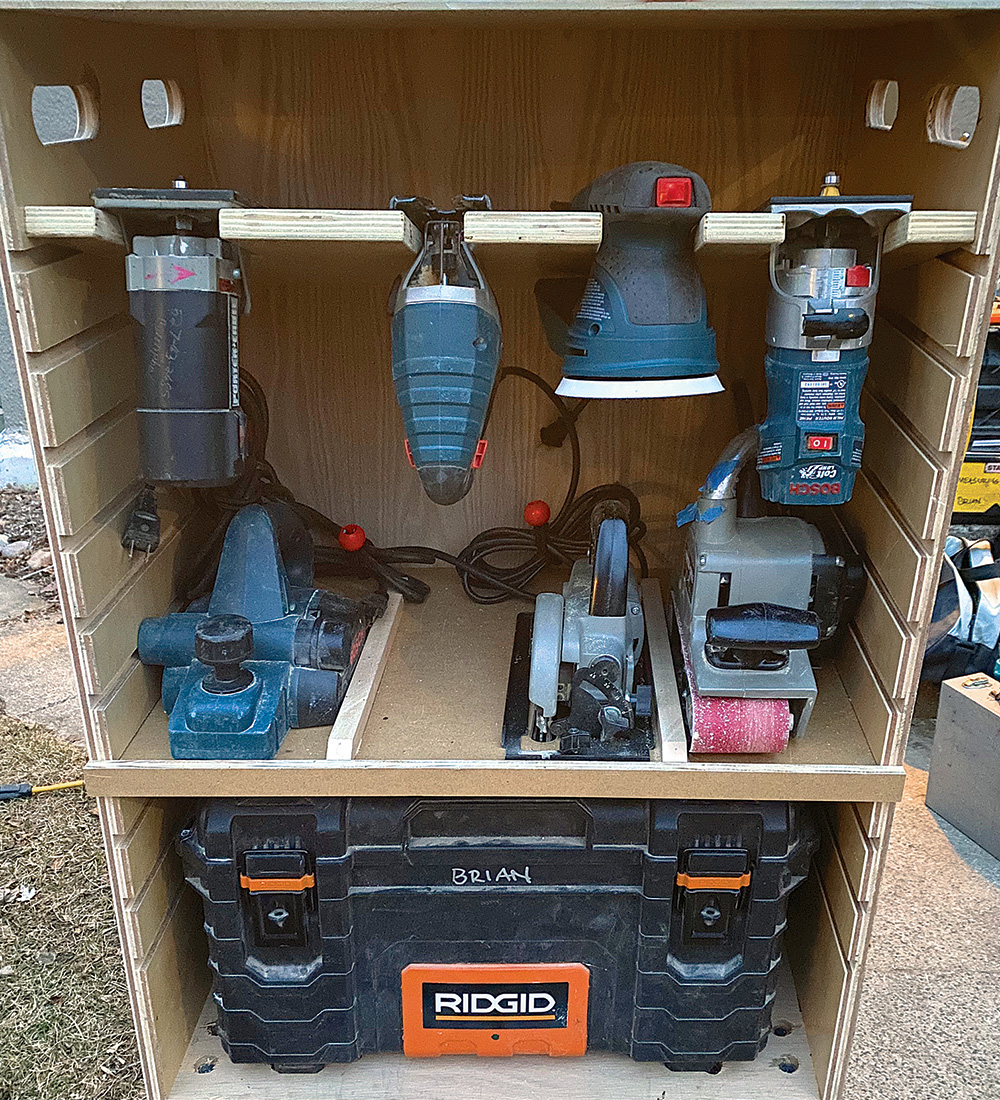
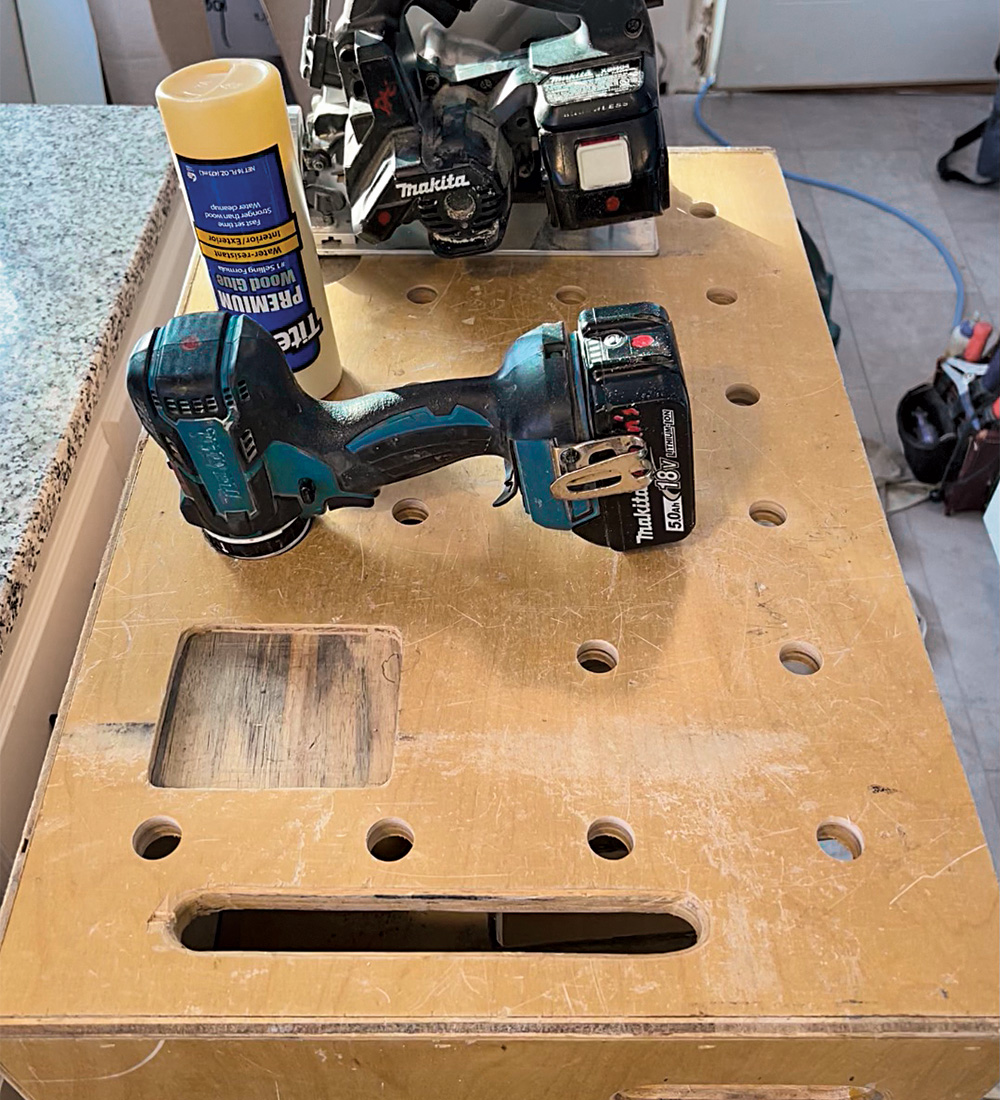
I continue to refine and expand the utility of the cart system and the truck setup. I added 20-mm, MFT-style dog holes to the cart tops, shallow wells for fasteners, four handholds at the top of each cart instead of just two—the list goes on. I’m considering adding fold-up miter-saw stand wings to the saw cart so it is easy to use as a stand by itself. I am also looking into reusable fasteners offered by Lamello and Festool to make the tops of the carts both secure and easily replaceable, if I start using the cart tops as a cutting surface. Each round of tinkering is aimed at improving versatility, functionality, and efficiency.
One of the other benefits of this system it that a single cart can be pulled out and reconfigured without affecting the rest. I built seven carts so that I can keep six in use on the truck and have one down for updates. The carts have proved very durable, which means that so far, pulling one out of rotation is only for refining the function, rather than for maintenance. The initial investment of time to build the carts was three weekends, during which time I built six carts with shelves, including tool holders in three of the carts, all with casters on and ready to roll.
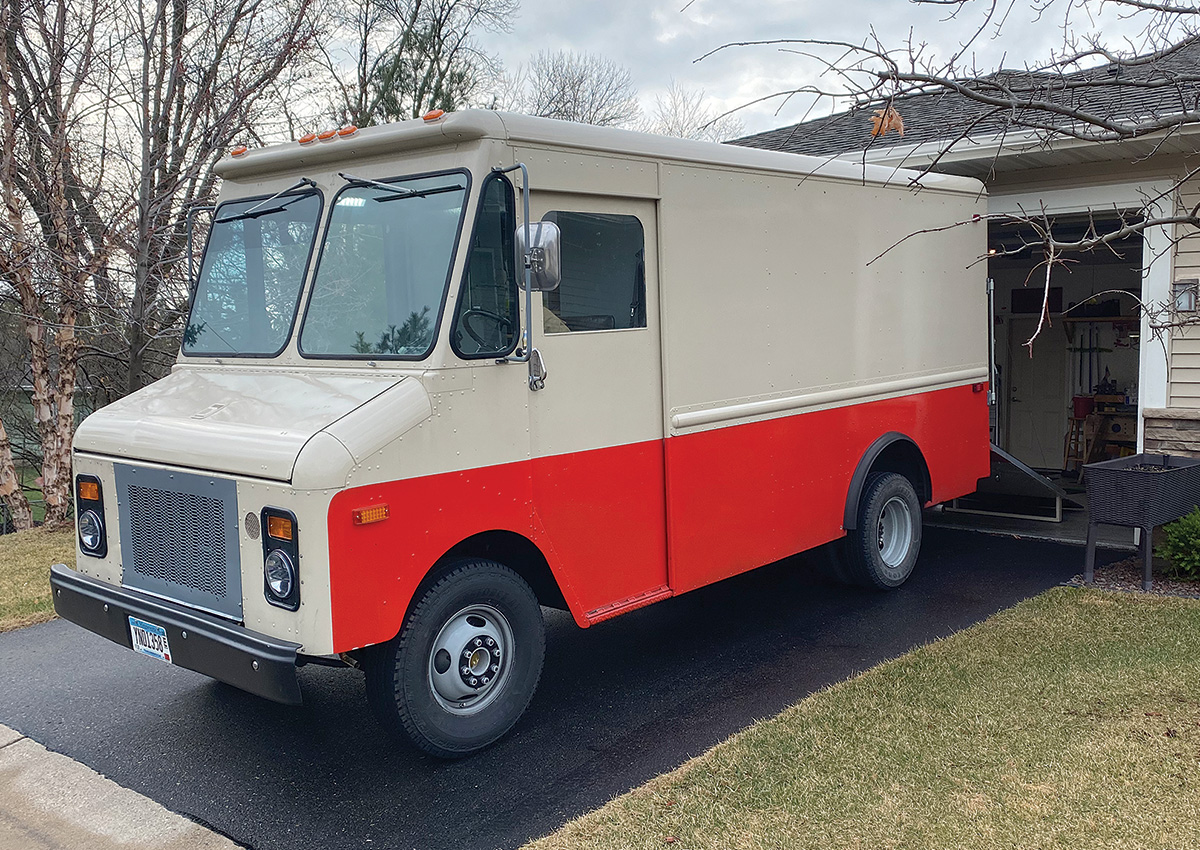
I started to develop this cart system when working out of a Ram ProMaster, which worked acceptably. I can even fit three of the carts in a minivan. But this rolling cart approach really shines with a rear ramp door setup, like those usually found on work trailers. In my case, I found an old ’77 Chevy Grumman step van that had been fitted with a ramp at Klingbeil Lumber Co. in Medford, Wis. The ProMaster and the step van are almost identical in size. I worked out of the step van for a summer and decided it was ideal for these tool carts and the way I approach work, as well as parking and hauling in the city.
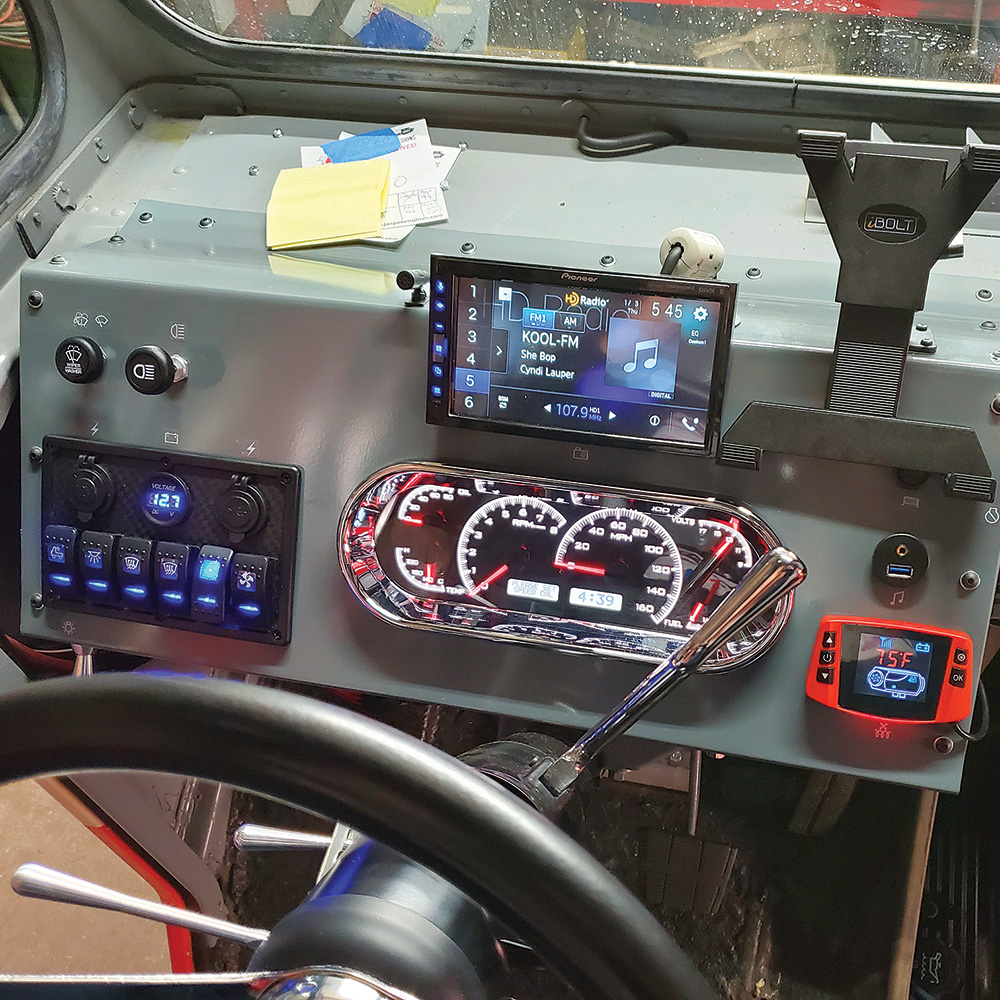
Rehabbing a step vanThe 1977 Chevy Grumman step van looked great when I bought it, but closer inspection revealed that the white oak that isolated the dissimilar metals of the steel frame and the aluminum body had rotted (this is the same galvanic corrosion issue faced by a builder using treated lumber and steel fasteners). Additionally, though the frame was sound, some suspension mounts, spindles, and wiring were shot. A frame-off restoration began. The frame was sandblasted and coated, and parts were found from a suitable donor truck—a ’78 Chevy C-30 one-ton truck with matching suspension and spindles in good shape. Before long the freshly coated frame was a rolling chassis. The work on rebuilding this truck was carried out by Huttner Enterprises in Dayton, Minn. My contribution was limited to listing the specifications of the rebuild, sourcing the new white-oak frame caps, and fitting out the cargo bay. Many components were refurbished or rebuilt. The transmission was rebuilt, the rear end cleaned up, and the already rebuilt steering box reused, along with the frame and body. Suspension, engine, wiring, steering column, instruments, wheels, tires, radiator, power steering, and brakes are all new. The power plant is an HT383 “stroker” crate motor with 323 hp and 444 lb. of torque. When new, the truck’s stock GM 350 produced 190 hp. New additions include an alarm system; GPS; cabin, cargo, and backup lighting and camera; shore power; a charging system and inverter; a sound system; and auxiliary kerosene/diesel heating. The rebuild cost was close to the purchase price of a new one-ton work truck. I simply wasn’t finding anything new that offered what this truck has, at least in its reincarnated form, not to mention the current availability and price issues in the truck market. Most newer step vans are larger. All of the rear ramp door configurations I’ve seen are on trailers, and my work in the city makes the truck and trailer setups less appealing. This is essentially a hybrid of truck, a van, and a trailer. It was a worthwhile rebuild to ensure the step van will last until I retire, just like these carts. |
Brian Campbell is a finish carpenter in Minneapolis, Minn. Photos by the author, except where noted.
Drawings: George Retseck
From Fine Homebuilding #307
RELATED STORIES
- Stacking Portable Tool-Storage System
- Pickup-Truck Tool Storage
- How to Make Simple Storage Bins for Workshop Drawers
Fine Homebuilding Recommended Products
Fine Homebuilding receives a commission for items purchased through links on this site, including Amazon Associates and other affiliate advertising programs.
Milwaukee M18 Fuel 18v Cordless Circular Saw (2730-22)
Paslode Cordless Finish Nailer (IM250A)




View Comments
The boxes are cool, then I get to the part about the van. That gem deserves an article of its own.