Podcast 517: Sizing Stringers for Wet Wood, Odd Foundations, and Concrete Domes
The crew hears about indoor-air quality and reclaiming flooring before taking questions about stair stringers, mudsill details, and building a concrete dome.

Follow the Fine Homebuilding Podcast on your favorite app. Subscribe now and don’t miss an episode:
 |
Help us make better episodes and enter for a chance to win an FHB Podcast T-shirt:
www.finehomebuilding.com/podcastsurvey
Paul asks why indoor-air quality isn’t talked about more in green building. Nat describes his process for reclaiming strip oak flooring. Barbara asks if wet stringer stock should be cut so it’s oversized. A YouTube listener wonders about his mudsill/foundation detail. Ethan shares his plan for an owner-built concrete dome.
Editor Updates:
- Andrew’s Trip to Austin
- Mike’s Radon fan
- Jeff’s Car repairs
- Patrick’s Soffits
Listener Feedback 1:
Paul from Central California writes: Hi Patrick, Greetings to you and the crew. Forgive me for raising an old and contentious question, but I haven’t yet been satisfied with the answers. I know that air-sealing has become an article of faith in the building science community. The appropriacy of reducing air movement through the building envelope is no longer questioned by anyone. I get why. Air-sealing’s impact on energy efficiency cannot be denied, and shouldn’t be ignored. Still, I have my reservations, and I hope you’ll hear me out.
I started working as a finish carpenter in my 20s with my dad. He was very talented and worked on high-end custom homes ringing the gated, man-made lakes in town. I thought I would be getting a lot of great exercise and fresh air. The reality was something different. Every day involved exposure to some new toxic substance: unhealthy dusts from engineered woods with Formaldehyde glues, offgasses from plastic flex trims, columns made of exotic foams, paints and thinners, solvents and glues of all kinds. Everything was extremely toxic and I was breathing it all in on a daily basis. I made it about a year before I was too weak to stand and too chemically sensitive to go out in public. Obviously, I couldn’t continue in construction, so I left and spent the next two decades rebuilding the health I lost in that year. It was hell.
The most important part of my recovery was keeping my air quality high. I am keenly aware of the air quality in any space I enter. It’s no secret that the air outside a building is often better than the air inside, and I can verify that personally. Most homes, including new homes, have dismal air quality. Commercial buildings are often little better, a problem compounded by the new plastic products inside, still offgassing chemicals from their manufacture. Every time I hear FHB talk about air-sealing, I’m reminded of all the toxic compounds going into the average building. I noticed in episode 499, that indoor-air quality is finally registering on the building science radar. That’s good, and it encourages me to ask this old, tired question again, how wise is the current obsessive focus on air sealing, air sealing, air sealing to the exclusion of occupant health? With so much toxicity built-in to the average new home, it strikes me as very unwise to seal that all in forever. Put some people and pets inside, a few years of poor housekeeping, pet mess, mold, dander, cleaning chemicals and poisonous “air fresheners” to hide the stink, and you’ve created the next public health catastrophe.
In a discipline where everything has a metric and a test, from R-values to J-values to blower door numbers, etc., what is the metric that building science uses to measure indoor air quality and guarantee it stays high? I appreciate how conscientious you all are and hope you’ll finally give this question the consideration it deserves.
Related Links:
Listener Feedback 2:
Nat writes: Hey Fine Homebuilding Podcast Crew, Hope you are doing well and that you have gotten to enjoy some of this gorgeous fall weather. I wanted to send a quick update on our flooring salvage (Podcast 489). The tips you offered were definitely helpful, especially the one about patience. Here are some other tips for anyone undertaking a demo project like this:
1. Get a tetanus shot. You will probably need it.
2. Get comfortable, functional PPE. Don’t skimp here: eye-protection, ear protection, dust masks or respirators, long sleeves, and sturdy shoes or boots are pretty much mandatory.
3. Limber up. A stretching routine and good physical therapist are not a bad idea.
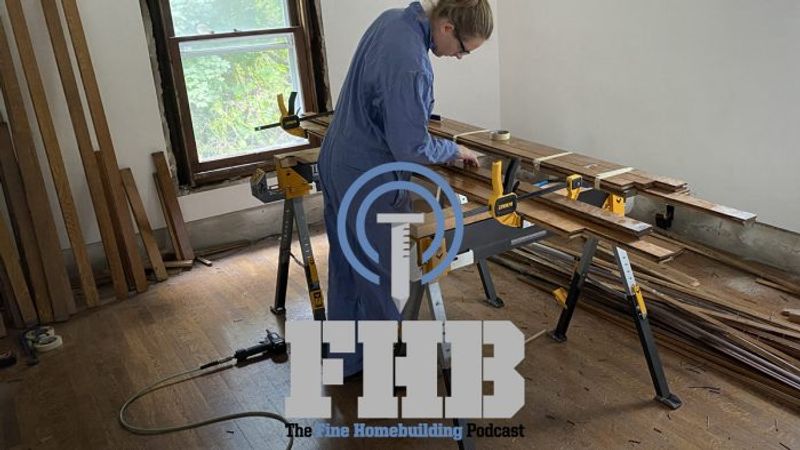
4. Find the right tools. Anything that minimizes bending over and maximizes production is going to go a long way here. For me, a framing hammer, long “Wonderbar” style pry bar, and reciprocating saw are all I needed to pop the flooring up with minimal damage and maximum speed (steady, but not fast in case you were wondering). Saw horses, a pneumatic denailing tool, and quick-clamps make bundling easier. (more below)
4. Dial in your process and get into production mode.
5. Have some good podcasts and music in the queue. Embrace the experience. You GET to salvage flooring!
6. Take time for fresh air and rejuvenation after each session. This is a marathon, not a sprint.
In case anyone is curious, this is our process:
1. Find the tongue side of the flooring and use a circular saw and oscillating multi-tool to cut the first-floor board (remember to set your depth). Cutting about 2 inches from the wall seemed to work well. 2 cuts may be required if you are leaving the base trim in place.
2. Using the oscillating tool, cut a rectangle at one end of the separated board and remove it. From this weakness, use your pry bar of choice to remove the strip you cut. This board will likely be face-nailed and should come up or split out pretty easily.
3. If you are trying to save as much square footage as possible, you will need to carefully pry at each nail and rotate the first few rows out until you have space for the reciprocating saw. Throughout this whole process it is important to treat every row of boards as if they are a single plank to minimize splitting and maximize production.
4. Once you can get your reciprocating saw under the flooring, cut each nail in the exposed row. The flooring should then want to pop out with very little persuasion. After trying a few different blades, I settled on a thick, “wood-with-nails”, demo type blade (9″ Milwaukee AX blades are my go-to). These blades have a thicker shank and don’t break as quickly as the thinner bimetal blades, and aren’t as expensive as the carbide tipped blades. The extra length reduces the strain on the shank and lets you use more of the blade as sections get dull. 5-packs can be bought for about $10 on sale and I get a couple hundred square feet removed per blade.
5. Once the boards are free, they go to the saw-horses for denailing. I was loaned an Air-Locker AP700 by a friend and it was so useful that I bought one for myself almost immediately. I can’t imagine doing this project without one.
6. After denailing, the boards are clamped together and then affixed to one another in manageable bundles with masking tape. The idea is that this makes them easy to transport and store, and helps keep them from twisting and warping until they can be installed.
We are able to pull about 10- sq. ft. per person per hour with this process. Our flooring is only 2 inches wide, so anything wider should go a good bit faster. We still have some clean-up and patching to do, but this project should save us somewhere between $5,000 and $7,000 in total, and I conservatively estimate it will be worth a tax-free $30/hr. when all is said and done – not a bad second job. We also love manual labor, we are keeping good material out of the landfill, we get to install flooring-with-character in our farmhouse rebuild, and my wife and I are having a shared experience (albeit “type-2 fun” at times). We also get to work in a time capsule – I have included some pictures of my favorite ads from the underlayment they used in portions of the house, a women’s journal from around 1916 (you can barely make out the date in the top-right corner of the cushioned heels/laxative ads page).
 |
 |
 |
 |
 |
 |
All of this makes the project worthwhile in our eyes, and if that wasn’t enough, some of our work is going back into the community: we were able to carefully remove and salvage all of the 8″ baseboard trim in the house, which, along with the doors and much of the other trim, went to a historic renovation downtown, a collaboration between our town and a local affordable housing non-profit. The house is nearing completion, and will become low-income housing for a lucky resident in the near future. While finishes may not seem too consequential, it is nice knowing that we saved the town and non-profit a chunk of change that can go back into the program and be used for more affordable housing projects.
That is our update. I hope it is helpful for someone out there. Thanks as always for the great content, Nat
Related Links:
Question 1: Do you need to accommodate shrinking lumber for interior staircases?
Barbara writes: Dear Podcast, I’ve been pondering a John Spier article in the October issue about stair stringer cut lines. Because the lumber will shrink along the short axis, John says to add 1/8″ to the riser height and step length to compensate. Makes sense. My question is: Does this apply to interior staircases or just deck stairs (?), because the article was actually about deck stairs. A quick answer is sufficient; then you can move on to more interesting listener questions.
Your faithful follower, Barbara
Related Links:
Question 2: Is my mudsill exposure considered uncommon?
fcrick on YouTube writes: My sill plate is embedded in the top of my foundation wall, so it’s only exposed on the outside and the top, and there is concrete in the way on the side, so it can only be seen from above, or from outside if the siding was removed. Is that unusual? Is there a reason that’s not more common? late 50s house in Seattle area.
Related Links:
Question 3: Building with a monolithic dome
Ethan writes: Hi there! I love your show and I’ve been listening nonstop for the past week. I would love to hear you guys discuss monolithic domes. I’m 22 and looking to build my first home which is sounding like a huge project. A three-story dome tower. Monolithic domes are sprayed from the inside with insulation and then concrete and I’d be putting the dome on a 2-story concrete circular tower with 1 or both first stories buried. I’m curious what you guys think about the process and how you would go about designing and building the interior with potential for observatory bedrooms insanely excellent R ratings for green energy and what not. Thank you guys!
Related Link:
END NOTES:
Members-only Aftershow Podcast 517: Building Homes With Good Indoor Air — Mike, Andrew and Patrick talk about building homes for chemically sensitive people and how modern construction materials and things in our homes and garages affect indoor air.
Check out one of our Project Guides: Siding & Exterior Trim!
Check out our FHB Houses:
Visit the Taunton Store • Magazine Index • Online Archive • Our First Issues • All Access
Help us make better episodes and enter for a chance to win an FHB Podcast T-shirt: www.finehomebuilding.com/podcastsurvey

If you have any questions you would like us to dig into for a future show, shoot an email our way: [email protected].
If we use your question we’ll send you a FHB Podcast sticker!
FHB Podcast T-shirts!
Represent your favorite podcast! Available in several styles and colors. Made from 100% cotton. Find the Podcast t-shirt and more cool products in the Fine Homebuilding Store.
| Fine Homebuilding podcast listeners can now get 20% off anything in the Taunton store, including Pretty Good House.
Use the discount code FHBPODCAST to take advantage of this special offer. |
 |
“Finally, knowledgeable people talking about building reasonably-sized, high-performance houses for normal people with real budgets!” — DanD, VA, 8/19/22, Amazon.com review |
We hope you will take advantage of a great offer for our podcast listeners: A special 20% off the discounted rate to subscribe to the Fine Homebuilding print magazine. That link goes to finehomebuilding.com/podoffer.
The show is driven by our listeners, so please subscribe and rate us on iTunes or Google Play, and if you have any questions you would like us to dig into for a future show, shoot an email our way: [email protected]. Also, be sure to follow Fine Homebuilding on Instagram, and “like” us on Facebook. Note that you can watch the show above, or on YouTube at the Fine Homebuilding YouTube Channel.
The Fine Homebuilding Podcast embodies Fine Homebuilding magazine’s commitment to the preservation of craftsmanship and the advancement of home performance in residential construction. The show is an informal but vigorous conversation about the techniques and principles that allow listeners to master their design and building challenges.
Other related links
-
- All FHB podcast show notes: FineHomebuilding.com/podcast.
- #KeepCraftAlive T-shirts and hats support scholarships for building trades students. So order some gear at KeepCraftAlive.org.
- The direct link to the online store is here.


