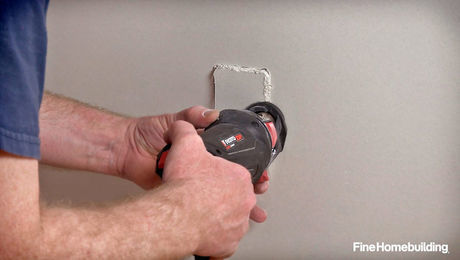
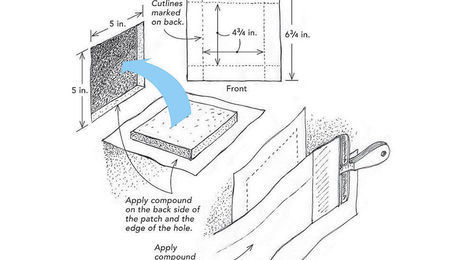
As a remodeling contractor in Pennsylvania, I often have to patch plaster walls. Unfortunately, “squaring up” a hole in a plaster wall to receive a drywall or rock-lath patch can be mighty frustrating. It seems the more I cut to square the hole, the more plaster falls out. As a result, I’ve found it easier to cut a piece of drywall to fit the ragged shape of the opening. But the patch has to be a good fit. If there are wide gaps around the edges, the filler tends to shrink and crack. The drawing shows a scribing method that I’ve developed to make an accurate patch quickly. Although it looks kind of complicated, the whole operation takes about five minutes.
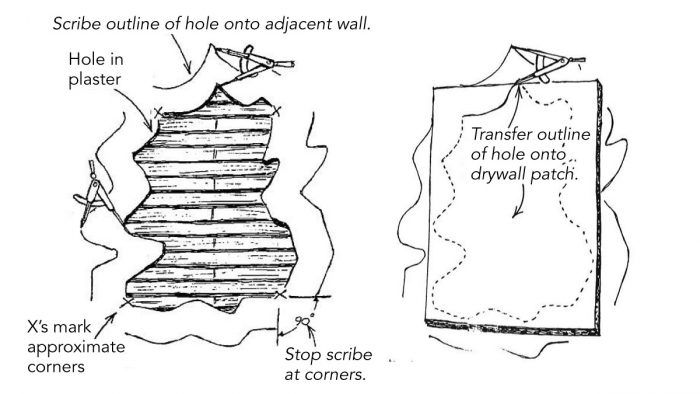
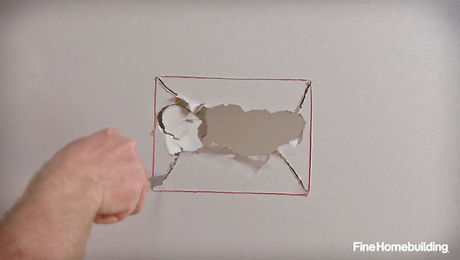
I begin by removing any loose plaster from the edges of the hole. Then I mark the approximate corners with X’s. They serve as registration points for starting and stopping the scribing, and their location isn’t critical.
Using a compass or a scribing tool, I scribe lines on the wall that duplicate the four edges of the hole. I usually set the distance between the pointer and the pencil between 3 in. and 4 in. While the setting is arbitrary, it shouldn’t be changed once set. As shown in the drawing, the top and bottom edges of the hole are scribed with the compass oriented vertically. The sides are scribed with the compass held horizontally.
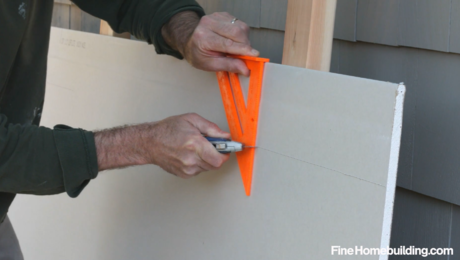
Next I cut a piece of drywall that is larger than the hole, but fits within the scribe lines. The one shown here is rectangular, but a rough patch can take on a pretty strange shape all by itself. I press the patch against the wall and, using the scribe marks on the wall, transfer the shape of the hole onto the patch. Now I can trim to the cutout line with a drywall saw and shave the edges as necessary with a utility knife for a perfect fit.
Mark Benzel, West Grove, PA
Edited and Illustrated by Charles Miller
From Fine Homebuilding #68


View Comments
This is the type of "tip" that I really appreciate - an elegant and straight-forward solution to a seemingly mind-boggling situation when encountered in the field.
Excellent tip! Thanks!