FHB Logo Facebook LinkedIn Email Pinterest Twitter Instagram Tiktok YouTube Plus Icon Close Icon Navigation Search Icon Navigation Search Icon Arrow Down Icon Video Guide Icon Article Guide Icon Modal Close Icon Guide Search Icon Skip to content
Subscribe
Log In
  • How-To
  • Design
  • Tools & Materials
  • Videos
  • Blogs
  • Forum
  • Magazine
  • Members
  • FHB House
  • Podcast
Log In
How-To

Retrofitting a Home Elevator

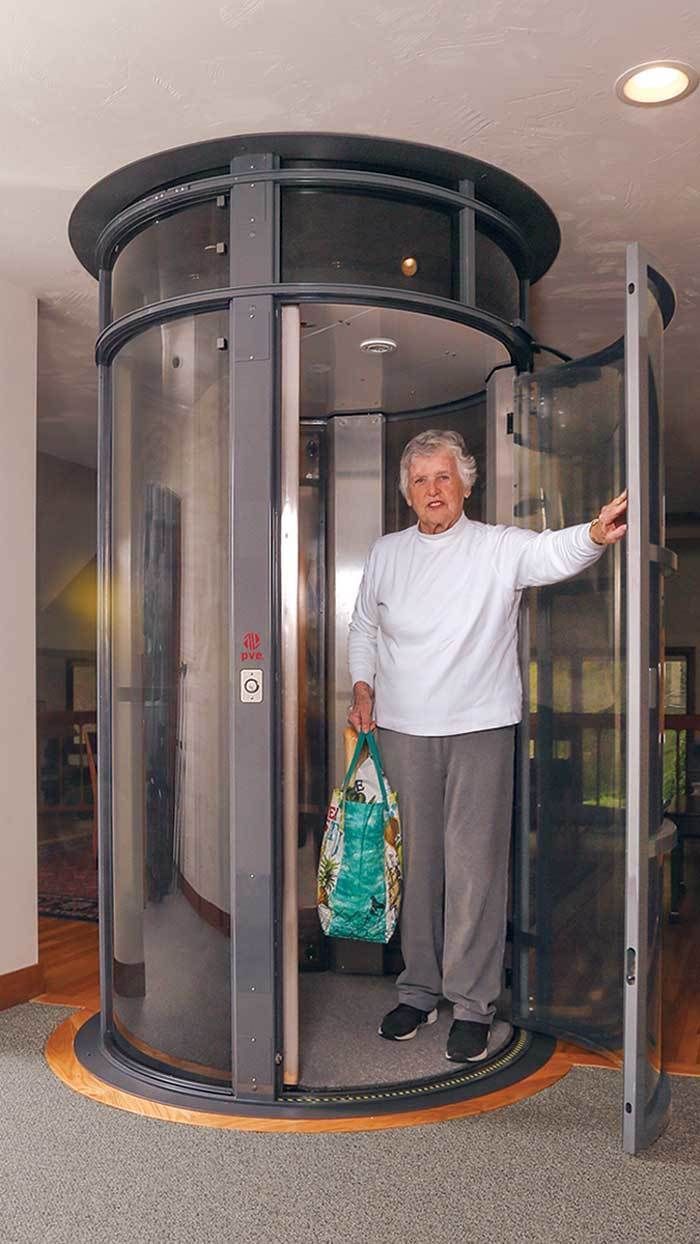
Powered by suction, pneumatic vacuum elevators are a low-maintenance, compact alternative to conventional lifts, plus they have a much more modern look.

By Kiley Jacques Issue 286 - Oct/Nov 2019
Maintaining the sightline. The location allows circulation around the entire unit and a clear view of the front pond. Custom finish work includes a 3-in. halfring of trim around the base. The PVE is quiet when in motion and easily accommodates a wheelchair.

Synopsis: Pneumatic vacuum elevators operate on air pressure, and unlike conventional elevators, they don’t require a pit, shaft, or mechanical room so they take up less space. Design editor Kiley Jacques describes the process of installing an elevator from cutting the openings to installing the tubes and connecting the parts and explains how adding this level of accessibility can make it easier for homeowners to age in place.


An increasing number of people are outfitting their homes to support aging in place. According to the AARP, nearly 90% of seniors last polled reported wanting to stay in their own homes well into their golden years. In the majority of cases, that means changes need to be made; some minor, others more significant. Among the suggested home modifications to support mobility, safety, and independence are home elevators —a rising trend.

Finding a fit

For this project, the homeowners opted for a pneumatic vacuum elevator (PVE), appreciating its compact fit. Unlike conventional home elevators, PVEs do not need a pit, shaft, or mechanical room. After reviewing the options, they settled on Pneumatic Vacuum Elevators’ PVE52 model, which is designed to make two to five stops and carry up to three people or 525 lb.

Corner blocking rounds out the opening, and plywood rings cover up the framing.
At the openings. To open the first floor, water supply and waste pipes, wiring, and HVAC ducts needed rerouting, which meant removing drywall and adding junction boxes. Floor joists were doubled on either side of the opening and a new header was installed to carry the cut joists. Corner blocking rounds out the opening, and plywood rings cover up the framing.

When determining where to put it, the clients and architect Stephen Lasar talked about having the elevator come up from the garage into the main entry foyer—in that location, they wouldn’t have needed to build a lift from the garage to the basement floor. But there was a large air handler in the way, and a significant amount of ductwork would have needed moving. It could have been done, but the occupants nixed the idea because the tube would have been almost in the middle of the dining room. They also discussed putting it behind the garage, but that posed a number of structural complications. Ultimately, they decided to run it from the basement floor through the entry hall and to the second floor. A mechanical lift gets them from the garage to the elevator.

Cutting the openings

Before installation, builder Rob Riebe, owner of Riebe Construction Co., and his crew put in 350 hours of prep time. The team was charged with removing the wall between the dining area and entry hall, cutting into two floors to create 54-in.-diameter openings, and excavating for the mechanical lift—this last task proved especially challenging when they discovered a huge boulder in the way. On the second floor, the crew moved a wall to gain 9 in. in the hallway, which provides 4 in. of clearance where the elevator comes closest to the wall. It was above the second floor that they needed to add the hoisting support beam. A bathtub located on the third floor made it challenging to install that beam, which had to be supported with stacked studs down to the foundation.​

Preparing for lift. The hoist chain is attached to a temporary steel rod, which is fastened to a ring with metal pins.

Starting point. Two crew members are stationed on the basement floor, two on the first, and one on the second to feed the tube sections up one at a time.

Installing the tubes

When the preparation work was done, an installation team from Connecticut-based Elevator Service Company came to measure the critical dimensions—PVEs have to be within 1⁄8 in. When all was confirmed, they arrived in four vans with all parts on board. The first day was devoted to offloading and assembling the components. Once the cylinder panels were snapped together within the frame, the crew moved the elevator into the house in three sections, starting with the topmost head unit, which houses the turbines, valves, and control cabinet. Then, they hoisted the first- and second-floor sections to the proper levels and moved them aside. Next, they set the bottom section level and plumb and attached the steel pins that would connect it to the section above. A bead of silicone sealant was applied around the entire top of the tube, and a 16-in. connecting ring was inserted between the floors. This sequence was repeated for each section.

Hoisting in sections. A new support beam was added to the third-floor joists to carry the pulley system and loads as the tube is lifted into position.

It took the four-member crew six days to finish the job—it was comparatively complex because of the two stops and tight squeeze on the second floor, plus the learning curve when working with this new type of elevator. After the homeowners’ long-anticipated inaugural ride, there was no doubt about the peace of mind their new PVE provides. With it in place, they foresee many mobile years ahead. “Making a home accessible is difficult and requires attention to detail,” Lasar says. “It is always good when one can combine accessibility and good design so that a person with a disability doesn’t feel second-class.”

Connecting parts. Silicone adhesive secures the rings that sit between each section. Steel pins lock the sections together.

How PVEs work

Pneumatic vacuum elevators operate on air pressure—much like the pneumatic tubes you see at a bank window. With an aluminum frame and polycarbonate panels comprising the exterior cylinder and a car made of steel, the self-supporting tube is driven by a suction assembly that houses the turbine engines, valves, and control board. Movement is the result of a high-pressure/low pressure environment. When turned on, the turbines draw air out of the tube, reducing the air pressure above the elevator cab to pull it upward. Lowering the pressure beneath the cab allows its descent. The cab comes to a stop when the air pressure is equalized and steel brakes are applied, locking it to the landing.


Kiley Jacques is design editor. Photos by the author, except where noted.

Drawing: Christopher Mills.

From Fine Homebuilding #286

To view the article, please click the View PDF button below.


More on home elevators:

Home Elevators – A residential elevator can reduce the price of your new home, and it’ll do the heavy lifting if you can’t.

A Hillside Cabin’s Unlikely Addition – A three-story tower solves steep-site problems by bringing the house to the cars.

Designing the Best Last House

Sign up for eletters today and get the latest how-to from Fine Homebuilding, plus special offers.

Signing you up...

This site is protected by reCAPTCHA and the Google Privacy Policy and Terms of Service apply.
See all newsletters
See all newsletters
×

Get home building tips, offers, and expert advice in your inbox

Signing you up...

This site is protected by reCAPTCHA and the Google Privacy Policy and Terms of Service apply.
See all newsletters
See all newsletters
View PDF

New Feature

Fine Homebuilding Forums

Ask questions, offer advice, and share your work

Log in or create an account to post a comment.

Sign up Log in

Become a member and get full access to FineHomebuilding.com

Up Next

Video Shorts

Featured Story

Replacing Old Shingles with a New Metal Roof

See how this old 1950s shingle roof was transformed and replaced with an exposed-fastener metal roof and new overhang size.

Featured Video

How to Install Exterior Window Trim

Learn how to measure, cut, and build window casing made of cellular PVC, solid wood, poly-ash boards, or any common molding material. Plus, get tips for a clean and solid installation.

Related Stories

  • Podcast 597: Members-only Aftershow — Mike’s Not-so-Forever Home
  • Lakeside Retirement Retreat
  • Pivot-Point Solution
  • Set for Life

Discussion Forum

Recent Posts and Replies

  • |
  • |
  • |
  • |
  • |
  • |
View More Create Post

Highlights

Fine Homebuilding All Access
Fine Homebuilding Podcast
Tool Tech
Plus, get an extra 20% off with code GIFT20

"I have learned so much thanks to the searchable articles on the FHB website. I can confidently say that I expect to be a life-long subscriber." - M.K.

Get home building tips, offers, and expert advice in your inbox

Signing you up...

This site is protected by reCAPTCHA and the Google Privacy Policy and Terms of Service apply.
See all newsletters
See all newsletters

Video

View All Videos
  • Podcast 597: Members-only Aftershow — Mike’s Not-so-Forever Home
  • Control Layers for a Remodel
  • Sponsored Content Low-VOC Paint-Tinting System
  • Sponsored Content Selecting the Right Paintbrush Size
View All

Retirement Homes

View All Retirement Homes Articles
  • Lakeside Retirement Retreat
  • Pivot-Point Solution
  • Set for Life
  • Retrofitting a Home Elevator
View All Retirement Homes Articles

BOOKS, DVDs, & MERCH

Shop the Store
  • Code Check Complete 3rd Edition
    Buy Now
  • 2023 Tool Guide
    Buy Now
  • Pretty Good House
    Buy Now
Shop the Store

Fine Homebuilding Magazine

  • Issue 318 - October 2023
    • Make Mudsills Square and Level
    • Turn Up the Heat With Induction Cooktops
    • The Fine Homebuilding Interview: Lloyd Alter
  • Issue 317 - Aug/Sept 2023
    • Finishing Drywall With Seamless Results
    • A Flat Roof in a Cold Climate
    • Compact Cordless Shop Vacs
  • Issue 316 - July 2023
    • Timber-Framed Solar Canopies
    • Build a Transom Above a Stock Door
    • Understanding Toilet Design and Efficiency
  • Issue 315 - June 2023
    • How to Craft a Copper Roof
    • 5 Lessons from Building in a Cold Climate
    • The Advantages of Cellular PVC Siding
  • Issue 314 - April/May 2023
    • 7 Options for Countertops
    • Tool Test: Wood-Boring Bits
    • Critical Details for Ductless Heat Pumps

Fine Homebuilding

Follow

  • YouTube
  • instagram
  • facebook
  • pinterest
  • Tiktok
  • twitter

Newsletter

Get home building tips, offers, and expert advice in your inbox

Signing you up...

This site is protected by reCAPTCHA and the Google Privacy Policy and Terms of Service apply.
See all newsletters
See all newsletters

Membership & Magazine

  • Online Archive
  • Start Free Trial
  • Magazine Subscription
  • Magazine Renewal
  • Gift a Subscription
  • Customer Support
  • Privacy Preferences

Taunton Network

  • Green Building Advisor
  • Fine Woodworking
  • Fine Gardening
  • Threads
  • About
  • Contact
  • Advertise
  • Careers
  • Copyright
  • Terms of Use
  • Site Map
  • Do not sell or share my information
  • Privacy Policy
  • Accessibility
  • California Privacy Rights

© 2023 The Taunton Press, Inc. All rights reserved.

X
X
This is a dialog window which overlays the main content of the page. The modal window is a 'site map' of the most critical areas of the site. Pressing the Escape (ESC) button will close the modal and bring you back to where you were on the page.

Main Menu

  • How-To
  • Design
  • Tools & Materials
  • Video
  • Blogs
  • Forum
  • Reader Projects
  • Magazine
  • Members
  • FHB House

Podcasts

  • FHB Podcast
  • ProTalk

Webinars

  • Upcoming and On-Demand

Podcasts

  • FHB Podcast
  • ProTalk

Webinars

  • Upcoming and On-Demand

Popular Topics

  • Kitchens
  • Business
  • Bedrooms
  • Roofs
  • Architecture and Design
  • Green Building
  • Decks
  • Framing
  • Safety
  • Remodeling
  • Bathrooms
  • Windows
  • Tilework
  • Ceilings
  • HVAC

Magazine

  • Current Issue
  • Past Issues
  • Magazine Index
  • Subscribe
  • Online Archive
  • Author Guidelines

All Access

  • Member Home
  • Start Free Trial
  • Gift Membership

Shop the Store

  • Books
  • DVDs
  • Taunton Workshops

More

  • FHB Ambassadors
  • Reader Projects
  • Podcast
  • FHB House
  • Customer Support

Account

  • Log In
  • Join

Newsletter

Get home building tips, offers, and expert advice in your inbox

Signing you up...

This site is protected by reCAPTCHA and the Google Privacy Policy and Terms of Service apply.
See all newsletters
See all newsletters

Follow

  • YouTube
  • instagram
  • facebook
  • pinterest
  • Tiktok
  • twitter

Join All Access

Become a member and get instant access to thousands of videos, how-tos, tool reviews, and design features.

Start Your Free Trial

Subscribe

FHB Magazine

Start your subscription today and save up to 70%

Subscribe

We hope you’ve enjoyed your free articles. To keep reading, become a member today.

Get complete site access to expert advice, how-to videos, Code Check, and more, plus the print magazine.

Start your FREE trial

Already a member? Log in