
Problem-Free Pocket Doors
Follow these installation guidelines and your pocket doors will work for a lifetime.
Synopsis: Pocket doors are sometimes a great solution to a space problem. Unfortunately, they can be tricky to install and to align precisely. In this article, finish carpenter Jim Peterson provides a step-by-step lesson in making sure that your pocket doors are installed securely and accurately, and that they remain free of problems for years to come. He discusses how to choose hardware, prep the opening, build the pocket, and prep and hang the door.
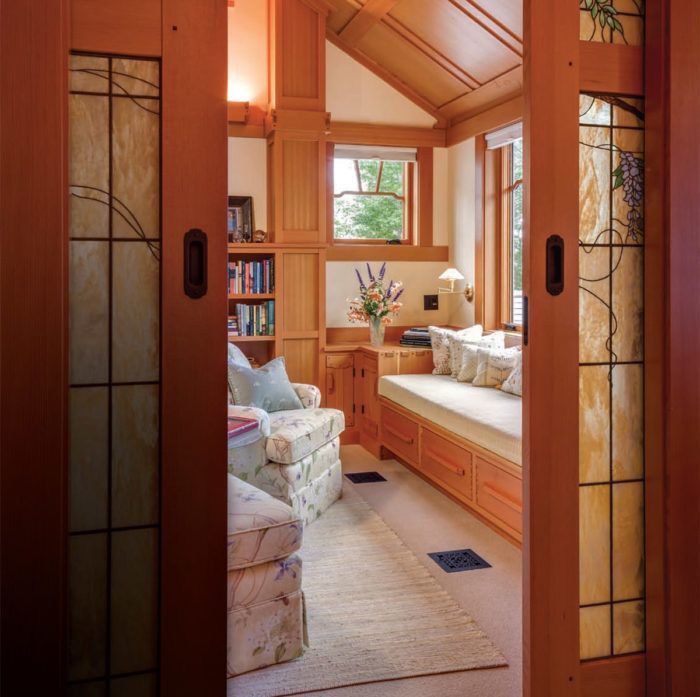
Because they’re a great space saver, pocket doors are often the only way to make small rooms accessible. A tiny half-bath carved from an existing floor plan is a perfect example. But pocket doors aren’t just for tiny baths and town-house closets; they’re also a classy way to separate larger living spaces, such as the pair of biparting doors separating the library or dining room in a large manor house. Unfortunately, pocket doors have a well-deserved reputation for being finicky. Sometimes pocket doors don’t line up with their jambs, sometimes they rub on the floor or pocket, and sometimes they just fall off the track.
Some of the frustration builders have with pocket doors is caused by the setup they’re using. Most builders either use a fully assembled prehung pocket door supplied by a door shop, or a pocket-door kit from a lumberyard or home center. Unfortunately, both types have flimsy stud walls made from cheap wood and sheet metal. This makes them susceptible to flexing and bending, which causes the door misalignment and rubbing that builders and homeowners complain about. Rather than deal with these problems, I build my own door pockets and use high-quality European hardware. In the more than 10 years that I’ve been installing pocket doors this way, I have yet to get one callback related to pocket-door problems.
Match The Hardware To The Door
My first step for a pocket-door installation is determining the size, weight, and thickness of the door planned for the pocket. This is important because the hardware I use is determined by the width and weight of the door. The size of the pocket is also determined by the door dimensions. Once I’ve matched the door to the hardware, I can get the rough-opening requirements from the hardware manufacturer. The hardware packaging and the manufacturer’s website contain detailed installation instructions and measured drawings for sizing the rough opening and door pocket correctly.
My favorite pocket-door hardware comes from Häfele and is available in two versions. The lighter-duty version, the HAWA 40, can handle doors up to about 80 lb. The HAWA 80 is rated for doors up to 176 lb. If a door weighs 70 lb. or more, I get the HAWA 80, as maxing out the lighter-duty hardware eventually bends the track or wears out the rollers. The stronger version also makes it easy to hang really heavy doors. The secret is the hanging hardware, which allows the door to pivot during installation and removal and lets you connect the top of the door to the rollers and the track one set of rollers at a time.
Another big plus of this hardware is that both versions have only 1⁄8 in. of space between the bottom of the track and the top of the pocket door. That’s just enough room to fit a 1⁄16-in.-thick wrench for removing the door from the rollers and hanging hardware. These tight tolerances allow me to set a pocket door’s head casing at the same height as the head casing on other bifold, sliding, and swinging doors, rather than setting it above. It’s the only hardware I’ve found that can do this.
Prepare The Opening And The Pocket
Pocket doors require a rough-opening width that’s at least twice the width of the door, plus at least one extra inch for jamb and shim space. When the HAWA 80 hardware is used (as on this job), the rough-opening height must be at least 2-3⁄4 in. taller than the door to allow for the track, the hanging hardware, and the floor guide. I always ask the general contractor and the framers to place structural headers above a pocket door as high as they can. I want to fur it down myself using LVL or plywood, which won’t shrink and twist as it dries, unlike ordinary framing lumber.
For a pocket in a 2×4 wall, I install the pocket-door track and bumper and then create the pocket sides with 3⁄4-in. plywood, using pocket screws for fastening. I’m careful to keep the plywood flush with the rest of the framing while I fasten it on three sides. When the door is on a concrete slab, I use concrete screws and Simpson Strong-Tie L90 L-brackets for fastening the plywood to the floor. I like using plywood because it goes up fast and results in a strong wall. The continuous layer of plywood also helps to deaden the sound of a rolling pocket door. For 2×6 and thicker walls, I prefer to build pockets from 1-3⁄8-in. smooth-faced (flush) solid-core interior doors. I use the doors because they have the same attributes as plywood and don’t twist like dimensional lumber.
Hang The Door
Unlike swinging doors, pocket doors have unbeveled edges and aren’t bored for a lockset, but I still have prep work to do before hanging them. With my door bench set up in another room, I begin prepping a pocket door by creating the recesses in the top of the door to accommodate the U-channels. I do this using a homemade router template and a router with a template collar. Then I put a groove in the bottom of the door with an edge guide and a slot cutter. The groove is for the bottom guide, which keeps the door centered in the pocket so that it opens and closes without hitting the sides.
I plumb the strike-side jamb, making sure that the door edge will contact it fully from top to bottom. I then hang the door from the hardware. Before installing the pocket-side jamb on the pocket side of the opening, I kerf both sides for brushed weatherstripping that I install on both sides of the pocket. The weatherstripping prevents seeing inside the pocket, where dust and pet hair tend to accumulate. I leave a 5⁄16-in. space between jamb and door to provide room for the brushes. After installing the jambs on the opening, I then install the casing. If the casing has mitered corners, I pocket screw and glue the head casing to the sides, forming an upside-down “U.” After letting the glue set for about 30 minutes, I install the trim as a unit, which keeps the miters tight and coplaner.
Prep The Opening And Build The Pocket
| Fasten the strike jamb. Using opposing shims, plumb the strike-side jamb, and fasten it every 8 in. with pairs of trim-head screws. A 6-ft. level ensures that the jamb is straight throughout its length so that it will make full contact with the edge of the door. |
|
|
Install the track. Fasten the track to two layers of 3⁄4-in. plywood attached to the bottom of the structural header. The plywood provides a straight, twist-resistant surface and bridges the gap that’s in the center of a two-ply header, which is where the track-mounting screws go. |
 |
|
Close the pocket. With the track in place, fasten the second side of the pocket to the subfloor and surrounding framing with pocket screws. It’s important to keep the plywood in the same plane as the surrounding framing. Any variation will prevent the drywall and casing from lying flat. |
 |

 |
Rock-solid Framing A straight header with a well-fastened, full-width plywood bottom is the best mounting surface for the pocket door’s aluminum track. The 3⁄4-in. plywood sides on the pocket resist flexing better than the manufactured pockets provided by door suppliers and ready-to-assemble pocket-door kits. Pocket screws in the plywood connect the pocket to the subfloor and the framing. |
Prep And Hang The Door
|
Prep the door for hardware. The HAWA 80 has two aluminum U-channels for receiving the hanging hardware. A plywood template clamped to the door and a router with a top-guided pattern bit and guide bushing create a pair of accurate mortises. |
 |
|
Help with heavy doors. Fastened with four screws, the 1-in.-wide by 1-1⁄4-in.-deep U-channels receive the rollers and make it easier to hang the door. |
 |
|
Cut a groove. Using a fence and a 3⁄8-in. straight bit, cut a groove in the bottom of the door for the plastic floor guide that keeps the door centered in the pocket. Taking several passes ensures the right depth without overheating the bit. |
 |
|
Plan for repairs. Create an opening in the track with a 1⁄2-in.-dia. carbide-tipped router bit so that the rollers can be replaced if necessary. Since the roller doesn’t reach the opening even when the door is fully closed, the door’s operation is unaffected. |
 |
|
Hang time. Slide the pocket-side hanging hardware, which rotates for easier installation, into the aluminum U-channel on the top of the door before tightening the locking bolt with Häfele’s 1⁄16-in.-thick wrench. With the door pushed partway into the pocket, slide the second roller into the second U-channel. |
 |
 |
Removable stops A properly installed pocket door is removable for finishing and repairs. The rough opening should be sized so that the width of the finished opening is 1⁄8 in. wider than the door, not including the stops. This ensures that when the stops on the pocket side of the opening are removed, the door can be pulled from the opening without damage. |
For more photos and details, click the View PDF button below:

View Comments
How were the pocket screw holes in the plywood done? Which jig did you use? I would like to do this on site with a jig that is portable and, preferably, when the plywood is in place. But I am unclear how to clamp a jig to the plywood under these circumstances.
That is great! Thanks for the article. I would like to get two HAWA 40 for my basement remodel but I am only finding prices above $400 each including track. I wonder where Jim has purchased the HAWA 40 for $200?
PeterH1,
Go to kregtool and look for Kreg Jig R3. You also need the clamp shown or something that will clamp the Jig R3.