
How to Trim a Hollow-Core Door to Height
Builder Rick Arnold shows how to make a clean cut and then block in the bottom of the door.
A clean, efficient way to measure, mark, cut, and fill a hollow-core door
Occasionally, especially on re-cuts, you have to cut a door above where there is solid material, and you can’t just leave the bottom of the door open. In this video, I’ll demonstrate how to cut a door and then block in the bottom so it doesn’t warp over time and it has a nice solid bottom.
More Door Resources
Hinge adjustment for a door’s final fit
A Custom hinge-mortising template
Video: Simplify door installation
First, I’m going to wrap the bottom of the shoe of my circular saw with masking tape to protect the door from getting scratched and dirty. On this door, I’m going to measure up 2-1/8″, which is not unheard of in houses where the flooring and framing aren’t planned well. I’ll make a few marks, and then, using a straightedge and a utility knife, score a line all the way across. That helps break the paint and the fibers in the surface of the door so you get a clean cut. I’ll then place my saw with the blade just below the line I just made, and then I’ll make a mark next to the edge of the base of the saw in order to locate a straightedge to guide my cut. I’ll measure the distance up to this mark and then make a mark the same distance up on the other side of the door. Now I can clamp the straightedge (in this case, a scrap of trim material) to the door to keep my saw running straight when I make the cut.
Now I will cover the knife cut I made earlier with masking tape in order to keep the circular-saw blade from chipping the edge of the wood as it rotates up and out of the face of the door. It’s not entirely necessary to wrap the tape all the way around the other side of the door, because the blade plunging into the underside is much less likely to cause chipping, but I go ahead and do it anyway to be on the safe side. Then, I run the circular saw across the door, alongside the straightedge I’ve secured, to make my cut.
After making the cut, I’ll remove some of the foam filler material in the bottom of the door to make room for the blocking. This can simply be done with a wide chisel. I can gently pry against the inside edge of the door if the foam is in there tight.
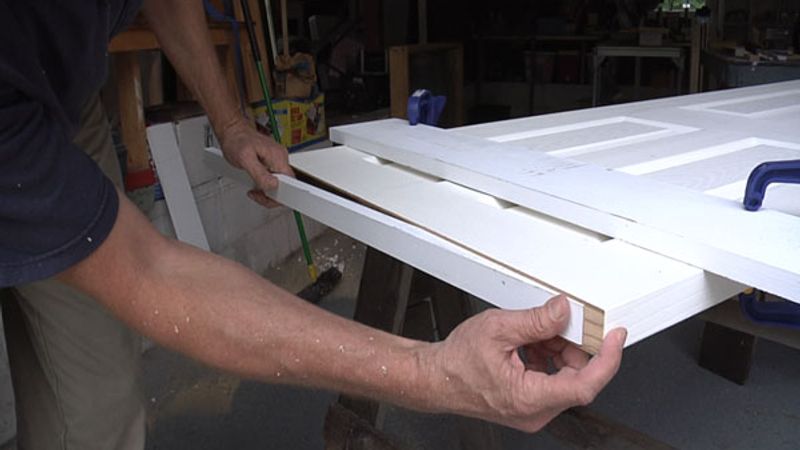
When I’m ready to cut my blocking, I measure the width of the opening in the bottom of the door at the edges. I don’t measure in the middle because the door is flexible enough that warping could give me an inaccurate measurement. After ripping a piece of wood on the tablesaw, I slip it into the door to check for fit, and I mark it and cut it to length. Before I put the piece of wood in, I run a bead of glue on the inside edge of each face of the door. I use a hammer to tap the filler piece into position, being careful not to push it in too far. Once one end is flush, I’ll tack it in place with my brad nailer, then work my way down the bottom of the door, tapping and nailing as I go. I use brads because they leave very small holes that will fill easily when I paint the door.
For more information on this topic:

View Comments
When I need to fill the bottom, I've found that sometimes the facing on the block you just cut out will detach from the block with a little encouragement from a chisel, or if need be, run it through the tablesaw to remove the facing or veneer. I'll also skip the brad nailer, and throw a couple of clamps on that glued in piece. That way you avoid getting the nailer/compressor out -- and hey, it was glued in before, wasn't it?
Instead of cutting a new piece of filler wood, I just pry apart the piece of door I cut off to retrieve the existing filler. It is already the exact size I need and I don't have to go looking for material to use as a filler. The cut-off door section is easy to pry apart and with a little touch up with a chisel and block plane, I am done in no time. Also, the existing filler fits so tightly I don't need any fasteners.
In less time than the author took setting up his cut I can build a jig that eliminates most of his steps. Take a four foot piece of 1" x 8" MDF. Add a piece of 1-5/8" door stop to the MDF, flat face to flat face about 1" in from one edge of the MDF. Using a four foot level to hold the door stop straight, glue and screw the stop in place. Now thake your skillsaw and cut the 1" x 8" running the edge of the saw shoe right up tight to the edge of the door stop. 1" x 8" works for us west coasters who use a Skill worm-drive or similar saw. Those big old side-winders may require a wider board. Now mark each side of your cut on the face of the door out near each edge. Align each end of your jig with each mark and clamp in place. (The reason that I set the stop 1" from the edge of the 1" x 8" is so that you can clamp behind the stop, not on top of it. If you clamp on top of the stop, and try to cut an 1-3/4" door with a 7-1/4" worm drive, the saw has to be set low enough that it hits the clamp.) Run your saw along the bottom of the door and your cut is done. The jig prevents tear-out better than tape and a knife cut. Since it sits between the saw and the door, it prevents maring of the door by the saw without all the tape. Since you set the edge of the jig on the actual line you want to cut, it eliminates mistakes and inacuracies than can happen when you set the guide away from the cut. Finally, with the jig you can cut a 0 to 1/16" taper, if needed, cleanly. In the example above, it doesn't look like the hinges had been set yet. If that's the case I'd cut both ends of the door. That way you maintain the proportions of the top and bottom rails(nothing looks stupider than a panel door with a bottom rail narrower than the top) and by cutting both ends you may not cut away the blocking on either end eliminating the need for a plug. If I needed a plug, I agree with the previous poster. Use your table saw and chop saw to clean off the old plug for reuse and use clamps no nails.
(http://top4biz.com )
Online Store,Get Name Brand Fashion From 12USD Now!
Lv,Gucci,Prada,Coach,Chanel Women sandal is $30
Ill go along with the previous comments. I got tired of measuring backset for various skill saws, and if you go off track in to the door yer hooped. The orudent person would use a jig that would not allow the saw to off track in the wrong direction.
I carry a jig in the truck which wraps around the door on both sides, square to the side, Not 3/4mdf. but rather 1/4" baltic birch. I dont score with paint grade doors, but would with veneer doors. The jig acts as a zero clearance saw guide and is held in place with Jorgenson spring clamps. I too use the cut off inset and simply reglue it with a few of the same spring clamps, using my jig as a caul to distribute the pressure evenly. Glued up and with a couple of passes of a block plane to chamfer the edges and all is well. No compressor, no table saw; and if you use a slower cordless saw, the mess is minimal.
used iterations of this jig for 20 years now, even used it to trim down about 40 metal exterior doors on one contract.
You use a hacksaw to cut through the wraparound on each side, cause the skill saw will not do nice things to them unless they are precut.
these doors were foam filled, so after deburring the edges of the metal, which will cause serious damage to flesh otherwise, a 71 router plane was used to pare out the foam fill appropriately. Then the blocking was reglued in place, and the wrap-around sweep kept the cut edges hidden and in place.
Eric
I have messed up some door installations. so this article gave me some good ideas
Benjamin Marcus Raucher