
The Trick to Hanging French Doors
Knowing where to place the shims is half the battle.
Synopsis: From checking the opening before you begin to the exact locations of shims and nails, this article walks readers through a tricky installation of interior double doors. Drawings illustrate common problems and how to fix them.
The old adage “Children should be seen and not heard” must have been coined by a French-door salesman. Most people I know like French doors. They’re an elegant way to cordon off rooms without visually separating them. In fact, they act more like windows between rooms than doors.
Hanging French doors, however, can be frustrating. Getting two doors, either of which may be slightly warped, to meet up perfectly when installed in the almost certainly imperfect framing of a house requires several levels of adjustment. Correcting the rough opening or fixing an out-of-plumb, or cross-legged, opening might call for the use of a sledgehammer, which doesn’t take much technical skill. Making adjustments for an out-of-level floor or a bowed door, on the other hand, takes a little more finesse.
Assessing The Rough Opening
Rough openings are rarely perfect, but a door jamb must be plumb and level. Some properly placed shims will correct most rough openings.
| Measure The Rough Opening
After checking the width of the rough opening, the author checks the height. A safe height is 2 1⁄2 in. more than the door’s height, or 82 1⁄2 in. for a standard interior door. If the door manufacturer hasn’t specified the rough opening’s width, a rule of thumb is to measure the width of the doors, then add 2 in. |
 |
| Opening Should Be Plumb And Level
First, check the floor for level. If the floor is more than 1⁄4 in. out of level across the rough opening, measure the difference and trim the high side’s jamb leg to even it out. Next, use a door hanger’s level, or a short level and long straightedge, to check the rough opening for plumb. If it’s out of plumb, shims can be used to fix it. Check the wall on both sides of the rough opening for plumb. If the wall is out of plumb, use a sledgehammer and a block of wood to realign it. Hold the block of wood against the bottom of the wall to protect the drywall, and whack it with the sledge. The base molding will hide any damage to the drywall. |
 |
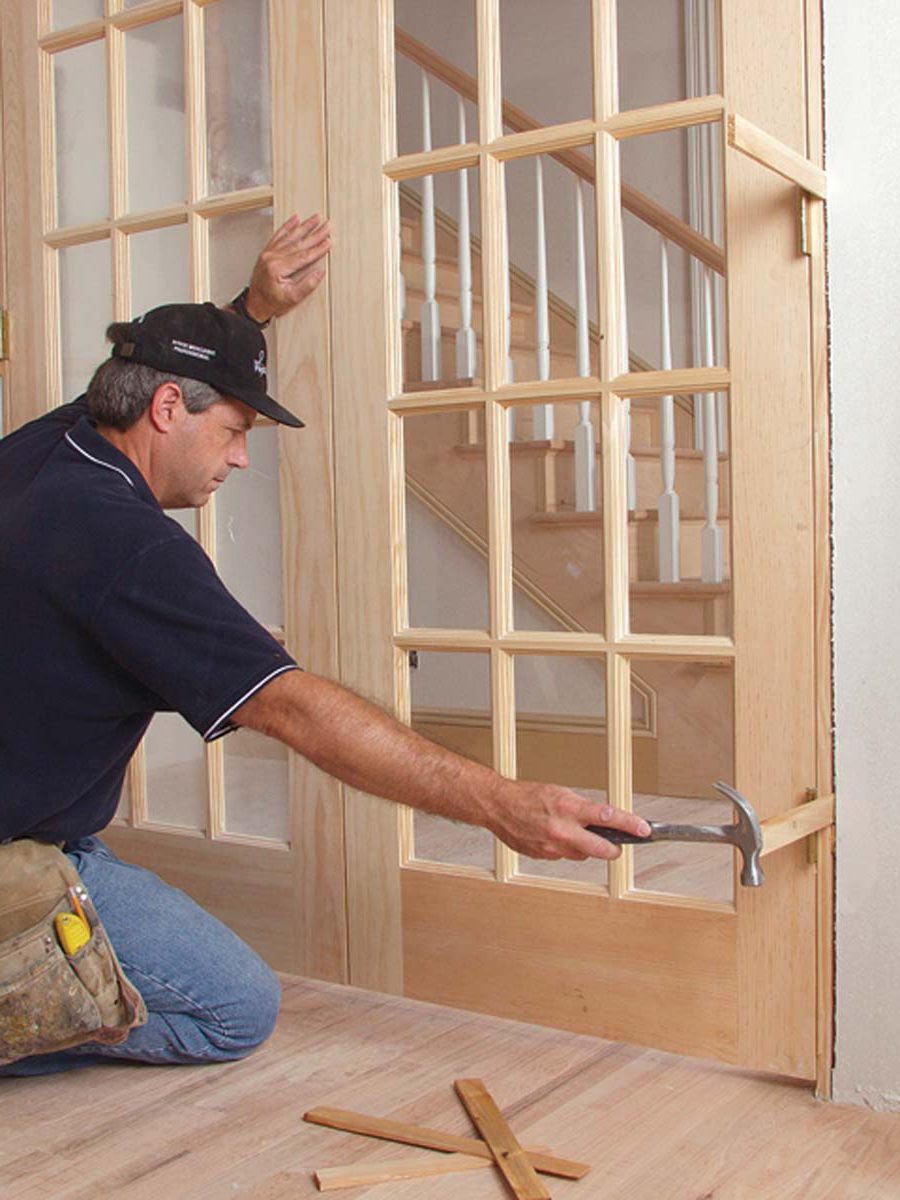
| Shimming The Rough Opening
Measure the hinge locations on the door; shim one side of the rough opening at these heights. Having shims behind each hinge transfers some of the door’s weight to the stud. In addition to plumbing the jamb, shims correct for twisted studs. Keep the shims’ build-out small — 1⁄8 in. is ideal — so that there’s room to shim the other side. Shim at the top hinge location first. Use a level to plumb the shims at the bottom, then middle hinge locations. When one side is done, set the jamb. |
 |
Install Jamb Into Tuned Opening
With one side of the rough opening plumbed, set the jamb. Additional shimming will be necessary to fine-tune the jamb for a perfect fit.
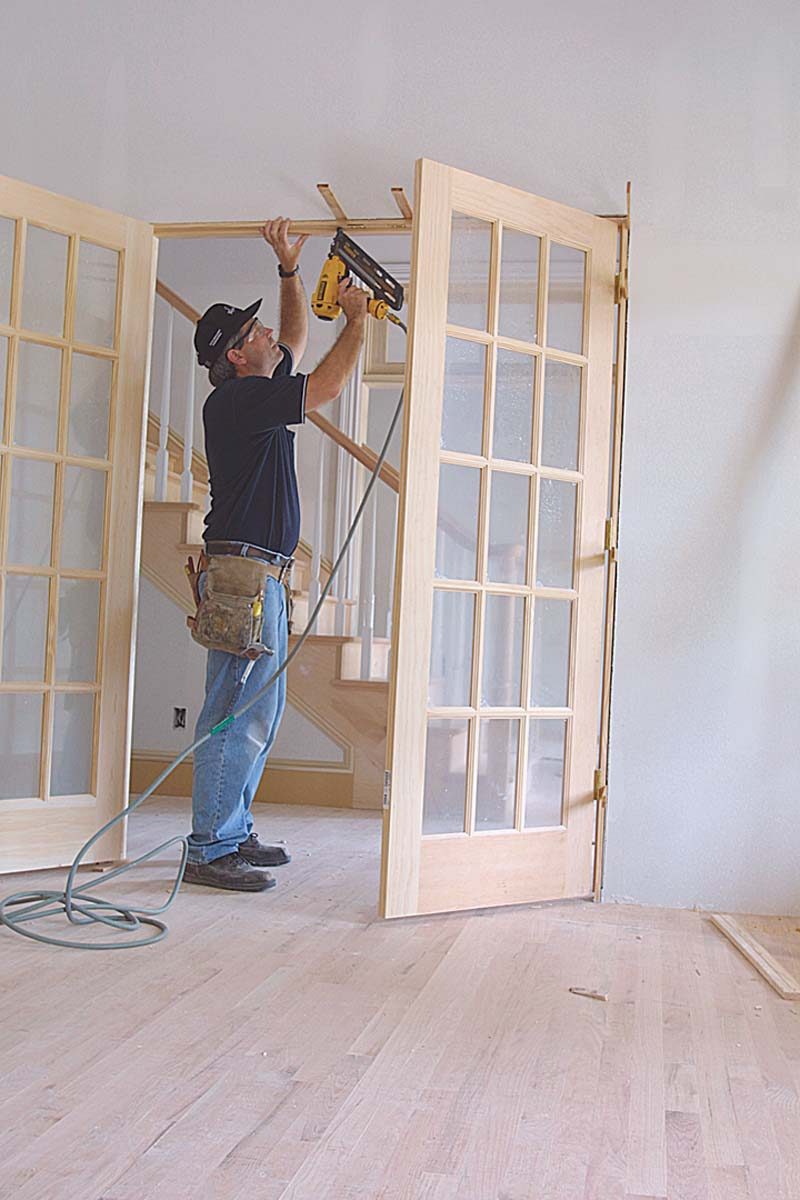
| Center The Jamb To The Wall
Remove the doors, insert the jamb into the opening, and drive one 21 ⁄2-in. finish nail on each side of the stop through the shims, starting at the top. Keep the jamb flush to the drywall, and check that it’s square to the wall as shown in the drawing below. Fastening the other side is similar, except here you install the shims as you go. Start behind the top hinge, then do the bottom, and finally the middle, checking all the while that the jamb is plumb, square, and flush with the drywall. |
 |
| Hang The Doors And Adjust
No matter how perfectly you set the jamb, it will need adjusting. Check the gaps around the doors to make sure they’re equal. Make the necessary adjustments to the jamb (drawings, facing page). Ideally, you’ll have to make only minor adjustments to get the door right. And that’s good because in the 62-in. rough opening, 60 in. is given over to the doors, 11 ⁄2 in. to the jambs, and 1 ⁄8 in. to the shims on the first stud, which leaves about 3 ⁄8 in. for final shimming. |
 |
| Securing The Jamb
Add shims where they are needed to correct bows or twists in the jamb, and nail the jamb in place. Be certain to nail through the shims. Close the doors and recheck the gaps. Use a razor knife to score the shims, and snap them off flush with the drywall. |
 |
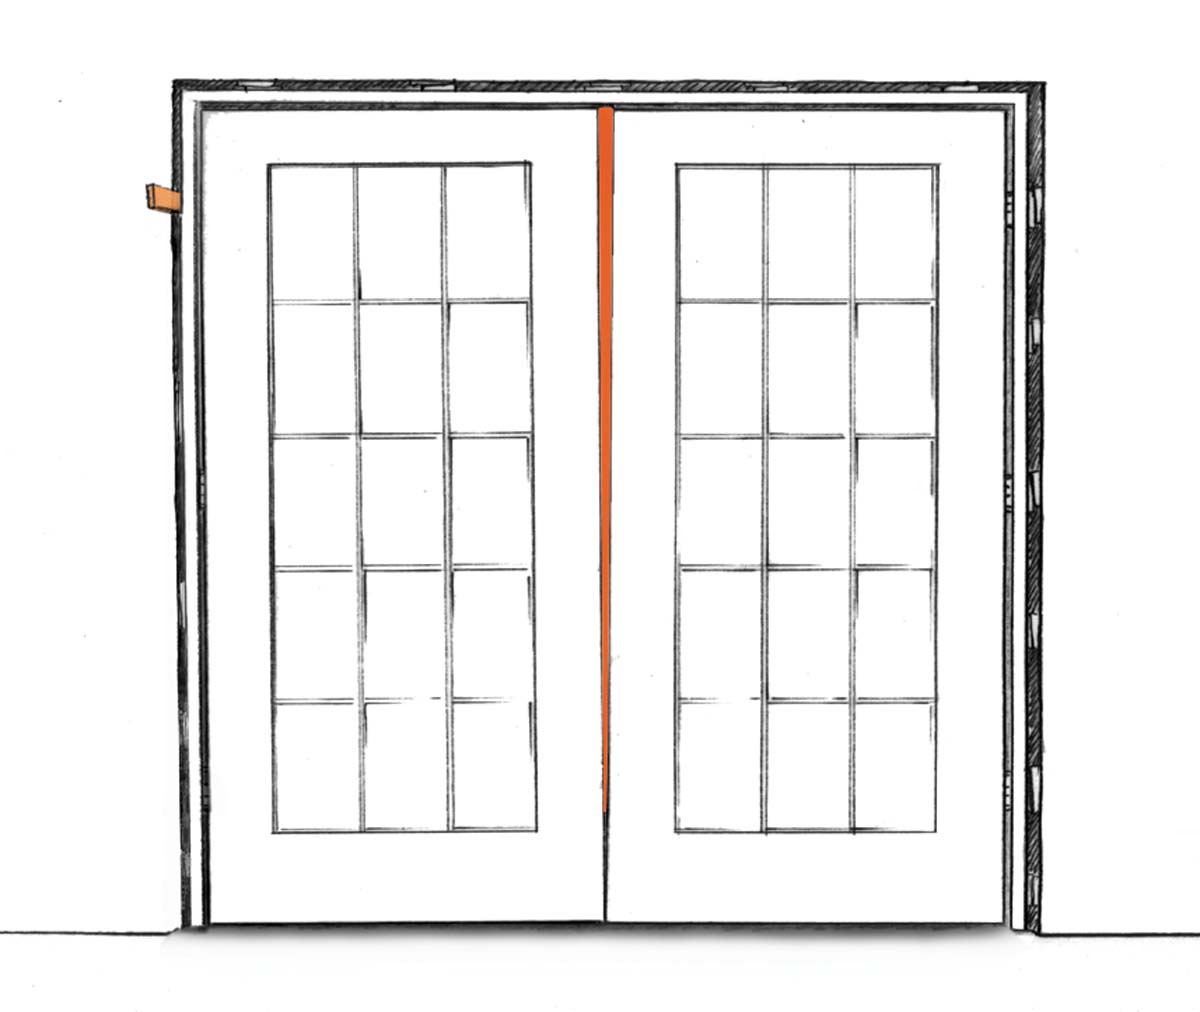
The Ideal Door Installation
French doors should have a nickel-thick gap all the way around. Wood doors shrink and grow with humidity. This gap ensures clearance for the doors to open and close even when swollen with moisture. If you want to be really good, gauge the humidity when you’re installing the doors. If they’re already swollen, make the gap between them a bit tighter so that it doesn’t open objectionably when the wood dries out. If the doors are dry when hung, allow a little extra room for growth. If gaps are uneven, the drawings below show how to get them right.
| Problem: There’s an uneven gap between the door and head jamb and wider gap at the bottom between the doors.
Solution: Tap in an extra shim behind the bottom hinge as shown to even the gaps around the doors. |
Problem: There’s a wider gap between the doors near the head jamb and too little at the bottom.
Solution: Shim behind top hinge as shown. |
Problem: There’s an even gap between the doors, but they aren’t aligned.
Solution: One of the jamb legs is too long. With a handsaw, shorten the longer leg by the difference between the two doors. Then pry down on the top of the cut jamb leg. If it doesn’t move, cut or pull the nails holding that leg, lower it, and renail. |
Problem: The doors aren’t in plane.
Solution: Check the walls for plumb, and adjust with a sledge as in the bottom right drawing on p. 63. If both walls are plumb, a door is bowed. Replace it, or split the difference by knocking each wall a little out of plumb. |


For more photos, illustrations, and details, click the View PDF button below:
