FHB Logo Facebook LinkedIn Email Pinterest Twitter Instagram Plus Icon Close Icon Navigation Search Icon Navigation Search Icon Arrow Down Icon Video Guide Icon Article Guide Icon Modal Close Icon Guide Search Icon Skip to content
Subscribe

In every issue you'll find...

  • Expert insights on techniques and principles
  • Unbiased tool reviews
  • Step-by-step details to master the job
  • Field-tested advice and know-how
Subscribe Now!
Subscribe
  • How-To
  • Design
  • Tools & Materials
  • Videos
  • Blogs
  • Forum
  • Magazine
  • Members
  • FHB House
  • Podcast
  • Join
  • Log In
Subscribe

Fine Homebuilding Project Guides

Drywall

Guide Home
Chapter
  • Drywall Basics
  • Tools and Materials
  • Hanging Drywall
  • Taping and Sanding
  • Special Installations
  • Drywall Repairs
  • Plaster
Building Skills

How to Choose and Mix Ready Mix Joint Compound

Patrick McCombe explains how to choose ready mix mud and how to mix it so it goes on easily and spreads smooth.

By Patrick McCombe

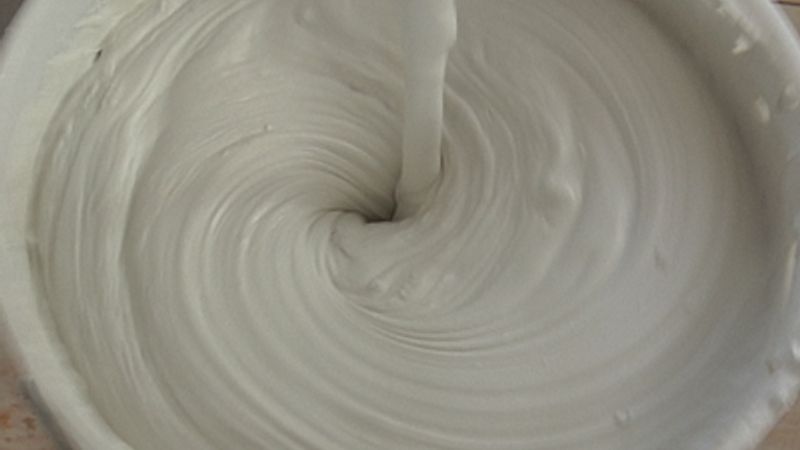
Ready mix joint compound comes in a variety of formulas including all purpose, lightweight, and with dust control. In this Building Skill we’re going to talk about ready mix mud and I’ll show you how to mix it so it goes on easily and spreads smooth.

Here are some qualities to consider when choosing between types of drywall mud:

All-purpose joint compound

  • Sands to a smooth finish
  • Resists dents and scuffs
  • Is the heaviest type of compound

Lightweight joint compound

  • Is about 20-lb. less per 5-gallon pail than regular compound
  • Sands with less effort
  • Doesn’t sand as smooth
  • Scratches easily

Dust control

  • Sheds heavier dust when sanding, which tends to fall to the floor instead of staying airborne

There are a couple of common ways to mix compound:

  • A heavy-duty drill fitted with a paddle or auger style mixing attachment is the easiest and most efficient method
  • A large “potato masher” mixer works if you don’t have a heavy-duty drill, but it requires more physical effort


More Drywall Articles and Videos

Video:

Hanging Drywall

Taping and Mudding

Inside Corners

How to install and finish drywall

How to Install and

Finish Drywall Fine Homebuilding members-only icon

installing-shingles-house-roof

Elegant Wainscot

From Drywall Scraps Fine Homebuilding members-only icon


Sign up for eletters today and get the latest how-to from Fine Homebuilding, plus special offers.

Signing you up...

This site is protected by reCAPTCHA and the Google Privacy Policy and Terms of Service apply.
See all newsletters
See all newsletters
Previous: Mixing Joint Compound Next: One-Day Taping

Guide

Drywall

Chapter

Taping and Sanding

View Comments

  1. HHDave | Mar 05, 2012 09:51am | #1

    A publication like Fine Homebuilding should always stand for doing things better. That's why I'm a little disappointed to find this video on ready-mix compound when setting-type compounds are so superior and SHOULD be what you promote. Granted, ready-mix is convenient being already mixed and coming in its own bucket. Beyond that, it sucks. It's slow to dry, very soft and easily damaged, and it shrinks as it dries, resulting in cracking, tape separation, and the need for more coats.

    I can't begin to tell you how many "professional" drywall jobs I've fixed over the years that were done using conventional ready-mix and tape. I switched to lightweight setting-type compound many years ago and have converted everyone who has ever worked for me to the product. It is as easy to sand as all-purpose ready-mix, but offers a number of advantages. Firstly, it sets chemically, so it begins to harden even before the water in it dries. This means that it becomes firm to the touch (and thus impervious to pedestrian damage) sooner than ready-mix. Since you mix it yourself, you can also vary the consistency to create a thicker filler coat followed by thinner finsih coats. You can do this even as the earlier coats are still wet. In this way, I can put a first coat of heavier mud on a seam, then, as it firms-up, spray it with water and apply a thin finish coat to feather it out and fill pinholes. Once all that is dry, a very quick sanding and I'm ready to prime.

    Since the product doesn't really shrink, it holds better to tape. You can skip the 3 step process for taping an inside corner when you use setting-type compound. Now, a lot of people try to do that with ready-mix and it results in the tape separating from the compound. But with setting-type, you can bed the tape, then build the mud right over it without waiting between coats.

    For all these reasons, my crews know never to buy the ready-mixed junk.

  2. patrick_mccombe | Mar 05, 2012 10:42am | #2

    Thanks for the comments, Dave. I agree with you, setting-type compound is great, but some folks feel more comfortable with ready-mix. And three coats of setting-type compound is overkill for all but the most-rushed or smallest jobs.

    About the same time we shot this video, we also did a video segment on setting-type compound that discusses the advantages you mentioned in your comment. The video should be available soon.

    Stay tuned.

    Patrick McCombe
    Associate Editor

  3. Benjamin1988 | Mar 09, 2012 07:26am | #3

    this article sheds light on a mis understood area

    Benjamin Marcus Raucher

Log in or create an account to post a comment.

Sign up Log in

Become a member and get full access to FineHomebuilding.com

Drywall

Drywall

Trusted, comprehensive guidance for choosing, hanging, taping, sanding, and repairing drywall—the right way

View Project Guide

View All Project Guides »

Become a member and get unlimited site access, including the Drywall Project Guide.

Start Free Trial

Drywall Basics
  • Types and Uses of Drywall
  • Planning the Job
Tools and Materials
  • Hanging Tools
  • Taping Tools and Materials
  • Sanding and Finishing Tools and Materials
Hanging Drywall
  • Prep for Hanging
  • Measuring and Cutting Drywall
  • Guidelines for Hanging and Fastening Drywall
  • Hanging Ceilings
  • Hanging Walls
  • Hanging Airtight Drywall
  • Trim Accessories/Corner Beads
Taping and Sanding
  • Taping Basics
  • Taping Seams
  • Taping Inside and Outside Corners
  • Sanding
Special Installations
  • Tricky Transitions
  • Curved Surfaces
  • Other Special Installations
  • Decorating with Drywall
Drywall Repairs
  • Patching Holes, Cracks, and More
Plaster
  • Working with Lime Plaster
  • Plaster Repair
  • Classic Plaster Techniques

Fine Homebuilding

Follow

  • twitter
  • facebook
  • instagram
  • pinterest

Newsletter

Get home building tips, offers, and expert advice in your inbox

Signing you up...

This site is protected by reCAPTCHA and the Google Privacy Policy and Terms of Service apply.
See all newsletters
See all newsletters

Membership & Magazine

  • Online Archive
  • Start Free Trial
  • Magazine Subscription
  • Magazine Renewal
  • Gift a Subscription
  • Customer Support
  • Privacy Preferences

Taunton Network

  • Green Building Advisor
  • Fine Woodworking
  • Fine Gardening
  • Threads
  • About
  • Contact
  • Advertise
  • Careers
  • Copyright
  • Terms of Use
  • Site Map
  • Do not sell or share my information
  • Privacy Policy
  • Accessibility
  • California Privacy Rights

© 2023 The Taunton Press, Inc. All rights reserved.

X
X
This is a dialog window which overlays the main content of the page. The modal window is a 'site map' of the most critical areas of the site. Pressing the Escape (ESC) button will close the modal and bring you back to where you were on the page.

Main Menu

  • How-To
  • Design
  • Tools & Materials
  • Video
  • Blogs
  • Forum
  • Reader Projects
  • Magazine
  • Members
  • FHB House

Podcasts

  • FHB Podcast
  • ProTalk

Webinars

  • Upcoming and On-Demand

Account

  • Log In
  • Join

Podcasts

  • FHB Podcast
  • ProTalk

Webinars

  • Upcoming and On-Demand

Popular Topics

  • Kitchens
  • Business
  • Bedrooms
  • Roofs
  • Architecture and Design
  • Green Building
  • Decks
  • Framing
  • Safety
  • Remodeling
  • Bathrooms
  • Windows
  • Tilework
  • Ceilings
  • HVAC

Magazine

  • Current Issue
  • Past Issues
  • Magazine Index
  • Subscribe
  • Online Archive
  • Author Guidelines

All Access

  • Member Home
  • Start Free Trial
  • Gift Membership

Shop the Store

  • Books
  • DVDs
  • Taunton Workshops

More

  • FHB Ambassadors
  • Reader Projects
  • Podcast
  • Customer Support

Account

  • Log In
  • Join

Newsletter

Get home building tips, offers, and expert advice in your inbox

Signing you up...

This site is protected by reCAPTCHA and the Google Privacy Policy and Terms of Service apply.
See all newsletters
See all newsletters

Follow

  • twitter
  • facebook
  • instagram
  • pinterest

Join All Access

Become a member and get instant access to thousands of videos, how-tos, tool reviews, and design features.

Start Your Free Trial

Subscribe

FHB Magazine

Start your subscription today and save up to 70%

Subscribe

We hope you’ve enjoyed your free articles. To keep reading, become a member today.

Get complete site access to expert advice, how-to videos, Code Check, and more, plus the print magazine.

Start your FREE trial

Already a member? Log in