
Getting Surfaces Ready for Wallpaper
Surface prep determines how well wallcoverings adhere, how good the job looks, and how long it lasts.
Ideally, surfaces should be clean, dry, flat, and stable. Before hanging wallcoverings, assess existing surfaces. Replace or repair wall surfaces as necessary, then prime and seal them. Sealing surfaces improves adhesion and, just as important, allows you to remove coverings later without destroying the underlying drywall or plaster.
In the old days, a wall was sized, or brushed with a glutinous mixture to improve adhesion. But sizing is rarely done today because it’s chemically incompatible with many pastes, causing them to crystallize, lump, and bubble, creating voids where the covering is unattached. Instead, professionals use one of the primer-sealers described in “Primer-Sealers for Wallcoverings” below.
Primer-Sealers for Wallcoverings |
||
| Primer-Sealer Type | Uses | Comments |
| Pigmented acrylic | Seals all surfaces, including existing wallpaper, vinyl covering, and latex paint; suitable base for all wall coverings | Also known as universal primer-sealer; cleans up with water; protects drywall when coverings are stripped; add pigment to hide existing wallpaper patterns. |
| Clear acrylic | Same uses as for pigmented acrylic, but can’t bond latex paint; suitable base for all wall coverings | Cleans with water; won’t protect drywall; can’t hide patterns. |
| Heavy-duty acrylic | Mostly for weighty vinyl coverings used for commercial installations | Soaks into raw drywall, so won’t protect it when covering is stripped away. |
| Alkyd/oil-based | Seals all surfaces except existing wallpaper or vinyl coverings; fast drying (2 to 4 hours); suitable base for all wall coverings | Thin with paint thinner to improve bond with existing paint; protects drywall; can be tinted. |
| Stain sealer; pigmented shellac | Hides or contains stains from water and smoke, wallpaper inks, grease, crayons, and more | Not a primer-sealer; when dry, apply acrylic primer-sealer topcoat. |
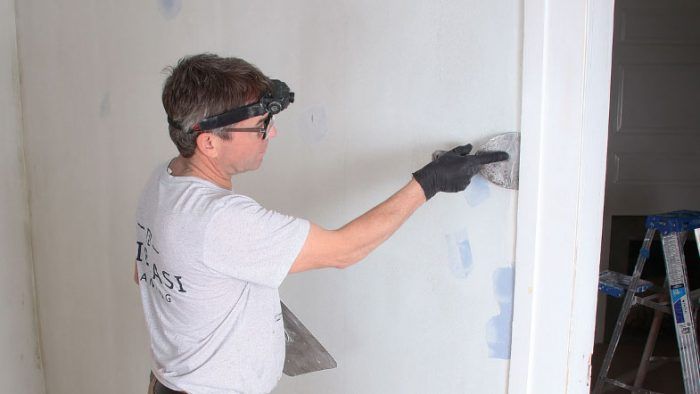
Before you start prep work, remove furniture from the room or move it to the center of the room and cover it with a tarp. That will allow you to work faster and be safer. And remove cover plates from electrical outlets and switches, which you’ll replace after you’ve papered. Speaking of safety, always use a voltage tester to be sure electrical power is off when you trim wallpaper around an electrical outlet or switch. A single-edge razor blade is recommended here, and you wouldn’t want the blade to touch a live conductor. Also, set up ladders and scaffolds so they don’t wobble. Wear a respirator when applying chemicals, and clean up waste as you go.
| Safety alert: Shock hazards near electrical outlets include steam, wet paste, and metal tools. So before repairing, stripping, or covering walls and ceilings, shut off electricity to circuits powering the areas you’ll be working on. Double-check that you’ve shut off those circuits by using a voltage tester on each fixture, switch, and outlet. |
Prepping painted surfaces
Before you wallpaper painted surfaces, figure out what kind of paint you’ve got and what shape it’s in. In general, oil-based paints are stable surfaces for wallcovering because they aren’t water-soluble. Yet some primer-sealers can stabilize even latex paint. You could scrape off a small patch of paint and have a paint store analyze it, but two simple tests should suffice.
Hot towel test. Soak a hand towel in hot water, wring it well, and rub the paint vigorously for 20 to 30 seconds. If paint comes off on the towel, you’ve probably got latex. Alternatively, you can use duct tape to hold a moist sponge next to a painted surface for 15 minutes before removing the sponge. If you see paint on the sponge, it’s latex.
X-tape test. If paint didn’t come off on your towel or sponge, it’s probably oil based. To see how well it’s bonded, use a razor blade to score a 1-in. X lightly in the surface (don’t cut into the drywall or plaster). Press masking tape over the X, and pull it off quickly: If there’s no paint on the tape, the paint is well adhered. If paint does come off, scrape and sand it thoroughly before proceeding.
If the existing paint is a well-adhered glossy or semigloss oil-based one, sand it lightly with fine sandpaper (150 grit to 180 grit), using a sanding block or an orbital sander. Then use a sponge mop, dampened with water, to remove the sanding dust. Alternatively, spray or wipe on paint deglosser to dull glossy and semigloss paint surfaces.
If the paint is a well-adhered flat oil-based paint, you can begin hanging wallcovering. Simply rinse the surface with a mild detergent solution to remove grime, rinse with clear water, and allow the surface to dry.
Latex paint should be prepared by scraping lightly and sanding. You needn’t remove the entire coat of paint; just sand it enough so the primer-sealer can bond. Avoid gouging or ripping the surface underneath, especially if it’s drywall. When you’re done sanding, wipe the wall clean and apply a coat of pigmented acrylic primer-sealer.
New wallpaper over old
You can wallpaper over an existing covering if:
- It is not highly textured, as lincrusta, stringcloth, and bamboo are.
- There are no prominent seams.
- There are no more than two layers already on the wall.
- The old wallpaper is well bonded.
Check edges and seams first: If they’re peeling or poorly adhered, strip the wallcovering. But if there are only a few isolated loose spots, use seam adhesive to reattach them. Or use a razor blade to cut out the loose seams. Then fill voids with spackling compound, allow it to dry, and sand lightly with 150-grit sandpaper.
Another potential problem is bleed-through from metallic wallpaper inks. To test, dampen a cloth with diluted ammonia (1 part ammonia to 4 parts water) and gently rub the old wallpaper. If inks change color (usually, they turn blue-green), they’ll bleed. To prevent this, seal the old wall-paper with pigmented shellac or a similar stain killer. Allow the sealer to dry thoroughly before painting surfaces with a universal primer-sealer.
Otherwise, if existing wallpaper is well adhered, wipe it with a damp sponge, let it dry, and then paint surfaces with pigmented acrylic primer-sealer. Tint the primer-sealer to match the background color of the new wallcovering.
Prepping raw drywall or plaster
Newly installed drywall must be sealed before you hang wallcoverings. Otherwise, the drywall’s paper face will absorb paste, making it impossible to remove the covering at a future date without damaging the drywall. To seal drywall, apply a coat of universal primer-sealer, which is an excellent base coat for papering and painting.
Allow gypsum plaster to dry two to three weeks before applying either wallcovering or paint. Uncured plaster contains alkali that is still warm, causing the paint and paste to bubble. “Hot plaster” has a dull appearance, whereas cured plaster has a slight sheen. Curing time varies, but keeping the house warm will hasten it. Cured plaster can also be coated with universal primer-sealer. (By the way, old lime plaster, which was used until the early 1900s, took a year to cure.)
Mold and MildewMold is a discoloration caused by fungi growing on organic matter such as wood, paper, or paste. Mildew is essentially the same, but it usually refers to fungi on paper or cloth. Without sufficient moisture and something to eat, mold (and mildew) can’t grow. Mold can grow on the paper and adhesives in drywall, but, technically, mold can’t grow on plaster because plaster is inorganic. If your plaster walls are moldy, the fungi are growing on grease, soap, dirt, or some other organic film on the plaster. If walls or ceilings are moldy, first alleviate the moisture. To determine the source, duct-tape a 1-ft.-sq. piece of aluminum foil to the wall. Leave this up for a week. Upon removal, if there’s moisture on the back of the foil, the source is behind the walls. If the front of the foil is damp, there’s excessive moisture in the living space, which you might reduce by installing ventilator fans or a dehumidifier for starters. If the drywall or plaster is in good condition, clean off the mold by sponging on a mild detergent solution. (Although widely recommended, diluted bleach isn’t any more effective than a household cleaner.) The sponge should be damp, not wet. Rinse with clean water, and allow the surface to dry thoroughly. Then paint on a universal primer-sealer. If you’ll be wallpapering the room, use a mildew-resistant, kitchen-and-bath adhesive. If mold or water stains are widespread and the drywall has deteriorated, there may be mold in the walls. Remove a section of drywall to be sure. If the framing is moldy, it may need to be replaced—a big job and one worth discussing with a mold-abatement specialist, especially if family members have asthma or chronic respiratory problems. |
