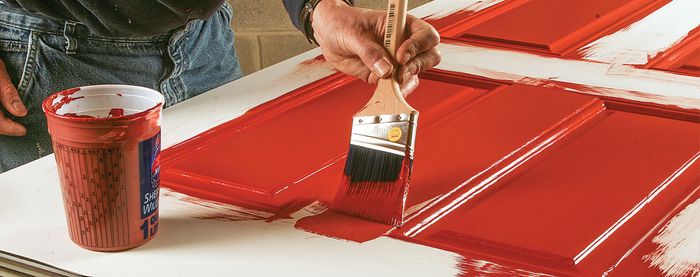
Repainting a House: Don’t Be Afraid to Spray
For each hour spent masking, you'll save eight hours of brushing and get a superior paint job.
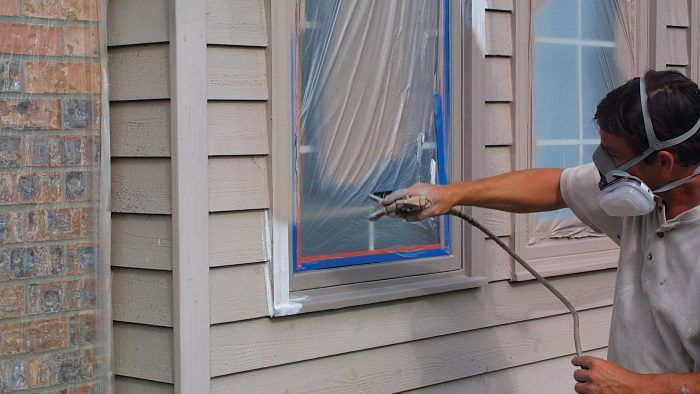
Synopsis: A professional painter argues against brushing in favor of spraying for a superior job. He demonstrates how to mask and spray paint a house, offers advice about renting a sprayer, and provides tips for making a paint job last 20 years.
Making a Paint Job Last 20 Years
I offer a 20-year warranty to any homeowner willing to pay for a top-quality paint job. I’ve never had a callback. Here are the crucial steps:
- Fix moisture problems, such as leaky roofs, damp basements, clogged gutters and backed-up drains. Paint can’t stay on a house that has water coming through the walls.
- Remove any loose paint and make sure you have a sound substrate.
- Bleach to remove mildew.
- Wash to remove dirt.
- Prime bare wood with acrylic latex primer.
- Caulk every split, crack or seam.
- Apply a thin, stain-blocking coat of alkyd primer.
- Topcoat with plenty of the best 100% acrylic latex you can buy. (Many brands offer lifetime warranties for their best paints.)
To paraphrase Thomas Edison: Painting is nine-tenths preparation and one-tenth application. These words are particularly true for those of us who wield a spray gun instead of a paintbrush. After several days of washing, scraping and caulking (which I’d also do if I were brushing), I have to spend another day or two carefully masking every surface that I don’t want painted. Fortunately, there is an upside to all this grunt work: After just a few hours of spraying, I get to remove the masking to unveil a flawless finish with crisp lines between the body and trim.
Don’t Neglect the Prep
If you want the job to last, you’ve got to prep it right. On those occasions when I have to repaint an old house that has many layers of failing paint, I’ll strip off all the paint and start over with bare wood. Fortunately, most of my jobs involve newer houses whose painted surfaces are intact but fading.
After scraping and sanding any patches of loose paint, I give the house a thorough cleaning. To get rid of mildew, I fill a garden sprayer with a mild (3:1) bleach solution and soak every square inch of the painted surfaces. Then I give the house a thorough, careful pressure-washing. I pressure-wash from the top down so that I’m constantly working from a clean surface into a dirty one. Word of warning: In the wrong hands, a pressure washer can do a lot of damage. If you’ve never used a pressure washer, have an experienced operator teach you how to use it, or hire a professional.
After the pressure-washing is done, I pull off the job for at least 24 hours to give the surface time to dry. When I return, I prime any bare wood with Sherwin-Williams A-100 acrylic latex primer.
Then I start caulking. Every split, crack or seam that could compromise the paint gets caulked and tooled; I tool with a wet finger and a rag.
Special Tools Make Masking Easy, if Not Fun
Masking off areas that don’t get painted (or that have already been painted) is the grunt work of spray-painting, but the right tools get the job done quickly.
Dual-Tac does windows. A Dual-Tac dispenser (3M Co.; 800- 480-1704; www.3m.com) joins two tapes to create a double-sided masking tape. Tape the perimeter of window glazing (photo bottom left), cover with plastic (photo bottom center), and trim off the excess with a razor blade (photo below).
Hand-Masker covers the wide stuff. A Hand-Masker M3000 Dispenser (also from 3M) fashions a giant swath of protection by adding a strip of tape to the edge of a wide roll of masking paper.
Handheld shield masks on the fly. A 4-ft. wide painting shield (Hyde Tools; 800-872-4933; www.hydetools.com) can prevent overspray. Covering the shield with layers of paper tape and removing each one as it becomes fouled keeps the working surface drip-free.
A High-Quality Sprayed Finish Requires Plenty of Masking
The basic ingredients for masking an exterior spray-painting job are high-density painter’s plastic and top-quality 1 1⁄2-in. tape; I use 3M #2040. This tape is pricey, but it sticks where it’s put and peels off easily.
I paint trim surfaces first, so I’m not concerned about overspray getting on the siding. At this stage, I mask only unpainted surfaces, such as brick, patios, roofs and glass.
I generally rely on drop cloths to cover the edges of roofs, decks and patios. But to ensure a perfect edge along the spray line, I tape down a 12-in. wide strip of masking paper; an ingenious tool called a Hand-Masker, from 3M Co., makes this job effortless. After the taping is done, I slip the edge of the drop cloth under the loose edge of the paper. When overspray is only a minor concern, the 12-in. masking paper is all the protection I need.
Spray All the Trim Surfaces First
It used to be that trim was always painted with oil-based paint—even when the body was done in latex—because oil tended to level out better when brushed. These days, latex has surpassed oil in every respect, so I use a top-quality acrylic latex product called Duration from Sherwin-Williams for all my exterior painting. Unfortunately, I can’t spray the entire house at the same time because even if the colors are identical, I always use a satin finish on the clapboards, and a gloss, or at least a semigloss, on the trim. The gloss finish really makes the trim stand out from the clapboards, but it also makes gutters and other messy surfaces much easier to clean.
For spraying trim surfaces, I outfit my spray gun with a compact (#213) spray tip (sidebar facing page), and I set the sprayer to the lowest possible pressure that still produces an even fan of paint. When I’m spray-painting trim, I always wear a hat, gloves and an organic filter respirator.
As with pressure-washing, I start at the top and work my way down. Instead of drop cloths, I often use a 4-ft. wide painting shield to protect the roof as I spray the gutter and fascia (photo left, facing page). Using a shield, especially on a ladder, is tricky, but the effort is worthwhile. It took me two hours to spray all of the soffits, fascia boards and gutters on the house in the photos, a job that would have taken me two full days if I had used a brush.
After the high work is done, I move on to the windows, doors and other trim. To ensure consistent coverage, I hold the spray tip about 12 in. away from the surface and move the gun in a smooth, even stroke (photo bottom right, p. 87). I carefully check for runs when painting muntins and other window trim because each piece will be hit several times from different angles.
Spray Equipment is Not Complicated (and you can rent it)
The standard paint-sprayer setup consists of the pump that draws the paint out of the can (photo left), and the hose and gun that deliver it (photos left, facing page). A professional setup like the one shown here (Graco Inc.; 800-328-0211; www.graco.com) retails for about $1,200, but I bought used equipment for less than $500.
Back when I was still predominantly a brush painter, I rented spray equipment when I needed it. I usually rented from my paint supplier because it was convenient, but also because they stocked all the spray tips and accessories I might need. Expect to pay from $50 to $75 per day for a contractor-grade setup. Whether you’re buying new or renting, make sure the dealer fully explains how to operate the equipment you’ll be using; it’s also a good idea to read the owner’s manual. Following are a few of the lessons I’ve learned over the years.
- Before starting the spray pump, always make sure that the priming lever is off, the pressure is turned down and the safety lock on the spray gun is engaged.
- If you don’t know what the unit was last used for, circulate a gallon of clean paint thinner through the lines.
- At the end of every workday, soak the spray tip and filter (photo top left, facing page) in xylene solvent.
- Replace the filter regularly, but never with anything coarser than medium (100 mesh), or the junk that gets past the filter will become stuck in the tip.
- Replace spray tips at the first sign of wear; a worn tip produces an uneven coat and wastes a lot of paint.
For more photos and details, click the View PDF button below:
Fine Homebuilding Recommended Products
Fine Homebuilding receives a commission for items purchased through links on this site, including Amazon Associates and other affiliate advertising programs.
DEWALT 18v Cordless Multitool (DCS355)
Metabo HPT Impact Driver (WH18DBDL2)
Milwaukee M18 Fuel 18v Cordless Circular Saw (2730-22)
