Make a Flare Connection
A reliable seal that’s resistant to damage from vibration is the right choice for plumbing oil, gas, and refrigerant lines.
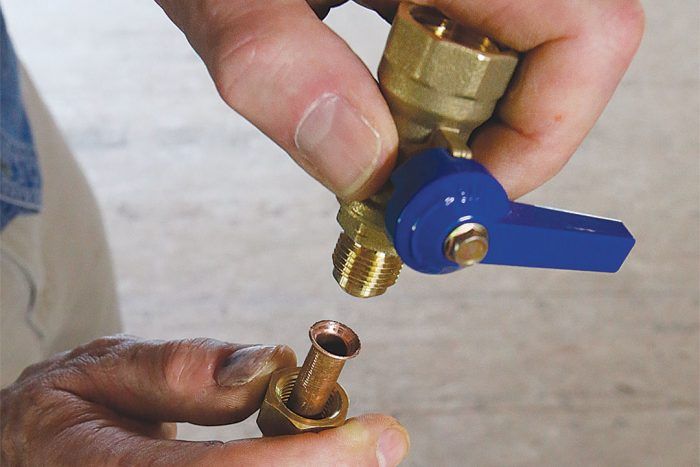
Builders make a lot of connections and it seems like they are getting ever more complicated. Just think of all the metal connectors required to build a deck today that didn’t exist a couple decades ago. Or the myriad plumbing connection you could choose to use if you’ve decided to run PEX tubing in your project. You may feel nostalgic for the days of soldering copper pipe. If you are installing oil, gas, or refrigerant lines, or having them installed, there’s a trusted connection you’ll want to know about.
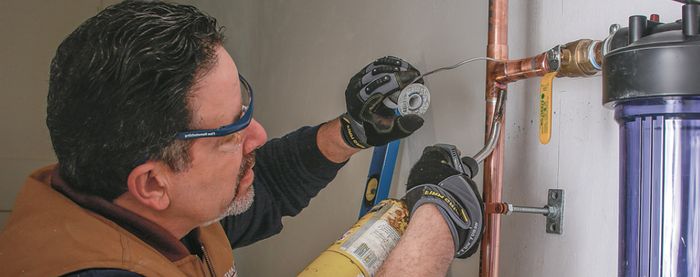
Flare connections aren’t something you encounter every day. To make one, the end of a pipe is widened into a bell shape using a special tool. A nut draws the flared tubing against a correspondingly shaped fitting, creating an extremely strong joint. The primary advantage of flare connections is that they form a relatively large contact area, making a reliable seal that’s resistant to damage from vibration. For that reason, they’re the go-to method for making critical connections in fuel-oil and gas lines, as well as for making high-pressure connections such as in refrigerant lines.
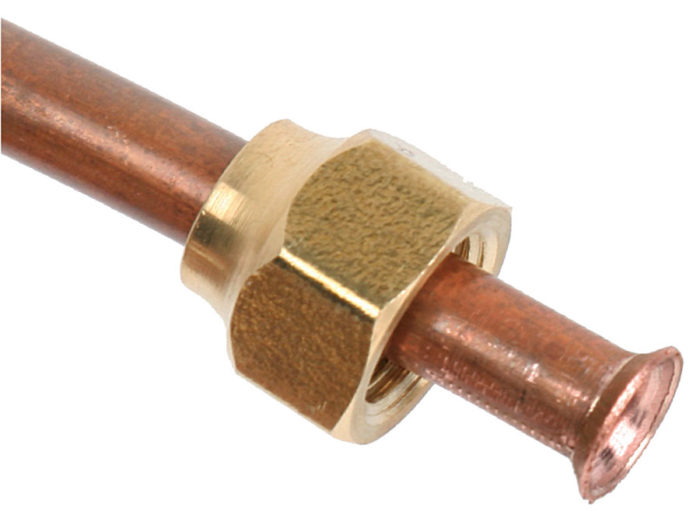
Unlike compression fittings, flare connections are highly resistant to being pulled apart. Another advantage they have over other plumbing connections is that flare connections can be disassembled and reassembled over and over again. Moreover, unlike with soldered connections, no open flame is required. That’s a safety advantage when working with gas and oil lines. In residential settings, flare connections are employed with the soft copper tubing used for gas and fuel-oil lines. They’re also used for refrigerant lines connecting air-conditioner and heat-pump components. While it’s legal to use flare connections on water lines, it’s rarely done. A leaking water line won’t fuel a fire or lead to an explosion, and residential water pressures aren’t high enough to warrant the use of this robust but relatively labor-intensive joint.
For all practical purposes, only soft copper, which is sold in coils, is ever flared. In theory, regular rigid copper pipe can be flared, but a soldered joint is much faster to make. Also, rigid copper is hard and likely to tear in the flaring process unless it’s first annealed (heated with a torch and allowed to cool slowly).
The flare angle used for copper tubing in residential plumbing is 45°, while 37.5° is the standard in industry and automotive work. In other words, if you’re fixing your brake lines, you need a different flare tool than what is shown here.
The instructions that come with flaring tools and that can be found online are typically vague in one area: how far the tubing needs to be inserted into the flaring block. Generally, the tubing should stick up about 1⁄16 in. above the block, but I’ve never seen a plumber measure this with anything more precise than his eyes.
After you’ve inserted the tubing, it’s important to get the sequence right for tightening the screws. Always tighten the one nearest the tubing first, and then the furthest one. In this way, the block acts like a second-class lever, where the load is between the force and the fulcrum. Here, the first screw acts as the fulcrum, the tubing is the load, and the second screw provides the force. This ensures that the block grasps the tubing tightly. After tightening the screws, spin the mandrel into the tubing, tighten it by hand, and check how the flare mates with the fitting. It should cover the mating surface without protruding into the threads.
STEP BY STEP
1) Cut the tubing cleanly: It’s important to cut the tubing squarely and with a minimal burr, so use a tubing cutter with a sharp wheel.
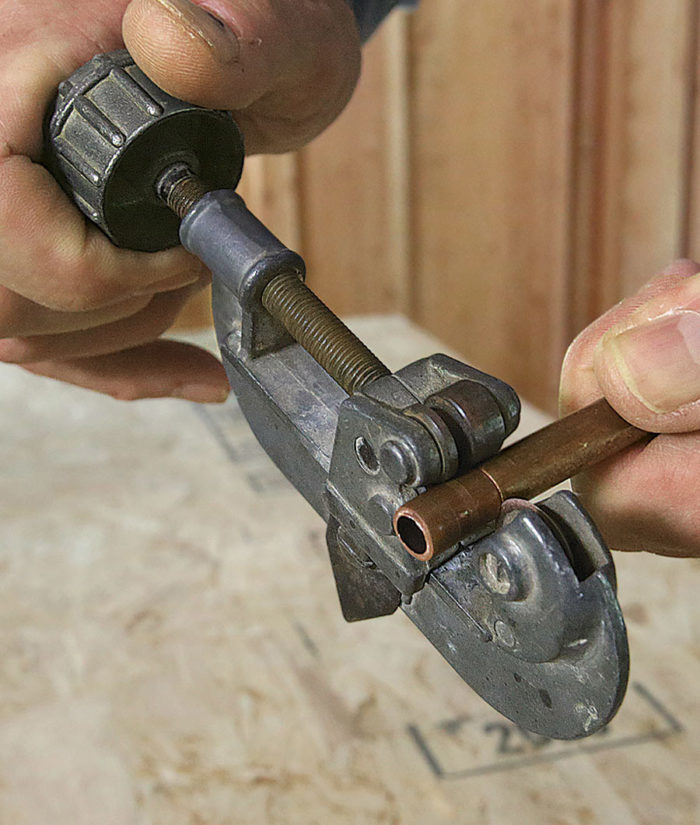
2) Deburr the cut: Use the blade on the back of the tubing cutter to ream the cut end to its original diameter.
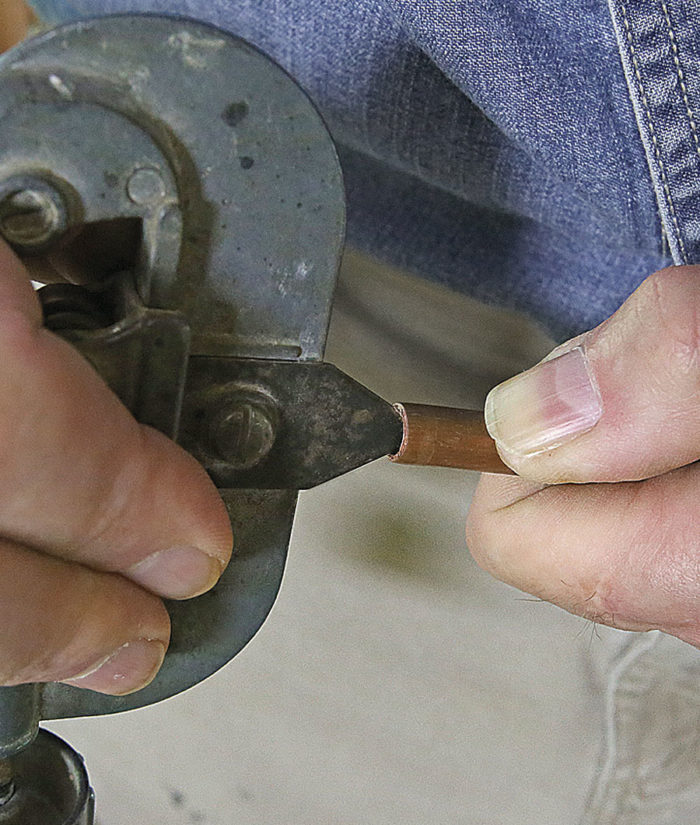
3) Add the nut: Once the tubing is flared, the nut would have to be placed from the far end. It’s much easier to place the nut on the near end before flaring, and doubly so if both ends are to be flared.
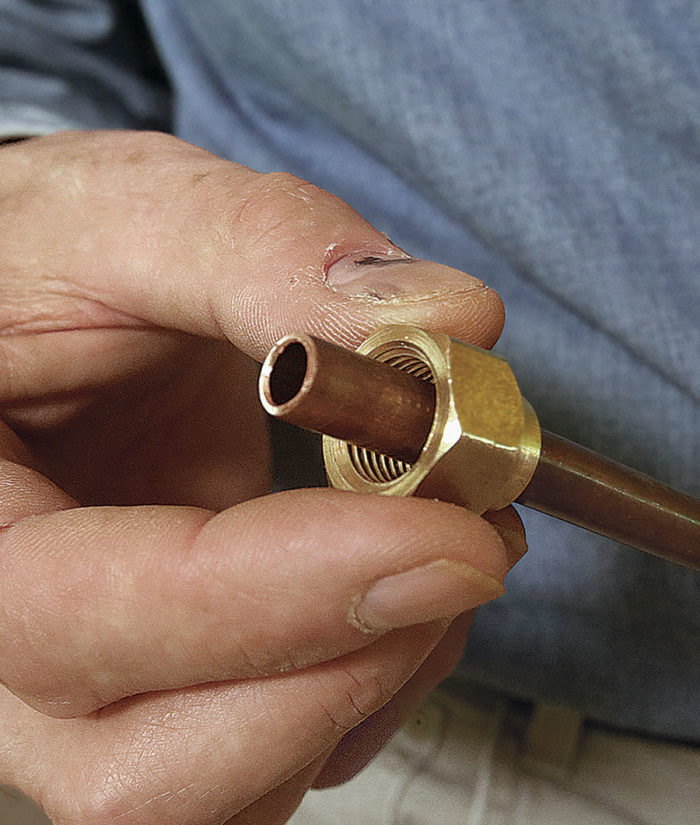
4) Insert the tubing into the flaring block: Match the tube diameter to the hole in the block. Most flaring-tool manufacturers recommend that the tubing protrude about 1/16 in. above the block.
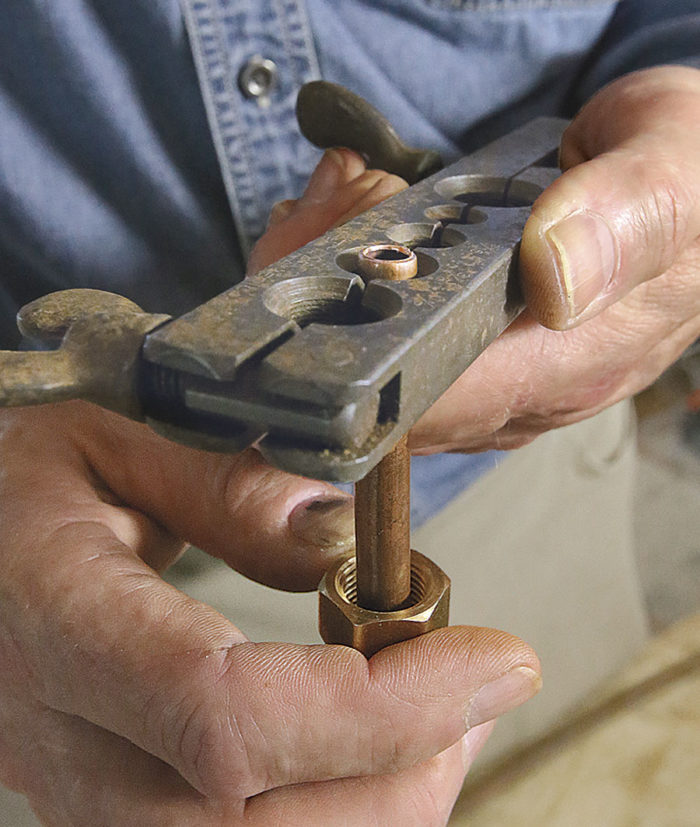
5) Tighten the nearest nut first: Hand tighten the nut nearest the tubing. Don’t be tempted to stick something like a screwdriver between the nut wings to really crank it tight. You can damage the tool.
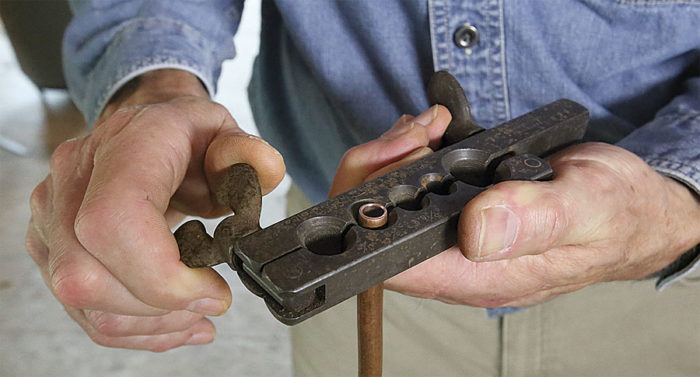
6) Tighten the far nut: This sequence uses leverage to ensure that the block grasps the tubing tightly.
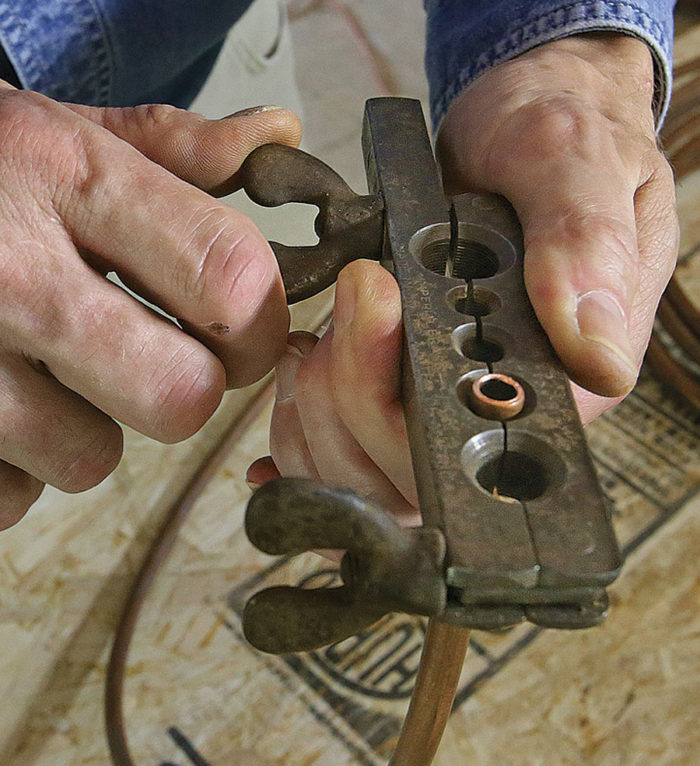
7) Slip the yoke onto the block: Slots in the yoke engage the flaring block. Center the cone over the tubing.
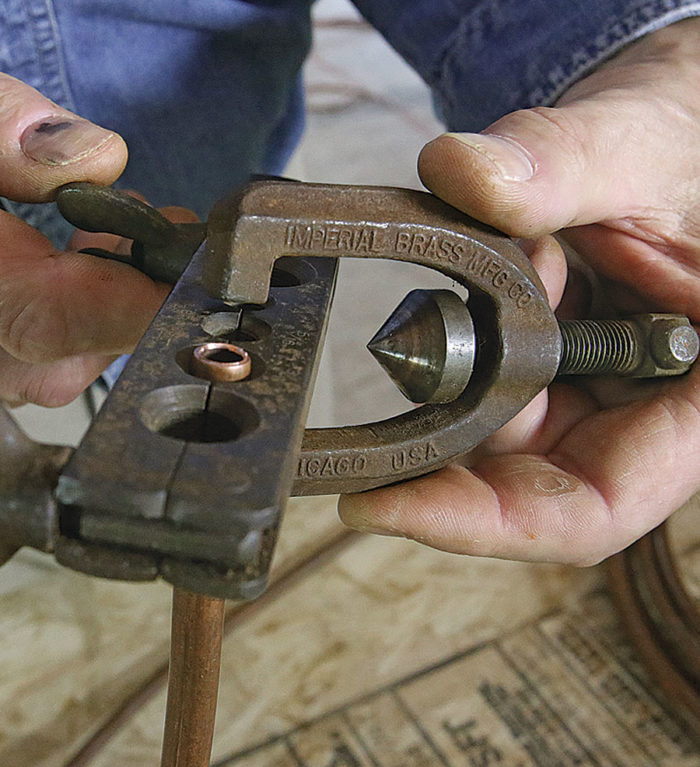
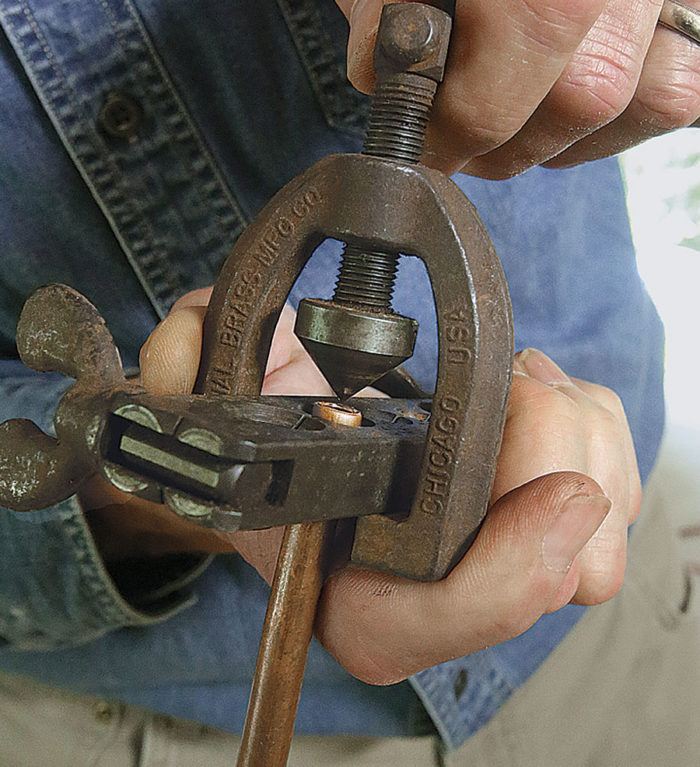
8) Flare the copper: Tighten the mandrel screw, then loosen and retighten once or twice to fully seat and burnish the tubing.
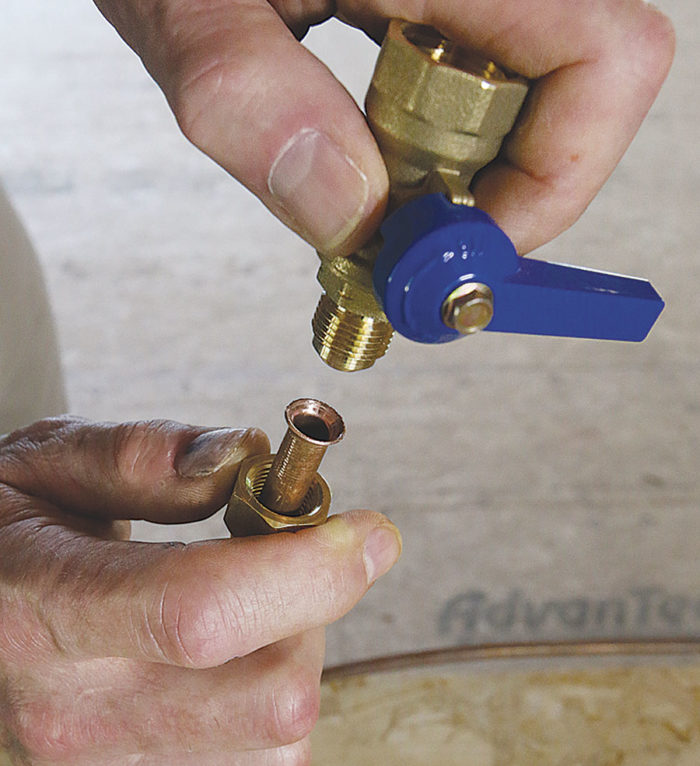
9) Connect to the fitting: Hold the flared end on the fitting, and tighten the nut. Make it snug, but don’t over-tighten. You can snug it up more if an air test reveals a leak.
For more photos and details, click the View PDF button below:


View Comments
Inside of every home are water drain lines, that carry gray water and sewage out of our homes. sewer line replacemnt gloucester county nj is very important to keep these lines clear and flowing is paramount to a healthy home. Too often, people ignore their drains until something goes wrong. But by then, dirty, bacteria filled water has soaked your floors, perhaps your walls, and the damage is already done.